May was a crazy month - we ran our first 5K race of the season, attended our first food truck event, celebrated Mother's Day and Baby Girl started swim lessons. Work has been busy for both of us as well. And now that the weather has changed, we've been trying to spend as much time outside as possible, at least when the weather cooperates. It's been a bit off-kilter lately, with 85 degrees one day and 60 degrees the next.
It was another delicious month in the kitchen. I remade some family favorites and rediscovered a few dishes I've been wanting to remake for awhile.
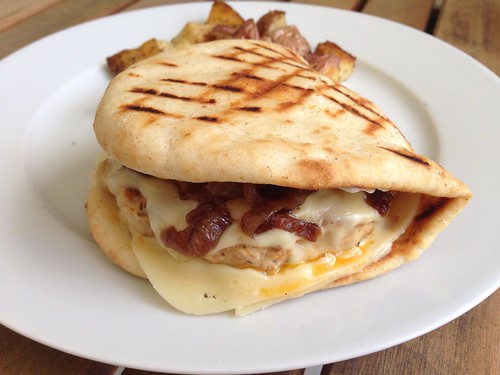
I used the last two 8-oz packages of homemade chorizo to make chicken chorizo patty melts for Sunday dinner. Everyone loved them. This is one of Baby Girl's favorite meals and she was sad to learn that it was the last of the homemade chorizo. If I can find my blender I may make another batch just so we can have these sandwiches again.
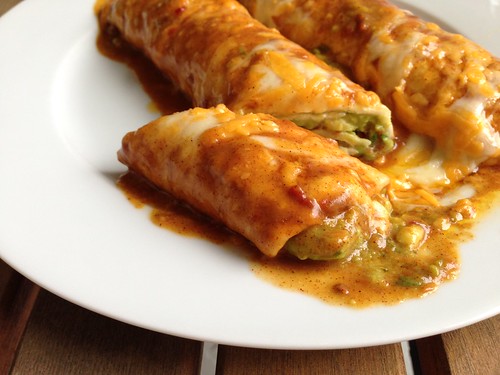
I pulled these avocado enchiladas from way back in the archives. Any time someone would ask for a vegetarian Mexican recipe I'd recommend them, but it had been 5 years since we'd actually eaten them. Just as delicious as I remembered.
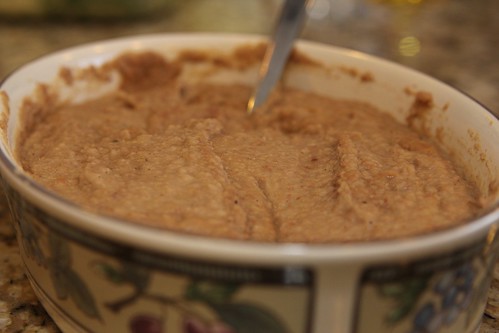
And, of course, we had refried beans on the side.
You all know how much I love these Hawaiian chicken sandwiches, so I was thrilled when Baby Girl requested them for dinner this month. I'm always grateful that she's a good eater but it makes me very proud when she actually asks me to make something specific.
And what sandwich would be complete without these roasted potatoes? I could eat these once a week (and sometimes I do).
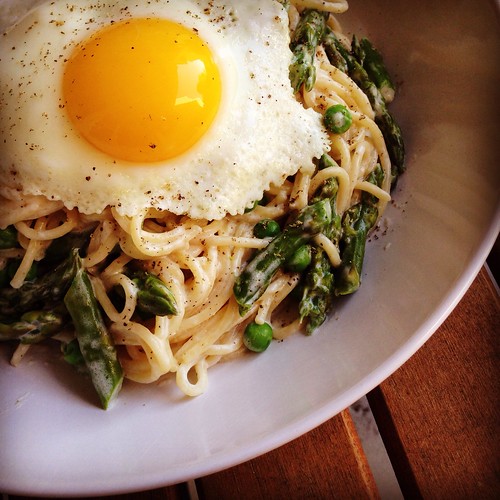
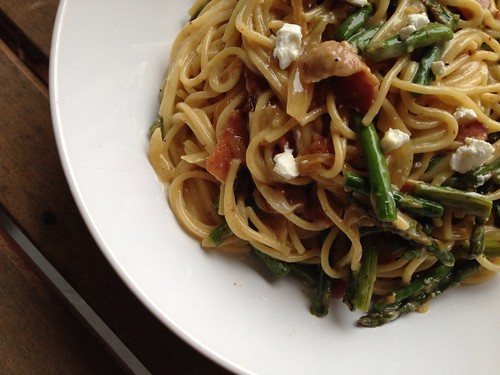
This is another meal Baby Girl asked me to make - linguine with alfredo, asparagus, peas and poached egg. I posted this photo on Instagram because it was just so perfect. Look at that egg contrasting with the asparagus and peas. Gorgeous. This one is always a winner.
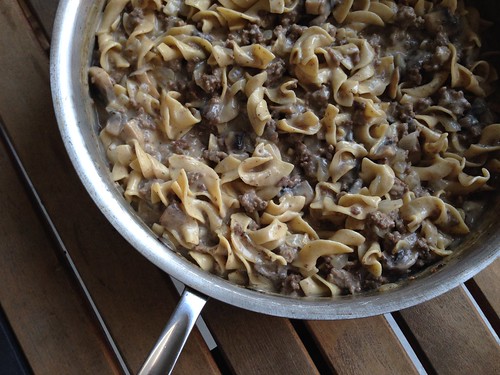
I also decided to do a new post for this skillet beef stroganoff. This is one of my most popular recipes and for good reason - it's a one-pot meal that tastes great every single time.
No recipe recap would be complete with these TRH salads. We went a few weeks without having them and I missed them.
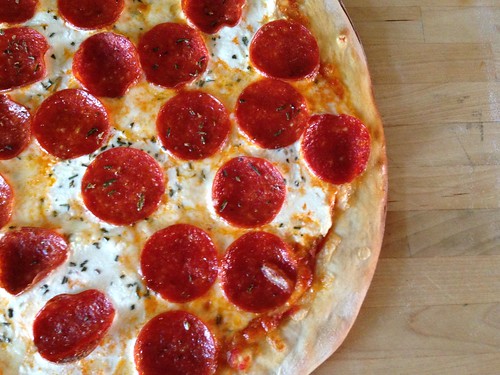
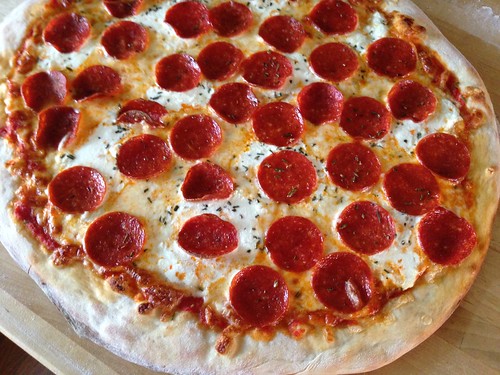
This 3 cheese pepperoni and rosemary pizza is my new favorite pizza. Words cannot adequately describe how delicious it is. I found one more ball of dough in my freezer and this is the pizza I'm going to make with it.
Another old favorite, this mom's helper is a knock-off version of Hamburger Helper that tastes world's better.
After recommending this chipotle honey lime pork tenderloin to some friends and watching them all blog about it I knew I had to remake it. Man, oh man, is this a good one. This time I made a quick chipotle mayo to dip the pork into. Divine, especially when paired with the recipe below.
I feel like the pork tenderloin above goes so beautifully with this mushrooms and corn with cilantro recipe. Maybe it's the shared cilantro, I don't know. All I know is this is phenomenal.
We need quick meals on Wednesdays when Baby Girl has swim lessons, and these roast beef and cheddar sandwiches were perfect. I didn't cook them on a panini press this time and they were still great. I prepped everything in advance so all we had to do was assemble and eat.
The day I had this bacon broccoli mac and cheese on the menu I didn't feel like eating pasta so I left it out. The broccoli coated in the cheese sauce mixed with bacon and scallions was delicious.
I can't go too long without making crispy tilapia. I actually made it twice - once as sandwiches and another time as fish sticks. We all loved the fish sticks and couldn't stop eating them.
I brought back an old favorite - cheesy zucchini rice - to serve with the fish sticks. Such a great side dish. This is one of SP's favorites and now that zucchini is in season we'll be having it a few times a month, I'm sure.
Friday, May 30, 2014
Wednesday, May 28, 2014
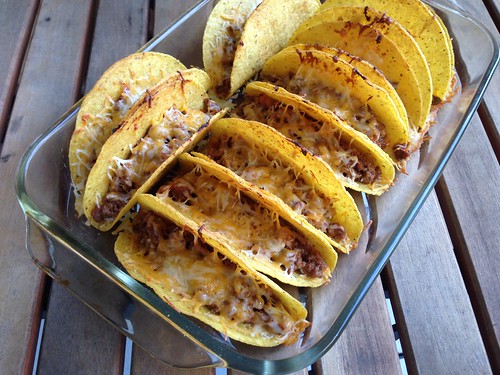
Crunchy Baked Tacos
I love tacos but there was always something about them that made me feel like they wouldn't work for a weeknight. I think it was all the prep work for the various toppings, trying not to overfill them at the table and a general dislike of tacos made with soft flour tortillas. Then I saw these Crunchy Baked Tacos from No. 2 Pencil and it was like a light bulb went off in my head. Minimal work and crunchy shells. I was sold.
Baking the shells with the meat and cheese already inside was brilliant - I hate when the cheese isn't fully melted and this solves that problem. Plus, you just take a taco from the baking dish and you're ready to eat. I kept the toppings simple - shredded lettuce, diced grape tomatoes and I found an avocado in my crisper so I diced that up, too. Some sour cream at the table and we were set.
This is definitely my new favorite taco recipe. I swapped out my filling recipe but kept the method the same. The one thing I didn't like - these don't reheat well the next day. In fact, they were downright awful. My recommendation would be to only make as many as you anticipate eating. The good news is they take hardly any time to cook so you can assemble some more and bake them off quickly if you decide you want a second helping.
Crunchy Baked Tacos
Filling from A Taste of Home Cooking, method from No. 2 Pencil
1 5.8 oz box yellow corn taco shells (12 shells)
1 pound ground beef
1 onion, chopped
1 clove minced garlic
2 teaspoons cumin
2 teaspoons chili powder
Salt and pepper
2 tablespoons tomato paste
1/2 cup salsa
1/4 cup sour cream
2 cups of freshly shredded colby jack cheese
romaine lettuce, shredded
vine-ripened tomatoes, diced
sour cream
taco sauce
Preheat oven to 400 degrees and place shells in a 9x13 baking dish.
Heat a saute pan over medium heat. Add the ground beef and cook, breaking up the large chunks, until just starting to brown. Add the onion and garlic and saute until the onions are soft and the beef is cooked through. Add the cumin, chili powder, salt, pepper and tomato paste. Let cook for about 5 minutes. Off heat, add the salsa and sour cream and stir to incorporate.
Sprinkle half of the cheese in the bottom of each taco shell. Evenly distribute the ground beef in each shell. Top ground beef with remaining shredded cheese.
Bake for 8-10 minutes (mine were done at 8 minutes), or until cheese is melted and shells have started to crisp.
Remove from oven and top with lettuce, tomatoes, sour cream and taco sauce.
Baking the shells with the meat and cheese already inside was brilliant - I hate when the cheese isn't fully melted and this solves that problem. Plus, you just take a taco from the baking dish and you're ready to eat. I kept the toppings simple - shredded lettuce, diced grape tomatoes and I found an avocado in my crisper so I diced that up, too. Some sour cream at the table and we were set.
This is definitely my new favorite taco recipe. I swapped out my filling recipe but kept the method the same. The one thing I didn't like - these don't reheat well the next day. In fact, they were downright awful. My recommendation would be to only make as many as you anticipate eating. The good news is they take hardly any time to cook so you can assemble some more and bake them off quickly if you decide you want a second helping.
Crunchy Baked Tacos
Filling from A Taste of Home Cooking, method from No. 2 Pencil
1 5.8 oz box yellow corn taco shells (12 shells)
1 pound ground beef
1 onion, chopped
1 clove minced garlic
2 teaspoons cumin
2 teaspoons chili powder
Salt and pepper
2 tablespoons tomato paste
1/2 cup salsa
1/4 cup sour cream
2 cups of freshly shredded colby jack cheese
romaine lettuce, shredded
vine-ripened tomatoes, diced
sour cream
taco sauce
Preheat oven to 400 degrees and place shells in a 9x13 baking dish.
Heat a saute pan over medium heat. Add the ground beef and cook, breaking up the large chunks, until just starting to brown. Add the onion and garlic and saute until the onions are soft and the beef is cooked through. Add the cumin, chili powder, salt, pepper and tomato paste. Let cook for about 5 minutes. Off heat, add the salsa and sour cream and stir to incorporate.
Sprinkle half of the cheese in the bottom of each taco shell. Evenly distribute the ground beef in each shell. Top ground beef with remaining shredded cheese.
Bake for 8-10 minutes (mine were done at 8 minutes), or until cheese is melted and shells have started to crisp.
Remove from oven and top with lettuce, tomatoes, sour cream and taco sauce.
Labels:
beef,
easy weeknight meal,
Mexican,
tacos,
toddler-approved
Monday, May 26, 2014
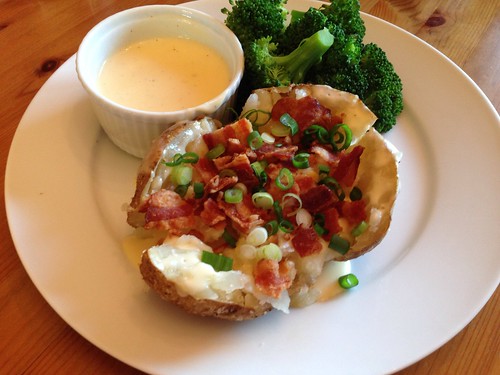
Steakhouse Baked Potatoes
We all love a good baked potato so I wanted to see if I could make it into a meal by adding steamed broccoli, crispy bacon and scallions all smothered in a delicious cheese sauce. These Steakhouse Baked Potatoes weren't quite as filling as I wanted - we like to eat a big dinner most nights - but if you have a late or hearty lunch these would be perfect as a light dinner.
Steakhouse Baked Potatoes
4 russet potatoes (about 1/2 pound each)
vegetable or olive oil
kosher salt
2 broccoli crowns, cut into florets
1 tablespoon butter
1 1/2 tablespoons all-purpose flour
1 1/4 cups 2% reduced-fat milk
2 ounces extra-sharp cheddar cheese, shredded (about 1/2 cup packed)
4 slices bacon, cooked and cut into small pieces
4 scallions
Preheat the oven to 350 degrees.
Wash and dry the potatoes and poke each potato all over with a fork (so they won’t explode).
Rub some oil over each potato. Place the potatoes on a baking sheet. Sprinkle salt over the potatoes and roll them around to cover completely.
Bake about 1 hour. Check the potatoes by inserting a fork into the center. It's done when the fork goes in easily.
While the potatoes are cooking, bring a large pot of water to a boil. Season wit salt and then add the broccoli. Cook for 4 minutes, then drain and keep warm. You can also steam the broccoli.
Melt butter in a small saucepan. Sprinkle flour over melted butter; cook for 1 minute, stirring often with a whisk. Gradually add milk to the flour mixture in pan, and bring to a boil, stirring often with a whisk. Cook for 1 minute or until slightly thick, then remove from heat. Add the cheese and stir until smooth.
Steakhouse Baked Potatoes
4 russet potatoes (about 1/2 pound each)
vegetable or olive oil
kosher salt
2 broccoli crowns, cut into florets
1 tablespoon butter
1 1/2 tablespoons all-purpose flour
1 1/4 cups 2% reduced-fat milk
2 ounces extra-sharp cheddar cheese, shredded (about 1/2 cup packed)
4 slices bacon, cooked and cut into small pieces
4 scallions
Preheat the oven to 350 degrees.
Wash and dry the potatoes and poke each potato all over with a fork (so they won’t explode).
Rub some oil over each potato. Place the potatoes on a baking sheet. Sprinkle salt over the potatoes and roll them around to cover completely.
Bake about 1 hour. Check the potatoes by inserting a fork into the center. It's done when the fork goes in easily.
While the potatoes are cooking, bring a large pot of water to a boil. Season wit salt and then add the broccoli. Cook for 4 minutes, then drain and keep warm. You can also steam the broccoli.
Melt butter in a small saucepan. Sprinkle flour over melted butter; cook for 1 minute, stirring often with a whisk. Gradually add milk to the flour mixture in pan, and bring to a boil, stirring often with a whisk. Cook for 1 minute or until slightly thick, then remove from heat. Add the cheese and stir until smooth.
Labels:
baked potato,
broccoli,
easy weeknight meal
Friday, May 23, 2014
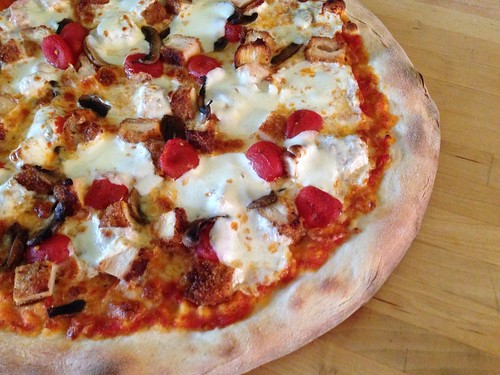
Pizza Fridays: Chicken Parm Pizza
This is one of those pizzas that came about because of leftovers. I had some leftover crispy chicken from the Crispy Chicken with Egg and Arugula and some grape tomatoes that were starting to get wrinkly. I figured I'd add in the standard pizza sauce and cheese and chicken parm pizza was born.
I had a few mushrooms leftover as well so I added those too, but I'm leaving them off the recipe below since they aren't part of a traditional chicken parm recipe.
Chicken Parm Pizza
1/2 pint grape tomatoes
olive oil
salt and pepper
1 ball of pizza dough
1/2 cup marinara or pizza sauce
4 oz mozzarella cheese, shredded
4 oz fresh mozzarella, cut into slices
1 cup crispy breaded chicken, cut into bite-size pieces
Flour, for dusting and rolling
Preheat the oven to 400 degrees. Arrange tomatoes on a foil-lined baking sheet; drizzle with olive oil, sprinkle with salt and pepper, and toss to combine. Cook for 20 minutes or until browned and bursting.
Place a pizza stone in your oven and turn the oven up to 550 degrees.
Lay a sheet of parchment paper the size of your pizza stone on a work surface. Lightly dust with flour. Roll or stretch the dough into a 12- to 14-inch circle on the parchment paper. Spread the pizza sauce in a thin layer over the dough, leaving a half-inch margin around the outer edges. Sprinkle the shredded mozzarella over the top, then add the pieces of chicken and roasted tomatoes. Top with the sliced fresh mozzarella.
Transfer the pizza to the hot pizza stone. Bake for 8-10 minutes, until the cheese is bubbling and the crust is golden brown.
Remove the pizza from the oven, let it cool for about 5 minutes before slicing and serving.
I had a few mushrooms leftover as well so I added those too, but I'm leaving them off the recipe below since they aren't part of a traditional chicken parm recipe.
Chicken Parm Pizza
1/2 pint grape tomatoes
olive oil
salt and pepper
1 ball of pizza dough
1/2 cup marinara or pizza sauce
4 oz mozzarella cheese, shredded
4 oz fresh mozzarella, cut into slices
1 cup crispy breaded chicken, cut into bite-size pieces
Flour, for dusting and rolling
Preheat the oven to 400 degrees. Arrange tomatoes on a foil-lined baking sheet; drizzle with olive oil, sprinkle with salt and pepper, and toss to combine. Cook for 20 minutes or until browned and bursting.
Place a pizza stone in your oven and turn the oven up to 550 degrees.
Lay a sheet of parchment paper the size of your pizza stone on a work surface. Lightly dust with flour. Roll or stretch the dough into a 12- to 14-inch circle on the parchment paper. Spread the pizza sauce in a thin layer over the dough, leaving a half-inch margin around the outer edges. Sprinkle the shredded mozzarella over the top, then add the pieces of chicken and roasted tomatoes. Top with the sliced fresh mozzarella.
Transfer the pizza to the hot pizza stone. Bake for 8-10 minutes, until the cheese is bubbling and the crust is golden brown.
Remove the pizza from the oven, let it cool for about 5 minutes before slicing and serving.
Wednesday, May 21, 2014
Recipe Redo: Skillet Beef Stroganoff
This Skillet Beef Stroganoff has been a family favorite for years but I was never happy with the photo. Whenever I ask SP for meal ideas he usually suggests this one, so I figured it was time to take a new picture.
You've got to love one-pot meals. Cooking the pasta in the sauce adds a silkiness and everything comes together beautifully. This one has really stood the test of time.
Skillet Beef Stroganoff
America's Test Kitchen Easy Skillet Suppers
1 pound ground beef
Salt and pepper
10 ounces white mushrooms, sliced thin
1 onion, chopped fine
2 tablespoons all-purpose flour
1 1/2 cups chicken broth
1 1/2 cups beef broth
1/3 cup brandy
1/3 pound wide egg noodles (3 cups)
2/3 cup sour cream
2 teaspoons lemon juice
Heat a large skillet over medium-high heat. Add the ground beef and cook until it begins to brown. Add the mushrooms, onion, and 1/2 teaspoon salt to the skillet and cook until the liquid from the mushrooms has evaporated, about 8 minutes.
Stir in flour and cook for 30 seconds, then add both broths and the brandy. Bring to a boil, then stir in the noodles. Cook, stirring occasionally, until noodles are tender, 10 to 12 minutes. Remove the skillet from the heat and stir in the sour cream and lemon juice. Season with salt and pepper, to taste.
You've got to love one-pot meals. Cooking the pasta in the sauce adds a silkiness and everything comes together beautifully. This one has really stood the test of time.
Skillet Beef Stroganoff
America's Test Kitchen Easy Skillet Suppers
1 pound ground beef
Salt and pepper
10 ounces white mushrooms, sliced thin
1 onion, chopped fine
2 tablespoons all-purpose flour
1 1/2 cups chicken broth
1 1/2 cups beef broth
1/3 cup brandy
1/3 pound wide egg noodles (3 cups)
2/3 cup sour cream
2 teaspoons lemon juice
Heat a large skillet over medium-high heat. Add the ground beef and cook until it begins to brown. Add the mushrooms, onion, and 1/2 teaspoon salt to the skillet and cook until the liquid from the mushrooms has evaporated, about 8 minutes.
Stir in flour and cook for 30 seconds, then add both broths and the brandy. Bring to a boil, then stir in the noodles. Cook, stirring occasionally, until noodles are tender, 10 to 12 minutes. Remove the skillet from the heat and stir in the sour cream and lemon juice. Season with salt and pepper, to taste.
Labels:
beef,
easy weeknight meal,
one-pot,
pasta
Monday, May 19, 2014
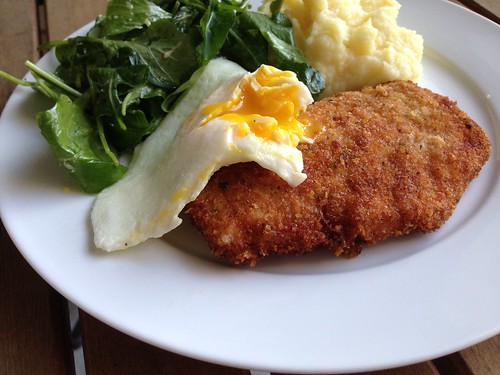
Crispy Chicken with Egg and Arugula
I love a good crispy chicken recipe. I also love anything topped with a fried egg. When Nicole posted this recipe for Crispy Chicken with Egg and Arugula I was stoked - two of my favorite things in one recipe? Brilliant.
This was such a comforting meal with the crispy chicken, creamy mashed potatoes and arugula with a tangy dressing. The fried egg with its runny yolk was delicious with the chicken. There's nothing complicated about this recipe but it's so, so good.
Crispy Baked Chicken with Egg and Arugula Salad
As seen on Prevention RD
1 egg + 1 tablespoon water
1/2 cup panko
1/2 cup breadcrumbs
2 tablespoons grated Parmesan
1/4 teaspoon pepper and salt
1/4 teaspoon garlic powder
1 lb chicken, each breast cut in half lengthwise
vegetable or canola oil
4 eggs
Arugula Salad:
8 oz fresh arugula
1 shallot, finely minced
1 teaspoon Dijon mustard
2 teaspoon red wine vinegar
1/4 cup extra-virgin olive oil
1 teaspoon sugar
1 teaspoon honey
1/4 teaspoon each salt and freshly ground black pepper
In one of two shallow bowls, whisk together the egg and 1 tablespoon water. In the second bowl, combine the panko, breadcrumbs, Parmesan, salt, pepper, and garlic powder.
Heat vegetable oil in a medium skillet (enough to shallow-fry the chicken). Working one at a time, dredge the chicken in the egg mixture and then in the breadcrumb mixture, coating both sides completely. Fry in batches until golden and crispy, about 5 minutes per side; remove to a paper-towel-lined plate.
Meanwhile, prepare the arugula salad. Whisk together the shallot, Dijon, vinegar, olive oil, sugar, honey, salt and pepper. Drizzle the dressing over the arugula and toss to combine.
In a small skillet, cook the eggs to your liking – over easy, medium, or hard.
To assemble, plate each chicken breast and top with 1 egg and 1/4 of the salad mixture. Serve immediately.
This was such a comforting meal with the crispy chicken, creamy mashed potatoes and arugula with a tangy dressing. The fried egg with its runny yolk was delicious with the chicken. There's nothing complicated about this recipe but it's so, so good.
Crispy Baked Chicken with Egg and Arugula Salad
As seen on Prevention RD
1 egg + 1 tablespoon water
1/2 cup panko
1/2 cup breadcrumbs
2 tablespoons grated Parmesan
1/4 teaspoon pepper and salt
1/4 teaspoon garlic powder
1 lb chicken, each breast cut in half lengthwise
vegetable or canola oil
4 eggs
Arugula Salad:
8 oz fresh arugula
1 shallot, finely minced
1 teaspoon Dijon mustard
2 teaspoon red wine vinegar
1/4 cup extra-virgin olive oil
1 teaspoon sugar
1 teaspoon honey
1/4 teaspoon each salt and freshly ground black pepper
In one of two shallow bowls, whisk together the egg and 1 tablespoon water. In the second bowl, combine the panko, breadcrumbs, Parmesan, salt, pepper, and garlic powder.
Heat vegetable oil in a medium skillet (enough to shallow-fry the chicken). Working one at a time, dredge the chicken in the egg mixture and then in the breadcrumb mixture, coating both sides completely. Fry in batches until golden and crispy, about 5 minutes per side; remove to a paper-towel-lined plate.
Meanwhile, prepare the arugula salad. Whisk together the shallot, Dijon, vinegar, olive oil, sugar, honey, salt and pepper. Drizzle the dressing over the arugula and toss to combine.
In a small skillet, cook the eggs to your liking – over easy, medium, or hard.
To assemble, plate each chicken breast and top with 1 egg and 1/4 of the salad mixture. Serve immediately.
Friday, May 16, 2014
Pasta Primavera
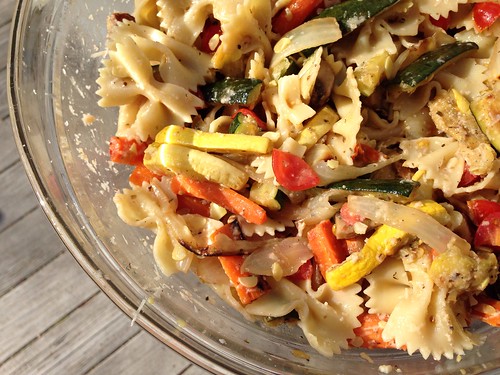
I've been making this Pasta Primavera recipe for years but for some reason I haven't blogged it yet. It's a great way to get plenty of veggies in your diet yet it's easy enough to make on a weeknight. It can be served hot, cold or room temperature, making it great for parties. I served this to my parents for a recent Sunday dinner and the 5 of us put away the whole bowl in one sitting.
Pasta Primavera
From Giada De Laurentiis
3 carrots, peeled and cut into thin strips
2 medium zucchini or 1 large zucchini, cut into thin strips
2 yellow squash, cut into thin strips
1 onion, thinly sliced
1 yellow bell pepper, cut into thin strips
1 red bell pepper, cut into thin strips
1/4 cup olive oil
Kosher salt and freshly ground black pepper
1 tablespoon dried Italian herbs or herbes de Provence
1 pound farfalle (bowtie pasta)
15 cherry tomatoes, halved
1/2 cup grated Parmesan
Preheat the oven to 450 degrees F.
On a large heavy baking sheet, toss all of the vegetables with the oil, salt, pepper, and dried herbs to coat. Transfer half of the vegetable mixture to another heavy large baking sheet and arrange evenly over the baking sheets. Bake until the carrots are tender and the vegetables begin to brown, stirring after the first 10 minutes, about 20 minutes total.
Meanwhile, cook the pasta in a large pot of boiling salted water until al dente, tender but still firm to the bite, about 8 minutes. Drain, reserving 1 cup of the cooking liquid.
Toss the pasta with the vegetable mixtures in a large bowl to combine. Toss with the cherry tomatoes and enough reserved cooking liquid to moisten. Season the pasta with salt and pepper, to taste. Sprinkle with the Parmesan and serve immediately.
Pasta Primavera
From Giada De Laurentiis
3 carrots, peeled and cut into thin strips
2 medium zucchini or 1 large zucchini, cut into thin strips
2 yellow squash, cut into thin strips
1 onion, thinly sliced
1 yellow bell pepper, cut into thin strips
1 red bell pepper, cut into thin strips
1/4 cup olive oil
Kosher salt and freshly ground black pepper
1 tablespoon dried Italian herbs or herbes de Provence
1 pound farfalle (bowtie pasta)
15 cherry tomatoes, halved
1/2 cup grated Parmesan
Preheat the oven to 450 degrees F.
On a large heavy baking sheet, toss all of the vegetables with the oil, salt, pepper, and dried herbs to coat. Transfer half of the vegetable mixture to another heavy large baking sheet and arrange evenly over the baking sheets. Bake until the carrots are tender and the vegetables begin to brown, stirring after the first 10 minutes, about 20 minutes total.
Meanwhile, cook the pasta in a large pot of boiling salted water until al dente, tender but still firm to the bite, about 8 minutes. Drain, reserving 1 cup of the cooking liquid.
Toss the pasta with the vegetable mixtures in a large bowl to combine. Toss with the cherry tomatoes and enough reserved cooking liquid to moisten. Season the pasta with salt and pepper, to taste. Sprinkle with the Parmesan and serve immediately.
Labels:
Italian,
pasta,
vegetables,
vegetarian
Friday, May 09, 2014
Pizza Fridays: 3 Cheese Rosemary and Pepperoni Pizza
I've been looking for new pizza recipes lately, so when Coleen mentioned loving Tara's 3 Cheese Rosemary and Pepperoni Pizza I knew I had to try it.
All I can say is stop what you're doing and make this pizza. Now. I had a month's worth of recipes scheduled before I made this and I bumped it to the front of the line because I had to share it with you guys immediately.
This is one gooey, cheesy, delicious pizza. I love the combination of mozzarella, fontina and ricotta. The spicy pepperoni cuts through the richness of the cheese and the rosemary is the perfect final touch. There's nothing more to say - insanely, ridiculously good.
3 Cheese Rosemary and Pepperoni Pizza
As seen on Smells Like Home
Sliced pepperoni
1 ball of pizza dough
1/2 cup marinara or pizza sauce
6 oz mozzarella cheese, shredded
6 oz Italian fontina cheese, shredded
1/4 cup ricotta cheese
1 tablespoon chopped fresh rosemary
Flour, for dusting and rolling
Place a pizza stone in the oven and preheat the oven to 500° F for at least 30 minutes.
Lay three sheets of paper towel on a plate. Top with however much pepperoni you want on your pizza. Cover with three more sheets of paper towel. Place the plate in the microwave and cook for 30 seconds. Check to see how much oil the pepperoni has released, then cook for another 30 seconds. This will release most of the oil onto the paper towels rather than your pizza.
Lay a piece of parchment paper the size of the pizza stone on a work surface. Dust lightly with flour and roll out the pizza dough into a 12- to 14-inch circle. Spoon the sauce evenly over the dough leaving a ½-inch border.
Top with the mozzarella and fontina cheeses. Dollop the ricotta by the tablespoon over the cheese then add pepperoni. Sprinkle the rosemary over the top.
Transfer the pizza on the parchment paper to the pizza stone. Bake for 5-10 minutes, checking often for doneness. Remove the pizza from the oven and allow it to rest for 5 minutes before slicing.
All I can say is stop what you're doing and make this pizza. Now. I had a month's worth of recipes scheduled before I made this and I bumped it to the front of the line because I had to share it with you guys immediately.
This is one gooey, cheesy, delicious pizza. I love the combination of mozzarella, fontina and ricotta. The spicy pepperoni cuts through the richness of the cheese and the rosemary is the perfect final touch. There's nothing more to say - insanely, ridiculously good.
3 Cheese Rosemary and Pepperoni Pizza
As seen on Smells Like Home
Sliced pepperoni
1 ball of pizza dough
1/2 cup marinara or pizza sauce
6 oz mozzarella cheese, shredded
6 oz Italian fontina cheese, shredded
1/4 cup ricotta cheese
1 tablespoon chopped fresh rosemary
Flour, for dusting and rolling
Place a pizza stone in the oven and preheat the oven to 500° F for at least 30 minutes.
Lay three sheets of paper towel on a plate. Top with however much pepperoni you want on your pizza. Cover with three more sheets of paper towel. Place the plate in the microwave and cook for 30 seconds. Check to see how much oil the pepperoni has released, then cook for another 30 seconds. This will release most of the oil onto the paper towels rather than your pizza.
Lay a piece of parchment paper the size of the pizza stone on a work surface. Dust lightly with flour and roll out the pizza dough into a 12- to 14-inch circle. Spoon the sauce evenly over the dough leaving a ½-inch border.
Top with the mozzarella and fontina cheeses. Dollop the ricotta by the tablespoon over the cheese then add pepperoni. Sprinkle the rosemary over the top.
Transfer the pizza on the parchment paper to the pizza stone. Bake for 5-10 minutes, checking often for doneness. Remove the pizza from the oven and allow it to rest for 5 minutes before slicing.
Wednesday, May 07, 2014
Recipe Redo: Avocado Enchiladas
Someone was looking for vegetarian Mexican recipes recently and I recommended these avocado enchiladas. Then I looked at the picture and cringed. I know enchiladas are hard to photograph but I knew I could do at least slightly better. We all love guacamole so I put these on the menu for the weekend.
These are basically guacamole-stuffed tortillas topped with homemade enchilada sauce and cheese. Nothing wrong with that. My guacamole recipe is below but you can prepare it however you would normally. I don't add garlic or jalapeno, but some people like that. Whatever you do, make the homemade enchilada sauce. It's a very simple recipe and I love the spice and tang from the chipotle in adobo. It's the perfect compliment to the creamy avocado.
I froze the leftovers in individual portions and can't wait to pull out one of those parcels for a quick lunch or dinner.
Avocado Enchiladas
Modified from ...But where do you get your protein?
1 1/2 tablespoons olive oil
1/4 cup all-purpose flour (spooned and leveled)
1 can (14.5 ounces) reduced sodium chicken broth
1 1/2 tablespoons chili powder
1 small canned chipotle chile in adobo
3/4 cup water
4 ripe avocados, sliced in half, pit removed and flesh scooped out
1/4 cup finely chopped red onion
1/2 cup cilantro leaves, roughly chopped
Lemon juice, to taste
2 tomatoes, seeded and diced
Salt and black pepper to taste
8 fajita-size flour tortillas
8oz grated sharp Cheddar or Monterey Jack cheese
Additional cilantro leaves
Preheat oven to 350 degrees.
In a medium saucepan, heat 1 1/2 tablespoons oil over medium. Add flour and cook, whisking occasionally, 1 minute. Add broth, chili powder, chipotle, and 3/4 cup water; bring to a boil, whisking constantly. Reduce heat, and simmer until lightly thickened, about 10 minutes.
Spray a glass 9x13" baking dish with cooking spray. Mash the avocado in a bowl. Add the onion, cilantro, lemon juice, tomatoes, and salt and pepper. Mix together like you're making guacamole. Taste and adjust seasoning.
Lay one tortilla on a work surface. Spoon 1/8 the avocado mixture into each tortilla and roll them up. Place tortillas in the prepared baking dish and cover with the enchilada sauce. Sprinkle the cheese over the top.
Bake for 20 minutes. Sprinkle with additional cilantro just before serving.
These are basically guacamole-stuffed tortillas topped with homemade enchilada sauce and cheese. Nothing wrong with that. My guacamole recipe is below but you can prepare it however you would normally. I don't add garlic or jalapeno, but some people like that. Whatever you do, make the homemade enchilada sauce. It's a very simple recipe and I love the spice and tang from the chipotle in adobo. It's the perfect compliment to the creamy avocado.
I froze the leftovers in individual portions and can't wait to pull out one of those parcels for a quick lunch or dinner.
Avocado Enchiladas
Modified from ...But where do you get your protein?
1 1/2 tablespoons olive oil
1/4 cup all-purpose flour (spooned and leveled)
1 can (14.5 ounces) reduced sodium chicken broth
1 1/2 tablespoons chili powder
1 small canned chipotle chile in adobo
3/4 cup water
4 ripe avocados, sliced in half, pit removed and flesh scooped out
1/4 cup finely chopped red onion
1/2 cup cilantro leaves, roughly chopped
Lemon juice, to taste
2 tomatoes, seeded and diced
Salt and black pepper to taste
8 fajita-size flour tortillas
8oz grated sharp Cheddar or Monterey Jack cheese
Additional cilantro leaves
Preheat oven to 350 degrees.
In a medium saucepan, heat 1 1/2 tablespoons oil over medium. Add flour and cook, whisking occasionally, 1 minute. Add broth, chili powder, chipotle, and 3/4 cup water; bring to a boil, whisking constantly. Reduce heat, and simmer until lightly thickened, about 10 minutes.
Spray a glass 9x13" baking dish with cooking spray. Mash the avocado in a bowl. Add the onion, cilantro, lemon juice, tomatoes, and salt and pepper. Mix together like you're making guacamole. Taste and adjust seasoning.
Lay one tortilla on a work surface. Spoon 1/8 the avocado mixture into each tortilla and roll them up. Place tortillas in the prepared baking dish and cover with the enchilada sauce. Sprinkle the cheese over the top.
Bake for 20 minutes. Sprinkle with additional cilantro just before serving.
Labels:
avocados,
enchiladas,
Mexican,
vegetarian
Monday, May 05, 2014
Deviled Eggs
I've been making deviled eggs for years but I've never shared my recipe here. It's fairly simple but very, very delicious. I don't measure the mayo or mustard, just go by feel and taste.
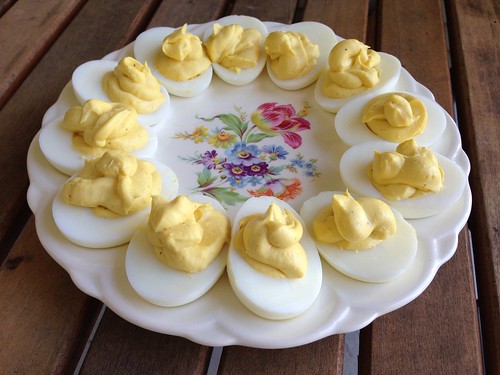
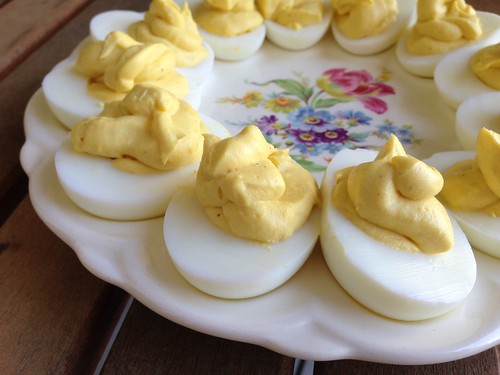
I've never been good at piping the filling back into the eggs, so excuse the unstyled photos. We inhaled these at Easter. Baby Girl loves them - she had three. Next year I'm making a full dozen since there were no leftovers.
Deviled Eggs
12 eggs
mayo
yellow mustard
salt
pepper
Put the eggs carefully in a large pot. Fill the pot with cold water so the eggs are completely covered. Put the pot on the stove and bring to a boil. Turn the heat off, cover the pot and allow to sit for 12 minutes. Drain the eggs and immediately submerge in ice water. Allow to cool completely.
Once the eggs are cool, peel them. Cut each egg in half and remove the yolks to a bowl. Mash each yolk as you add it to the bowl so the yolk is a smooth paste. Add some mayo (start with a few tablespoons) and mash into the yolks. You want the mixture to be smooth and creamy. Add more mayo as needed to get the consistency you want. Add a few squirts of mustard to taste. The more mustard you add the spicier they'll be. Season with salt and pepper.
Pipe or spoon the filling back into each egg half.
I've never been good at piping the filling back into the eggs, so excuse the unstyled photos. We inhaled these at Easter. Baby Girl loves them - she had three. Next year I'm making a full dozen since there were no leftovers.
Deviled Eggs
12 eggs
mayo
yellow mustard
salt
pepper
Put the eggs carefully in a large pot. Fill the pot with cold water so the eggs are completely covered. Put the pot on the stove and bring to a boil. Turn the heat off, cover the pot and allow to sit for 12 minutes. Drain the eggs and immediately submerge in ice water. Allow to cool completely.
Once the eggs are cool, peel them. Cut each egg in half and remove the yolks to a bowl. Mash each yolk as you add it to the bowl so the yolk is a smooth paste. Add some mayo (start with a few tablespoons) and mash into the yolks. You want the mixture to be smooth and creamy. Add more mayo as needed to get the consistency you want. Add a few squirts of mustard to taste. The more mustard you add the spicier they'll be. Season with salt and pepper.
Pipe or spoon the filling back into each egg half.
Wednesday, April 30, 2014
April Re-Make Recap
Has this been a crazy "spring" or what? I put spring in quotes because the weather lately doesn't seem very springlike. I'm writing this post on April 29 and it's rainy, cold and windy. Oh wait, maybe that IS spring and we've just been spoiled by recent years when spring meant sunny skies and warmer weather.
But enough about the weather, let's talk about April. It was another great month. We celebrated my mom's birthday, went to a ridiculous number of birthday parties for school friends, enjoyed hunting for Easter eggs and had a fantastic adult weekend while Baby Girl had a sleepover at my parent's house. We also ate very well, as usual.
No recipe recap would be complete without these TRH salads. Are you getting tired of seeing them? We're not getting tired of eating them, that's for sure. I think Baby Girl truly believes this is what "salad" means. When she sees salad on a menu she assumes it's this one.
I really should have snapped a picture of this cauliflower bacon mac and cheese. All I did was swap out the broccoli for cauliflower but it's like an entirely new recipe. So delicious.
I had some leftover cooked pork tenderloin in the freezer and rice noodles in the pantry so I had to remake this hoisin pork with rice noodles. It was just as good as we remembered.
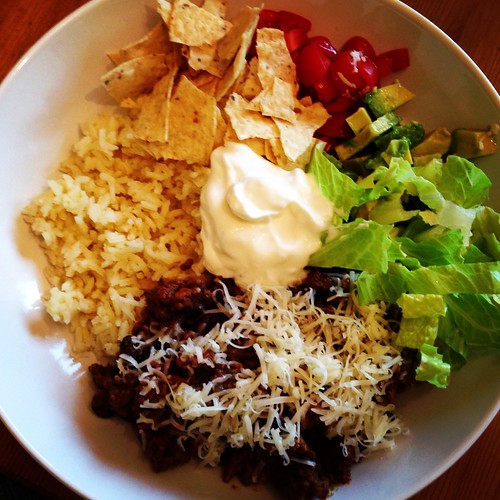
We finally introduced my parents to taco rice one Sunday. It's a staple at our house and, thankfully, they loved it.
Speaking of salad, I got it in my head that I wanted to make spinach salad with warm bacon dressing. Baby Girl surprised me recently by eating fresh spinach (she's still not a fan of it once it's cooked) so I couldn't wait for her to try this. She was a big fan.

I can't get enough of this chocolate pudding. I remade it for Sunday dinner one week and we were all licking the ramekins. It's so easy and so flavorful. I foresee a lot of this pudding this summer, although Baby Girl really wants me to try vanilla pudding. I just need to find a good recipe.
I saw this cucumber and avocado tartine at the bottom of one of my posts recently and immediately wrote down the ingredients so I could make it for lunch during the week. What's not to love about creamy avocado, crispy cucumber and tangy dressing on a crunchy roll?
One day when it wasn't cold and rainy we had a cookout with my parents. I made this creamy macaroni salad. It's great because it's easy and low in calories since the dressing is made with Greek yogurt. Baby Girl loves this recipe - she ate a ton of it.

I can't let asparagus season pass by without making this spicy pork and asparagus stir fry again and again. I made a double batch recently so I'd have plenty of leftovers to freeze. I love pulling out the little parcels to eat with angel hair or spaghetti.
I've been craving fish lately so, of course, I made tilapia francese. There's just something about the meaty fish with the lemony sauce and crispy coating that works so well.

I've been making this california club chopped salad with feta recently because I keep ending up with half-full containers of feta in my fridge. I prefer it with the blue cheese but feta works well, too.
And speaking of feta, I was all set to use the last little bit of it in this asparagus with tomato and feta for Easter but it had expired. So, we had just the tomatoes and shallot. It was still delicious. I like the brightness the tomatoes add to the roasted asparagus.

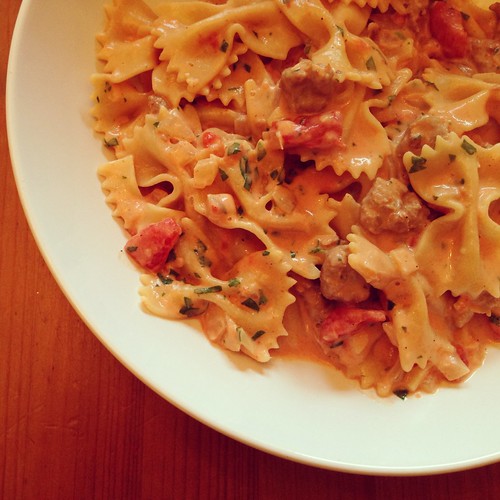
I've been meaning to remake this bowties with sausage, tomato and cream for ages and finally remembered I had a pound of Italian sausage in the freezer. Man, is this a great recipe. So flavorful and delicious with so few ingredients.
Baby Girl recently started swimming class on Wednesday nights, which means I need quick, easy meals. Since we had ham leftover from Easter I whipped up a batch of these sweet ham and swiss sliders.
I should probably expand my tilapia repertoire, but I just love this crispy tilapia recipe. I can't get enough of that panko crunch.
I served the tilapia with leek and pea risotto to use up some leftover leeks. This time I removed the leeks from the pan rather than slow-cooking them so the leek flavor really came through.
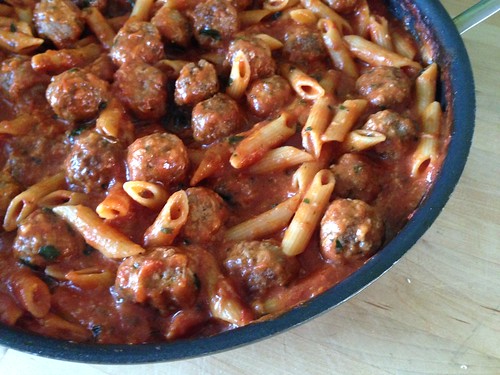
We had my mother-in-law over for dinner recently. She asked for penne and meatballs, so SP asked me to make weeknight spaghetti and meatballs with penne instead of spaghetti. I have to say, I enjoyed the penne more than the spaghetti. It was easier for us to eat, especially Baby Girl.
But enough about the weather, let's talk about April. It was another great month. We celebrated my mom's birthday, went to a ridiculous number of birthday parties for school friends, enjoyed hunting for Easter eggs and had a fantastic adult weekend while Baby Girl had a sleepover at my parent's house. We also ate very well, as usual.
No recipe recap would be complete without these TRH salads. Are you getting tired of seeing them? We're not getting tired of eating them, that's for sure. I think Baby Girl truly believes this is what "salad" means. When she sees salad on a menu she assumes it's this one.
I really should have snapped a picture of this cauliflower bacon mac and cheese. All I did was swap out the broccoli for cauliflower but it's like an entirely new recipe. So delicious.
I had some leftover cooked pork tenderloin in the freezer and rice noodles in the pantry so I had to remake this hoisin pork with rice noodles. It was just as good as we remembered.
We finally introduced my parents to taco rice one Sunday. It's a staple at our house and, thankfully, they loved it.
Speaking of salad, I got it in my head that I wanted to make spinach salad with warm bacon dressing. Baby Girl surprised me recently by eating fresh spinach (she's still not a fan of it once it's cooked) so I couldn't wait for her to try this. She was a big fan.

I can't get enough of this chocolate pudding. I remade it for Sunday dinner one week and we were all licking the ramekins. It's so easy and so flavorful. I foresee a lot of this pudding this summer, although Baby Girl really wants me to try vanilla pudding. I just need to find a good recipe.
I saw this cucumber and avocado tartine at the bottom of one of my posts recently and immediately wrote down the ingredients so I could make it for lunch during the week. What's not to love about creamy avocado, crispy cucumber and tangy dressing on a crunchy roll?
One day when it wasn't cold and rainy we had a cookout with my parents. I made this creamy macaroni salad. It's great because it's easy and low in calories since the dressing is made with Greek yogurt. Baby Girl loves this recipe - she ate a ton of it.
I can't let asparagus season pass by without making this spicy pork and asparagus stir fry again and again. I made a double batch recently so I'd have plenty of leftovers to freeze. I love pulling out the little parcels to eat with angel hair or spaghetti.
I've been craving fish lately so, of course, I made tilapia francese. There's just something about the meaty fish with the lemony sauce and crispy coating that works so well.
I've been making this california club chopped salad with feta recently because I keep ending up with half-full containers of feta in my fridge. I prefer it with the blue cheese but feta works well, too.
And speaking of feta, I was all set to use the last little bit of it in this asparagus with tomato and feta for Easter but it had expired. So, we had just the tomatoes and shallot. It was still delicious. I like the brightness the tomatoes add to the roasted asparagus.

I've been meaning to remake this bowties with sausage, tomato and cream for ages and finally remembered I had a pound of Italian sausage in the freezer. Man, is this a great recipe. So flavorful and delicious with so few ingredients.
Baby Girl recently started swimming class on Wednesday nights, which means I need quick, easy meals. Since we had ham leftover from Easter I whipped up a batch of these sweet ham and swiss sliders.
I should probably expand my tilapia repertoire, but I just love this crispy tilapia recipe. I can't get enough of that panko crunch.
I served the tilapia with leek and pea risotto to use up some leftover leeks. This time I removed the leeks from the pan rather than slow-cooking them so the leek flavor really came through.
We had my mother-in-law over for dinner recently. She asked for penne and meatballs, so SP asked me to make weeknight spaghetti and meatballs with penne instead of spaghetti. I have to say, I enjoyed the penne more than the spaghetti. It was easier for us to eat, especially Baby Girl.
Monday, April 28, 2014
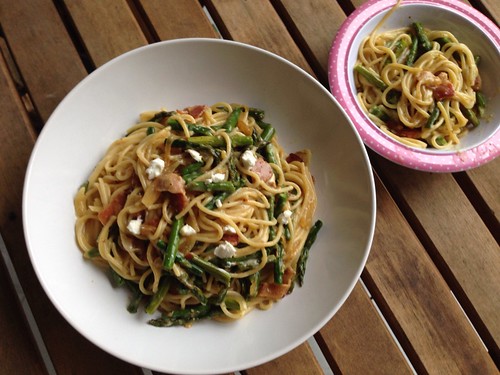
Goat Cheese and Roasted Asparagus Carbonara
You all know how much I love carbonara. It's one of my all-time favorite pasta dishes. I love experimenting with different add-ins, so this Goat Cheese and Roasted Asparagus Carbonara was perfect.
As always, I used my favorite carbonara recipe as a base and then followed the original recipe for the addition of the roasted asparagus and goat cheese. Not surprisingly, we all loved it. Baby Girl is still not the world's biggest asparagus fan, but she'll eat them. I, on the other hand, can never get enough and am loving that they're back in season. Those gorgeous stalks were perfect with the creamy, rich carbonara and the goat cheese added a nice tang.
Goat Cheese and Roasted Asparagus Carbonara
From Confections of a Foodie Bride and Nigella Lawson
2 bunches asparagus
3 cloves garlic, thinly sliced
Olive oil
Salt
Pepper
1lb linguine or spaghetti
8 slices thick-cut bacon, diced
1 large onion, sliced
1/4 cup dry white wine or vermouth
4 eggs
1 1/2 cups shredded Parmesan
1/4 cup heavy cream
Freshly ground black pepper
Freshly ground nutmeg
4 oz goat cheese, crumbled
Preheat oven to 425. Place asparagus and garlic on a baking sheet, drizzle with olive oil, salt, and pepper. Bake for 12 minutes and then cut the stalks in half or thirds.
Cook pasta according to package directions. Set aside 1 cup of pasta water and then drain the pasta.
Cook the bacon until almost completely crisped. Add the onions and cook until softened and starting to caramelize, about 15 minutes. Add the white wine or vermouth and let it bubble so that, after a few minutes, you have a small amount of thick syrup left.
In a bowl, beat together the eggs, Parmesan, cream, pepper and nutmeg. Add the crumbled goat cheese, stirring to mix well.
Add the pasta to the pan, tossing well to coat with the syrupy sauce. Take the pan off the heat (remove from the stove completely, don't just turn off the burner) and add the eggs and cheese mixture, swiftly tossing everything with tongs to mix. Grind over some more pepper and grated cheese, if desired. Add the asparagus, toss to coat (adding some of the pasta water, if necessary).
Serve immediately.
As always, I used my favorite carbonara recipe as a base and then followed the original recipe for the addition of the roasted asparagus and goat cheese. Not surprisingly, we all loved it. Baby Girl is still not the world's biggest asparagus fan, but she'll eat them. I, on the other hand, can never get enough and am loving that they're back in season. Those gorgeous stalks were perfect with the creamy, rich carbonara and the goat cheese added a nice tang.
Goat Cheese and Roasted Asparagus Carbonara
From Confections of a Foodie Bride and Nigella Lawson
2 bunches asparagus
3 cloves garlic, thinly sliced
Olive oil
Salt
Pepper
1lb linguine or spaghetti
8 slices thick-cut bacon, diced
1 large onion, sliced
1/4 cup dry white wine or vermouth
4 eggs
1 1/2 cups shredded Parmesan
1/4 cup heavy cream
Freshly ground black pepper
Freshly ground nutmeg
4 oz goat cheese, crumbled
Preheat oven to 425. Place asparagus and garlic on a baking sheet, drizzle with olive oil, salt, and pepper. Bake for 12 minutes and then cut the stalks in half or thirds.
Cook pasta according to package directions. Set aside 1 cup of pasta water and then drain the pasta.
Cook the bacon until almost completely crisped. Add the onions and cook until softened and starting to caramelize, about 15 minutes. Add the white wine or vermouth and let it bubble so that, after a few minutes, you have a small amount of thick syrup left.
In a bowl, beat together the eggs, Parmesan, cream, pepper and nutmeg. Add the crumbled goat cheese, stirring to mix well.
Add the pasta to the pan, tossing well to coat with the syrupy sauce. Take the pan off the heat (remove from the stove completely, don't just turn off the burner) and add the eggs and cheese mixture, swiftly tossing everything with tongs to mix. Grind over some more pepper and grated cheese, if desired. Add the asparagus, toss to coat (adding some of the pasta water, if necessary).
Serve immediately.
Friday, April 25, 2014
Chicken Chorizo Patty Melts
Awhile back I made a big batch of Mexican-style chorizo using my friend Melissa's recipe. I froze it in 8oz portions and then pretty much forgot all about it. SP has been bugging me to do a better job of keeping the freezer at a manageable level so I asked him to find some recipes using fresh chorizo. When he sent me the link for these Chicken Chorizo Patty Melts I knew I had to try them ASAP.
Man oh man, people, words cannot describe these sandwiches. The chorizo isn't spicy but it has great flavor. You can top anything with caramelized onions and I'll be a fan. And the melted cheese just brings it all together. I especially love that these are served on flat breads. I'm a big fan of flat breads. We bought a package a week last year so I could make these flat bread pizzas. So, so good.
If you have the time and the freezer space I highly recommend making Melissa's chorizo to use in this recipe. I can't speak to the quality and flavor of supermarket fresh chorizo because mine doesn't carry it. All they have is the fully-cooked variety, which doesn't have much flavor at all and wouldn't work in this recipe anyway. But if you have access to excellent, flavorful fresh chorizo, by all means, use that.
Chicken Chorizo Patty Melts
From Sunny Anderson
Patties:
1 pound ground chicken
8 ounces fresh chorizo
2 cloves garlic, minced
2 tablespoons chopped fresh oregano (or 2 teaspoons dried)
1 teaspoon kosher salt
Onions:
1 tablespoon butter
1 tablespoon vegetable oil
1 large or 2 regular Vidalia or sweet onions, sliced
Kosher salt and freshly ground black pepper
spreadable or softened butter
4 oblong/rectangular flat breads (can also use naan or pita)
8 to 10 slices Jarlsberg or Swiss cheese
mayo
In a large bowl, gently but thoroughly combine the chicken, chorizo, garlic, oregano and salt. Form into equal-sized thin patties (I got 5) roughly the size of the bread you will be using or in the case of the flat bread, 1/2 the bread size. Cover the patties with plastic wrap and refrigerate for at least 30 minutes.
In a medium saute pan on medium heat melt the butter with the oil. Add the onion and season with a pinch of salt and a couple of grinds of pepper, to taste. Saute until the onions are caramelized, about 35 minutes, and set aside.
Preheat a griddle or grill pan over medium-high heat. Spread a thin layer of butter on both sides of the flat breads. Add them to the grill pan and cook until both sides have nice grill marks and are starting to get crispy. Remove to a plate.
Add the patties to the grill and cook until crispy on the edges and cooked through, about 4 minutes per side. Add a slice of cheese to each patty in the last minute of cooking. Remove to a plate. Assemble the sandwiches by spreading some mayo on the bread. Place one of the patties on half the flat bread, then top with some of the onions. Fold the other half of the bread over and serve.
Man oh man, people, words cannot describe these sandwiches. The chorizo isn't spicy but it has great flavor. You can top anything with caramelized onions and I'll be a fan. And the melted cheese just brings it all together. I especially love that these are served on flat breads. I'm a big fan of flat breads. We bought a package a week last year so I could make these flat bread pizzas. So, so good.
If you have the time and the freezer space I highly recommend making Melissa's chorizo to use in this recipe. I can't speak to the quality and flavor of supermarket fresh chorizo because mine doesn't carry it. All they have is the fully-cooked variety, which doesn't have much flavor at all and wouldn't work in this recipe anyway. But if you have access to excellent, flavorful fresh chorizo, by all means, use that.
Chicken Chorizo Patty Melts
From Sunny Anderson
Patties:
1 pound ground chicken
8 ounces fresh chorizo
2 cloves garlic, minced
2 tablespoons chopped fresh oregano (or 2 teaspoons dried)
1 teaspoon kosher salt
Onions:
1 tablespoon butter
1 tablespoon vegetable oil
1 large or 2 regular Vidalia or sweet onions, sliced
Kosher salt and freshly ground black pepper
spreadable or softened butter
4 oblong/rectangular flat breads (can also use naan or pita)
8 to 10 slices Jarlsberg or Swiss cheese
mayo
In a large bowl, gently but thoroughly combine the chicken, chorizo, garlic, oregano and salt. Form into equal-sized thin patties (I got 5) roughly the size of the bread you will be using or in the case of the flat bread, 1/2 the bread size. Cover the patties with plastic wrap and refrigerate for at least 30 minutes.
In a medium saute pan on medium heat melt the butter with the oil. Add the onion and season with a pinch of salt and a couple of grinds of pepper, to taste. Saute until the onions are caramelized, about 35 minutes, and set aside.
Preheat a griddle or grill pan over medium-high heat. Spread a thin layer of butter on both sides of the flat breads. Add them to the grill pan and cook until both sides have nice grill marks and are starting to get crispy. Remove to a plate.
Add the patties to the grill and cook until crispy on the edges and cooked through, about 4 minutes per side. Add a slice of cheese to each patty in the last minute of cooking. Remove to a plate. Assemble the sandwiches by spreading some mayo on the bread. Place one of the patties on half the flat bread, then top with some of the onions. Fold the other half of the bread over and serve.
Labels:
chicken,
easy weeknight meal,
sandwiches
Wednesday, April 23, 2014
Pasta alla Norcina
Baby Girl loves to watch cooking shows on TV. I'll admit, the first time she told me she wanted to watch Lidia I shed a tear. When we aren't crazy busy with other activities we'll spend some quiet time Saturday afternoon watching cooking on PBS. That's pretty much how I developed my love of cooking so she's in good company.
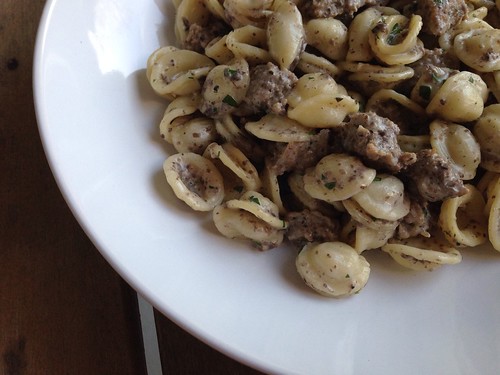
One afternoon recently we were watching America's Test Kitchen and they made this recipe for Pasta alla Norcina. It had everything we love in one dish - pasta, mushrooms and sausage, with a touch of heavy cream thrown in to gild the lily. I immediately found the recipe online and printed it off.
This was my first time making orecchiette for Baby Girl and she couldn't get enough. She was eating the plain pasta right out of the colander after I drained it. SP told me I could make this once a week and he'd be happy. It may seem a little time consuming with all the steps (it wouldn't be an ATK recipe without all those steps) but the result is well worth it. And it really doesn't take that long to put together.
I doubled the recipe (printed below) so we'd have enough for leftovers the next day. This makes a lot - I'd say 6-8 servings if you have a veggie on the side - so the original recipe would probably work fine for a family of 4 without leftovers.
Pasta alla Norcina
From America's Test Kitchen
Kosher salt and pepper
1/4 teaspoon baking soda
8 ounces ground pork
2 garlic cloves, minced
1 teaspoon minced fresh rosemary
Pinch ground nutmeg
8 ounces cremini mushrooms, trimmed
10 teaspoons vegetable oil
2/3 cup heavy cream
1 lb orecchiette
1/2 cup dry white wine
2 ounces Pecorino Romano cheese, grated
2 tablespoons minced fresh parsley
3 teaspoons lemon juice
Grease a small dinner plate with vegetable oil spray. Dissolve 1 1/2 teaspoons salt and the baking soda in 4 teaspoons water in a medium bowl. Add the pork and fold gently to combine; let stand for 10 minutes.
Add 1 teaspoon garlic, 1/2 teaspoon rosemary, nutmeg, and 1 teaspoon pepper to pork and stir and smear with a rubber spatula until well combined and tacky, 10 to 15 seconds. Transfer pork mixture to the greased plate and form into a 6-inch patty.
Pulse the mushrooms in a food processor until finely chopped, 10 to 12 pulses.
Heat 4 teaspoons oil in 10-inch skillet over medium-high heat until just smoking. Add the sausage patty and cook without moving it until the bottom is browned, 1 to 2 minutes. Flip and continue to cook until the second side is well browned, 1 to 2 minutes longer (very center of patty will be raw). Remove pan from heat, transfer sausage to cutting board, and roughly chop. Transfer sausage to bowl and add cream; set aside.
Cook pasta, drain and reserve 1 1/2 cups cooking water.
While pasta cooks, return now-empty skillet to medium heat. Add 4 teaspoons oil, mushrooms, and pinch salt; cook, stirring frequently, until mushrooms are browned, 3 to 5 minutes. Stir in remaining 2 teaspoon oils, remaining garlic, remaining 1/2 teaspoon rosemary, and ½ teaspoon pepper; cook until fragrant. Stir in wine, scraping up any browned bits, and cook until completely evaporated. Stir in sausage and 1/3 cup reserved cooking water and simmer until meat is no longer pink, 1 to 3 minutes. Remove pan from heat and stir in Pecorino until smooth.
Add sauce, parsley, and lemon juice to pasta and toss well to coat. Before serving, adjust consistency with remaining reserved cooking water as needed and season with salt and pepper to taste.
One afternoon recently we were watching America's Test Kitchen and they made this recipe for Pasta alla Norcina. It had everything we love in one dish - pasta, mushrooms and sausage, with a touch of heavy cream thrown in to gild the lily. I immediately found the recipe online and printed it off.
This was my first time making orecchiette for Baby Girl and she couldn't get enough. She was eating the plain pasta right out of the colander after I drained it. SP told me I could make this once a week and he'd be happy. It may seem a little time consuming with all the steps (it wouldn't be an ATK recipe without all those steps) but the result is well worth it. And it really doesn't take that long to put together.
I doubled the recipe (printed below) so we'd have enough for leftovers the next day. This makes a lot - I'd say 6-8 servings if you have a veggie on the side - so the original recipe would probably work fine for a family of 4 without leftovers.
Pasta alla Norcina
From America's Test Kitchen
Kosher salt and pepper
1/4 teaspoon baking soda
8 ounces ground pork
2 garlic cloves, minced
1 teaspoon minced fresh rosemary
Pinch ground nutmeg
8 ounces cremini mushrooms, trimmed
10 teaspoons vegetable oil
2/3 cup heavy cream
1 lb orecchiette
1/2 cup dry white wine
2 ounces Pecorino Romano cheese, grated
2 tablespoons minced fresh parsley
3 teaspoons lemon juice
Grease a small dinner plate with vegetable oil spray. Dissolve 1 1/2 teaspoons salt and the baking soda in 4 teaspoons water in a medium bowl. Add the pork and fold gently to combine; let stand for 10 minutes.
Add 1 teaspoon garlic, 1/2 teaspoon rosemary, nutmeg, and 1 teaspoon pepper to pork and stir and smear with a rubber spatula until well combined and tacky, 10 to 15 seconds. Transfer pork mixture to the greased plate and form into a 6-inch patty.
Pulse the mushrooms in a food processor until finely chopped, 10 to 12 pulses.
Heat 4 teaspoons oil in 10-inch skillet over medium-high heat until just smoking. Add the sausage patty and cook without moving it until the bottom is browned, 1 to 2 minutes. Flip and continue to cook until the second side is well browned, 1 to 2 minutes longer (very center of patty will be raw). Remove pan from heat, transfer sausage to cutting board, and roughly chop. Transfer sausage to bowl and add cream; set aside.
Cook pasta, drain and reserve 1 1/2 cups cooking water.
While pasta cooks, return now-empty skillet to medium heat. Add 4 teaspoons oil, mushrooms, and pinch salt; cook, stirring frequently, until mushrooms are browned, 3 to 5 minutes. Stir in remaining 2 teaspoon oils, remaining garlic, remaining 1/2 teaspoon rosemary, and ½ teaspoon pepper; cook until fragrant. Stir in wine, scraping up any browned bits, and cook until completely evaporated. Stir in sausage and 1/3 cup reserved cooking water and simmer until meat is no longer pink, 1 to 3 minutes. Remove pan from heat and stir in Pecorino until smooth.
Add sauce, parsley, and lemon juice to pasta and toss well to coat. Before serving, adjust consistency with remaining reserved cooking water as needed and season with salt and pepper to taste.
Monday, April 21, 2014
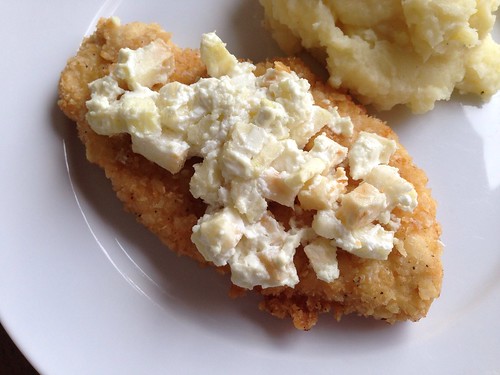
Goat Cheese and Apple Chicken
Recently I had half a log of goat cheese leftover and I knew exactly what I wanted to make with it. I'd had Nicole's Goat Cheese and Apple Chicken saved for awhile and couldn't wait to try it.
We all enjoyed this a lot, although I found myself wishing for a bit more of the goat cheese. The apple flavor was less pronounced than I thought it would be but I loved the crunch mixed with the creaminess of the cheese. I'll definitely make this one again.
Goat Cheese and Apple Chicken
As seen on Prevention RD
non-stick cooking spray
3 large boneless, skinless chicken breasts, halved lengthwise
salt and pepper
20 saltine crackers
1 teaspoon garlic salt
1 egg
2 tablespoons water
2 tablespoons olive oil
4 oz goat cheese, at room temperature
1 apple, peeled, cored, and diced
Preheat the oven to 350. Line a baking dish with aluminum foil and spray with non-stick spray. Season chicken with salt and pepper.
Add the saltines to a food processor and pulse to make crumbs. You could also add the crackers to a bag and smash them into crumbs. Place the crumbs in a shallow bowl or pie plate and add the garlic salt. In another shallow bowl or pie plate, whisk the egg with a fork, then add the water. Dip the seasoned chicken into the egg and then the cracker mixture.
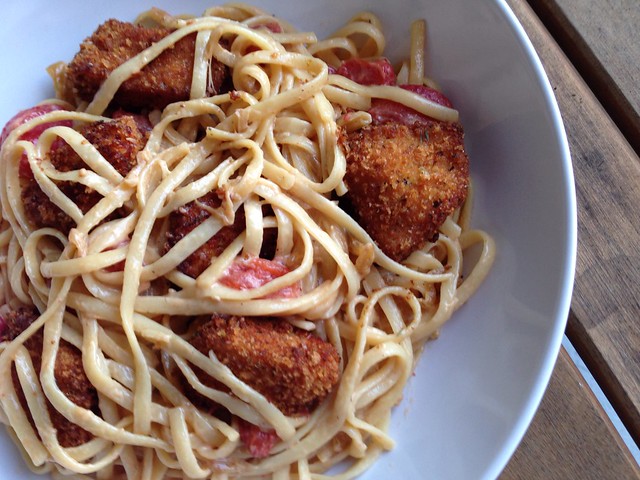
Heat a non-stick pan over medium heat and add the oil. Cook the chicken on both sides until brown and crispy, about 5 minutes per side. Place the chicken in the baking dish.
In another small bowl combine the goat cheese and the apple. Spread the mixture evenly over the chicken breasts.
Bake the chicken for about 10-15 minutes or until cheese is warm and browned. Remove from oven and serve hot.
We all enjoyed this a lot, although I found myself wishing for a bit more of the goat cheese. The apple flavor was less pronounced than I thought it would be but I loved the crunch mixed with the creaminess of the cheese. I'll definitely make this one again.
Goat Cheese and Apple Chicken
As seen on Prevention RD
non-stick cooking spray
3 large boneless, skinless chicken breasts, halved lengthwise
salt and pepper
20 saltine crackers
1 teaspoon garlic salt
1 egg
2 tablespoons water
2 tablespoons olive oil
4 oz goat cheese, at room temperature
1 apple, peeled, cored, and diced
Preheat the oven to 350. Line a baking dish with aluminum foil and spray with non-stick spray. Season chicken with salt and pepper.
Add the saltines to a food processor and pulse to make crumbs. You could also add the crackers to a bag and smash them into crumbs. Place the crumbs in a shallow bowl or pie plate and add the garlic salt. In another shallow bowl or pie plate, whisk the egg with a fork, then add the water. Dip the seasoned chicken into the egg and then the cracker mixture.
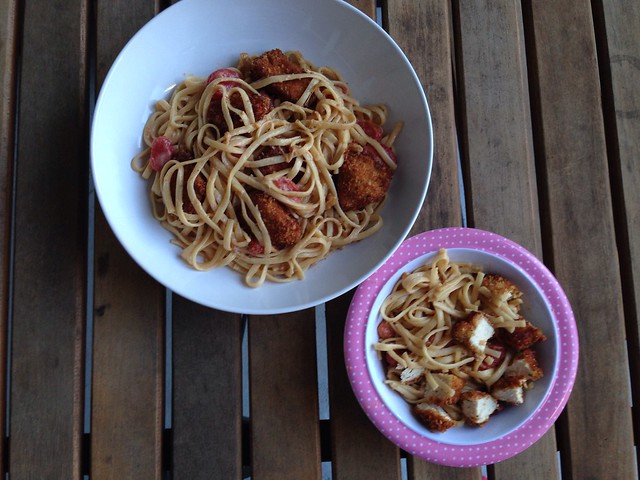
Heat a non-stick pan over medium heat and add the oil. Cook the chicken on both sides until brown and crispy, about 5 minutes per side. Place the chicken in the baking dish.
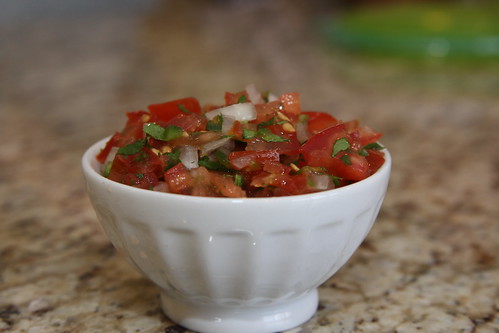
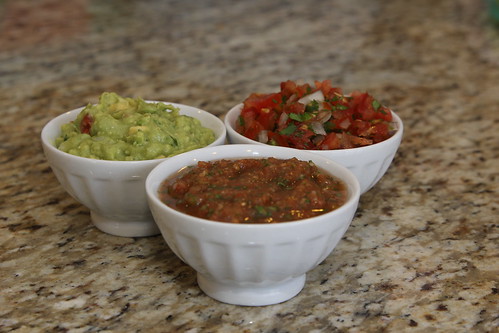
In another small bowl combine the goat cheese and the apple. Spread the mixture evenly over the chicken breasts.
Bake the chicken for about 10-15 minutes or until cheese is warm and browned. Remove from oven and serve hot.
Friday, April 18, 2014
Pork Carnitas
Another pork taco recipe? Yes, I know on Monday I shared a recipe for Cuban Street Tacos. SP actually made these Pork Carnitas back in early March and I'm just getting around to blogging them now. So I hope you guys like pork tacos!
As you may have realized, we've started doing Sunday dinners with my parents again. It started back in September after my stepgrandmother had a stroke and was subsequently moved to a long-term care facility. Things were very rough in the beginning, especially for my parents since my stepdad is the only one local and a lot of the burden of his mother's care fell to him. SP thought it would be a good idea to take food over to their house on Sundays so they could relax, spend time with Baby Girl and not have to worry about dinner for one night. SP and I recently started alternating the cooking so he could try out some new recipes and get back into the kitchen.
SP actually prepared this whole meal himself while me, Baby Girl and my mom were at the Philadelphia Flower Show for the day. The flavor was outstanding. I was expecting a citrus flavor from the orange juice but all it did was add to the overall depth of flavor. These tacos were meaty and delicious.
Pork Carnitas
Williams-Sonoma Mexican cookbook
3 lbs boneless pork shoulder or 3 lbs country-style pork ribs
6 garlic cloves, halved
1 orange, zest of (cut into wide strips using a vegetable peeler)
3/4 cup fresh orange juice
sea salt
1 tablespoon canola oil (if necessary)
12 corn or flour tortillas, warmed
guacamole
salsa fresca
refried beans
Cut off any big pieces of fat from the pork and put the fat into a wide, heavy saucepan or frying pan. Cut the pork into strips about 1 1/2 inches long and 3/4 inch wide. Add the pork to the pan with the garlic, orange zest, orange juice, and 2 teaspoons sea salt. The meat should be in a single layer, if possible. Add water to barely cover the meat and bring to a boil over medium heat. Reduce the heat to medium low, cover partially, and cook, stirring occasionally, until all of the liquid has evaporated, about 1 hour. If the meat is not yet fork tender, add a bit more water, cover and continue cooking.
Uncover the pan and continue cooking the pork until all the fat is rendered and the meat is browning in the melted fat, 10-15 minutes longer. There is usually enough melted fat in the pan, but if necessary, add the 1 tablespoon oil. When the meat is brown and crisp, using a slotted spoon, transfer it to a colander and let any excess fat drain away.
Immediately transfer the pork to a warmed serving bowl. Serve with the warm tortillas, guacamole and salsa to make tacos.
As you may have realized, we've started doing Sunday dinners with my parents again. It started back in September after my stepgrandmother had a stroke and was subsequently moved to a long-term care facility. Things were very rough in the beginning, especially for my parents since my stepdad is the only one local and a lot of the burden of his mother's care fell to him. SP thought it would be a good idea to take food over to their house on Sundays so they could relax, spend time with Baby Girl and not have to worry about dinner for one night. SP and I recently started alternating the cooking so he could try out some new recipes and get back into the kitchen.
SP actually prepared this whole meal himself while me, Baby Girl and my mom were at the Philadelphia Flower Show for the day. The flavor was outstanding. I was expecting a citrus flavor from the orange juice but all it did was add to the overall depth of flavor. These tacos were meaty and delicious.
Pork Carnitas
Williams-Sonoma Mexican cookbook
3 lbs boneless pork shoulder or 3 lbs country-style pork ribs
6 garlic cloves, halved
1 orange, zest of (cut into wide strips using a vegetable peeler)
3/4 cup fresh orange juice
sea salt
1 tablespoon canola oil (if necessary)
12 corn or flour tortillas, warmed
guacamole
salsa fresca
refried beans
Cut off any big pieces of fat from the pork and put the fat into a wide, heavy saucepan or frying pan. Cut the pork into strips about 1 1/2 inches long and 3/4 inch wide. Add the pork to the pan with the garlic, orange zest, orange juice, and 2 teaspoons sea salt. The meat should be in a single layer, if possible. Add water to barely cover the meat and bring to a boil over medium heat. Reduce the heat to medium low, cover partially, and cook, stirring occasionally, until all of the liquid has evaporated, about 1 hour. If the meat is not yet fork tender, add a bit more water, cover and continue cooking.
Uncover the pan and continue cooking the pork until all the fat is rendered and the meat is browning in the melted fat, 10-15 minutes longer. There is usually enough melted fat in the pan, but if necessary, add the 1 tablespoon oil. When the meat is brown and crisp, using a slotted spoon, transfer it to a colander and let any excess fat drain away.
Immediately transfer the pork to a warmed serving bowl. Serve with the warm tortillas, guacamole and salsa to make tacos.
Wednesday, April 16, 2014
Garlic Bread Carbonara
Another carbonara recipe to add to my collection. Ashley mentioned this Garlic Bread Carbonara awhile back and I was immediately intrigued. When she finally posted the recipe I couldn't wait to make it.
We all enjoyed this - hey, it's carbonara, what's not to like - but I realized that carbonara without fresh vegetables mixed in can be rather heavy. Just another reminder that my tastes have changed as we've modified the way we eat. I was glad I paired this with a light salad to cut some of that richness.
Garlic Bread Carbonara
From Cheesecurd in Paradise and Nigella Lawson
1 pound spaghetti
8 slices bacon, chopped
1 large onion, sliced
1/4 cup dry white wine or vermouth
4 eggs
1 1/2 cups freshly grated Parmesan
1/4 cup heavy cream
Freshly ground black pepper
Freshly ground nutmeg
Breadcrumbs:
1/2 stick butter, melted
1 1/2 cups fresh bread crumbs (about 2 slices of bread)
1 tablespoon garlic powder
Pre-heat oven to 350 degrees.
Cook the pasta according to the package directions.
In another large pan that will fit the pasta later, cook the bacon until crispy but not crunchy. Add the onions and cook until softened and starting to caramelize, about 15 minutes. Pour over the white wine or vermouth and let it bubble away so that, after a few minutes, you have a small amount of salty winey syrup left. Take the pan off the heat.
In a bowl, beat together the eggs, Parmesan, cream, and pepper.
When the pasta is done, remove approximately 1/2 cup of the pasta water before draining. Put the pan with the bacon back on the heat and add the drained pasta, tossing well to coat with the syrupy sauce. Take the pan off the heat again and add the eggs and cheese mixture, swiftly tossing everything to mix. Thin with pasta water, if needed. Grind over some more pepper and grate over the nutmeg to serve.
Toss breadcrumbs with melted butter and garlic powder. Spread evenly on a lined baking sheet. Cook for 2-3 minutes, or until crispy.
Plate pasta and top with crispy garlic bred crumbs.
We all enjoyed this - hey, it's carbonara, what's not to like - but I realized that carbonara without fresh vegetables mixed in can be rather heavy. Just another reminder that my tastes have changed as we've modified the way we eat. I was glad I paired this with a light salad to cut some of that richness.
Garlic Bread Carbonara
From Cheesecurd in Paradise and Nigella Lawson
1 pound spaghetti
8 slices bacon, chopped
1 large onion, sliced
1/4 cup dry white wine or vermouth
4 eggs
1 1/2 cups freshly grated Parmesan
1/4 cup heavy cream
Freshly ground black pepper
Freshly ground nutmeg
Breadcrumbs:
1/2 stick butter, melted
1 1/2 cups fresh bread crumbs (about 2 slices of bread)
1 tablespoon garlic powder
Pre-heat oven to 350 degrees.
Cook the pasta according to the package directions.
In another large pan that will fit the pasta later, cook the bacon until crispy but not crunchy. Add the onions and cook until softened and starting to caramelize, about 15 minutes. Pour over the white wine or vermouth and let it bubble away so that, after a few minutes, you have a small amount of salty winey syrup left. Take the pan off the heat.
In a bowl, beat together the eggs, Parmesan, cream, and pepper.
When the pasta is done, remove approximately 1/2 cup of the pasta water before draining. Put the pan with the bacon back on the heat and add the drained pasta, tossing well to coat with the syrupy sauce. Take the pan off the heat again and add the eggs and cheese mixture, swiftly tossing everything to mix. Thin with pasta water, if needed. Grind over some more pepper and grate over the nutmeg to serve.
Toss breadcrumbs with melted butter and garlic powder. Spread evenly on a lined baking sheet. Cook for 2-3 minutes, or until crispy.
Plate pasta and top with crispy garlic bred crumbs.
Monday, April 14, 2014
Cuban Street Tacos
For our Mexican feast last month T made these Cuban Street Tacos. She prepped and cooked it before we got there, so the only thing we had to do was pull the pork and broil it.

Photo credit: T. Casey
This had such great flavor. And I loved the crispy bits so don't skip that step! I definitely ate way too many of these (we all did).

Photo credit: T. Casey
Cuban Street Tacos
As seen on Sweet Peas Kitchen, adapted from What's Cookin' Chicago, originally adapted from Cook's Illustrated, June 2008
1 (4-pound) boneless pork butt, cut into 2-inch chunks
1 tablespoon sea salt
1 tablespoon oil
1 cup water
1 cup chicken stock
1/2 teaspoon pepper
1 teaspoon ground cumin
1 teaspoon chili powder
1 teaspoon dried oregano
2 bay leaves
3 large garlic cloves, minced
1 to 2 jalapeños, minced
1 onion, peeled and halved
juice of 1 lime
1 medium orange, halved and juice, rinds reserved
8 corn tortillas
1 small red onion, thinly sliced
1/2 cup chopped cilantro
1 cup Monterey Jack cheese
2 limes, cut into wedges
Rub the pieces of pork shoulder all over with salt. Refrigerate for at least 1 hour.
Preheat oven to 300 degrees F.
Heat oil in a Dutch oven over medium-high heat. Add pork and sear pieces on all sides. Once all the pork is seared and lightly browned, remove from the pot and place in a large bowl. Pour in water and chicken stock, scraping the bottom of the pan with a flat-edged spatula to release all the tasty brown bits. Add pepper, cumin, chili powder, oregano, bay leaves, garlic, jalapenos, onion, lime juice, orange juice and orange rinds and bring to a simmer, stirring occasionally. Add pork pieces and cover the pot and place it in the preheated oven. Bake for 1 hour, take a peek and give the pot a stir to turn the meat. Put the lid back on and let it continue to bake in the oven for another hour.
After 2 hours of baking time, remove the pot from oven. Remove the bay leaves, onion and orange rinds from the pot and discard. Remove the pork and place in a large bowl; set aside. Place the pot on the stove top and let the remaining liquid come to a boil over high heat. Let it boil until it thickens up and is reduced to about 1 cup, about 10 -15 minutes.
Lower racks to near the bottom of the oven and turn oven to broil. In the bowl, pull each piece of pork in half using two forks. Pour the reduced liquid over the pork and add salt and pepper to taste; stir to combine. Place the coated pieces of pork on a wire cooling rack set on a baking sheet. Broil the meat for 5 to 8 minutes on each side until well browned. Serve immediately in warm tortillas. Garnish with red onion slices, cilantro, Monterey Jack cheese, and lime wedges.

Photo credit: T. Casey
This had such great flavor. And I loved the crispy bits so don't skip that step! I definitely ate way too many of these (we all did).

Photo credit: T. Casey
Cuban Street Tacos
As seen on Sweet Peas Kitchen, adapted from What's Cookin' Chicago, originally adapted from Cook's Illustrated, June 2008
1 (4-pound) boneless pork butt, cut into 2-inch chunks
1 tablespoon sea salt
1 tablespoon oil
1 cup water
1 cup chicken stock
1/2 teaspoon pepper
1 teaspoon ground cumin
1 teaspoon chili powder
1 teaspoon dried oregano
2 bay leaves
3 large garlic cloves, minced
1 to 2 jalapeños, minced
1 onion, peeled and halved
juice of 1 lime
1 medium orange, halved and juice, rinds reserved
8 corn tortillas
1 small red onion, thinly sliced
1/2 cup chopped cilantro
1 cup Monterey Jack cheese
2 limes, cut into wedges
Rub the pieces of pork shoulder all over with salt. Refrigerate for at least 1 hour.
Preheat oven to 300 degrees F.
Heat oil in a Dutch oven over medium-high heat. Add pork and sear pieces on all sides. Once all the pork is seared and lightly browned, remove from the pot and place in a large bowl. Pour in water and chicken stock, scraping the bottom of the pan with a flat-edged spatula to release all the tasty brown bits. Add pepper, cumin, chili powder, oregano, bay leaves, garlic, jalapenos, onion, lime juice, orange juice and orange rinds and bring to a simmer, stirring occasionally. Add pork pieces and cover the pot and place it in the preheated oven. Bake for 1 hour, take a peek and give the pot a stir to turn the meat. Put the lid back on and let it continue to bake in the oven for another hour.
After 2 hours of baking time, remove the pot from oven. Remove the bay leaves, onion and orange rinds from the pot and discard. Remove the pork and place in a large bowl; set aside. Place the pot on the stove top and let the remaining liquid come to a boil over high heat. Let it boil until it thickens up and is reduced to about 1 cup, about 10 -15 minutes.
Lower racks to near the bottom of the oven and turn oven to broil. In the bowl, pull each piece of pork in half using two forks. Pour the reduced liquid over the pork and add salt and pepper to taste; stir to combine. Place the coated pieces of pork on a wire cooling rack set on a baking sheet. Broil the meat for 5 to 8 minutes on each side until well browned. Serve immediately in warm tortillas. Garnish with red onion slices, cilantro, Monterey Jack cheese, and lime wedges.
Friday, April 11, 2014
Linguine with Crispy Chicken, Roasted Tomatoes, and Caramelized Onion Cream Sauce
When Cassie first posted a photo of this Linguine with Crispy Chicken, Roasted Tomatoes, and Caramelized Onion Cream Sauce on Facebook I was hooked. And then she posted the recipe on her blog and I knew I had to make it. It's got everything I love in one dish - pasta, crispy chicken, tomatoes and caramelized onions. Yum!!
I was able to prep some of the components during the day, which made it easier to throw together at the end of the day. Baby Girl is an excellent eater (and very polite - she always tells me she loves my cooking) but she doesn't usually proclaim anything as her favorite. After her first bite of this dish she told me she loved it and it was her favorite meal. After every bite she told me I had to make this again and again and again.
We all enjoyed this and it reheated well, which is pretty impressive for a cream-based pasta dish. Everything comes together so well. I particularly liked the apple juice in the onions - it added just a hint of sweetness. I was worried this would be heavy but it was actually pretty light. I can't wait to honor Baby Girl's request and make this again.
Linguine with Crispy Chicken, Roasted Tomatoes, and Caramelized Onion Cream Sauce
As seen on Cassie Craves
8 ounces linguine, cooked according to package directions
Parmesan cheese
For the roasted tomatoes:
1 pint cherry tomatoes
1 tablespoon olive oil
Salt and pepper to taste
For the chicken:
1 large chicken breast, cut into bite-sized chunks
1 egg, beaten
1 cup panko breadcrumbs
1/2 cup Italian-style breadcrumbs
1 teaspoon Italian seasoning
1/2 teaspoon garlic powder
1/2 teaspoon each salt and black pepper
Vegetable oil for frying
For the sauce:
1 large onion, thinly sliced
2 tablespoons butter
1 tablespoon olive oil
3 cloves garlic, minced
1/2 cup apple juice
1 cup heavy cream (I used 1/2 and 1/2)
Salt and pepper to taste
Preheat the oven to 400 degrees. Arrange tomatoes on a foil-lined baking sheet; drizzle with olive oil, sprinkle with salt and pepper, and toss to combine. Cook for 20 minutes or until browned and bursting.
Meanwhile, add the beaten egg to a large bowl. Mix together the panko, Italian breadcrumbs, Italian seasoning, garlic powder, and salt and pepper in a separate bowl. Heat vegetable oil in a medium saucepan (enough to shallow-fry the chicken). Dip the chicken pieces in the egg, then in the breadcrumb mixture. Fry in batches until golden and crispy; remove to a paper-towel-lined plate.
Melt the butter and olive oil in a large skillet. Add the onions, season with salt and pepper, and cook over medium-low heat, stirring frequently, until onions are fragrant and caramelized. Add the garlic; cook and stir for 30 seconds. Raise heat to medium-high and stir in the apple juice, scraping the bottom of the pan with a wooden spoon to pick up any browned bits. Let the apple juice reduce slightly, then stir in the cream. Reduce heat back to medium-low and heat gently until thickened; taste for seasoning and add salt and pepper to taste.
Gently stir together the reserved tomatoes, crispy chicken, and pasta. Add the sauce and toss gently to combine. Serve with parmesan cheese.
I was able to prep some of the components during the day, which made it easier to throw together at the end of the day. Baby Girl is an excellent eater (and very polite - she always tells me she loves my cooking) but she doesn't usually proclaim anything as her favorite. After her first bite of this dish she told me she loved it and it was her favorite meal. After every bite she told me I had to make this again and again and again.
We all enjoyed this and it reheated well, which is pretty impressive for a cream-based pasta dish. Everything comes together so well. I particularly liked the apple juice in the onions - it added just a hint of sweetness. I was worried this would be heavy but it was actually pretty light. I can't wait to honor Baby Girl's request and make this again.
Linguine with Crispy Chicken, Roasted Tomatoes, and Caramelized Onion Cream Sauce
As seen on Cassie Craves
8 ounces linguine, cooked according to package directions
Parmesan cheese
For the roasted tomatoes:
1 pint cherry tomatoes
1 tablespoon olive oil
Salt and pepper to taste
For the chicken:
1 large chicken breast, cut into bite-sized chunks
1 egg, beaten
1 cup panko breadcrumbs
1/2 cup Italian-style breadcrumbs
1 teaspoon Italian seasoning
1/2 teaspoon garlic powder
1/2 teaspoon each salt and black pepper
Vegetable oil for frying
For the sauce:
1 large onion, thinly sliced
2 tablespoons butter
1 tablespoon olive oil
3 cloves garlic, minced
1/2 cup apple juice
1 cup heavy cream (I used 1/2 and 1/2)
Salt and pepper to taste
Preheat the oven to 400 degrees. Arrange tomatoes on a foil-lined baking sheet; drizzle with olive oil, sprinkle with salt and pepper, and toss to combine. Cook for 20 minutes or until browned and bursting.
Meanwhile, add the beaten egg to a large bowl. Mix together the panko, Italian breadcrumbs, Italian seasoning, garlic powder, and salt and pepper in a separate bowl. Heat vegetable oil in a medium saucepan (enough to shallow-fry the chicken). Dip the chicken pieces in the egg, then in the breadcrumb mixture. Fry in batches until golden and crispy; remove to a paper-towel-lined plate.
Melt the butter and olive oil in a large skillet. Add the onions, season with salt and pepper, and cook over medium-low heat, stirring frequently, until onions are fragrant and caramelized. Add the garlic; cook and stir for 30 seconds. Raise heat to medium-high and stir in the apple juice, scraping the bottom of the pan with a wooden spoon to pick up any browned bits. Let the apple juice reduce slightly, then stir in the cream. Reduce heat back to medium-low and heat gently until thickened; taste for seasoning and add salt and pepper to taste.
Gently stir together the reserved tomatoes, crispy chicken, and pasta. Add the sauce and toss gently to combine. Serve with parmesan cheese.
Wednesday, April 09, 2014
Salsa Fresca
This is the other salsa recipe I made for the Mexican-themed dinner we had with friends last month. I've been making this one for ages but never thought to take a picture to share with you guys.
Photo credit - T. Casey
Obviously this one is very different from the grilled salsa. This one is much lighter and chunkier. They're both delicious, just different. I think it was great to have both versions at the dinner. We had no problem inhaling both salsas and the guacamole.
Photo credit - T. Casey
Salsa Fresca
As seen in the Williams-Sonoma Mexican cookbook
1 lb. ripe tomatoes, cut into 1/4-inch pieces
1/3 cup finely chopped white onion
1/4 cup chopped fresh cilantro
1 jalapeno chiles, finely chopped (ribs and seeds removed if you want it less spicy)
2 teaspoons fresh lime juice
Sea salt to taste
In a bowl, toss together the tomatoes, onion, cilantro, chiles, and lime juice. Sprinkle with salt and toss again. Cover and let stand for 10 to 15 minutes to allow the flavors to mingle, then serve with your favorite chips.
Makes 2 cups.
Photo credit - T. Casey
Obviously this one is very different from the grilled salsa. This one is much lighter and chunkier. They're both delicious, just different. I think it was great to have both versions at the dinner. We had no problem inhaling both salsas and the guacamole.
Photo credit - T. Casey
Salsa Fresca
As seen in the Williams-Sonoma Mexican cookbook
1 lb. ripe tomatoes, cut into 1/4-inch pieces
1/3 cup finely chopped white onion
1/4 cup chopped fresh cilantro
1 jalapeno chiles, finely chopped (ribs and seeds removed if you want it less spicy)
2 teaspoons fresh lime juice
Sea salt to taste
In a bowl, toss together the tomatoes, onion, cilantro, chiles, and lime juice. Sprinkle with salt and toss again. Cover and let stand for 10 to 15 minutes to allow the flavors to mingle, then serve with your favorite chips.
Makes 2 cups.
Monday, April 07, 2014
Orange Margaritas
We needed margaritas to go with our Mexican-themed dinner. Since I had a bunch of navel oranges leftover from a previous recipe, I decided to make Orange Margaritas.
Photo credit - T. Casey
I ended up with 24oz of fresh-squeezed orange juice so I quadrupled the original recipe. It was a little heavy on the tequila and we couldn't really taste the orange juice so I've decreased the tequila below. These were delicious and really easy to make - the hardest part was squeezing all the citrus by hand. I definitely got an arm workout.
Orange Margarita
As seen on Confections of a Foodie Bride
Yields: 4 servings
6 oz homemade margarita mix*
6 oz fresh squeezed orange juice
4 oz silver tequila
4 oz orange liqueur
Sugar, for rimming glasses (optional)
Combine all the ingredients in a pitcher or carafe, stirring well.
Run one of the juiced limes or orange halves around the outside edge of the glasses and then dip in sugar. You can also dip the glass in water and then the sugar.
Fill glasses with ice and pour the margarita over the top.
*Homemade Margarita Mix
1/2 cup sugar
1 cup water
1 cup fresh squeezed lime juice
Heat the water and sugar in a small sauce pan over medium heat, stirring often, until the sugar is completely dissolved and the water is clear. Let cool. Pour into a pitcher with the lime juice.
Leftovers will keep 7-10 days in a jar in the fridge.
Photo credit - T. Casey
I ended up with 24oz of fresh-squeezed orange juice so I quadrupled the original recipe. It was a little heavy on the tequila and we couldn't really taste the orange juice so I've decreased the tequila below. These were delicious and really easy to make - the hardest part was squeezing all the citrus by hand. I definitely got an arm workout.
Orange Margarita
As seen on Confections of a Foodie Bride
Yields: 4 servings
6 oz homemade margarita mix*
6 oz fresh squeezed orange juice
4 oz silver tequila
4 oz orange liqueur
Sugar, for rimming glasses (optional)
Combine all the ingredients in a pitcher or carafe, stirring well.
Run one of the juiced limes or orange halves around the outside edge of the glasses and then dip in sugar. You can also dip the glass in water and then the sugar.
Fill glasses with ice and pour the margarita over the top.
*Homemade Margarita Mix
1/2 cup sugar
1 cup water
1 cup fresh squeezed lime juice
Heat the water and sugar in a small sauce pan over medium heat, stirring often, until the sugar is completely dissolved and the water is clear. Let cool. Pour into a pitcher with the lime juice.
Leftovers will keep 7-10 days in a jar in the fridge.
Friday, April 04, 2014
Meatball Grilled Cheese Sandwiches
One Sunday SP made spaghetti and meatballs for dinner. The meatball recipe he used yielded quite a bit of leftovers so I froze probably 5 or 6 meatballs for another time. While meal planning one week I decided I wanted to do something different with the meatballs and these meatball grilled cheese sandwiches were born.
I'm partial to good old American cheese but use whatever type of cheese you like. This is really more of a method than a recipe. Use your favorite meatball recipe or even buy some frozen if that's easier. I've added sauteed spinach to these as well and really enjoyed it (plus it makes me feel better to have something healthy thrown in there).
Meatball Grilled Cheese Sandwiches
Makes 4 sandwiches
5-6 meatballs
Butter, for the bread
8 slices bread
Cheese (I like American, use whatever you like)
Extra marinara sauce for dipping
Slice the meatballs into thin discs so they'll lay flat on the bread.
Butter one side of each piece of bread. Flip the bread over so the butter side is down and lay two slices of cheese on each piece of bread. Top four of the slices with some of the sliced meatballs. Add a little extra sauce and then top each with one of the bread and cheese slices, butter side up.
Place the sandwiches on a griddle or large non-stick pan set over medium-low heat. Cook low and slow, allowing the bread to brown evenly and the cheese to start melting before flipping over to cook on the other side. Remove from the heat once both sides of the bread are golden brown and the cheese has melted. Allow to rest for a few minutes before cutting and serving with extra sauce for dipping.
I'm partial to good old American cheese but use whatever type of cheese you like. This is really more of a method than a recipe. Use your favorite meatball recipe or even buy some frozen if that's easier. I've added sauteed spinach to these as well and really enjoyed it (plus it makes me feel better to have something healthy thrown in there).
Meatball Grilled Cheese Sandwiches
Makes 4 sandwiches
5-6 meatballs
Butter, for the bread
8 slices bread
Cheese (I like American, use whatever you like)
Extra marinara sauce for dipping
Slice the meatballs into thin discs so they'll lay flat on the bread.
Butter one side of each piece of bread. Flip the bread over so the butter side is down and lay two slices of cheese on each piece of bread. Top four of the slices with some of the sliced meatballs. Add a little extra sauce and then top each with one of the bread and cheese slices, butter side up.
Place the sandwiches on a griddle or large non-stick pan set over medium-low heat. Cook low and slow, allowing the bread to brown evenly and the cheese to start melting before flipping over to cook on the other side. Remove from the heat once both sides of the bread are golden brown and the cheese has melted. Allow to rest for a few minutes before cutting and serving with extra sauce for dipping.
Labels:
beef,
easy weeknight meal,
lunch,
meatballs,
sandwiches,
toddler-approved
Wednesday, April 02, 2014
Pizza alla Vodka
During the cooler months I make homemade pizza every Friday. I've had my eye on Josie's Pizza alla Vodka for awhile and finally got around to making it recently.
Man, was this good. I probably could have made the vodka sauce a bit spicier, but I was worried it would be too spicy for Baby Girl. The sauce recipe yields a ton so I froze individual portions for future pizzas. We've already had another pizza with the sauce, subbing olives for the tomatoes since Baby Girl is obsessed with black olives. I can't wait to make this with fresh basil once I get my garden going (if this eternal winter ever ends).
Pizza alla Vodka
As seen on Pink Parsley
1 heaping cup halved cherry or grape tomatoes
1 tablespoon olive oil
pinch of sugar
kosher salt
1 tablespoon butter
1/2 small onion, minced
2 cloves garlic, minced
1/4-1/2 teaspoon crushed red pepper flakes
2 teaspoons tomato paste
1 (28-oz) can crushed tomatoes
1/2 cup vodka
1/2 cup heavy cream
1 lb. pizza dough
olive oil, for brushing
2 links spicy Italian sausage
1 cup freshly shredded mozzarella cheese
1/2 cup freshly grated Parmesan cheese
2 tablespoons chopped fresh basil
Preheat the oven to 500 degrees. Place a baking stone on the bottom rack.
Toss the tomatoes with olive oil, salt, and sugar. Spread on a rimmed baking sheet or in a glass baking dish. Roast the tomatoes, stirring every 5 minutes, for 15-20 minutes total. Remove the tomatoes from the oven. If you're like me, allow the tomatoes to cool slightly, then remove the skins. Move the baking stone to the top rack.
In a medium skillet, melt the butter over medium heat. Add the onion and cook, stirring often, until softened, 5-6 minutes. Stir in the garlic, red pepper flakes, and tomato paste, and cook until fragrant, stirring constantly, about 30 seconds. Pour in the crushed tomatoes, bring to a simmer, and cook until slightly thickened, about 5 minutes. Stir in the vodka and cook an additional 5-8 minutes, remove from heat, and stir in the cream. Season with salt and pepper to taste, and set aside.
Remove the sausage from its casings and cook in a skillet over medium-high heat until browned and cooked through, 5-6 minutes. Drain off fat and set aside.
Sprinkle a large square of parchment paper with flour and roll into a 14-inch round. Brush the edges with olive oil. Spread 1/2 - 3/4 cup of the vodka sauce over the dough. Don't use too much sauce or the pizza will be soggy in the middle. Sprinkle with the mozzarella, followed by the spicy sausage, roasted tomatoes and Parmesan cheese.
Transfer the pizza to the preheated baking stone, and cook 10 minutes, rotating the pizza 180 degrees after 5 minutes. Allow to cool 10 minutes then sprinkle with the basil, slice, and serve. Pass the extra vodka sauce at the table for dipping.
Man, was this good. I probably could have made the vodka sauce a bit spicier, but I was worried it would be too spicy for Baby Girl. The sauce recipe yields a ton so I froze individual portions for future pizzas. We've already had another pizza with the sauce, subbing olives for the tomatoes since Baby Girl is obsessed with black olives. I can't wait to make this with fresh basil once I get my garden going (if this eternal winter ever ends).
Pizza alla Vodka
As seen on Pink Parsley
1 heaping cup halved cherry or grape tomatoes
1 tablespoon olive oil
pinch of sugar
kosher salt
1 tablespoon butter
1/2 small onion, minced
2 cloves garlic, minced
1/4-1/2 teaspoon crushed red pepper flakes
2 teaspoons tomato paste
1 (28-oz) can crushed tomatoes
1/2 cup vodka
1/2 cup heavy cream
1 lb. pizza dough
olive oil, for brushing
2 links spicy Italian sausage
1 cup freshly shredded mozzarella cheese
1/2 cup freshly grated Parmesan cheese
2 tablespoons chopped fresh basil
Preheat the oven to 500 degrees. Place a baking stone on the bottom rack.
Toss the tomatoes with olive oil, salt, and sugar. Spread on a rimmed baking sheet or in a glass baking dish. Roast the tomatoes, stirring every 5 minutes, for 15-20 minutes total. Remove the tomatoes from the oven. If you're like me, allow the tomatoes to cool slightly, then remove the skins. Move the baking stone to the top rack.
In a medium skillet, melt the butter over medium heat. Add the onion and cook, stirring often, until softened, 5-6 minutes. Stir in the garlic, red pepper flakes, and tomato paste, and cook until fragrant, stirring constantly, about 30 seconds. Pour in the crushed tomatoes, bring to a simmer, and cook until slightly thickened, about 5 minutes. Stir in the vodka and cook an additional 5-8 minutes, remove from heat, and stir in the cream. Season with salt and pepper to taste, and set aside.
Remove the sausage from its casings and cook in a skillet over medium-high heat until browned and cooked through, 5-6 minutes. Drain off fat and set aside.
Sprinkle a large square of parchment paper with flour and roll into a 14-inch round. Brush the edges with olive oil. Spread 1/2 - 3/4 cup of the vodka sauce over the dough. Don't use too much sauce or the pizza will be soggy in the middle. Sprinkle with the mozzarella, followed by the spicy sausage, roasted tomatoes and Parmesan cheese.
Transfer the pizza to the preheated baking stone, and cook 10 minutes, rotating the pizza 180 degrees after 5 minutes. Allow to cool 10 minutes then sprinkle with the basil, slice, and serve. Pass the extra vodka sauce at the table for dipping.
Subscribe to:
Posts (Atom)