Showing posts with label cheese. Show all posts

Monday, June 04, 2018

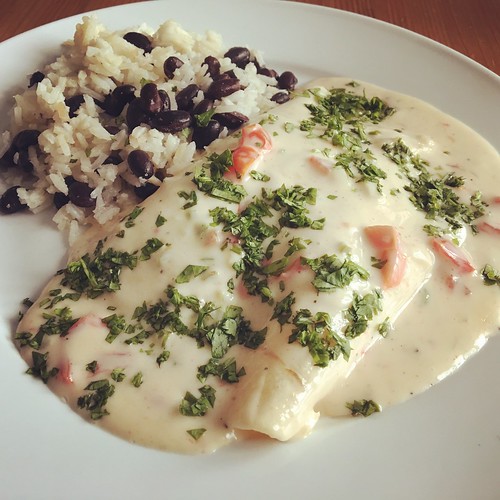
Soft Cheese Tacos

I've been on a serious Tex-Mex kick lately. I can't get enough tortillas, salsa, cilantro, cheese, avocados...I want it ALL. I saw these Soft Cheese Tacos from Homesick Texan and I was hooked. Cheese, cheese and more cheese - sign me up!

Soft cheese tacos

There is absolutely nothing healthy about this dish but sometimes you just need to indulge. The ingredient list seems long, but it's actually a really easy meal to put together. And, surprisingly, these reheat beautifully. My only caution is to test your jalapenos before you add them to the queso. Sometimes jalapenos are more like green peppers and other times they're fiery little devils. The last time I made these one jalapeno was mild and the other was super spicy. I ended up using only a quarter of the spicy one and the queso was perfect.

One more note - these are a wonderful vegetarian meal but Steve likes meat so I usually add some of the rotisserie chicken I keep in the freezer. The chicken is entirely unnecessary but know it's an option if you also live with a carnivore.

Soft Cheese Tacos
Homesick Texan

For the queso:
2 tablespoons unsalted butter
1/4 cup diced yellow onion
2-4 jalapeños, seeded and diced (check spice level!)
2 cloves garlic, minced
3/4 cup diced grape tomatoes
2 tablespoons cornstarch
1 cup whole milk
1 cup water
1 pound American cheese, chopped or shredded
1/2 teaspoon kosher salt
1/2 teaspoon ground cumin

For the soft cheese tacos:
2 tablespoons vegetable oil
12 corn tortillas
12 ounces (3 cups) Colby Jack, shredded
1/4 cup diced yellow onion
2 cups cooked chicken (optional)
Garnish: sliced pickled jalapeño, minced cilantro

Preheat the oven to 350°F.

In a 2-quart saucepan, heat the butter over medium-low heat. Add the onion and jalapeños. Cook until softened, about 5 minutes. Add the garlic and tomatoes and cook for 30 more seconds.

Whisk together the cornstarch, milk and water until well combined then pour into the pot. Bring to a simmer and cook for a couple of minutes until it thickens. Turn the heat down to low and add the American cheese. Stir until the cheese has melted, then add the salt and cumin. Turn off the heat.

Pour the oil into a 9x13 baking dish. Place the tortillas in the baking dish (it’s okay if they overlap) and move them around to make sure they all get coated with some of the oil. Place uncovered in the oven for 5 minutes until they're soft and warm. Remove the baking dish from the oven and stack the tortillas on a plate. Reserve the baking dish.

To assemble the tacos, place a warm tortilla on a clean surface. Add 1/4 cup of the shredded Colby Jack down the center of the tortilla then add 1 teaspoon of the onions and some chicken, if using. Roll the tortilla then place seam side down in the reserved baking dish. Repeat with the remaining tortillas.

Cover the baking dish with foil and bake for 15 minutes. Reheat the queso over low heat, stirring occasionally. Once the tacos are done, remove them from the oven and pour the queso evenly over the tacos. They'll be swimming in queso, which is what you want. Serve warm with sliced pickled jalapeños and cilantro.
Pin It!

Monday, August 07, 2017

Cheesy Tomato Biscuit Casserole

I don't know about you but I get in such a rut with side dishes. Most of the time it's because I'm feeling uninspired or lazy and the same old same old is easy to throw together. I'm happy to report that I branched out this weekend and now I have a new, amazing side dish to add to my repertoire. And, bonus, it reheats well (if you have any leftovers that is).

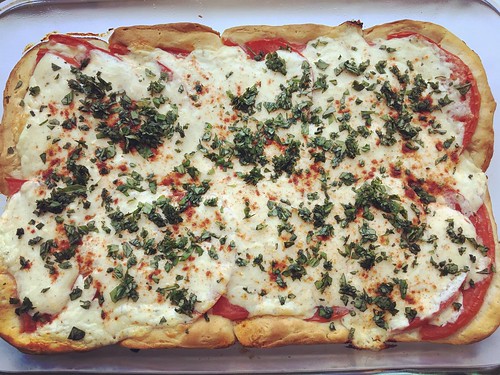
Cheesy tomato biscuit casserole

My friend Amy posted this Cheesy Tomato Biscuit Casserole months ago, but I've been waiting until the height of tomato season to make it. While you can get tomatoes year-round, the ones we're enjoying right now are insane. I don't know if it's just a good year for tomatoes or what, but damn. I feel like I need to eat. all. the. tomatoes. every. day. So, so good.

As I was typing up this post I realized I forgot the onion in the original recipe. Oops! Since we thought it was amazing without it - and, bonus, if you skip that step you have one less pan to clean - I'm leaving it out. I also opted to add fresh chopped basil once this came out of the oven, mainly because my basil plant is out of control right now and because tomatoes and basil are so good together. Totally your call. Also, use way more tomato than you think you need. Tomatoes have a lot of water in them so they'll shrink as they cook.

Hurry up and make this simple and delicious side dish now. You won't be sorry!

Cheesy Tomato Biscuit Casserole
Slightly modified from BellyFull

1/2 cup sour cream
1/4 cup mayonnaise
1 cup shredded cheddar cheese
1/4 teaspoon kosher salt
1/4 teaspoon pepper
1/4 teaspoon dried oregano
1/4 teaspoon garlic powder
1 container (16 ounce) Pillsbury Grands Buttermilk Biscuits
4 tomatoes, cut into 1/4-inch slices
paprika
fresh basil, chopped (optional)

Preheat the oven to 400 degrees. Coat a 9x13 casserole dish with nonstick cooking spray.

Combine the sour cream, mayonnaise, cheese, salt, pepper, oregano and garlic powder in a small bowl. Set aside.

Press the biscuits into the casserole dish, pinching the seams together so they cover the bottom of the pan and pushing the dough slightly up the sides. The dough will be thin.

Arrange the tomato slices on top of the biscuits, overlapping to fit as many slices as you can. Spread the cheese mixture over the top then sprinkle with a little paprika.

Bake for 25-27 minutes until the dough is cooked through and the cheese mixture is browning and bubbly. Let stand for 10 minutes, then top with chopped basil and cut into slices.

To reheat leftovers: Preheat a toaster oven to 350 degrees. Spray some foil with non-stick cooking spray and place a slice of the casserole on top. Heat in the toaster oven, being careful not to burn the edges of the crust, for about 5-10 minutes depending on your toaster.
Pin It!

Thursday, June 01, 2017

One-Pot Bacon and Feta Pasta

One-pot meals are amazing, right? I know they're so 2015, but what busy family doesn't love a meal that combines minimal effort with maximum flavor? Ashley's recipe for One-Pot Chicken Feta Alfredo sounded perfect for a busy weeknight.

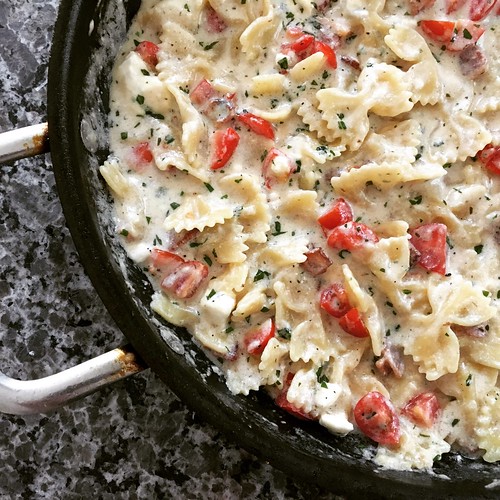
One pot pasta

I decided to make a few changes to the recipe - I left out the chicken, swapped the pancetta for bacon (although my family LOVES pancetta) and left the tomatoes and basil as a garnish rather than cooking them with the pasta (because I simply cannot stand loose tomato skin - blech).

The result was a creamy, cheesy, simply delicious and EASY weeknight meal. This is absolutely going in the permanent rotation, although I'll need to double it next time if we want leftovers.

One-Pot Bacon and Feta Pasta
Modified from Cheesecurd in Paradise

4 slices of bacon, cut into pieces (I like to use kitchen shears)
8 oz bow tie pasta
6 oz crumbled feta, divided
1 1/2 cups shredded Parmesan cheese
2 cups reduced sodium chicken broth
1 cup half-and-half
1/4 teaspoon garlic powder
1 tablespoon minced fresh basil
2 tomatoes, chopped

In a large non-stick skillet with a lid, cook the bacon until it's crispy. If there's a lot of fat, drain most of it off. Add the pasta, 4 oz of the feta, Parmesan, chicken broth, half-and-half and garlic powder.

Bring to a boil, then cover and reduce to a simmer. Cook for 15-20 minutes, just until the pasta is al dente (with a little bite left).

Add the basil, tomatoes and remaining 2 oz of feta. Stir to combine and let sit for 5 minutes before serving.
Pin It!

Thursday, November 03, 2016

Three Cheese Risotto

I've been on a serious risotto kick lately. I've always loved it, but for some reason I'm finding rice so comforting these days. Like pasta, risotto is incredibly versatile. You can add so many different ingredients, serve it with meat or make it meat-free, whatever floats your boat.

I recently printed off this recipe for Four Cheese Spaghetti, but what I really wanted was risotto. So I figured I'd combine the cheeses and fresh herbs from the pasta recipe with my standard risotto recipe. The result was, in a word, outstanding.

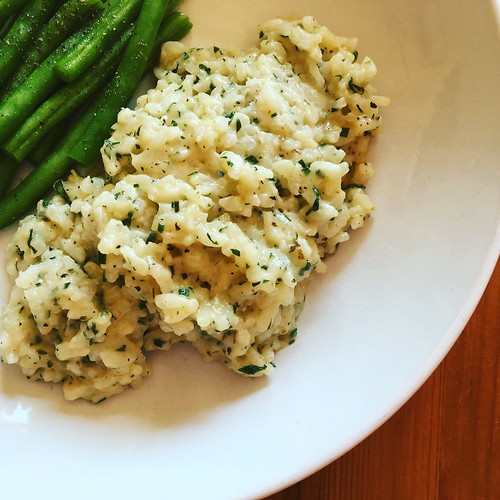
Three cheese risotto

This time of year I can't take a good food picture to save my life, so forgive me for the less-than-stellar photo that accompanies this post. Just close your eyes and imagine if creamy, dreamy risotto had a love child with mac and cheese. That's basically what you've got here. We couldn't get enough of this one. Katie took the leftovers to school for lunch and practically licked the Thermos clean.

Three Cheese Risotto
Inspired by Damn Delicious

6-8 cups chicken or vegetable broth
1 tablespoon extra virgin olive oil
1 tablespoon butter
1 large shallot, chopped
3 cloves garlic, minced
2 teaspoons Italian seasoning
1 1/2 cups arborio rice
1/2 cup dry white wine
1 cup shredded mozzarella cheese
1/4 cup shredded Gruyere or Swiss cheese
1/4 cup freshly grated Parmesan cheese
Kosher salt and freshly ground black pepper, to taste
2 tablespoons chopped fresh parsley leaves
2 tablespoons chopped fresh chives

Bring chicken broth to a boil in a saucepan then turn down the heat and keep at a simmer.

In a deep, heavy skillet, melt the oil and butter over medium-high heat. Add the shallot, garlic and Italian seasoning. Saute for about 2 minutes or until the shallot is tender. Add the rice and cook for another 2-3 minutes to toast the rice, stirring frequently.

Add the white wine and bring to a boil. Once the rice has absorbed the wine, add 1 ladle (approx. 1 cup) of the simmering stock. Stir the rice every so often, making sure to push down any rice stuck to the edges of the pans. Once the liquid is nearly absorbed, add another ladle of stock. Continue to do this until the rice is cooked but still slightly chewy. Taste the rice after about 20 minutes to check the consistency. If you notice you're running low on broth, add more to the saucepan so you don't run out.

Remove the pan from the heat and stir in the cheeses. Season with salt and pepper, if needed. Add in the chopped herbs, stir to combine, then serve.
Pin It!

Tuesday, May 10, 2016

Baked Camembert

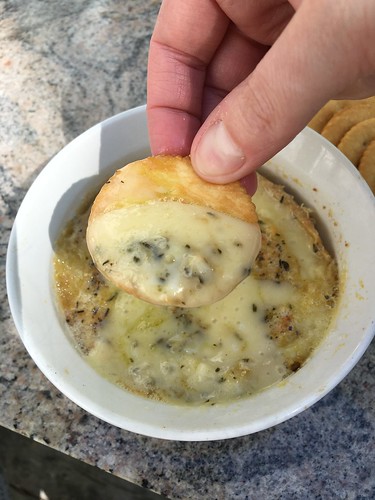
Do you remember when food blogs weren't nearly as plentiful as they are today? Back when I started blogging (August 2006!) the Internet was a much quieter place. One of the first food blogs I stumbled on was The Food Pornographer. She rarely posts recipes - her focus is on restaurants and photos of food - but she did post this one for Baked Camembert, which her extended family likes to make for special occasions.

Untitled

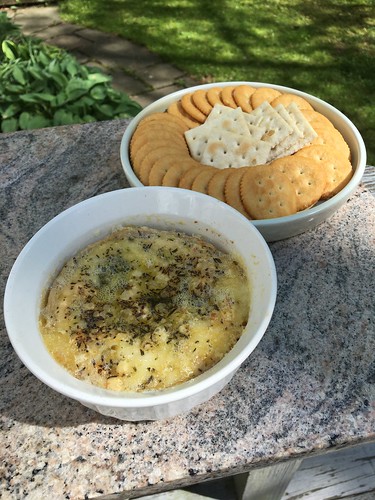
I made the same tweaks that they did - more garlic, no nuts or cranberries - and served it with crackers as our first course on Mother's Day.

Untitled

The smell of the garlic and rosemary baking in the oven was downright intoxicating. As soon as it came out of the oven we all descended like vultures and it was quickly devoured. Poor Steve is lactose intolerant so he took a Lactaid pill to enjoy the cheesy deliciousness. And then Katie proceeded to all but elbow him out of the way to get to the cheese. I had to restrain her so Daddy could have a few bites. That girl loves cheese, just like her parents.

Baked Camembert
Modified from Jamie Oliver

8oz Camembert cheese
2 cloves garlic, thinly sliced
1 teaspoon fresh rosemary leaves, minced
olive oil
crackers or bread for dipping

Preheat the oven to 350.

Cut off the rind from one side of the cheese. Put the cheese into an oven-safe ramekin. Press the sliced garlic into the top of the cheese, then sprinkle with the minced rosemary. Drizzle with a little olive oil. Bake in the preheated oven for 15 to 20 minutes, until the cheese is soft and gooey.

Allow to cool slightly, then serve with crackers or bread cubes for dipping.
Pin It!

Tuesday, September 08, 2015

Caprese Salad with Warm Bacon Dressing

Raise your hand if you're mourning the end of summer. I know I am. I love everything about summer - the warmth, the sun setting later, the pool, the beach, kids playing in the backyard before bed. I'm not one of those people who looks forward to fall with its cooler temps, sweaters and boots. Give me t-shirts and flip flops any day.

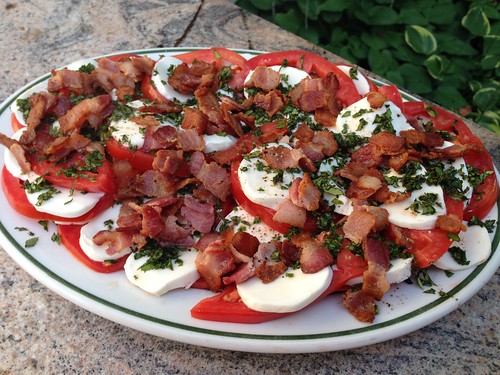
But, alas, summer is winding down. The good news is, this is the time when Jersey tomatoes are still at their best and there's no better way to showcase them than in caprese salad. I'm not usually one to mess with perfection. Caprese, with its creamy fresh mozzarella and red ripe tomatoes sprinkled with basil is my idea of a perfect summer meal. I love to eat it plain or tossed with pasta.

Caprese with warm bacon dressing

Then I saw this recipe for Caprese Salad with Warm Bacon Dressing. I was skeptical at first. Bacon on caprese? With red wine vinegar? Admittedly, I'm not a fan of balsamic on caprese, so I was hesitant to try this. But I'm so glad I did. We had this with my parents for Labor Day dinner and we were fighting over it. The crispy bacon is the perfect contrast to the mozzarella and tomatoes and the warm dressing, with just the right amount of tang from the red wine vinegar, is addictive.

Caprese Salad with Warm Bacon Dressing
As seen on Fake Ginger, adapted from Southern Living

2 1/2 pound beefsteak tomatoes, cut into 1/2-inch slices
8 ounces fresh mozzarella, cut into 1/2-inch slices
1/2 cup fresh basil leaves, finely minced
6 thick bacon slices, chopped into bite-size pieces
2 tablespoons red wine vinegar
1/2 teaspoon salt
1/2 teaspoon pepper

Arrange the tomatoes and mozzarella on a serving platter. Sprinkle with the minced basil.

Saute the bacon pieces in a large skillet over medium heat until crisp. Remove the bacon pieces to a paper towel-lined plate. Transfer 2 tablespoons of the bacon fat to a small bowl. Let stand for 1 minute, then whisk in the vinegar, salt, and pepper. Add the bacon pieces to the dressing and stir to combine. Drizzle the dressing over the salad right before serving.
Pin It!

Monday, February 23, 2015

Fried Mozzarella Sticks

Baby Girl loves cheese sticks. She eats them as a snack almost every day after school. Or rather, she used to. One week I noticed the package in the fridge was still mostly full so I checked the expiration date. It was that weekend. Since the Super Bowl was coming up I figured I'd turn them into Fried Mozzarella Sticks and went searching for a recipe.

Untitled

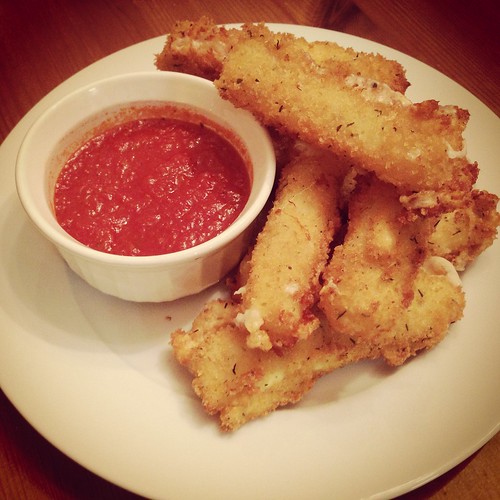
The key to any mozzarella stick recipe is to freeze the cheese sticks before you bake or fry them. I'm not sure why the recipe I used doesn't say to do that but it's an absolute MUST. The cheese will melt if it's anywhere close to room temperature. Heck, even mine frozen started to melt and ooze as they fried. So do not, under any circumstances, forget that step.

These were delicious, full of melty, gooey cheese. I only made 8 since it was just the three of us. SP and I each had three and Baby Girl devoured two. I'll definitely be making these again the next time we have cheese sticks that need to be used up.

Fried Mozzarella Sticks
Modified from Add a Pinch

24 mozzarella sticks
1 cup buttermilk
1 egg
1 cup flour
3 cups panko
1 tablespoon Italian seasoning
vegetable oil
pizza or marinara sauce, for dipping

The day before you plan to make these, place however many cheese sticks you want to eat into the freeze. Freeze them overnight. Do not skip this step!

The next day, prepare three separate bowls for dredging your mozzarella sticks. Whisk the buttermilk and the egg in one bowl. Put the flour in the second bowl. In the third bowl, combine the panko and the Italian seasoning.

Dip each cheese stick into the buttermilk, then into the flour, then back into the buttermilk and finally into the panko. Set aside on a sheet pan until all the cheese sticks have been coated.

Pour about 1 inch of oil into a 12-inch non-stick skillet. Heat over medium heat until the oil starts to shimmer. Add a few cheese sticks at a time, being careful not to crowd the pan. Use tongs to remove them as they turn golden brown.

Place on a baking sheet lined with paper towels to drain. Serve warm with pizza or marinara sauce for dipping.
Pin It!

Wednesday, February 11, 2015

Easy Cheddar Cheese Sauce for Vegetables

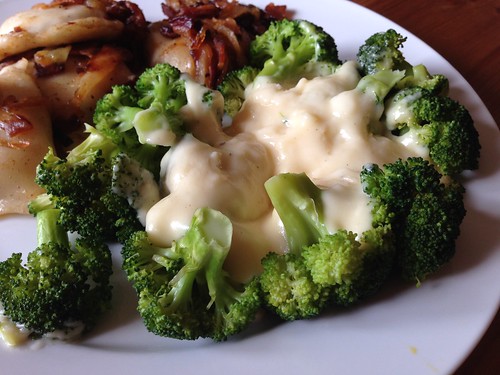
We all love pierogies but it had been ages since I'd served them for dinner. I always serve them with bacon and caramelized onions, with a big dollop of sour cream. And I always serve steamed broccoli on the side. This time I wanted to do something a little different with the broccoli. Enter this Easy Cheddar Cheese Sauce for Vegetables.

Easy cheese sauce

This is the same sauce you'd make for mac and cheese. It's an easy sauce to make and was really good with the steamed broccoli. I thought the original recipe was a bit thick, so I've halved the butter and flour in the recipe below.

Easy Cheddar Cheese Sauce for Vegetables
As seen on Iowa Girl Eats

1 tablespoon butter
1 tablespoons flour
salt and pepper
1 cup milk
1-1/2 cups freshly shredded cheddar cheese

Melt butter in a saucepan over medium heat. Add flour and whisk for one minute.

Slowly whisk in milk then season with salt and pepper and switch to a wooden spoon. Stir and cook until thickened, about 4-5 minutes.

Turn off heat and add cheese. Stir until melted and smooth. Taste then season with additional salt and pepper if necessary. Serve immediately.
Pin It!

Monday, December 22, 2014

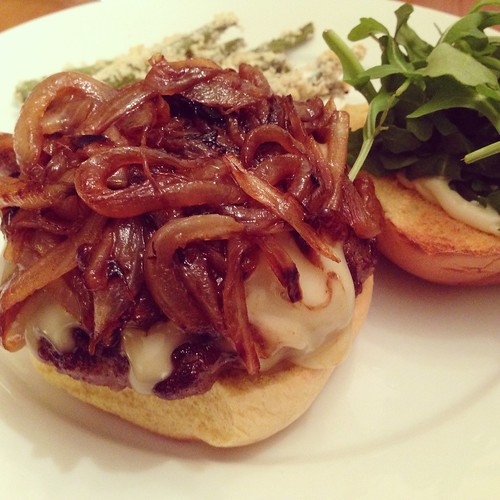
Burgers with Brie, Caramelized Onions, Arugula and Garlic Mayo

I love a good burger, don't you? These Burgers with Brie, Caramelized Onions, Arugula and Garlic Mayo have been on my radar ever since Kate posted them. What's not to like about Brie and caramelized onions?

Untitled

Sorry for yet another bad sandwich photo but you get the gist. These were delicious. SP mistakenly bought the "intense, earthy" Brie rather than our usual "nutty and buttery" Brie, so the cheese really shone through. Between that and the peppery arugula, we were glad for the sweetness of the caramelized onions.

Burgers with Brie, Caramelized Onions, Arugula and Garlic Mayo
As seen on Kate's Recipe Box

1 lb. ground chuck
Salt and pepper, to taste
Brie cheese
caramelized onions
arugula
garlic mayo
4 burger buns

Heat a grill to medium heat.

Divide the meat into 4 patties. Press an indentation in the center so they don't bulge while they cook. Season both sides liberally with salt and pepper.

Grill for 3 minutes on one side, then flip and grill for another 2 minutes. Remove to a plate, top each patty with some of the cheese and tent with foil. Let rest for 5 minutes.

Serve the burgers on buns topped with caramelized onions, arugula and garlic mayo.
Pin It!

Wednesday, January 29, 2014

Broccoli Cheddar Risotto

I'm on a serious risotto kick these days. When one of the ladies on my cooking board sang the praises of this Broccoli-Cheddar Oven Risotto I couldn't wait to try it.

Untitled

While I'm sure the oven method is easier, I prefer to cook risotto on the stove top because I have more control. The cooking method is the only change I made to the recipe.

Untitled

We all loved this, even if I ended up with more broccoli than rice. The flavor was great and the rice was nice and creamy. I also like that this was an all-in-one starch and veggie side dish.

Broccoli Cheddar Risotto
Adapted from Food Network Magazine

4-6 cups low-sodium chicken broth
2 tablespoon extra-virgin olive oil, divided
2 broccoli crowns, cut into small florets
Kosher salt and freshly ground pepper
3 tablespoons unsalted butter, divided
1 small onion, finely chopped
1 1/4 cups arborio rice
1/4 cup dry white wine
1 cup grated sharp cheddar cheese (about 4 ounces)

Bring the chicken broth to a low simmer in a saucepan. Heat 1 tablespoon of the olive oil in a large skillet over medium-high heat. Add the broccoli and season with salt and pepper. Cook, stirring every so often, until the broccoli is tender and browning in spots, about 15 minutes. Remove the broccoli from the skillet.

Melt 1 tablespoon oil and 1 tablespoon butter in the now-empty skillet over medium-high heat. Add the onion and cook, stirring occasionally, until slightly softened, about 2 minutes. Add the rice and stir to coat. Pour in the wine and cook until evaporated, about 1 minute.

Start adding the chicken broth one ladle-full at a time, letting it fully absorb before adding more. This process takes anywhere from 17-25 minutes.

Before you add the final ladle of broth, add the broccoli back in. Add the final ladle of broth and once it's absorbed, taste some of the rice to make sure it's cooked through. Turn off the heat and add the grated cheese and 2 tablespoons of butter. Adjust seasoning, if necessary.
Pin It!

Wednesday, July 24, 2013

Bacon, Brie, Lettuce, Avocado and Tomato (BBLAT) Sandwiches

::Putting on my flame-retardant suit::

I'm not a fan of BLTs.

There, I said it. The simplicity just doesn't do it for me. I need more than bacon, lettuce and tomato to make a sandwich. In my mind, those are toppings. Add them to a burger or chicken sandwich and I'm a happy camper. But on their own, meh. SP, on the other hand, loves BLTs.

I think I've mentioned before that we always do a what's for dinner post on my cooking board and one night someone said they were having bacon, Brie, lettuce, avocado and tomato sandwiches - a gourmet twist on a traditional BLT. It sounded heavenly and a good way to compromise on dinner.

BBLAT

These sandwiches were amazing. I loved the Brie and avocado - both added a great creaminess to the sandwich. I still think a nice piece of chicken would have made these perfect but they were still great without it. I left the Brie off SP's sandwich (although Baby Girl insisted on having some on hers) and when I couldn't finish my sandwich he ate the last few bites of mine and decided he liked it better. Score!

BBLAT2

The recipe below is really just an ingredient list since we all know how to make a sandwich. I can't wait to make these again the next time SP asks for BLTs.

Bacon, Brie, Lettuce, Avocado and Tomato Sandwiches
For two sandwiches

4 slices bread, toasted
Mayo
8 slices bacon, cooked to desired doneness
4oz Brie, sliced
2 Romaine leaves
1/2 avocado, sliced
4 slices tomato

Spread some mayo on all four slices of bread. Layer on the bacon, Brie, lettuce, avocado and tomato. Cut in half and serve.
Pin It!

Monday, January 21, 2013

Chicken with Prosciutto, Brie, and Arugula

While making this week's meal plan I realized I had chicken in the freezer, a box of arugula in the crisper quickly going bad, and half a wheel of Brie. I'd had my eye on this recipe for Chicken with Prosciutto, Brie, and Arugula ever since Jaida posted it, so this seemed like the perfect time to make it.

chickenbrie3

This isn't a complicated recipe but I was happy I chose to make it on a weekend instead of a weeknight. I always get flustered breading and frying chicken so I prefer to take my time and do it right rather than rushing. As you can see, patience is a virtue and I got a nice, crispy crust on the cutlets. Delicious.

chickenbrie

The slightly-melted Brie and prosciutto combined with the tang from the arugula dressing was divine. This will definitely be going on my 2013 roundup at the end of this year. I was peeved at myself for only making two chicken breasts (and one was so teeny tiny it barely counts as a full breast). SP was also peeved - he ate both his pieces for dinner so he didn't get any leftovers for lunch. I cut Baby Girl's chicken into nuggets, which she devoured along with the crispy potato wedges I served alongside.

Chicken Cutlets with Prosciutto, Brie, and Arugula
Bobby Flay, as seen on Sweet Beginnings

Arugula Salad
2 tbsp red wine vinegar
1 tsp Dijon mustard
Salt and freshly ground black pepper, to taste
1/4 cup extra virgin olive oil
1/2 lb baby arugula, rinsed and spun dry

Chicken
1 cup flour
2 large eggs, lightly beaten
2 cups Panko breadcrumbs
Salt and freshly ground black pepper, to taste
4 (6 oz) boneless, skinless, chicken breasts
6 tbsp unsalted butter, divided
2 tbsp olive oil, divided
1/4 lb Brie, rind removed, sliced
8 thin slices Virginia ham or prosciutto

Prepare Arugula Salad: In a medium bowl, whisk together vinegar, mustard, salt and pepper in a large bowl. Slowly whisk in the oil until emulsified. Add the arugula and toss to coat the leaves with the vinaigrette. Set aside while you prepare the chicken.

Place flour, eggs and breadcrumbs in three separate shallow bowls and season each with salt and pepper. Place a wire baking rack over a baking sheet; set aside.

Place each chicken breast between two pieces of waxed paper (or a freezer-style plastic bag) and pound to 1/4-inch thickness. Season chicken on both sides with salt and pepper, and dredge each breast in the flour; tap off excess. Dip into the egg wash and let excess drip off, and then dredge on both side in the breadcrumbs. Place on a baking rack set over a baking sheet.

Preheat two large nonstick sauté pans over high heat. Add 3 tablespoons of butter and 1 tablespoon of oil to each pan and heat until the butter is melted and sizzling. Place 2 breasts in each pan and cook until golden brown on the first side, using tongs flip over and continue cooking until golden brown on the second side and the chicken is cooked through, about 5 to 6 minutes total.

Remove to a plate and immediately top each breast with a few slices of Brie, then top with a few slices of prosciutto and some of the arugula salad. Serve immediately.
Pin It!

Monday, January 14, 2013

Baguette with Prosciutto, Gorgonzola and Fig Jam

Right before the holidays a friend posted on Facebook about a recipe for Baguette with Prosciutto, Gorgonzola and Fig Jam. It sounded divine and I immediately planned my New Year's Eve menu around it.

fig toast

I only made about a quarter of the baguette because it was just SP and I eating these (Baby Girl licked all the fig jam off her slice - she turned her nose up at the gorgonzola and tried the prosciutto but claimed she didn't like it). The recipe below is my best guess at how much of everything you'll need for a full baguette.

I used gorgonzola (and only a little bit at that) but the flavor was still a bit too pungent for me. Soña recommended layering the fig jam and cheese together to help cut the flavor a bit so that's how I wrote the recipe below. I also think Brie would be excellent. Good thing I have 3/4 of a jar of jam left. Have you tried fig jam? I hadn't before making this and it was great!

Baguette with Prosciutto, Gorgonzola and Fig Jam
Recipe from Soña

1 French baguette
1 small jar fig jam
8oz blue cheese
12-16oz prosciutto, thinly sliced

Preheat the oven to 400 degrees (or preheat the broiler).

Slice the baguette into 1/2"-thick slices, on a slight bias. Place on a baking sheet lined with parchment paper and toast briefly, until just starting to brown. Remove from the oven.

Top each slice with a small amount of fig jam. Add some blue cheese then a slice of prosciutto.

Return to the oven (or broiler) and heat until the cheese melts and the prosciutto starts to crisp.

Serve immediately.
Pin It!

Wednesday, December 19, 2012

Pork Tenderloin Stuffed with Brie and Bacon

Pork tenderloin is so cheap at our supermarket that buying it is a no-brainer. A woman on my cooking board recently made this Pork Tenderloin Stuffed with Smoked Gouda and Bacon and highly recommended it, so I figured I'd give it a try, swapping the Gouda for Brie since I had half a wheel leftover from Thanksgiving.

Pork loin

Unfortunately I didn't secure the tenderloin tightly enough and most of the cheese leaked out as it melted, which was a huge bummer. The few pieces with cheese were delicious and it did mix with some of the bacon, but I'd been hoping for more cheesy goodness inside the rolled-up pork. Next time (and there will be a next time) I'll need to be more careful. This was delicious even with the missing cheese. You can't go wrong with bacon.

Pork Tenderloin Stuffed with Brie and Bacon
As seen on Elly Says Opa!

1 (about 1 lb.) pork tenderloin
1/4 lb. bacon, chopped
3 oz. Brie, rind removed, cut into cubes
Fresh or dried parsley, to taste
Fresh or dried sage, to taste
Salt and pepper
Olive oil (optional)

Preheat the oven to 375.

Cook the chopped bacon in a skillet and remove with a slotted spoon. Reserve bacon fat.

Butterfly pork tenderloin and pound slightly to thin it out. Sprinkle with salt, pepper, sage and parsley. Top with the Brie and the cooked bacon.

Starting at one end, roll the pork tenderloin up end to end (or tri-fold it, like you would a letter). Secure with kitchen twine or toothpicks.

Sprinkle salt and pepper on the rolled up tenderloin and roast it in the oven for 50-60 minutes until the internal temperature is 140 degrees. OR Rub the tenderloin with a little olive oil, salt and pepper. Sear it in a hot pan to brown on all sides, and then put it in the oven to finish cooking, 30-40 minutes. OR Sprinkle salt and pepper on the rolled up tenderloin and sear it in the reserved bacon fat to brown on all sides, and then move the skillet to the oven to finish cooking, 30-40 minutes.

After you remove the tenderloin from the oven, put it under a foil tent to rest for about 10 minutes before slicing it.
Pin It!

Wednesday, December 05, 2012

Baked Brie in Mini Phyllo Cups with Strawberry Jam

I love baked brie. There's a restaurant near my house that serves a slice of baked brie topped with raspberry jam, slivered almonds and a brown sugar glaze. I knew I wanted to try making some sort of baked brie for Thanksgiving but I wanted it to be easier to eat.

Baked Brie

There are hundreds of recipes out there so this is basically a method, not a recipe. I had to leave out the almonds because of Baby Girl's nut allergy and since I already had strawberry jam open I used that instead of raspberry. I added a pinch of brown sugar to each cup for that added sweetness. These were delicious and so simple to make.

Baked Brie in Mini Phyllo Cups with Strawberry Jam
Makes 24 cups

2 boxes mini phyllo cups
6oz Brie, rind removed, cut into 24 cubes
Fruit jam of your choice
Brown sugar
Sliced almonds (optional)

Preheat the oven to 325 degrees.

Remove phyllo cups from their packaging and place on a baking sheet. Add one piece of Brie into each phyllo cup. Top the cheese with some of the jam and sprinkle with brown sugar. Top with sliced almonds, if using.

Bake for 5-8 minutes until the cheese is melted and the cups start to brown. Serve warm.


Pin It!

Friday, May 25, 2012

Foodbuzz Tastemaker: Cheese Quesadillas

When I was pregnant with Baby Girl we went to one of our favorite Mexican restaurants for dinner. As you may know, pregnant woman aren't supposed to eat unpasteurized cheese. Not knowing much about Mexican cheeses, I asked our server what kind of cheese they used in their quesadillas. Imagine my surprise when he said American cheese. Obviously that's not very authentic, but I can see why they do it. American cheese has a nice mild flavor and melts beautifully.

When I was selected for the Kraft Singles Foodbuzz Tastemaker program I knew exactly what I wanted to make - quesadillas. I've been meaning to try American cheese ever since that night at the Mexican restaurant (almost 3 years ago - how is that possible!?) Baby Girl absolutely loves American cheese. She asks for a slice every day when we get home from daycare. And she's never met a carb she doesn't like. Quesadillas are a big hit in our house and something I should make more often, given their versatility and ease.


One of the things I loved about making these quesadillas was how easy they were. No cheese to shred saves time. I was able to make 4 quesadillas in a matter of minutes. They were cheesy and delicious, with a nice, mild flavor. Baby Girl likes hers plain but I had mine with diced tomato, diced avocado and sour cream.


I will absolutely make quesadillas with American cheese again. I love a good plain cheese quesadilla but the possibilities are endless in terms of fillings. A big thanks to Foodbuzz and Kraft for this opportunity. Baby Girl sends her thanks as well because she gets to eat the remaining cheese as an afternoon snack.

Simple Cheese Quesadilla

Cooking spray
4 flour tortillas
4 slices American cheese, such as Kraft Singles

Spray a griddle or large, non-stick skillet with cooking spray and heat over medium heat. Toast one tortilla on both sides, then lay one slice of cheese, torn into pieces to fit, on half the tortilla. Fold the over half of the tortilla over to cover the cheese. Turn the heat down to low and flip the tortilla as needed to melt the cheese without burning the tortilla. Cut each quesadilla into three wedges. Serve with whatever toppings you like - sour cream, pico de gallo, avocado, lime wedges, etc.

As part of the Foodbuzz Tastemaker Program, I received a coupon for free Kraft Singles and a stipend.
Pin It!

Monday, September 19, 2011

Cheesy Zucchini Rice

I'm always looking for new side dishes, especially ones that combine starch and vegetable. This recipe for Cheesy Zucchini Rice sounded like a perfect way to use zucchini before the season ends.


When I told SP what we were having he was more than a little skeptical. I think he wasn't sure what to expect, but as soon as he tasted it he proclaimed he would eat an entire bowl of just the rice. And yet the man claims not to like risotto. Go figure. Baby Girl was also a big fan. Not for moms of picky kids, this is a great way to sneak in veggies.

Don't be shy with the salt and pepper in this dish. Because of the zucchini the rice needs a good amount of salt. I've also realized I'm disappointed in my supermarket brand cheddar cheese. Our store brand is pretty stellar in most instances, but their cheese is just bland. Make sure to use a nice, sharp cheese that actually packs some flavor.

Cheesy Zucchini Rice
Very Slightly Modified from Pink Parsley

1 3/4 cups chicken broth
1 cup long-grain white rice
2 tablespoons butter
1 medium zucchini, grated on the large holes of a cheese grater then wrung dry in a clean kitchen towel
1 cup shredded sharp cheddar
Salt and pepper, to taste

Bring the broth to a boil in a medium saucepan. Stir in the rice, cover, and reduce heat to low. Cook 20 minutes, or until most of the liquid has been absorbed.

Remove from heat, add the butter and zucchini, and cover. Allow to stand 5 minutes, then stir to incorporate. Stir in the cheese, season liberally with salt and pepper, and serve.
Pin It!

Saturday, May 03, 2008

Ricotta Pasta with Spinach

I'm not sure what happened here...


Personally, I blame the frozen spinach. I think there was too much of it and it sucked up all the moisture. The last time I made this it was much creamier, but I also used fresh baby spinach. I also ran out of white wine so I used chicken stock instead. The flavor was definitely compromised. This was not a stellar preparation of this dish.
Pin It!

Monday, January 28, 2008

Burrata

Recently I saw an episode of Lidia's Italy where Lidia showcases burrata, a fresh Italian cheese made from mozzarella and cream. The outer shell is solid mozzarella while the inside contains both mozzarella and cream. SP went to a local Italian market looking for it last weekend and they special-ordered it for us. This is how it arrived:


... wrapped in leeks. I was really excited to try this cheese after seeing it on Lidia's show, so I served it exactly as she did:


... on top of grilled bread nestled in broccoli rabe sauteed with garlic and a drizzle of olive oil. I couldn't wait to cut into the cheese and see the oozing, creamy center but unfortunately our burrata didn't ooze. In fact, the center was mostly solid. It still had that creamy, buttery flavor, but the "wow" factor was missing.

I served this as a first course before we ate the rollatini. Everyone enjoyed it, but I think I need to find a market that sells it freshly made.
Pin It!