Showing posts with label vegetables. Show all posts

Thursday, January 20, 2022

Chicken, Shrimp, and Mixed Veggie Stir Fry

I made this amazing stir fry last night and had to document it for posterity (and easy sharing among friends). I don't make a lot of stir fries because Steve finds them to be one dimensional. This was anything but. The sauce was drinkably good.


I took the original recipe for Shrimp with Broccoli and turned it into a chicken, shrimp and mixed veggie stir fry, packing it with as many veggies as I could. I love the versatility and my family loved that I mixed chicken and shrimp. Ha! For some reason it never occurred to me that I could do that. What can I say, I'm a bit slow sometimes. 

Peanuts would be great on this, by the way. As I was eating it I kept thinking how much it reminded me of kung pao. If Katie wasn't allergic to nuts I would have rustled some up. 

Chicken, Shrimp, and Mixed Veggie Stir Fry
Sauce from Rachel Cooks

1/2 cup reduced sodium soy sauce
1/4 cup rice wine vinegar
1/4 cup packed brown sugar
1/4 cup water
2 tablespoons freshly grated ginger
4 cloves garlic, minced
2 tablespoons cornstarch
1 teaspoon sesame oil
1 teaspoon chile garlic sauce, or more to taste

2 tablespoons canola oil, divided
2 broccoli crowns, cut into florets
1 medium onion, chunked
8 mushrooms, chunked
2 large/4 small carrots, peeled and chunked
2 ribs celery, chunked
1 red or green bell pepper, ribs and seeds removed, chunked
salt and pepper, to taste
1-lb raw, peeled, deveined shrimp
1-lb boneless chicken thighs, cut into bite-size pieces
1 can sliced water chestnuts, drained and rinsed

Cooked rice or noodles, for serving

Whisk the sauce ingredients together in a 2-cup measuring cup. Set aside.

Heat 1 tablespoon of oil in a large frying pan or wok over high heat. Add broccoli, onion, mushrooms, carrots, celery and bell peppers. Season with salt and pepper and cook until veggies are crisp tender. Remove to a bowl.

Season shrimp with salt and pepper. Heat 1 tablespoon oil in the now-empty pan and add shrimp in a single layer. Cook, turning once, until just pink. Remove to another bowl.

Season chicken with salt and pepper then add to the pan. Cook, undisturbed, until brown on one side. Add veggies and sauce, then mix together and allow chicken to cook through and sauce to thicken, 5 minutes. Add the shrimp and water chestnuts and heat through.

Serve over rice or noodles.

Pin It!

Monday, January 04, 2021

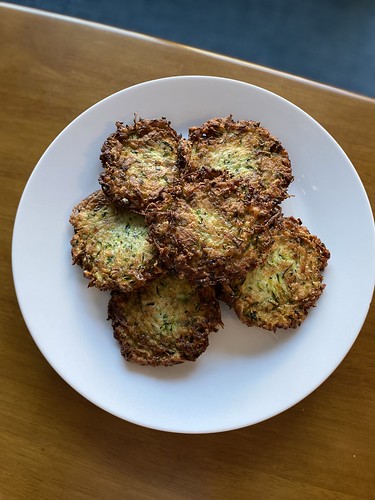
Zucchini Fritters

I'm always struggling to use up zucchini in the summer and I don't even grow it in my garden. In 2020, in addition to discovering delectable zucchini muffins, I made a lot of these zucchini fritters. The dipping sauce is what makes them so good (I'm a complete sucker for soy sauce).

I found the recipe in a cookbook, but it looks like the author originally posted it on Bon Appetit's website. I'm happy to report that these even reheat well. They won't be as crispy, but the texture is surprisingly good reheated.

Zucchini Fritters
By Jenny Rosenstrach

Soy Dipping Sauce
3 tablespoons unseasoned rice vinegar
1 tablespoon reduced-sodium soy sauce
1 1/2 teaspoons sugar
Crushed red pepper flakes

Fritters
1 1/2 pounds zucchini (about 3 medium), grated
1/2 teaspoon kosher salt plus more for seasoning
1 large egg
1/4 cup flour
3 tablespoons finely chopped fresh chives or shallot
1 tablespoon cornstarch
Freshly ground black pepper
1/3 cup vegetable oil

Mix vinegar, soy sauce, sugar, and a pinch of red pepper flakes in a small bowl until sugar is dissolved. Set aside.

Place zucchini in a colander set in the sink and toss with 1/2 teaspoons salt. Let stand 10 minutes, then wring zucchini dry in a clean kitchen towel. Place zucchini in a large bowl and gently mix in egg, flour, chives, and cornstarch; season with salt and pepper.

Heat oil in a large skillet over medium heat. Working in 2 batches, drop 1/4-cupfuls zucchini mixture into skillet, flattening slightly; cook until golden and crisp, about 3 minutes per side. Transfer fritters to a paper towel–lined plate; season with salt. Serve with soy dipping sauce.

DO AHEAD: Fritters can be made 30 minutes ahead. Keep warm in a 200° oven.

Pin It!

Thursday, May 28, 2020

Sheet Pan Kielbasa, Potatoes and Veggies

I'm very late to the sheet pan dinner craze but this is one that will be on rotation forever. I've already made it twice and it's just so, so good.

Sheet pan

I love that you can make this however you want with whatever veggies and meat you want. It's a one-pan meal that hits all the right notes with minimal cleanup.

Sheet Pan Kielbasa, Potatoes and Veggies

1 package (14-16oz) precooked sausage or kielbasa cut in half lengthwise and sliced into 1/2" half-moons
1 medium onion (red, white, whatever you have), cut into bite sized pieces
2 broccoli crowns, separated into florets
1 small head cauliflower, separated into florets
1/2 lb red potatoes, peeled and cut into small, bite-size pieces
3 tablespoons olive oil
1 tablespoon paprika
1 tablespoon onion powder
1/2 tablespoon garlic powder
1/2 tablespoon dried thyme
1 teaspoon kosher salt, or to taste
1/2 teaspoon freshly grated black pepper, or to taste
1 cup shredded cheddar cheese (or mozzarella, Monterey Jack, colby, whatever you want)

Preheat the oven to 450 and line a baking sheet with a couple sheets of aluminum foil.

Combine the sausage, onion, broccoli, cauliflower and potatoes in a large bowl. Season with the oil, paprika, onion and garlic powders, dried thyme, salt and pepper. Mix well. Dump onto the baking sheet and spread out in an even layer. Put sheet pan in the oven.

Roast for 25 minutes. Remove pan from the oven and test to make sure the potatoes are fully cooked (use the tip of a knife). If they aren't, put back in the oven for another 5-10 minutes. Once the potatoes are cooked through, top with the shredded cheddar cheese and put back in for another 5 minutes to melt the cheese.
Pin It!

Wednesday, November 01, 2017

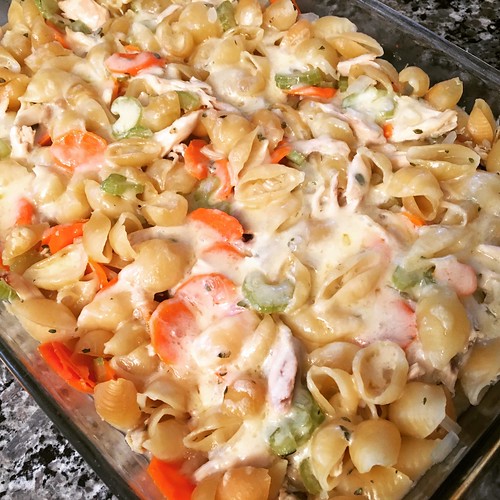
Chicken Noodle Soup Casserole

Do you ever make a recipe and just know that it's going to be something you make again and again and again? This Chicken Noodle Soup Casserole is one of those recipes. Not only was it delicious, it was one of the easiest meals I've ever made.

Chicken noodle soup casserole

The beauty of this recipe is two-fold:

1. Everything bakes together in a casserole dish so you don't even have to worry about food splatter on your stovetop.
2. It's hearty and comforting for those chilly nights.

To make this even easier, I used rotisserie chicken (I've been buying rotisserie chickens and freezing the meat in small portions for pizzas or recipes like this one) and prepped the celery, carrots, onion, thyme and garlic the night before. I made this for Halloween night since Steve and Katie like to have a quick meal before heading out for candy. I dumped everything in a huge bowl, mixed it all up, popped it in the oven to bake, steamed some green beans and called it dinner. So, so good.

The only issue was some of the pasta wasn't fully submerged in the broth so it didn't cook properly. I'm hoping that's easily solved by giving this a quick stir halfway through the cooking time. I can't wait to make it again!

Chicken Noodle Soup Casserole
As seen on The Seasoned Mom

2 cups diced, cooked chicken (rotisserie chicken works great)
2 celery stalks, diced
2 large/4 small carrots, peeled and diced
1/2 large onion, finely diced
1 tablespoon fresh thyme leaves, minced (or 1 teaspoon dried thyme)
2 large garlic cloves, minced or grated
12 ounces uncooked rotini pasta (I used shells)
4 cups low-sodium chicken broth
1 teaspoon salt
1 cup shredded cheddar cheese

Preheat oven to 425. Spray a 9 x 13-inch baking dish with cooking spray.

In a large bowl), stir together cooked chicken, celery, carrots, onion, thyme, garlic, uncooked pasta, chicken broth, and salt until well mixed. Pour into the baking dish and spread evenly.

Cover tightly with foil and bake for 40 minutes, uncovering to stir halfway through to make sure all the pasta has a chance to cook.

Uncover and sprinkle the cheese over the top. Bake uncovered for 5-10 more minutes until the cheese is melted. Let cool for a few minutes before serving.
Pin It!

Friday, May 26, 2017

Pork and Vegetable Stir Fry

I used to make stir fries all the time and then I just...stopped. I have no clue why. Maybe we got burnt out on them or maybe they just fell off my radar the way things do when you're a food blogger who's always trying to make something new so you have content to blog. Whatever the reason, it's been a very long time since I made a stir fry.

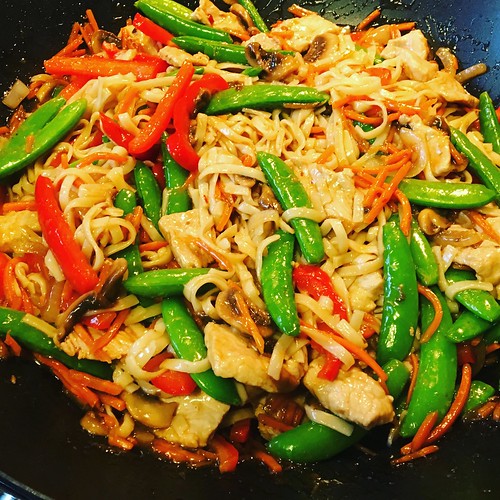
Pork stir fry with udon noodles

While meal planning last week I found a recipe for Pork “Lo Mein” Ramen that I'd printed from my friend Katie's blog. It sounded easy, which I really need these days. I had two pork chops in the freezer to use up, and veggies are amazing right now, so I was psyched. While looking up ramen on Wegman's website, to see how many ounces of noodles are in a package, I discovered that ramen isn't safe for someone with a nut allergy. Who knew? Poor kid will never know that particular joy of college dorm life. This meant finding a different, safe noodle. I ended up getting these udon noodles and the texture was perfect - silky smooth, with a nice chew.

I figured one pack of udon noodles was equal to four packs of ramen, so I doubled the original recipe, which was perfect. It seemed like a lot of food but we were all so in love with this recipe we went back for seconds and there are barely any leftovers. Thanks for an amazing recipe, Katie, and for helping me rediscover my love of stir fries!

Pork and Vegetable Stir Fry
Adapted from So Tasty, So Yummy

2 tablespoons cornstarch
1 teaspoon chile garlic sauce
1/4 cup soy sauce
1 tablespoon oyster sauce
1 cup chicken broth
1 12-oz package udon noodles
2 tablespoons canola oil, divided
1 pound pork loin chops, sliced thin
1 tablespoon grated fresh ginger
2 cloves garlic, minced
1 small onion, thinly sliced
1/2 pound mushrooms, sliced
1 small red bell pepper, sliced thin
1 cup shredded carrots
1 8oz bag snow or snap peas
1 teaspoon sesame oil

In a two cup measuring cup, whisk together the cornstarch, chile garlic sauce, soy sauce, oyster sauce and chicken broth.

Cook the udon noodles according to the package instructions. Drain and set aside.

Heat 1 tablespoon of the oil in a large skillet or wok over medium-high heat. Stir fry the pork, ginger and garlic until almost cooked through. Remove the pork from the wok and add the remaining tablespoon of oil. Once the oil is hot, add the onion, mushrooms, bell pepper and carrots. Stir fry for 3 to 5 minutes, until the veggies start to soften.

Pour the broth mixture over the vegetables, bring to a boil and cook for a minute more. Add the pork and snow or snap peas. Cook for another minute, then add the udon noodles and sesame oil. Toss to coat the noodles evenly with the sauce. Serve.
Pin It!

Tuesday, November 17, 2015

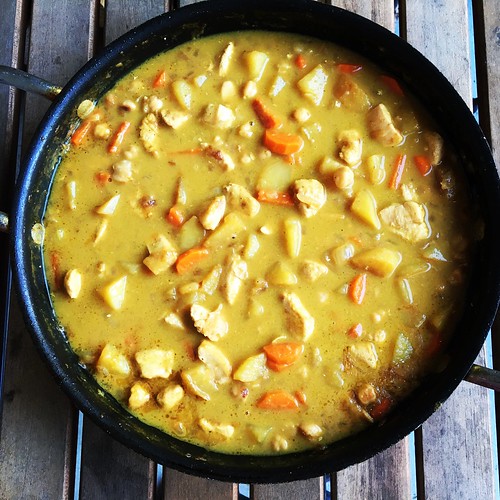
Chicken Curry with Potatoes, Carrots and Chickpeas

I love a good one-pot meal and lately I've been really into curries. I think it's because we discovered coconut milk was safe for Baby Girl. Or maybe it's because we can't get enough of the buttered naan I serve alongside. Whatever the reason, I've been wanting to make my friend Chelsea's chicken curry recipe for a while now and I finally put it on the menu this week.

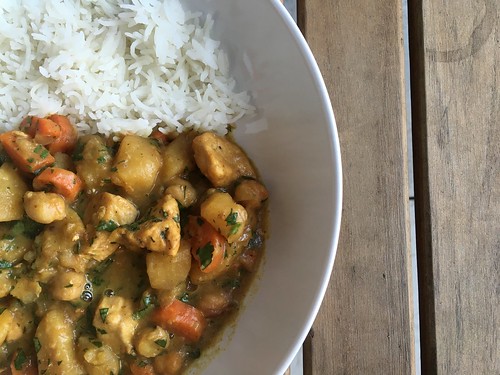
Chicken curry with potatoes, carrots and chickpeas

This is one of those meals that is so versatile you could add whatever veggies you like, or whatever is lurking in your crisper drawer. Don't like carrots? Leave them out. Have some cauliflower approaching it's birthday? Add it in. Vegetarian? Leave out the chicken or sub in some tofu and switch to vegetable broth. The sauce is what makes this so good, so use your imagination.

Chicken curry with potatoes, carrots and chickpeas

The sauce is the best part of any curry, in my humble opinion, so I opted not to thicken this. If you prefer a thicker curry, add some cornstarch during the final simmer.

Chicken Curry with Potatoes, Carrots and Chickpeas
Recipe from my friend Chelsea

2 tablespoons olive oil, divided
2 chicken breasts or 4 chicken thighs, cut into bite-size pieces
salt and pepper
1 medium onion, minced
3 garlic cloves, minced or grated
2 tablespoons grated fresh ginger
3 teaspoons yellow curry powder
2 cups chicken broth, divided
4-5 small gold potatoes, cut into bite-size pieces
3 carrots, cut into bite-size pieces
1 can chick peas, drained and rinsed
Juice of one lime
1 teaspoon fish sauce
1 can coconut milk
Optional: sriracha or hot sauce, to taste
Minced cilantro, for serving

Heat 1 tablespoon of olive oil in a large skillet over medium-high heat. Season the chicken with salt and pepper, then add to the hot skillet. Cook until browned but not cooked through, about 5 minutes. Remove the chicken to a plate and set aside. Add the onion, garlic and ginger to the skillet. Season with a little salt and pepper, then cook until the onions are softened.

Add the other tablespoon of olive oil and the curry powder. Let the curry powder toast for about one minute, then add the potatoes, carrots, and chick peas. Add 1/2 cup of chicken broth, then stir to scrape up any browned bits from the bottom of the pan.

Cover and cook until the potatoes and carrots are soft, about 10 minutes. Add the rest of the chicken broth and scrape the bottom of the pan again. Bring to a boil and simmer for another 5 minutes.

Add the chicken and any accumulated juices, coconut milk, fish sauce, lime juice, and sriracha (if using) to the pan. Simmer until the sauce has thickened slightly (it will continue to thicken as it sits).

Serve over basmati or jasmine rice topped with chopped fresh cilantro.
Pin It!

Tuesday, September 08, 2015

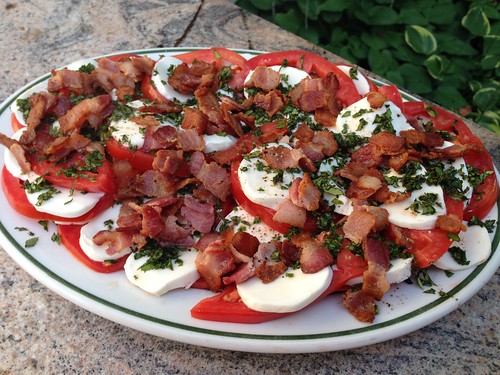
Caprese Salad with Warm Bacon Dressing

Raise your hand if you're mourning the end of summer. I know I am. I love everything about summer - the warmth, the sun setting later, the pool, the beach, kids playing in the backyard before bed. I'm not one of those people who looks forward to fall with its cooler temps, sweaters and boots. Give me t-shirts and flip flops any day.

But, alas, summer is winding down. The good news is, this is the time when Jersey tomatoes are still at their best and there's no better way to showcase them than in caprese salad. I'm not usually one to mess with perfection. Caprese, with its creamy fresh mozzarella and red ripe tomatoes sprinkled with basil is my idea of a perfect summer meal. I love to eat it plain or tossed with pasta.

Caprese with warm bacon dressing

Then I saw this recipe for Caprese Salad with Warm Bacon Dressing. I was skeptical at first. Bacon on caprese? With red wine vinegar? Admittedly, I'm not a fan of balsamic on caprese, so I was hesitant to try this. But I'm so glad I did. We had this with my parents for Labor Day dinner and we were fighting over it. The crispy bacon is the perfect contrast to the mozzarella and tomatoes and the warm dressing, with just the right amount of tang from the red wine vinegar, is addictive.

Caprese Salad with Warm Bacon Dressing
As seen on Fake Ginger, adapted from Southern Living

2 1/2 pound beefsteak tomatoes, cut into 1/2-inch slices
8 ounces fresh mozzarella, cut into 1/2-inch slices
1/2 cup fresh basil leaves, finely minced
6 thick bacon slices, chopped into bite-size pieces
2 tablespoons red wine vinegar
1/2 teaspoon salt
1/2 teaspoon pepper

Arrange the tomatoes and mozzarella on a serving platter. Sprinkle with the minced basil.

Saute the bacon pieces in a large skillet over medium heat until crisp. Remove the bacon pieces to a paper towel-lined plate. Transfer 2 tablespoons of the bacon fat to a small bowl. Let stand for 1 minute, then whisk in the vinegar, salt, and pepper. Add the bacon pieces to the dressing and stir to combine. Drizzle the dressing over the salad right before serving.
Pin It!

Thursday, June 25, 2015

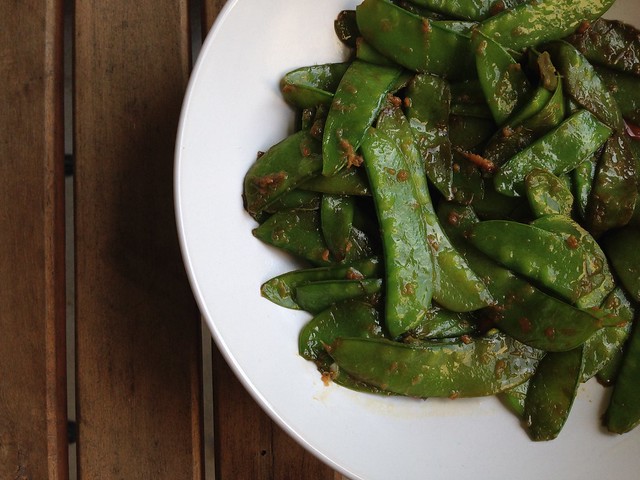
Quick Stir-Fried Snow Peas or Sugar Snap Peas

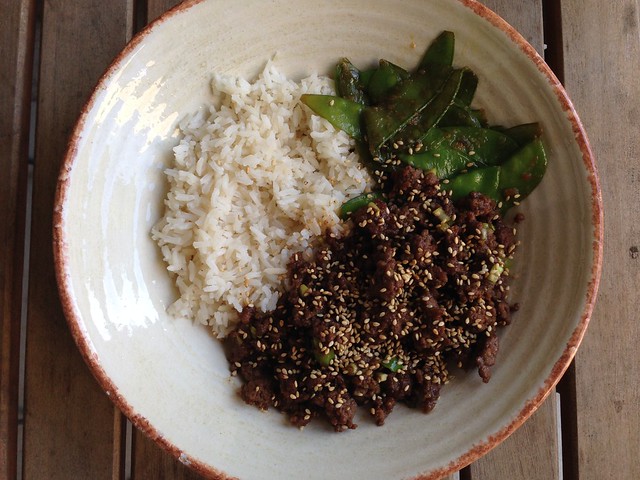
Baby Girl loves snow peas. Usually she eats them raw but I wanted to try cooking them as a side dish for dinner one night. After a quick Google search I found this recipe for Quick Stir-Fried Snow Peas or Sugar Snap Peas. The ingredients closely mirrored my main dish (a family favorite - Cheater Korean Beef) so I thought it would be perfect

Snow peas

Sadly, I overcooked the snow peas, but they were still tasty. Baby Girl told me she loved the flavor but wished they were still crispy like when she eats them raw. Next time (and there will definitely be a next time) I won't let them go too far.

Snow peas

Quick Stir-Fried Snow Peas or Sugar Snap Peas
As seen on Diner's Journal from the NY Times

2 tablespoons canola, vegetable or peanut oil
1 1/2 pounds snow or sugar snap peas, washed and trimmed
1 tablespoon minced ginger
1 tablespoon minced garlic
1 teaspoon dark sesame oil
1 to 2 tablespoons soy sauce

Place 2 tablespoons oil in a large, deep skillet or wok and turn heat to high. When it begins to smoke, toss in peas and cook, stirring almost constantly, until they are glossy, bright green and begin to show a few brown spots, about 5 minutes.

When peas are almost done, stir in ginger and garlic, and cook another minute or so. Turn off heat and remove peas to a platter. Drizzle with dark sesame oil and soy sauce. Taste and adjust seasoning, and serve.
Pin It!

Wednesday, February 11, 2015

Easy Cheddar Cheese Sauce for Vegetables

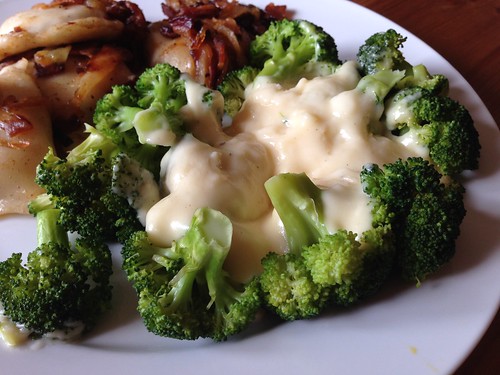
We all love pierogies but it had been ages since I'd served them for dinner. I always serve them with bacon and caramelized onions, with a big dollop of sour cream. And I always serve steamed broccoli on the side. This time I wanted to do something a little different with the broccoli. Enter this Easy Cheddar Cheese Sauce for Vegetables.

Easy cheese sauce

This is the same sauce you'd make for mac and cheese. It's an easy sauce to make and was really good with the steamed broccoli. I thought the original recipe was a bit thick, so I've halved the butter and flour in the recipe below.

Easy Cheddar Cheese Sauce for Vegetables
As seen on Iowa Girl Eats

1 tablespoon butter
1 tablespoons flour
salt and pepper
1 cup milk
1-1/2 cups freshly shredded cheddar cheese

Melt butter in a saucepan over medium heat. Add flour and whisk for one minute.

Slowly whisk in milk then season with salt and pepper and switch to a wooden spoon. Stir and cook until thickened, about 4-5 minutes.

Turn off heat and add cheese. Stir until melted and smooth. Taste then season with additional salt and pepper if necessary. Serve immediately.
Pin It!

Wednesday, November 26, 2014

Collard Greens

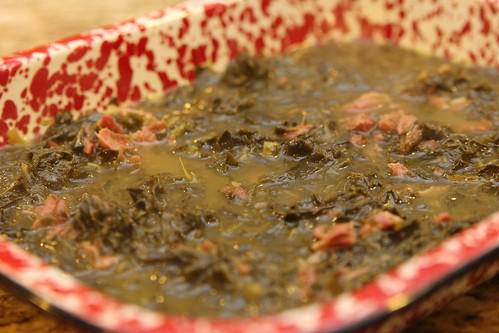
I love collard greens but the last time I tried to make them they were inedible. So. Much. Salt. I vowed to try again for our Southern night redo. This time I pretty much eliminated the salt from the recipe and I nailed it!


These were perfect with fried chicken, mac and cheese and cornbread. It takes some time to prep the collard greens but since you have to boil the water for an hour that's the perfect time to get it done. These were just as good as the ones we get from our favorite BBQ spot - a little spicy and so flavorful.

Collard Greens
Modified from Paula Deen

1 smoked ham hock
1 tablespoon seasoned salt
1/4 teaspoon black pepper
1/2 teaspoon garlic powder
a few dashes Tabasco sauce
1 large bunch collard greens
1 tablespoon butter

In a large pot, bring 3 quarts of water to a boil. Add the ham hock, seasoned salt, black pepper, garlic powder and hot sauce. Reduce heat to medium and cook for 1 hour.

While the water is boiling, wash the collard greens thoroughly. Remove the stems that run down the center by holding the leaf in one hand and stripping the leaf down with your other hand. The tender young leaves in the heart of the collards don't need to be stripped.

Once all the leaves have been washed and dried, stack 6 to 8 leaves on top of one another, roll them up, and slice into 1/2 to 1-inch thick slices.

After the water cooks for an hour, put the greens in the pot and add the butter. Cook for 45 to 60 minutes, stirring occasionally. Taste and adjust the seasoning, if needed. If you want, you can remove the ham hock, allow to cool and pick the meat off the bone. Add the meat to the collard greens and stir to combine before serving.
Pin It!

Wednesday, July 09, 2014

Pasta with Smashed Peas, Sausage, and Ricotta Cheese

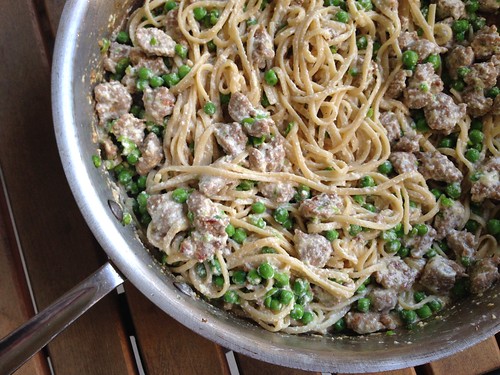
We had an almost-full container of ricotta cheese in the fridge, so I asked SP to search for a recipe to use it up. He found this one for Tagliatelle with Smashed Peas, Sausage, and Ricotta Cheese that sounded both easy and delicious.

Linguine with sausage, peas and ricotta

Like I do with most pasta recipes these days, I only used a half pound instead of the full pound. Cutting down on the pasta while keeping the filler ingredients the same is an easy way for us to get our pasta fix without going overboard. I also cut the peas down from a full pound to a half pound because, wow a pound is a lot of peas. SP wanted the sauce to be smoother. We couldn't taste the ricotta at all, which was disappointing, but we still enjoyed it.

Pasta with Smashed Peas, Sausage, and Ricotta Cheese
Giada De Laurentiis

1/2 pound fresh or dried tagliatelle pasta (or other wide, long pasta)
2 tablespoons olive oil
2 cloves garlic, chopped
1 pound hot Italian sausage, casings removed
1/2 pound frozen peas, thawed
1 cup whole milk ricotta cheese
1 bunch fresh basil leaves chopped (about 3/4 cup)
1/4 cup fresh grated Pecorino Romano cheese
salt and pepper, to taste

Bring a large pot of salted water to a boil over high heat. Cook the pasta according to package directions. Drain, reserving 1 cup of the pasta cooking water.

Meanwhile, in a large, heavy skillet heat the olive oil and garlic over medium-high heat and add the sausage. Use a wooden spoon to break up the sausage into bite-sized bits.

Once the sausage has browned, about 5 minutes, remove and set aside. Add the peas to the pan and, using the back of the wooden spoon, smash the peas.

Turn off the heat. Add the ricotta cheese along with the cooked pasta and toss to coat, adding the pasta cooking water in 1/4 cup additions, if needed, to make the pasta moist. Return the sausage to the pan. Add the basil, Pecorino Romano cheese, and salt. Toss gently to coat and serve immediately
Pin It!

Friday, June 20, 2014

Cooler Corn on the Cob

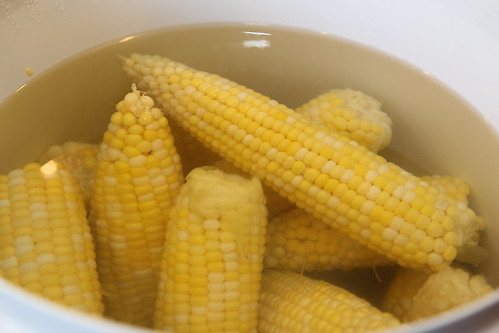
For our recent BBQ-themed dinner with C&T we had something I'd never heard of before - cooler corn on the cob. T had seen the idea on Pinterest when looking for camping meal ideas and figured it would be fun to try for our backyard BBQ. This would be awesome for parties - you can make a large amount of perfectly-cooked corn in no time flat and it keeps warm for hours.

Untitled
Photo credit - T. Casey

The "recipe" is not really a recipe, just a method, but I had to share it with you guys. I'm going to offer to bring cooler corn to the next BBQ we're invited to, just to try it out for myself.

Cooler Corn on the Cob

1 cooler (small or large depending on how much corn you're making)
Corn on the cob

Wash the cooler well. Shuck the corn, removing all the outer levels and silk. Place the shucked corn in the cooler.

Bring a large pot of water to a boil. Pour over the corn. You want to submerge the corn. Close the lid of the cooler and let it sit for at least 30 minutes.

The corn can sit in the cooler for a couple hours. When you're ready to eat, just drain off the water and enjoy.
Pin It!

Friday, May 16, 2014

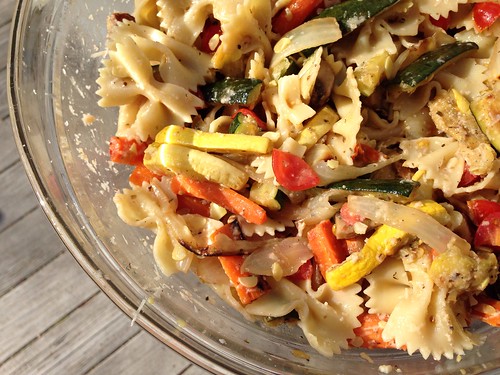
Pasta Primavera

I've been making this Pasta Primavera recipe for years but for some reason I haven't blogged it yet. It's a great way to get plenty of veggies in your diet yet it's easy enough to make on a weeknight. It can be served hot, cold or room temperature, making it great for parties. I served this to my parents for a recent Sunday dinner and the 5 of us put away the whole bowl in one sitting.

Pasta primavera

Pasta Primavera
From Giada De Laurentiis

3 carrots, peeled and cut into thin strips
2 medium zucchini or 1 large zucchini, cut into thin strips
2 yellow squash, cut into thin strips
1 onion, thinly sliced
1 yellow bell pepper, cut into thin strips
1 red bell pepper, cut into thin strips
1/4 cup olive oil
Kosher salt and freshly ground black pepper
1 tablespoon dried Italian herbs or herbes de Provence
1 pound farfalle (bowtie pasta)
15 cherry tomatoes, halved
1/2 cup grated Parmesan

Preheat the oven to 450 degrees F.

On a large heavy baking sheet, toss all of the vegetables with the oil, salt, pepper, and dried herbs to coat. Transfer half of the vegetable mixture to another heavy large baking sheet and arrange evenly over the baking sheets. Bake until the carrots are tender and the vegetables begin to brown, stirring after the first 10 minutes, about 20 minutes total.

Meanwhile, cook the pasta in a large pot of boiling salted water until al dente, tender but still firm to the bite, about 8 minutes. Drain, reserving 1 cup of the cooking liquid.

Toss the pasta with the vegetable mixtures in a large bowl to combine. Toss with the cherry tomatoes and enough reserved cooking liquid to moisten. Season the pasta with salt and pepper, to taste. Sprinkle with the Parmesan and serve immediately.

Pin It!

Friday, March 28, 2014

Recipe Redo: Creamed Spinach

I've been making my friend Melissa's recipe for creamed spinach for years but was never able to get a good photo of the finished product. SP has been hankering for a good steak dinner. Unfortunately there aren't any great steak places nearby that offer a consistently good meal, so we decided to make our own dinner at home. We have a fantastic Amish butcher at a local farmer's market so we picked up some steaks and I whipped up this creamed spinach.

Untitled

Of course I forgot that I wanted to blog the creamed spinach on its own, so this Instagram photo is the best shot I got that night. Trust me, this is a recipe you want to have in your back pocket. It's easy and delicious. The original Emeril recipe calls for fresh spinach, but I always use frozen since finding 2lbs worth of fresh spinach without breaking the bank can be difficult. Frozen is just as good and makes this a side dish I can throw together whenever the mood strikes.

Creamed Spinach
As seen on Alosha's Kitchen, modified from Emeril Lagasse

2 cups frozen spinach
2 tablespoons unsalted butter
1 shallot, finely minced
2 cloves garlic, minced
3/4 teaspoon salt
1/2 teaspoon freshly ground black pepper
1/4 teaspoon nutmeg
1/2 - 1 cup heavy cream

Place the frozen spinach in a microwave-safe bowl and cook for a few minutes (will vary depending on your microwave) until just defrosted. Place in a clean kitchen towel and wring out all the excess water in the spinach.

Melt the butter in a medium saute pan over medium-high heat. Add the shallots and garlic and cook, stirring, until soft and fragrant, about 2 minutes. Add the spinach and cook, stirring, just until the liquid is released. Add the cream (start with 1/2 cup), salt, pepper, and nutmeg, and cook until the cream is reduced by half, about 4 minutes. You may want to add more cream if it looks dry. Remove from the heat and serve immediately.
Pin It!

Wednesday, March 05, 2014

Salad with Pancetta, Pepperoncini and Parmesan

I was looking for something different to serve alongside the Breakfast Risotto I made a few weeks ago. I remembered Bridget's recipe for Salad with Pancetta, Peperoncini and Parmesan and figured it would be perfect since both recipes called for pancetta.

Untitled

We all enjoyed this salad, although the peperoncini were a bit too spicy for Baby Girl. It's a very simple salad that packs great flavor. Baby Girl was popping the pancetta like candy and really enjoyed the dressing.

Salad with Pancetta, Peperoncini, and Parmesan
As seen on The Way the Cookie Crumbles

Dressing:
2 cloves garlic
1/2 teaspoon salt
1/2 teaspoon pepper
1 1/2 tablespoons fresh lemon juice
1 teaspoon Worcestershire sauce
1 teaspoon Dijon mustard
1/4 cup extra virgin olive oil

Salad:
2 romaine hearts, washed and chopped
8 peperocini, stems removed, chopped fine
6 ounces pancetta, cooked and crumbled
1/2 cup (1 ounce) shredded parmesan

For the dressing: Heat a small nonstick skillet over medium heat. Add the garlic cloves in their peels and allow to toast, turning often, until the peel starts to blacken in spots, about 5 minutes. Allow to cool, then remove the peel and mince the garlic. Combine the garlic with the rest of the dressing ingredients.

For the salad: Mix everything together, then toss with the dressing.
Pin It!

Monday, March 03, 2014

Crispy Black Bean Tacos with Feta and Slaw

Sometimes I'll put a dish on our weekly meal plan that makes SP nervous. He's always game to try anything I make and he's the first to say, "I trust you because you're a good cook" but we all know that sometimes a recipe can sound good on paper but not taste so great in person.

Untitled

These Crispy Black Bean Tacos with Feta and Slaw were one of those dishes that initially made him wary. When I told him the name of the dish he gave me that side-eye look of his that lets me know he's reserving judgement. I think it was the corn tortillas - neither of us are big fans of corn tortillas, but I knew frying them in a bit of oil would completely change their texture for the better.

Untitled

I'm happy to report that he loved these tacos, as did I. Baby Girl was also a huge fan. Per usual, she wanted to taste the black bean mixture and snacked on the broccoli slaw as I was getting everything prepped. Like Elly says, these are an awesome weeknight meal because there's very little prep work or cooking needed. I'm so happy SP loved this dish because I can't wait to make it again.

Crispy Black Bean Tacos with Feta and Slaw
As seen on Elly Says Opa, from Bon Appetit
Makes 8 tacos

1 (15 oz.) can black beans, drained and rinsed
1/2 teaspoon cumin
salt and pepper
1 1/2 cups broccoli slaw mix
2 teaspoons olive oil
1 tablespoon lime juice
2 scallions, thinly sliced
1/3 cup chopped cilantro
vegetable or canola oil
8 white or yellow corn tortillas
crumbled feta cheese
Bottled hot sauce for serving

Place the beans, cumin, and salt and pepper to taste in a bowl and partially mash.

In another bowl, toss the broccoli slaw mix with olive oil, lime juice, scallions and cilantro. Season to taste with salt and pepper, and set aside.

Heat about 3 teaspoons of the vegetable or canola oil in a large nonstick skillet over medium-high heat. Add as many tortillas as you can fit in a single layer. Move the tortillas around in the pan so they're all evenly coated with oil on both sides. After one side is golden brown, flip the tortillas over and spoon some of the bean mixture onto one half of each tortilla. Cook for about 1 minute. Fold the tacos in half and cook until golden brown and crispy, 1-2 minutes per side.

Remove the tacos to a paper towel-lined plate and drain off any excess oil. Open the tortilla and stuff with some of the slaw and crumbled feta. Repeat the process with the remaining tortillas, adding more oil to the pan, as needed. Top with hot sauce, if desired, before serving.
Pin It!

Friday, December 13, 2013

Recipe Swap: Leek and Pea Risotto

Time for another recipe swap! This month's theme was Blogger's Choice, which means we can pick any recipe from our assigned blog. I got my friend Mary Ellen's blog and let me tell you, I had a REALLY hard time picking a recipe to make. I've already made quite a few of her things and I just couldn't narrow down what I wanted to make. Did I want chicken, tofu, vegetarian, breakfast? I had no idea. Everything sounded good. Finally I decided to make a risotto since Mary Ellen has said numerous times that it's her favorite thing to make. I chose this Leek and Pea Risotto because I had some leeks I needed to use up and I always have frozen peas on hand.

leek and pea risotto2

The only change I made was to leave the leeks in the pan while I cooked the rice rather than removing them, which may have been a mistake. SP said he couldn't taste the leeks at all, so maybe they'd have been more pronounced if they hadn't cooked down so much. Even so, this was outstanding. I really love risotto and it's so easy to make. I don't know why it has such a bad reputation for being difficult.

leek and pea risotto

I served the risotto with crispy pork chops - I pounded the pork very thin then breaded it with egg and panko bread crumbs, then shallow-fried them in some vegetable oil. They were the perfect accompaniment. This was an outstanding dinner. I can't wait to make more versions of risotto. Check out Mary Ellen's risotto tab for more recipe ideas.


Leek and Pea Risotto
As seen on Mary Ellen’s Cooking Creations

6 cups chicken broth
3 tablespoons extra-virgin olive oil
2 medium leeks (white and pale green parts only), thinly sliced and washed
1 1/4 cups Arborio rice
1/4 cup dry white wine
1/2 cup frozen peas
2 tablespoons unsalted butter (I didn't use this)
1/3 cup grated Parmigiano-Reggiano

Bring stock to a simmer in a medium saucepan, then keep at a low simmer.

Cook leeks in 2 tablespoons oil in a 4-quart heavy pot over medium heat, stirring occasionally, until softened but not browned, 7 to 8 minutes. Transfer to a plate.

Add remaining tablespoon oil and rice to pot and cook, stirring constantly, until rice is coated evenly, about 1 minute.

Add wine and simmer, stirring, until most has been absorbed, about 1 minute.

Add 1 cup hot stock to the pan. Stir constantly until stock has been absorbed. Continue simmering and adding hot stock, 1 cup at a time, stirring constantly and allowing each addition to be absorbed before adding the next, until 1 cup stock is left, 15 to 18 minutes.

Add peas, leeks, and remaining cup of stock and cook, stirring, until rice is just tender, 3 to 5 minutes.

Stir in butter and cheese then remove from heat.

To check out what the other bloggers chose click the links below:


Pin It!

Wednesday, December 11, 2013

Roasted Carrots

I feel like I'm in a vegetable rut. I always make the same things over and over again. I've never been a huge fan of carrots but I do like them roasted. In the interest of changing up our routine I went on a hunt for an easy recipe to make one night and found these Roasted Carrots.

roasted carrots

Simple and delicious. It takes hardly any time at all to prepare these and then the oven does all the work.

Roasted Carrots
Recipe from Pastor Ryan

3 lbs carrots, peeled
1/4 cup olive oil
2 teaspoons fresh thyme
salt and pepper, to taste
4 scallions, minced

Preheat the oven to 400 degrees.

If the carrots aren't all the same size, cut them down the middle lengthwise into same-size pieces. Lay them on a sheet pan or in a baking dish and drizzle with olive oil. Sprinkle with the fresh thyme, salt and pepper.

Bake for 35-40 minutes until they're soft. Sprinkle with chopped scallions and serve.
Pin It!

Monday, December 02, 2013

Roasted Green Beans

I love to roast vegetables but I never thought to roast green beans until the girls on my cooking board mentioned it. And it couldn't be simpler - toss with seasonings and oil and roast until tender.

Roasted green beans

There are a ton of variations - my cooking board mentioned adding onions or mushrooms, garlic, various spices, even soy sauce and orange juice for an Asian spin - but so far I've only done oil, salt and pepper. I'll definitely be experimenting soon, though.

Recently I roasted 2lbs of green beans for 5 adults and 1 child and we had very few leftover. They're so addicting we kept going back for more.

Roasted Green Beans

2lbs green beans
2 tablespoons olive oil
salt and pepper

Preheat the oven to 425 degrees.

Trim the ends off the green beans and place in a 9 x 13" baking dish. Add the oil and season with salt and pepper. Toss to coat all the beans evenly.

Bake for 10-15 minutes or until the beans are tender and starting to brown in spots. Every few minutes give them a toss with tongs.
Pin It!

Wednesday, November 27, 2013

Cauliflower Gratin

This was one of two side dishes I served with the turkey meatloaf - Ina's Cauliflower Gratin. Cauliflower isn't a vegetable I cook with regularly, but it's a great alternative to broccoli or other cold-weather vegetables. And bonus, SP and Baby Girl both love it.

Cauliflower gratin2

When I think of gratins I think of heavy, cream-laden dishes but this was surprisingly light. The sauce is made with milk, not cream, and there's only 4 tablespoons of butter for a 3-lb head of cauliflower.

Cauliflower gratin

We all loved this. I can't wait to experiment with more cauliflower dishes this winter.

Cauliflower Gratin
Recipe from Ina Garten

1 (3-pound) head cauliflower, cut into large florets
Kosher salt
4 tablespoons (1/2 stick) unsalted butter, divided
3 tablespoons all-purpose flour
2 cups milk
1/2 teaspoon freshly ground black pepper
1/4 teaspoon grated nutmeg
3/4 cup freshly grated Gruyere, divided
1/2 cup freshly grated Parmesan
1/4 cup fresh bread crumbs (from one slice of bread)

Preheat the oven to 375 degrees.

Cook the cauliflower florets in a large pot of boiling salted water for 5 to 6 minutes, until tender but still firm. Drain.

Meanwhile, melt 2 tablespoons of the butter in a medium saucepan over low heat. Add the flour, stirring constantly with a wooden spoon for 2 minutes. Pour the milk into the butter-flour mixture and stir until it comes to a boil. Boil, whisking constantly, for 1 minute, or until thickened. Off the heat, add 1 teaspoon of salt, the pepper, nutmeg, 1/2 cup of the Gruyere, and the Parmesan.

Pour 1/3 of the sauce on the bottom of a 2 1/2-quart baking dish. Place the drained cauliflower on top and then spread the rest of the sauce evenly on top. Combine the bread crumbs with the remaining 1/4 cup of Gruyere and sprinkle on top. Melt the remaining 2 tablespoons of butter and drizzle over the gratin. Sprinkle with salt and pepper.

Bake for 25 to 30 minutes, until the top is browned. Serve hot or at room temperature.
Pin It!