Showing posts with label dessert. Show all posts

Wednesday, January 20, 2021

Grapefruit Cake

Early in the pandemic I went on a baking spree because we needed all the comforting things. I also instituted 3pm dessert as a way for us to get out of our respective funks, gather in the kitchen and have something sweet. 

To blog

This grapefruit cake came about because Katie insisted that Steve buy a grapefruit on their last shopping trip together before the lockdown. She didn't want to eat it plain, so I Googled dessert recipes and came across this one. It was so, so, so good. Nice and flavorful from the grapefruit with a perfect sweetness thanks to the glaze.

Grapefruit Greek Yogurt Cake
As seen on Sally's Baking Addiction

1 1/2 cups flour
1 1/2 teaspoons baking powder
1/2 teaspoon salt
3 large eggs
3/4 cup plain, vanilla or citrus Greek yogurt
1 cup packed light brown sugar
1/2 cup vegetable or canola oil
1/4 cup freshly squeezed grapefruit juice, strained
1 1/2 tablespoons grapefruit zest
1 teaspoon pure vanilla extract
seeds scraped from 1/2 of a vanilla bean (optional)

Grapefruit Glaze
1 cup confectioners’ sugar, sifted
2 tablespoons freshly squeezed grapefruit juice, strained
1/4 teaspoon pure vanilla extract

Preheat the oven to 350 and grease a 9×5 inch loaf pan.

Whisk the flour, baking powder, and salt together in a large bowl. In a medium bowl, whisk the eggs. Once combined, whisk in the yogurt, brown sugar, oil, grapefruit juice, zest, vanilla extract, and (optional) seeds. Pour the wet ingredients into the dry ingredients and mix with a large wooden spoon or rubber spatula until combined.  Spread batter into the prepared loaf pan. 

Bake for 45-50 minutes. Baking times vary, so keep an eye on it. The cake is done when a toothpick inserted in the center comes out clean. If you find the top of the cake is browning too quickly in the oven, loosely cover it with aluminum foil.

Remove the cake from the oven and set on a wire rack. Allow to cool before drizzling with glaze.
For the glaze, whisk the ingredients together and drizzle over cake. Slice and serve. 

Cover and store leftover cake at room temperature for up to 5 days or store it in the refrigerator.

Pin It!

Sunday, January 03, 2021

Pear Custard Pie

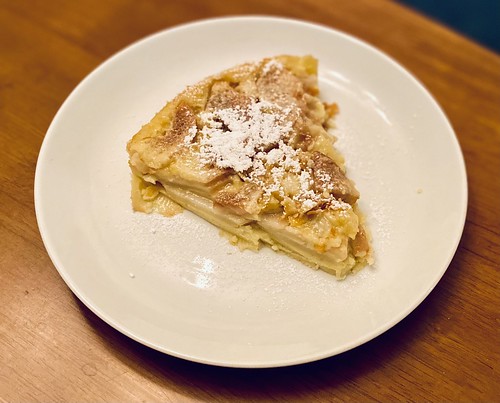
A few years ago someone gifted us Harry & David pears and we've been hooked ever since. Now we just buy them for ourselves and gorge on the sweet perfection. The problem is that they all seem to ripen at the same time and a person can only eat so many pears. 

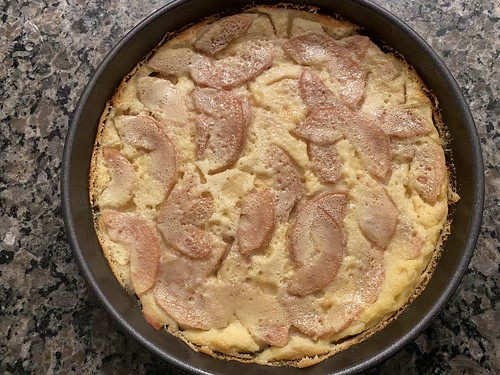
Enter the Pear Custard Pie. I did a quick search for easy pear desserts and this is the second one that came up. I wanted something I could throw together quickly and this certainly fit the bill. The hardest, most time-consuming part is peeling the pears. The batter is made in a blender and then you bake it.


We loved this so much that I made a second cake the next day. Steve and Katie have decided that every year we'll use 8 pears to make two cakes and eat the remaining 2 pears for breakfast. Sounds good to me.

The flavor of the pear really shines so be sure to use good quality pears (like the ones from Harry & David).

Pear Custard Pie

As seen on Dinner at the Zoo

Cooking spray
4 firm pears peeled, cored and thinly sliced
4 tablespoons unsalted butter, melted
3 eggs
3/4 cup milk
1/4 teaspoon kosher salt
1/3 cup granulated sugar
1/3 cup all purpose flour
2 teaspoons pure vanilla extract
Powdered sugar for garnish

Preheat the oven to 350. Coat a 9 inch round cake pan with cooking spray. Arrange the pear slices in the pan.

Put the butter, eggs, milk, salt, granulated sugar, flour and vanilla into a blender; process until smooth.
Pour the batter over the pears. 

Bake for 40-45 minutes until the custard is golden and firm to the touch. Cool slightly and dust the top with powdered sugar before serving.

Leftovers can be refrigerated up to 3 days, but be sure to reheat the slices for about 20-30 seconds in the microwave to take the chill off.


Pin It!

Thursday, June 25, 2020

Zucchini Muffins

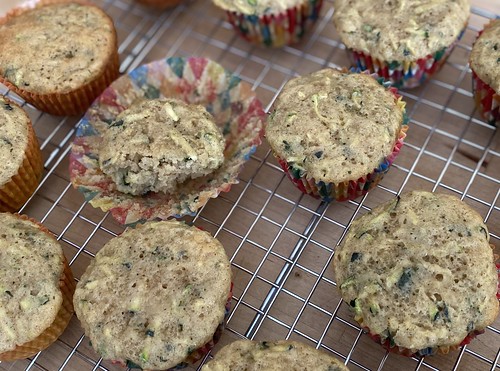
I can't believe I've never baked with zucchini. We love zucchini and I use it a lot in savory recipes like Crispy Baked Zucchini Fries, Zucchini Corn Pizza, Cheesy Zucchini Rice, zucchini fritters, on skewers, in summer pastas, etc. But this was my first time baking with it.

Zucchini muffins

The result? So good!! None of us could taste the zucchini. Now, I'll admit this is not exactly the healthiest recipe. If you're looking for a healthy way to get your kids to eat veggies, this isn't it. But they were delicious and a great way to use up zucchini that was past its prime.

The original recipe said it would yield 12 muffins. I got 15. I'm also not one to measure certain ingredients so I probably had more than 2 cups of shredded zucchini.

Zucchini Muffins
As seen on Land O Lakes

1 1/2 cups all-purpose flour
1 cup sugar
1/2 teaspoon baking powder
1/2 teaspoon baking soda
1/2 teaspoon ground cinnamon
1/2 teaspoon salt
1/2 cup unsalted butter, melted
2 large eggs
1 medium (2 cups) zucchini, shredded

Heat oven to 350. Put paper baking cups into 12 (or more) muffin pan cups; set aside.

Combine flour, sugar, baking powder, baking soda, cinnamon and salt in bowl; mix well. Combine butter and eggs in bowl; stir into flour mixture just until moistened. Stir in zucchini.

Use an ice cream scoop to fill prepared muffin pan cups three-fourths full with batter. Bake 22-25 minutes or until toothpick inserted into center comes out clean. Cool 5 minutes in pan; remove to cooling rack.
Pin It!

Thursday, October 17, 2019

Strawberry Summer Sheet Cake

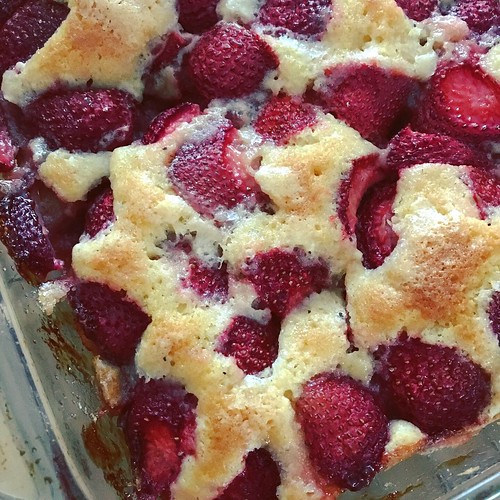
I know strawberry season is long gone but if I don't blog this Strawberry Summer Sheet Cake now it'll sit in my draft folder for years and never see the light of day. So just agree to save this for next spring/summer, OK? Great.

To blog

I went through a baking phase this summer, fueled mostly by all the amazing produce (fruit) available. We'd buy way more than we could eat in a week, so by Thursday I'd be Googling recipes for overripe fruit. We shared all the spoils with friends and they seemed very happy about it, so it was a win-win.

This cake was so good. Oof. Just looking at the photo again is making me wistful. It wasn't overly sweet, which we loved. The berries really shone through and the cake itself was moist and delicate. We didn't do this, but a scoop of vanilla ice cream would be perfect on top of a slice. Or a dusting of powdered sugar. Or whipped cream.

Strawberry Summer Sheet Cake
From Smitten Kitchen

9 tablespoons unsalted butter, at room temperature
3/4 teaspoon fine sea or table salt
1 1/2 cups plus 3 tablespoons granulated sugar
1 large egg
1 large egg yolk
1 1/2 teaspoons vanilla extract
3/4 cup milk
2 1/4 teaspoons baking powder
2 1/4 cups flour
1 1/2 pounds of the freshest, even a touch overripe, strawberries, hulled and halved
Vanilla ice cream, powdered sugar or whipped cream, for serving

Heat your oven to 350°F.

Lightly coat the sides and corners of a 9×13-inch pan with butter or nonstick spray, and fit the bottom with a rectangle of parchment paper.

In a large bowl, beat butter, salt, and 1 1/2 cups of the granulated sugar until light and fluffy. Add egg, yolk, and vanilla and beat until combined. Add milk and mix until (updated) combined; it may look a little curdled but don’t fret, it will smooth out in a minute. Sprinkle baking powder evenly over batter and beat into batter for 20 seconds longer than will seem necessary — this ensures it’s perfectly distributed. Scrape down the bowl. Add flour and beat or stir until just combined.

Spread batter in prepared pan. Arrange strawberries cut side down, as snugly as you can get them to fit. If you have extra, nudge them in anyway. Leave no strawberries behind. Sprinkle with remaining 3 tablespoons of sugar — it will seem like a lot but helps the strawberries get jammy and gives the cake a great texture.

Bake until golden brown and a toothpick inserted into the cake comes out free of wet batter (gooey strawberries are a given and doesn’t mean it’s under baked) — about 45 to 48 minutes. Let cool in pan on a rack. Cut into squares and serve.

Do ahead: Cake is even better a half- to a full day later, when the strawberries marry with better with the cake.
Pin It!

Wednesday, October 16, 2019

Green Tea Ice Cream

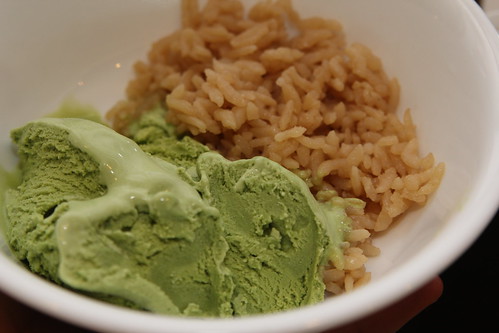
This is one of the recipes I found in my draft folder that had never been published. It was from one of the themed dinners we used to do with our friends, Chris and Tracie. I posted the other recipes from this meal back in 2015 (!!!) but not this one. I wish I knew why. It was an Asian-inspired meal and we made: Pork and Shrimp Dumplings, Fried Rice, someone brought sushi and someone else brought some sort of meat dish. Forgive me, it's been 4+ years.

This is what I wrote at the time:

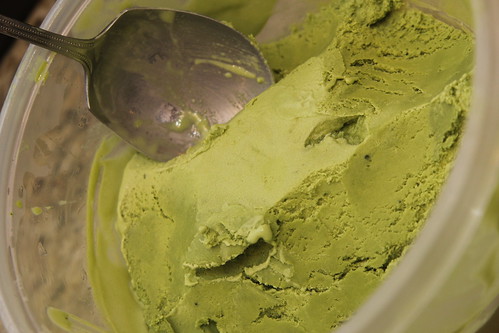
One of T's contributions to our Asian meal was Green Tea Ice Cream. I've never had it before and couldn't wait to try it.

Asian night
(all photos by T. Casey)

Just look at that color - I love it!

Asian night

Green Tea Ice Cream
As seen on Annie's Eats
Yield: about 1 quart

1 cup whole milk
3/4 cup sugar
Pinch of salt
2 cups heavy cream
4 teaspoons matcha (green tea powder)
6 large egg yolks

Combine the milk, sugar and salt in a medium saucepan. Heat over medium heat until warmed through. Meanwhile pour the heavy cream into a large bowl and whisk in the matcha. Set a fine mesh sieve over the bowl.

In a separate medium bowl, whisk the egg yolks until smooth. Whisking constantly, slowly pour the warmed milk mixture into the bowl with the egg yolks. Return the entire mixture to the saucepan and continue to cook, stirring constantly and scraping the bottom of the pan, until the mixture thickens slightly (it will register 170-175˚ F on an instant read thermometer). Immediately remove from the heat and pour the mixture through the mesh strainer into the bowl with the cream mixture. Whisk the mixture vigorously to dissolve the green tea powder. Cover and chill in the refrigerator.

Once the mixture is thoroughly chilled, transfer it to an ice cream maker and freeze according to the manufacturer’s instructions.
Pin It!

Thursday, October 10, 2019

Salted Chocolate Chunk Cookies

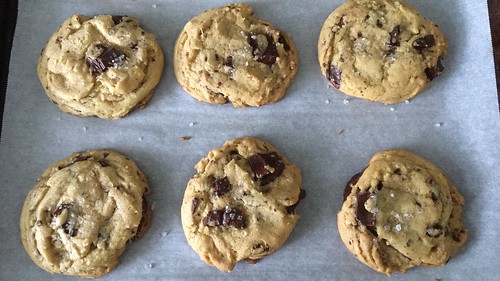
I went through a phase a few summers ago where I made these cookies every few weeks. They're just that addictive. I don't know about you all, but I love a good mash up of salty and sweet. That's where these Salted Chocolate Chunk Cookies shine.

Salted chocolate chunk cookies

Salted Chocolate Chunk Cookies
Smitten Kitchen

1 stick unsalted butter, at room temperature
2 tablespoons granulated sugar
1 cup packed light or dark brown sugar
1 large egg
1 teaspoon vanilla extract
3/4 teaspoon baking soda
Heaped 1/4 teaspoon (1/4 + 1/8 teaspoon) fine sea or table salt
1 3/4 cups flour
1/2 pound semi-or bittersweet chocolate, cut into roughly 1/2-inch chunks with a serrated knife
Flaky sea salt, to finish

Heat oven to 360°F and line two baking sheets with parchment paper.

In a large bowl, cream the butter and sugars together with an electric mixer until very light and fluffy, about 5 minutes. Add egg and vanilla, beating until incorporated, and scraping down the bowl as needed. Beat in salt fine sea or table salt and baking soda until combined, then the flour on a low speed until just mixed. The dough will look crumbly at this point. With a spatula, fold/stir in the chocolate chunks.

Scoop cookies into 1 1/2 tablespoon mounds, spacing them apart on the prepared baking sheet. Sprinkle each with a few flakes of sea salt. Bake for 11 to 12 minutes, until golden on the outside but still very gooey and soft inside. Out of the oven, let rest on baking sheet out of the for 5 minutes before transferring a cooling rack.

Pin It!

Tuesday, February 12, 2019

Cheese Danish

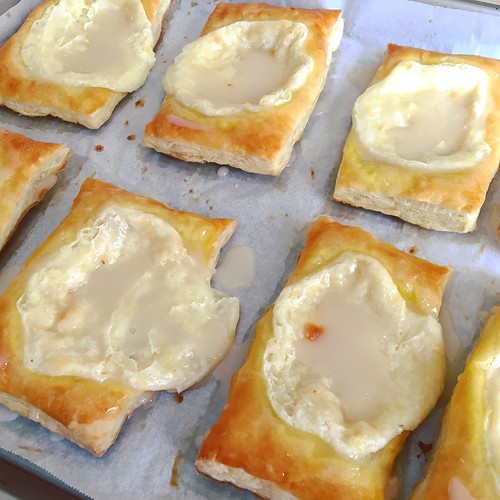
I'm so glad Kate over at Kate's Recipe Box decided to try her hand at homemade cheese danish. I love them...when they're good. And they rarely are. Most have barely a hint of cheese filling and the filling is tasteless, more texture than flavor. But these are incredible. And so easy thanks to frozen puff pastry dough.

Cheese danish

I cut my dough into 8 pieces, which was a good size for us. We all agreed that we didn't need the glaze in the original recipe. I also added a pinch of salt to the cheese filling.

Cheese Danish
As seen on Kate’s Recipe Box
Makes 8-12

1 sheet frozen puff pastry
6 oz. cream cheese, softened
4 tablespoons sugar
pinch of salt
1 teaspoon lemon zest
1 teaspoon vanilla extract
1 egg
1 tablespoon water

Thaw the puff pastry at room temperature for an hour, until it unfolds without breaking. Preheat the oven to 350 degrees. Line a baking sheet with parchment paper.

Roll out the puff pastry into roughly a 9 x 13" rectangle. Cut into 8 or 12 even pieces. Lay the pieces on the lined baking sheet.

Using a hand mixer, beat together the cream cheese, sugar, salt, lemon zest, and vanilla. Place about 2 tablespoons of the cream cheese mixture on top of each puff pastry, spreading out slightly so you have only a thin band of dough at the edges.

Beat the egg with the water and brush evenly over the puff pastry.

Bake for 15-20 minutes, until the puff pastry is lightly browned. Let cool to room temperature and serve.
Pin It!

Monday, May 15, 2017

Chocolate Chip Croissant Bread Pudding

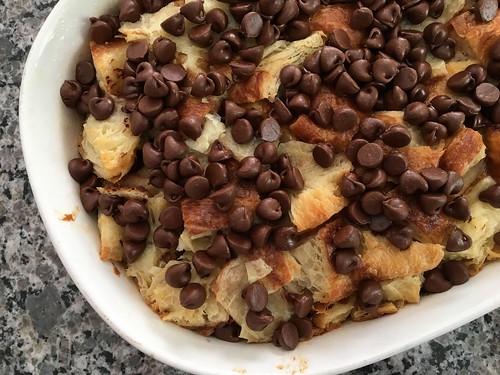
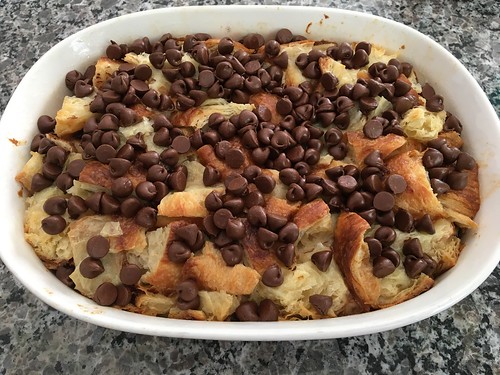
You guys. This chocolate chip croissant bread pudding is Ah-May-Zing. Utterly and completely decadent and worth every calorie.

Chocolate chip bread pudding

I was looking through my recipes for something to make for Mother's Day dessert when I stumbled upon this recipe from Fake Ginger I'd printed a while back. You probably don't know this about me, but I'm a sucker for a chocolate croissant. I used to get them from my college bakery all the time. I'd ask them to heat it up to slightly melt the chocolate in the middle. What I appreciated the most was that the chocolate actually went from edge to edge, not like some bakeries where there's maybe 1 tablespoon of chocolate inside. This recipe is basically turning my beloved chocolate croissant into a shareable dessert!

Chocolate chip bread pudding

After reading the directions I decided to skip slicing and toasting the croissants. Bite-sized pieces are more traditional for bread pudding and toasting seemed completely unnecessary. The result was fantastic. Some of the bread pudding was ooey and gooey, other bites were crispy. It was the perfect blend of textures. We were all oohing and ahhing as we ate and I'm already dreaming about the leftovers in the fridge.

Chocolate Chip Croissant Bread Pudding
Slightly modified from Fake Ginger

4 tablespoons unsalted butter, melted and cooled slightly
3 large eggs
1 cup milk
1 cup heavy cream
1/4 cup sugar
1 teaspoon vanilla
1/4 teaspoon salt
6 croissants, torn or cut into pieces
1 1/2 cups milk chocolate chips

Preheat oven to 350F. Grease a 2-quart baking dish.

Whisk together the melted butter, eggs, milk, heavy cream, sugar, vanilla, and salt. Place half the croissant pieces in a 2-quart baking dish. Sprinkle about 2/3 of the chocolate chips over them and then top with remaining pieces of croissant.

Pour the egg mixture over top, pressing down gently to make sure most of the croissants are covered. You don't want all the pieces completely submerged.

Cover with foil and bake for 30 minutes. Uncover, sprinkle the remaining chocolate chips on top and bake until golden brown, 15-20 minutes more.

Let sit for 15 minutes before serving.
Pin It!

Monday, May 09, 2016

Buttermilk Pie

Whenever I buy a quart of buttermilk to make my homemade chicken nuggets, I end up with quite a lot leftover. I've heard about powdered buttermilk, but I've never seen it in our supermarket. I've also tried a homemade version using milk and lemon juice, but I didn't think it tasted the same. I have an amazing recipe for IHOP pancakes that uses buttermilk, so we usually have pancakes a few weekends in a row. But this time I wanted to try something different, especially after my friend, Kylee, posted this recipe for Buttermilk Pie.

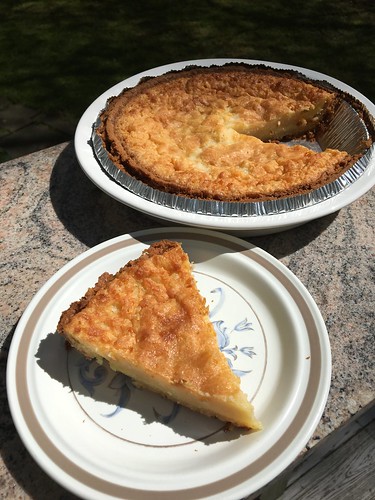
Untitled

From what I understand, this is a Southern staple, which means I'd never heard of it before Kylee posted the recipe. I went into this with zero expectations, just excited to try something new.

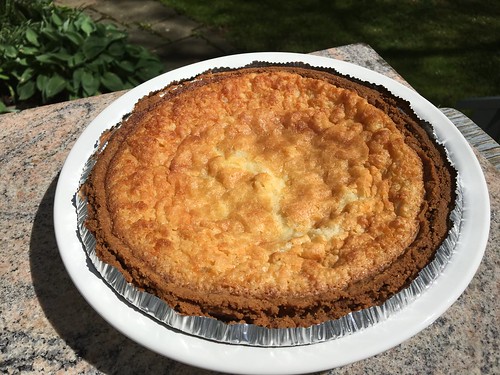
Untitled

The recipe couldn't be easier - you just mix all the ingredients together and pour into a pie crust. This actually makes two pies, so it's perfect for a family get together or to bring into the office. We gave the second one away to a friend and he said the pie was gone the next morning.

The consistency is almost like a custard, but denser. It's impossible to describe - there's a hint of vanilla, a slight tang from the buttermilk and a mellow sweetness. I chose a ready-made shortbread pie crust because I didn't want to futz with making my own crust, but next time I might try to find a traditional pie crust instead. I did over bake my pies (the tops are very brown) so make sure you start with 50 minutes and check it often.

Buttermilk Pie
As seen on Kylee Cooks

6 eggs, beaten
1 cup low fat buttermilk
1 teaspoon vanilla
2 cups sugar
2 tablespoons cornstarch
1 teaspoon table salt
1 cup butter, melted and cooled
2 unbaked 9-inch pie crusts

Preheat the oven to 350.

In a large bowl, beat the eggs, buttermilk and vanilla together with a hand mixer for about 5 minutes. In a medium bowl, combine the sugar, cornstarch, salt and melted butter. Mix until well combined. Add the sugar mixture to the eggs and stir together, using a wooden spoon, until just combined.

Put the pie crusts (in pie plates) onto a large baking sheet. Divide the filling between the two crusts.

Bake for 50-55 minutes. You want the filling to be loose/wobbly (kind of like a thick custard) when you tap it, but not runny and the top to be lightly browned.

Let the pies cool completely. Serve at room temperature.
Pin It!

Friday, May 06, 2016

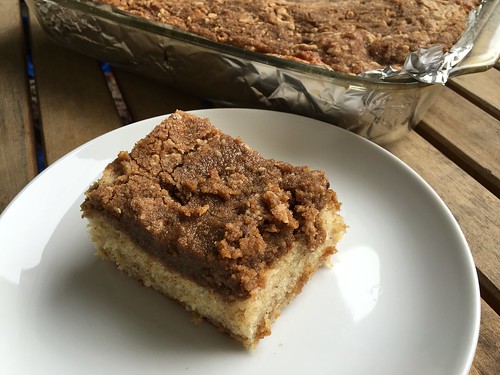
Banana Crumb Coffee Cake

What do you do when you have overripe bananas sitting on your counter? You bake with them, of course. As luck would have it, I saw this recipe for Banana Crumb Coffee Cake just as my bananas were starting to go from edible to mush. A quick check of the pantry and fridge showed I had all the ingredients on hand, so I set to baking.

Banana crumb coffee cake

What a cake. I loved the subtle banana flavor mixed with the traditional coffee cake. This was moist and delicious, just perfect to have with your morning coffee or tea (I don't drink either, by the way) or as a sweet treat.

A few notes:

1. I don't like using my stand mixer so I used my hand mixer. It worked fine.
2. I don't own a pastry cutter, so I attempted to break up the butter for the streusel topping by hand. It didn't work. I ended up just mixing it together as best I could and sprinkling it on top of the cake. The butter melts as the cake cooks, so it didn't matter.
3. I tried to divide the batter in half, sprinkling some of the streusel in the middle before topping with the remaining batter. It didn't work. It also didn't matter.
4. Steve is lactose intolerant, so he asked me not to glaze the cake (since the glaze contains milk). And, let's be honest, this is sugary enough without adding more sugar on top. You won't miss it. We certainly didn't.
5. This makes a TON of food, which makes it great if you're having a party or know people who will take a few slices off your hands. We kept four pieces for ourselves and gave away the other 12 (3 sets of 4 pieces each). We had some very thankful friends and family, let me tell you.

Banana Crumb Coffee Cake
As seen on Tide and Thyme

2 cups flour
3 teaspoons baking powder
1 teaspoon salt
3 ripe bananas
1/2 cup butter, room temperature
2 cups granulated sugar
2 eggs
1 teaspoon vanilla extract
1 cup milk

For the streusel:
12 tablespoons (1 ½ sticks) cold butter, cubed
1 1/2 cups light brown sugar
1 1/2 cups flour
1 teaspoon cinnamon

For the glaze:
1 cup powdered sugar
1 teaspoon vanilla extract
1-2 tablespoons milk

Preheat oven to 350 degrees. Line a 9×13 baking dish with aluminum foil and spray with cooking spray. Set aside.

In a medium bowl whisk together flour, baking powder and salt.

In a stand mixer fitted with a paddle attachment (or a large bowl with a hand mixer), mash bananas until they become liquified. Mix in butter until combined and then mix in sugar, eggs, milk, and vanilla.

With mixer running on low, carefully add flour and mix until just combined.

Prepare streusel by combining all the ingredients in a medium bowl, cut the butter in with a pastry cutter until a coarse crumb forms.

Pour 1/2 of the batter into the prepared pan. Top with 1/3 of the crumb mixture. Cover the filling with the remaining batter and top with remaining crumb mixture. Don't worry if this doesn't work - it didn't for me and it still tasted great.

Bake for 50-55 minutes until the center is set and a toothpick comes out clean. Cool for at least 1 hour.

Mix together the glaze ingredients and drizzle over the cake before serving.
Pin It!

Monday, February 15, 2016

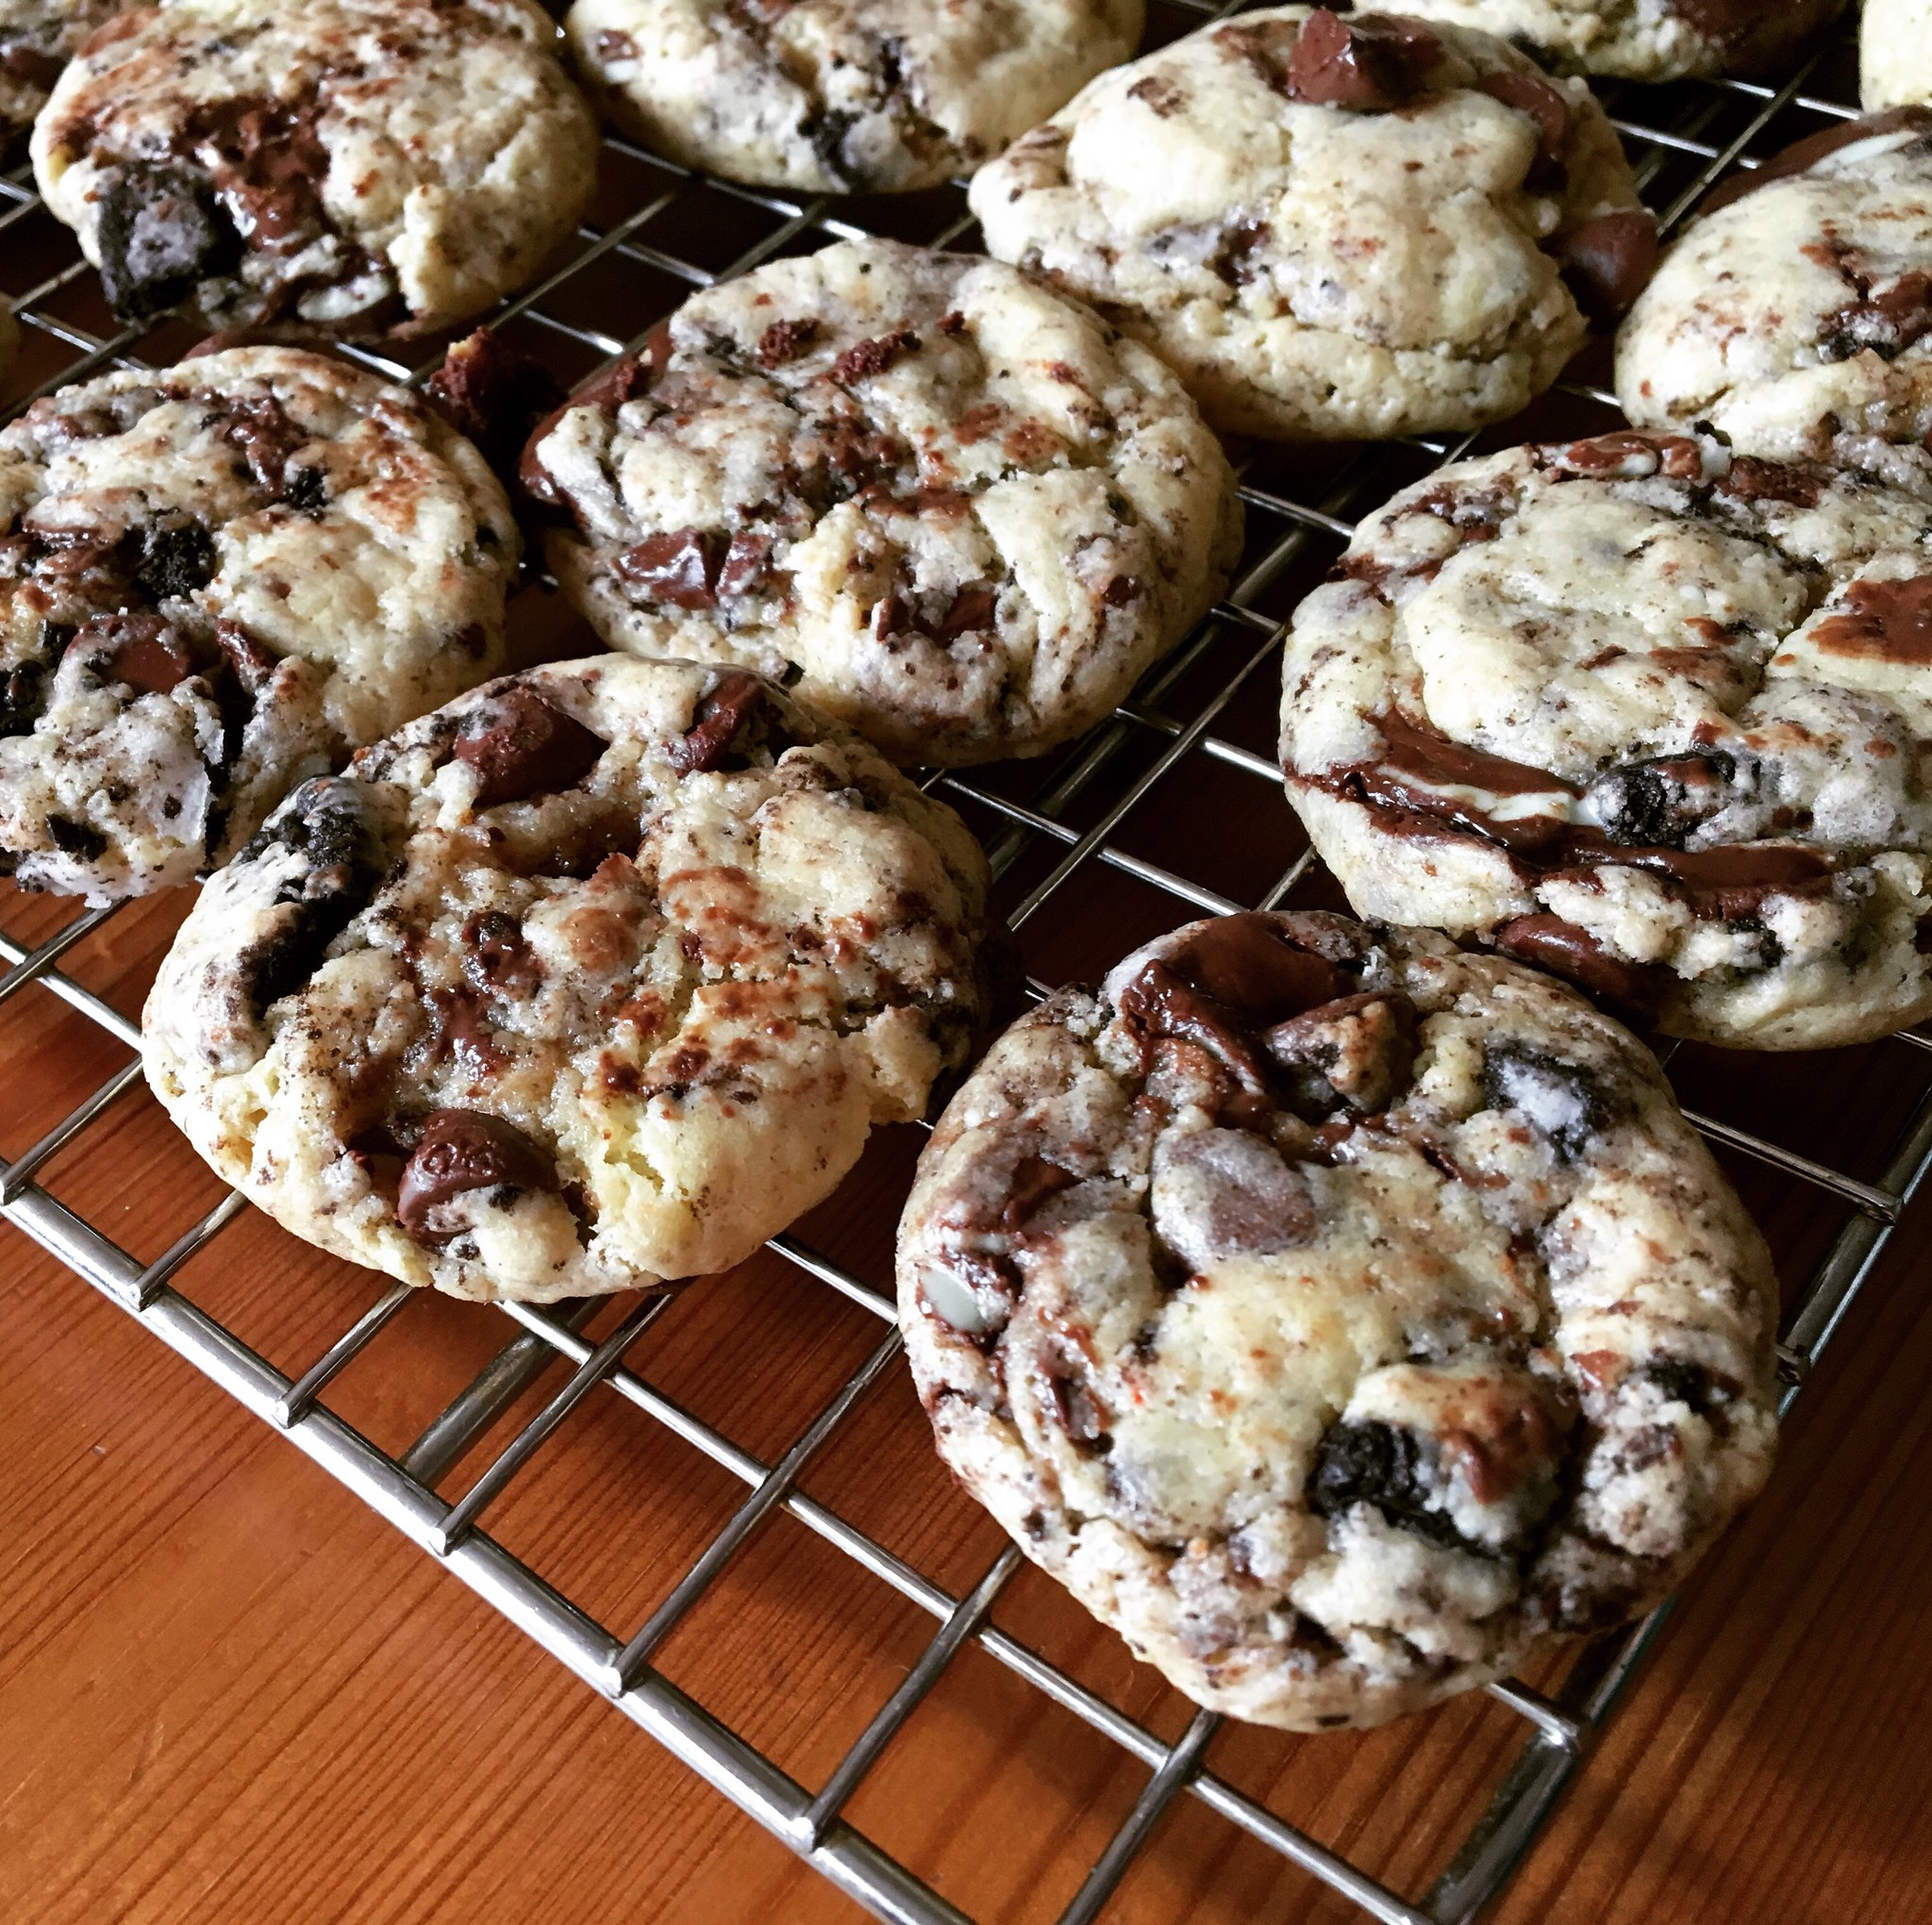
Oreo Peppermint Cookies

You're going to laugh at me. Do you want to know the reason I made these Oreo Peppermint Cookies? It's because I had half a brick of cream cheese leftover from the weekend of Winter Storm Jonas when we treated ourselves to bagels for breakfast.

That seems silly, right, trading cookies for a bagel. But see, here's the thing - if there's cream cheese in the house, I'll want to buy bagels to use it up. And then it becomes a vicious cycle of buying more cream cheese to finish the bagels and more bagels to finish the cream cheese. The truth is, I have a serious weakness for bagels. I used to eat half an everything bagel with cream cheese for breakfast every morning. In the summer I'd add nice, thick slices of fresh Jersey tomatoes and wash it all down with a tall glass of orange juice. That breakfast was the first thing to go when I decided to get serious about weight loss, exercise and healthier living a few years ago.

Oreo peppermint cookies

But cookies...meh. I can take or leave a cookie. The only dessert I have no willpower over is cake. I figured I'd make these cookies, we'd eat a few and then the rest would go into the office with Steve. Katie and I made the dough one Sunday morning and baked them off that afternoon before we went to my parent's house for Sunday dinner. And, as planned, the rest went to the office Monday morning.

Steve couldn't find the Andes Peppermint Crunch chips listed in the original recipe, so he just got a regular box of Andes mints. I crushed them up like I did for the Oreos and that worked fine and tasted great.

Because of the cake mix, these don't taste like your typical homemade cookie, but everyone who tried them liked them.

Oreo Peppermint Cookies
Slightly modified from Inside BruCrew Life

1 box yellow cake mix
1 stick butter, melted
1 egg
1/2 teaspoon peppermint extract
1/2 teaspoon vanilla extract
4 ounces cream cheese, softened
8 Oreo cookies, crushed into pieces
1 package Andes mints, crushed (or 1 cup Andes Peppermint Crunch pieces)
1/2 cup chocolate chips

Preheat the oven to 350 degrees.

Combine the cake mix, melted butter, egg, and extracts in a large bowl. Using a hand mixer, beat until a soft dough forms. Add the softened cream cheese and beat in gently until combined. Stir in the Oreos, peppermint pieces and chocolate chips. Cover the bowl and refrigerate the dough for at least 30 minutes.

Using a 1 1/2 tablespoon cookie scoop, divide the dough into 36 balls.

Bake on an ungreased cookie sheet for 9 minutes. These didn't spread at all, so I was able to fit 8 dough balls on each sheet. The cookies will be very soft and look under done. Let them sit on the hot cookie sheet for 2 minutes, then gently remove them with a spatula to a cooling rack. Very gently tap the tops of the cookies with the bottom of the spatula to even out the tops. Let them sit until completely cool. Store in an airtight container.
Pin It!

Monday, June 08, 2015

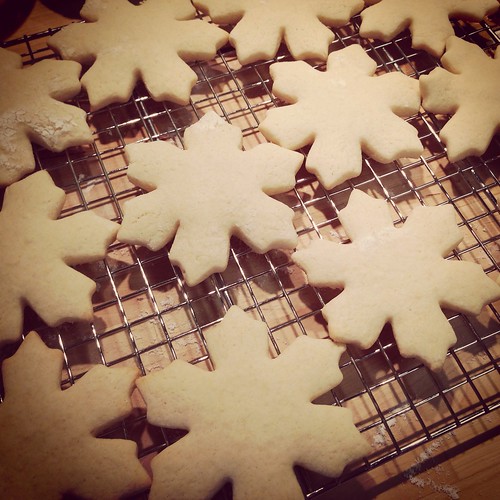
Cut-Out Sour Cream Sugar Cookies

::waves hi:: I hope you guys are still with me. I didn't realize I'd taken such a long break. It was completely unintentional, actually. Here's the short explanation before I tell you about these cookies I made for Christmas.

Long story short, blogging isn't as much fun for me as it used to be. I've never been a big-name blogger but I started to get annoyed that my photos aren't that good, that I always had to try new recipes instead of remaking old favorites, that I wasn't interested in food trends like spiralizers and zoodles. Frankly, blogging became a chore so I just stopped doing it. I can't remember the last time I photographed a meal with the intention of blogging about it. I started remaking dishes I hadn't made in years and just enjoyed eating with my family every night.

Last night I realized it had been more than a month since I blogged and I figured I should see if I had any recipes in my draft folder that I could write about. And I found these Cut-Out Sour Cream Sugar Cookies that I made for Christmas.

Sour cream sugar cookies

I never even grabbed a shot of these frosted so you'll just have to take my word for it that the frosting was awesome. Baby Girl and I made these together and they were so easy and so delicious. Definitely my go-to cookie recipe for the holidays from now on.

I don't know how often I'll blog in the coming weeks/months, but I'm actually making a new recipe tonight. If it's good, I'll blog about it. If you want to follow me on Instagram you can see all the food photos I do take, although it's not always of things I've cooked.

Cut-Out Sour Cream Sugar Cookies
By Monica

FOR COOKIE DOUGH:
2 3/4 cups flour
1/2 teaspoon baking soda
1/4 teaspoon salt
1/2 cup sour cream, room temperature
1/2 cup butter, softened
1 cup sugar
1 egg
1/2 teaspoon vanilla

FOR FROSTING (makes 1/2 cup of frosting):
1 cup powdered sugar
1 tablespoon butter, softened
1/2 teaspoon vanilla
2 tablespoons half and half
food coloring

In large bowl, whisk together flour, baking soda, and salt; set aside. In second large bowl, with an electric mixer, cream the sour cream and butter at low speed; add sugar, eggs, and vanilla and mix until combined. (It's okay if it's a little lumpy as long as no butter chunks are visible.) Gradually add the flour mixture to the sour cream mixture, mixing until well combined. Dough will be sticky. (You can stir it by hand with a wooden spoon.) Divide dough onto two pieces of plastic wrap; flatten dough, wrap tightly, and refrigerate 1-2 hours. (Make ahead tip: Dough may be made to this point and refrigerated for up to 3 days or frozen for up to 1 month.)

Preheat oven to 350 degrees. Line 2 baking sheets with parchment paper; set aside.

Generously flour your counter and rolling pin. Sprinkle the top of the dough with more flour. Starting at the center, roll the dough out until dough is an even 1/4" thick all over. Dip cookie cutter in flour and cut out dough shapes. Transfer dough shapes to baking sheets.

Bake 2 sheets at a time for 8-10 minutes, rotating and switching pans half way through cooking time. Bake just until they are cooked all the way through but haven't started browning on the bottom. Transfer hot cookies to a baking rack to cool completely.

Combine powdered sugar, softened butter, vanilla, and half of the half and half in a large bowl. Use an electric mixer to combine ingredients on a low speed until you have a thick paste and all of the lumps are gone. Gradually add remaining half and half and continue mixing on medium speed until frosting is a smooth, silky, spreadable consistency. If it's still too thick, add more cream 1/2 teaspoon at a time. Mix in food coloring, if desired. Frost each cookie and decorate with sprinkles while frosting is still wet. Leave out to dry for several hours until dry to touch before storing in an airtight container. If stacking frosted cookies, put waxed or parchment paper between layers.
Pin It!

Wednesday, April 01, 2015

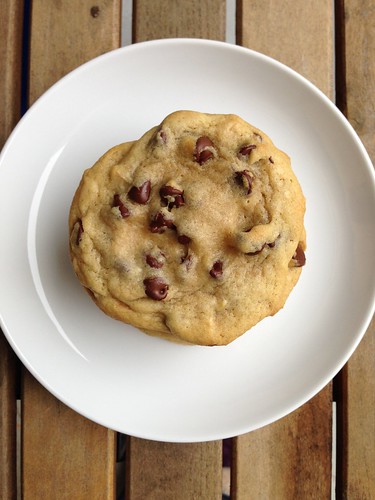
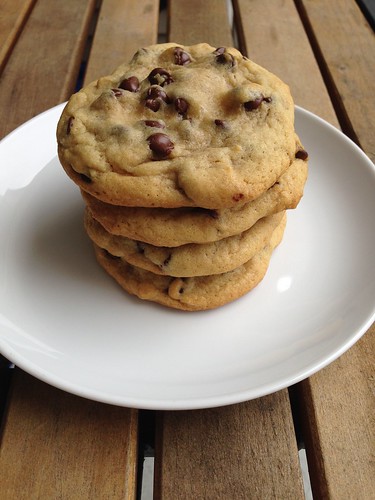
Chewy Café-Style Chocolate Chip Cookies

Chocolate chip cookie recipes are a dime a dozen and everyone seems to have a favorite. I wanted something sweet to bring to our friend's house and remembered Mary Ellen posting this recipe for Chewy Café-Style Chocolate Chip Cookies. She raved about the recipe so I was excited to give it a try.

Chocolate chip cookies

You have to chill the dough, which means planning ahead if you want to make these, but they're worth the wait. I'm still not sure rolling the dough into balls, then tearing them apart and smashing them back together is worth the time and/or energy, but in the interest of following the recipe I did it this time. Next time I may just scoop the dough loosely and see how that works out.

Chocolate chip cookies

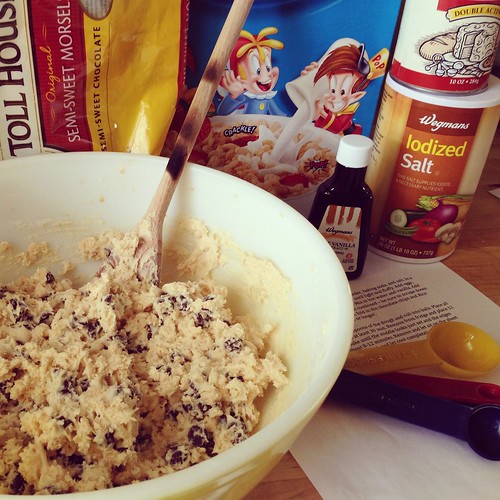
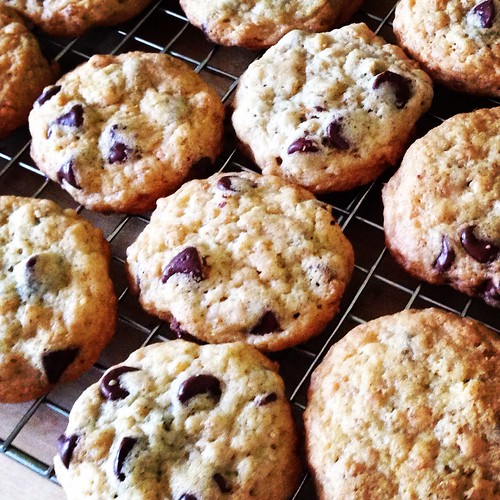
These were delicious (and huge). Full of chocolate chips, crispy on the outside and chewy on the inside. Not too sweet, either. I, unlike most people, didn't have a go-to recipe before this one and I don't think I need to look any further. These were everything I like in a chocolate chip cookie.

Chocolate chip cookies

Chewy Café-Style Chocolate Chip Cookies
As seen on Mary Ellen's Cooking Creations, from Host the Toast

2 cups + 2 tablespoons all purpose flour
1 teaspoon baking soda
2 teaspoons cornstarch
1/2 teaspoon salt
1 1/2 sticks butter, melted and cooled
1 cup light brown sugar, lightly packed
1/2 cup granulated sugar
2 large eggs
2 teaspoons vanilla extract
1 1/2 cups chocolate chips

In a medium-sized bowl, whisk together the flour, baking soda, cornstarch, and salt. Set aside.

In a large bowl, beat together the cooled melted butter and the sugars with a hand mixer for about one minute. Add in the eggs and vanilla extract. Beat until just combined.

Slowly add in the dry ingredients and mix just until there are no flour clumps left. Fold in the chocolate chips. Cover the bowl with plastic wrap and refrigerate for one hour.

Remove the dough from the refrigerator and preheat the oven to 325 degrees, making sure you have one rack in the middle of the oven. Line a few baking sheets with parchment paper (I needed 5, but it you don't have that many you can always reuse them once they've cooled).

Scoop 3 tablespoons of cookie dough at a time and roll into balls. Pull the balls apart by pulling on both sides, then put the two halves together again with the lumpy, torn sides facing up. Place the dough on a baking sheet, making sure the cookies have plenty of space to spread. (I was able to fit 5 cookies per sheet).

Bake for about 12 minutes, rotating half-way through, or until the cookies have spread out and the edges are golden, but the center of the cookie still looks soft and just slightly under-cooked. Remember, every oven is different, so you can start with just one or two cookies on the tray to see what baking time works best for your oven. Mine took 13 minutes.

Let cool on the baking sheets until the cookies are firm enough to remove. Place the cookies on wire cooling racks to cool completely. Repeat with remaining batches, until all cookies are baked. Store in an air-tight container.
Pin It!

Monday, March 09, 2015

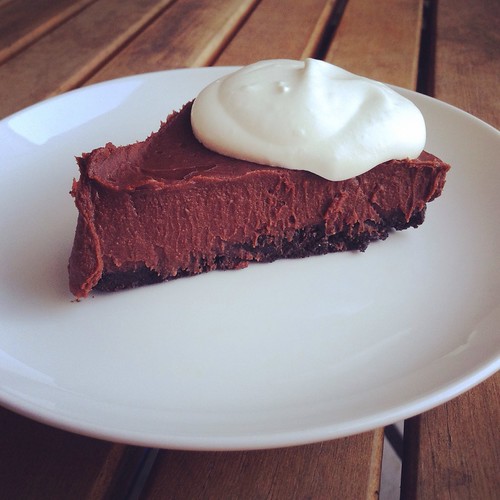
Double Chocolate Silk Cream Pie

We all know I don't bake, but when I saw this recipe for Double Chocolate Silk Cream Pie I had to have it. An Oreo cookie crust and rich, chocolate filling sounded heavenly. And since there's no baking involved I figured it would be a piece of cake (or pie...ha!) to whip up one weekend.

Double chocolate silk pie

The only downside to this recipe is that the pie has to cool overnight. The original recipe says you can let it cool for 4-6 hours, but you really want this ice cold so overnight is probably best (at least in my opinion). The lingering smell of crushed Oreos and cooked chocolate drove us all crazy until we could finally enjoy a slice of this decadent pie.

A little goes a long way for this one, unless you have a serious sweet tooth. I served this with fresh whipped cream after Sunday dinner and we were all in love. Baby Girl especially loved this one, so I know I'll be making it again soon.

Double Chocolate Silk Cream Pie
As seen on Lauren's Latest

CRUST
20 Oreo cookies
6 tablespoons melted butter

FILLING
5 large egg yolks
1 1/2 cups heavy cream
3 tablespoons granulated sugar
1/8 teaspoon salt
1 1/2 teaspoons vanilla extract
10 oz. semi sweet chocolate chips

whipped cream, for serving

Place all the Oreo cookies (use the whole cookie) in a food processor. Pulse a few times until the cookies become crumbs. Mix the crumbs and melted butter together until moist. Press into the bottom and up the sides of a 9-inch pie plate or cake pan. Refrigerate while making the filling.

Separate the eggs, reserving the egg yolks in a bowl. Reserve or discard the egg whites. Lightly beat the yolks and set aside.

Place a medium-sized glass bowl over a pot with about an inch of simmering water (this is called a double boiler). Make sure the water does not touch the bottom of the bowl. Add the cream to the bowl and heat until you start to see bubbles forming. This will scald the cream. Stir in the sugar and salt, whisking until dissolved, about 2 minutes. Stream one tablespoon at a time of the hot cream into the egg yolks, whisking after each tablespoon is added. Do this 4 or 5 times. This is called tempering. Stir the tempered egg yolks back into the cream in the double boiler. Cook, whisking occasionally, until the eggs and cream start to thicken and coat the back of a spoon, about 8 minutes. The pie won't set if you don't thicken the cream and egg mixture long enough, so if you're unsure whether or not the mixture is thick enough, continue cooking for another 5 minutes.

Remove the cream and egg mixture from the heat and stir in the vanilla and chocolate chips. Whisk until the mixture is smooth and all the chocolate has melted. Pour the filling into the prepared pie shell and cool to room temperature.

Once the pie is cool, cover it with plastic wrap, pressing the plastic wrap directly onto the filling. Refrigerate the pie overnight. Cut into pieces and serve with whipped cream (recipe below).

Homemade whipped cream

1 cup heavy cream
2 tablespoons confectioners' (powdered) sugar

Place a metal, glass or ceramic bowl in the freezer for 15-30 minutes to chill. Once chilled, pour the cream into the bowl and add the sugar. Using an electric hand mixer or balloon whisk, beat the cream to the desired consistency. For soft peaks, the cream will be just thick enough to hold its shape. For stiffly beaten cream, the beaters or whisk wires will leave distinct traces on the cream and stand in firm peaks when the beaters are lifted.

MAKE AHEAD
The cream can be whipped up to 1 day ahead, covered tightly with plastic wrap, and refrigerated. If liquid separates from the cream, whip it again to incorporate the liquid.

Pin It!

Monday, October 27, 2014

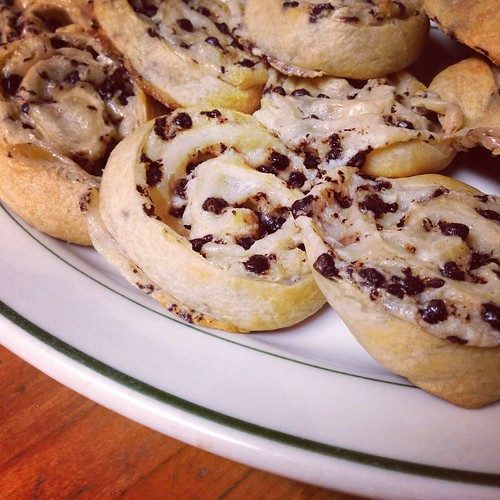
Chocolate Chip Cream Cheese "Cookies"

I'm not sure where I first saw these Chocolate Chip Cream Cheese Breakfast Cookies but my best guess is one of my friends shared the link on Facebook. Or maybe it was one of the blogs I follow. Either way, as soon as I saw them I knew I had to make them. I printed off the recipe and waited for the right time.

Chocolate cream cheese cookies

The right time came a few weeks ago for Sunday dinner with my parents. A friend of theirs was over so we had enough people to make a dent in the cookies (they don't really reheat well). Of course mine look nothing like the ones in the original blog post but who cares. They still tasted phenomenal and are so simple to make.

I baked these at my mom's house and they took a bit longer than the 12-14 minutes stated in the recipe so my suggestion is to watch them closely after the 15-minute mark and take them out when they're golden brown. Mine sort of fell apart, but like I said, it didn't matter. We all loved these. They are definitely best served warm. When they sat for more than a few minutes they got a bit chewy and tough so bake them right before you want to eat them.

PS. I took the word breakfast out of the title because, let's be honest, these are not breakfast food. I also put cookies in parentheses because they aren't really cookies either.

Chocolate Chip Cream Cheese "Cookies"
As seen on Cookies and Cups
Makes approximately 15 cookies

1 can seamless crescent rolls
1 (8 oz) block cream cheese, at room temperature
1/4 cup sugar
2 teaspoons vanilla
1/2 cup mini chocolate chips

Unroll the crescent roll sheet and stretch the dough out slightly in the shape of a rectangle.

Using a hand mixer, beat the cream cheese, sugar and vanilla together until smooth in a medium sized bowl. Spread the cream cheese mixture over the top of the crescent sheet, leaving an edge of about 1/2 inch. Sprinkle the chocolate chips on top of the cream cheese.

Roll the crescent sheet up tightly and wrap in cling wrap. Refrigerate overnight.

When you're ready to bake them, preheat the oven to 350°. Line two cookie sheets with parchment paper.

Slice the roll into 1/2" slices. Arrange half the slices on each baking sheet. Bake for 10 minutes, then rotate the sheets (move the sheet on the bottom rack to the top rack and vice versa, as well as turn the sheets a half turn). Bake for another 5-10 minutes, until they turn golden brown around the edges. Transfer to a wire rack and allow to cool slightly. Eat warm.
Pin It!

Wednesday, September 10, 2014

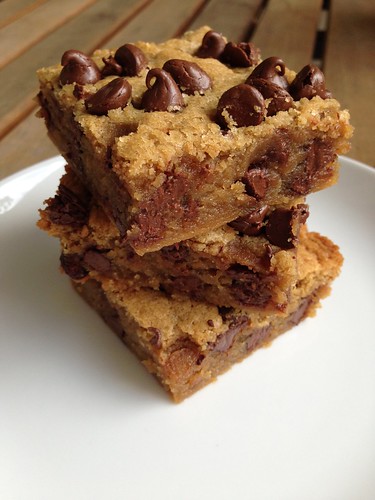
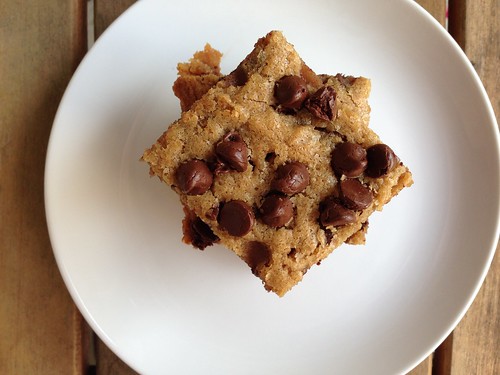
Peanut Butter Chocolate Chip Bars

When I posted a picture of these Peanut Butter Chocolate Chip Bars on social media I simply said "I did a bad, bad thing." That pretty much sums up these squares of ridiculousness. Easy to make, sinfully rich, decadent beyond words.

Peanut butter chocolate bars

Now, you all know I rarely bake. So you may be asking yourself why I made these. I made them because I couldn't stop thinking about them. I was innocently scrolling through my Facebook news feed one evening when I came across a photo of these bars. After clicking through to the recipe I couldn't stop thinking about them. I knew I had to make them when Baby Girl wasn't home. My plan was to freeze them and clean the kitchen thoroughly since they contain peanut butter, which she's allergic to.

Peanut butter chocolate bars

You know what's bad about these bars? They're too easy to make. Melt better, mix in the rest of the ingredients, bake, let cool, done. Like I said, too easy.

Just posting a picture of these got two of my friends to make them that same night. I wonder how many more people will try them after seeing this post? Sorry. You're welcome.

Peanut Butter Chocolate Chip Bars
As seen on Averie Cooks
YIELD: one 8x8 pan, cut into 9 or 12 squares

1 stick unsalted butter
1/3 heaping cup peanut butter
1 large egg
1 cup light brown sugar, packed
1 tablespoon vanilla extract
1 cup all-purpose flour
1 cup semi-sweet chocolate chips + 2 tablespoons, for sprinkling

Preheat oven to 350. Line an 8-by-8-inch baking pan with aluminum foil. Spray the foil with cooking spray; set aside.

In a large, microwave-safe bowl, melt the butter. This should take about 1 minute on high power. You may need more or less time depending on your microwave. Let cool for 2 minutes.

Add the peanut butter, egg, brown sugar, vanilla to the butter and whisk until smooth. Add the flour and stir until just combined. Don't over mix. Stir in 1 cup of the chocolate chips.

Spoon the batter into the prepared pan, smoothing the top lightly with a spatula. Sprinkle evenly with the remaining 2 tablespoons of chocolate chips.

Bake for about 25 to 30 minutes, or until done. A toothpick inserted in the center should come out clean, or with a few moist crumbs, but no batter. Mine took 30 minutes.

Allow the bars to cool in the pan for at least 30 minutes before slicing and serving.

Bars will keep airtight at room temperature for up to 1 week, or in the freezer for up to 6 months.
Pin It!

Friday, August 29, 2014

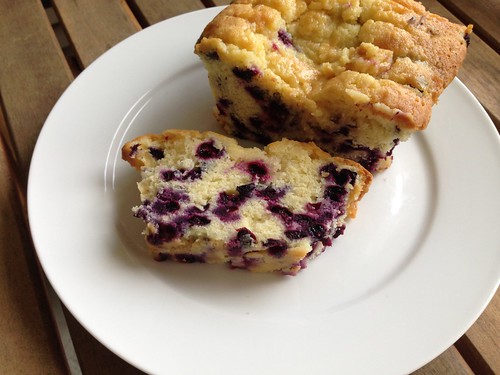
Blueberry Lemon Bread

Baby Girl's camp went blueberry picking last month and she brought home a huge container of blueberries. I had already planned to make this Blueberry Lemon Bread that Melissa has been raving about for years.

Blueberry lemon bread

I'm not sure what happened but my bread was very, very moist. When I turned it out onto the cooling rack it cracked and almost fell apart. It was inverted on the rack for only a few seconds, but it was enough time for the wire to leave deep grooves in the top. But, all that aside, this was still a delicious dessert and a great way to use up the blueberries.

Blueberry Lemon Bread
As seen on Alosha's Kitchen

1 1/2 cups all purpose flour
1 teaspoon baking powder
1/4 teaspoon Kosher salt
6 tablespoons unsalted butter, softened to room temperature
1 cup + 1/3 cup granulated sugar
2 large eggs
2 teaspoons lemon zest (zest of one medium lemon)
1/2 cup whole milk
1 1/2 cups fresh blueberries
3 tablespoons lemon juice

Preheat oven to 325 degrees.

Butter and sugar a 9- or 10-inch loaf pan; set aside. Whisk together flour, baking powder and salt in a small bowl; set aside.

Using an electric mixer, cream the butter and 1 cup of the sugar together until light and fluffy. Add eggs one at a time, beating well after each addition. Add the lemon zest. Slowly mix in the flour mixture, alternating with the milk, beginning and ending with the flour mixture.

Lightly coat blueberries with a small amount of flour. Gently fold in blueberries into the batter. Spoon batter into loaf pan.

Bake for about one hour, or until golden brown and a wooden toothpick inserted into the center comes out clean.

When the bread has about 5 minutes cooking time left, bring remaining 1/3 cup of sugar and lemon juice to boil in a small saucepan, stirring until sugar dissolves. Once removed from the oven, pierce the top of the hot loaf several time with a cooking chopstick (or knife) without touching the bottom of the loaf in pan. Pour the hot sugar mixture over the loaf.

Cool for 30 minutes in pan on a wire rack, then turn bread out of pan and cool completely on rack.
Pin It!

Monday, August 25, 2014

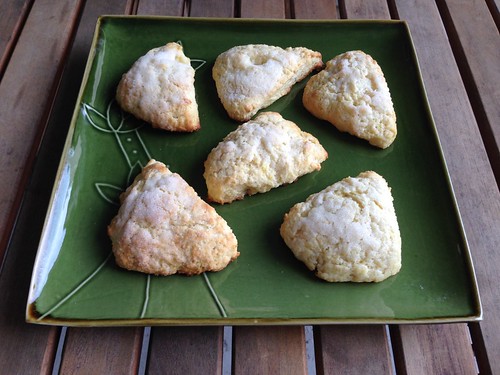
Buttermilk Scones

Whenever I buy buttermilk for a recipe there's always a lot leftover. Usually I can find ways to use it up but this time SP called dibs on it so he could make Buttermilk Scones.

Buttermilk scones

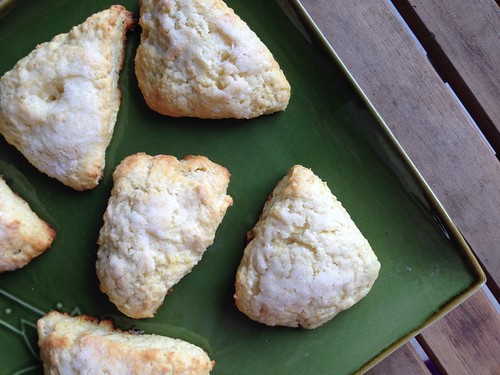
I woke up on Sunday morning to the smell of these baking. Mmmm. While the second batch was cooking I fried up some bacon and then we all sat down to enjoy the delicious, hot scones and crispy, salty bacon. These were incredible fresh from the oven, so light and flaky. Unfortunately, by the time we got them to my parent's house that evening they were a bit mushy and tough. If you aren't going to eat these right away, definitely freeze them so they don't lose their texture.

Buttermilk scones

I've already asked SP to make a savory version with bacon, cheddar and scallions, modeled after an episode of Diners, Drive-Ins and Dives where Guy Fieri had savory scones with a bacon gravy. I can almost taste them.

Buttermilk Scones
As seen on All the Cooks

3 cup all-purpose flour
1/3 cup sugar
1 tablespoon baking powder
1/2 teaspoon baking soda
3/4 teaspoon salt
1 1/2 sticks unsalted butter, cold, cut into small pieces
1 cup buttermilk
1 tablespoon lemon zest

1/2 stick unsalted butter, melted for brushing
1/4 cup sugar, for dusting

Preheat the oven to 425.

In a medium bowl, combine the flour, sugar, baking powder, baking soda, and salt with a fork. Add the cold butter pieces and, using your fingertips (or a pastry blender or two knives), work the butter into the dry ingredients until the mixture resembles course cornmeal. It's okay if you have some larger pieces of butter, it makes the scones flaky.

Add the buttermilk and lemon zest and mix with a fork until the ingredients are just moistened. The dough will be soft. If the dough looks dry, add another tablespoon of buttermilk.

Gather the dough into a ball, pressing it gently so it holds together, and turn it out onto a lightly floured work surface. Knead it very briefly (about a dozen turns) then cut in half.

Roll one of the dough halves into a 1/2-inch thick circle about 7 inches across. Brush the dough with half of the melted butter and sprinkle with 2 tablespoons of the sugar. Cut the dough into 6 triangles and place the triangles on a baking sheet lined with parchment paper. Repeat with the other half of the dough.

Bake the scones for 10 to 12 minutes, until both the tops and bottoms are golden. Transfer the scones to a rack to cool slightly.

NOTE: These are best served warm or at room temperature. But they do not last long. If you aren't going to eat them immediately, wrap each scone in plastic wrap and put in a freezer bad. They'll stay fresh for one month. To serve, defrost the scones in the plastic wrap, then unwrap and reheat on a baking sheet for 5 minute in a 350-degree oven.
Pin It!

Friday, July 18, 2014

Krispie Chocolate Chip Cookies

I needed a dessert for Fourth of July. I've had Stephanie's Krispie Chocolate Chip Cookies printed out for awhile, I even bought the Rice Krispies to make them awhile back, so I figured it was time to make them happen.

Rice Krispie cookies

These cookies take some planning because you need to chill the dough twice before baking. I can't stand when cookies spread because the butter in the dough is too warm, so I appreciate taking the extra time to make sure these don't do that.

Rice Krispie cookies

The Rice Krispies add an interesting texture to these cookies. Even after we finished the batch I still couldn't decide if I was a fan or not. Don't get me wrong, the cookies were delicious, but the cooked cereal gets chewy and I prefer a moist, cakey chocolate chip cookie rather than a chewy one. It didn't stop me from eating them, though. Wink, wink.

Krispie Chocolate Chip Cookies
As seen on Stephanie Cooks

1 1/4 cups all-purpose flour
1 teaspoons baking powder
1/2 teaspoon salt
1/2 teaspoon baking soda
1 stick unsalted butter, at room temperature
3/4 cup granulated sugar
1 large egg, at room temperature
2 teaspoons hot water
2 teaspoons vanilla
1 1/2 cups Rice Krispies
1 cup chocolate chips

Whisk or sift the flour, baking powder, baking soda, and salt together. In a large mixing bowl, beat together the butter and sugar until light and fluffy. Add the egg, beating until just combined. Add the hot water and vanilla and beat until combined.

Add the flour mixture, in two batches, beating just until combined – be sure to scrape down the sides of the bowl. Using a wooden spoon, fold in the chocolate chips and Rice Krispies. Cover and refrigerate for 30 minutes or longer.

Scoop out 1 tablespoon of dough at a time and roll into a ball. Place all the dough balls on one baking sheet and chill at least 30 minutes.

Preheat the oven to 375 degrees.

Remove the dough from fridge and place 12 balls on a cookie sheet, evenly spaced apart. Bake until the middle looks just set and the edges begin to brown, about 8 minutes. Don't overcook. Remove and let sit on the baking sheet for 1 minute. Move the cookies to a wire rack and let cool completely. Repeat with the remaining dough.
Pin It!

Monday, June 02, 2014

Banana Cake with Cream Cheese Frosting

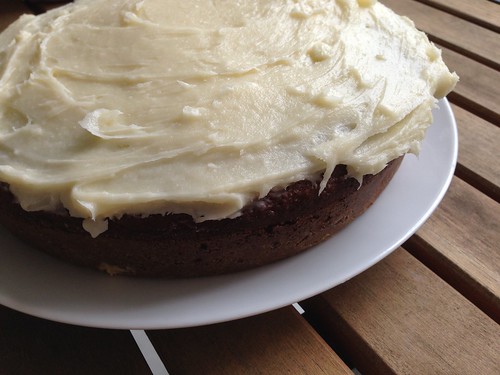
I've mentioned before that SP has been trying to get back into the kitchen. Recently he decided he wanted to use some of our overripe bananas to make this Banana Cake with Cream Cheese Frosting.

Banana cake with cream cheese frosting

He and Baby Girl made this together, which was so cute to watch. Due to her nut allergy we had to leave out the walnuts, but we didn't miss them. Being a chocolate lover, I had hoped SP would be open to adding chocolate chips instead but he wanted the banana to really shine.

Banana cake with cream cheese frosting

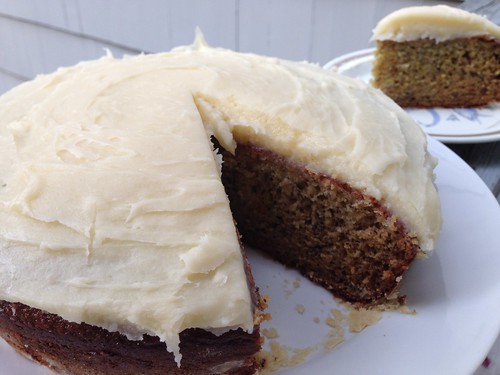
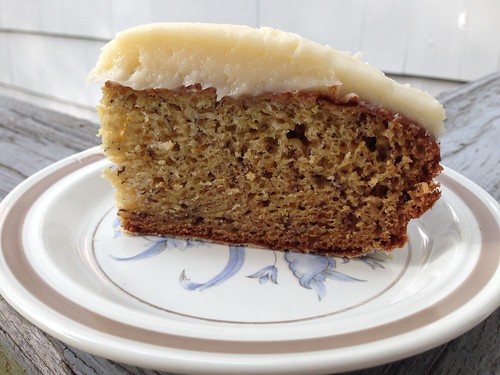
This was excellent. The cake was moist and flavorful and cream cheese icing is pretty darn fantastic. The recipe made a nice, thick layer of it, too. This takes a bit of planning since you need very ripe bananas and the ingredients have to come to room temperature, but otherwise it's very simple.

Banana cake with cream cheese frosting

Banana Cake with Cream Cheese Frosting
Ina Garten, from Barefoot Contessa How Easy is That?

3 very ripe bananas, mashed
3/4 cup granulated sugar
1/2 cup light brown sugar, lightly packed
1/2 cup vegetable oil
2 extra-large eggs, at room temperature
1/2 cup sour cream
1 teaspoon pure vanilla extract
Grated zest of 1 orange
2 cups all-purpose flour
1 teaspoon baking soda
1/2 teaspoon kosher salt
1/2 cup coarsely chopped walnuts (optional)
Cream Cheese Frosting (recipe follows)
Walnut halves, for decorating (optional)

Cream Cheese Frosting:
6 ounces cream cheese, at room temperature
6 tablespoons (3/4 stick) unsalted butter, at room temperature
1 teaspoon pure vanilla extract
2 1/2 cups sifted confectioners' sugar (1/2 pound)

Preheat the oven to 350 degrees. Grease and flour a 9 by 2-inch round cake pan.

In the bowl of an electric mixer fitted with the paddle attachment, mix the bananas, granulated sugar, and brown sugar on low speed until combined. With the mixer still on low, add the oil, eggs, sour cream, vanilla, and orange zest. Mix until smooth.

In a separate bowl, sift together the flour, baking soda, and salt. With the mixer on low, add the dry ingredients and mix just until combined. Stir in the chopped walnuts, if using. Pour the batter into the prepared pan and bake for 45 to 50 minutes, until a toothpick inserted in the center comes out clean. Cool in the pan for 15 minutes, turn out onto a cooling rack, and cool completely.

Spread the frosting thickly on the top of the cake and decorate with walnut halves, if using.
Cream Cheese Frosting:

Mix the cream cheese, butter, and vanilla in the bowl of an electric mixer fitted with the paddle attachment on low speed until just combined. Don't whip! Add the sugar and mix until smooth. Yield: frosting for one 9-inch cake.
Pin It!