Showing posts with label Mexican. Show all posts

Monday, June 04, 2018

Soft Cheese Tacos

I've been on a serious Tex-Mex kick lately. I can't get enough tortillas, salsa, cilantro, cheese, avocados...I want it ALL. I saw these Soft Cheese Tacos from Homesick Texan and I was hooked. Cheese, cheese and more cheese - sign me up!

Soft cheese tacos

There is absolutely nothing healthy about this dish but sometimes you just need to indulge. The ingredient list seems long, but it's actually a really easy meal to put together. And, surprisingly, these reheat beautifully. My only caution is to test your jalapenos before you add them to the queso. Sometimes jalapenos are more like green peppers and other times they're fiery little devils. The last time I made these one jalapeno was mild and the other was super spicy. I ended up using only a quarter of the spicy one and the queso was perfect.

One more note - these are a wonderful vegetarian meal but Steve likes meat so I usually add some of the rotisserie chicken I keep in the freezer. The chicken is entirely unnecessary but know it's an option if you also live with a carnivore.

Soft Cheese Tacos
Homesick Texan

For the queso:
2 tablespoons unsalted butter
1/4 cup diced yellow onion
2-4 jalapeños, seeded and diced (check spice level!)
2 cloves garlic, minced
3/4 cup diced grape tomatoes
2 tablespoons cornstarch
1 cup whole milk
1 cup water
1 pound American cheese, chopped or shredded
1/2 teaspoon kosher salt
1/2 teaspoon ground cumin

For the soft cheese tacos:
2 tablespoons vegetable oil
12 corn tortillas
12 ounces (3 cups) Colby Jack, shredded
1/4 cup diced yellow onion
2 cups cooked chicken (optional)
Garnish: sliced pickled jalapeño, minced cilantro

Preheat the oven to 350°F.

In a 2-quart saucepan, heat the butter over medium-low heat. Add the onion and jalapeños. Cook until softened, about 5 minutes. Add the garlic and tomatoes and cook for 30 more seconds.

Whisk together the cornstarch, milk and water until well combined then pour into the pot. Bring to a simmer and cook for a couple of minutes until it thickens. Turn the heat down to low and add the American cheese. Stir until the cheese has melted, then add the salt and cumin. Turn off the heat.

Pour the oil into a 9x13 baking dish. Place the tortillas in the baking dish (it’s okay if they overlap) and move them around to make sure they all get coated with some of the oil. Place uncovered in the oven for 5 minutes until they're soft and warm. Remove the baking dish from the oven and stack the tortillas on a plate. Reserve the baking dish.

To assemble the tacos, place a warm tortilla on a clean surface. Add 1/4 cup of the shredded Colby Jack down the center of the tortilla then add 1 teaspoon of the onions and some chicken, if using. Roll the tortilla then place seam side down in the reserved baking dish. Repeat with the remaining tortillas.

Cover the baking dish with foil and bake for 15 minutes. Reheat the queso over low heat, stirring occasionally. Once the tacos are done, remove them from the oven and pour the queso evenly over the tacos. They'll be swimming in queso, which is what you want. Serve warm with sliced pickled jalapeños and cilantro.
Pin It!

Friday, May 19, 2017

Shrimp Enchiladas with Sour Cream Poblano Sauce

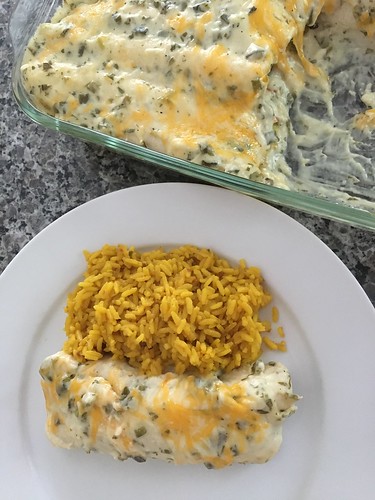
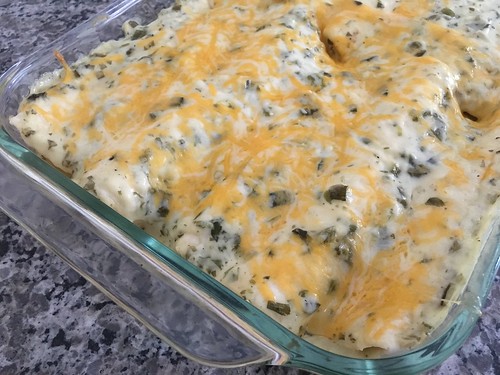
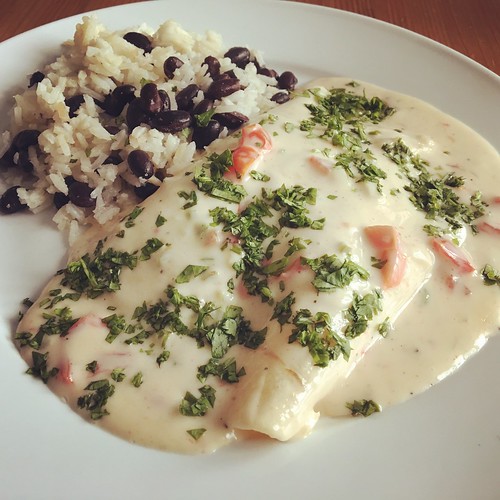
For some reason I got it into my head that I wanted shrimp enchiladas. Mind you, I've never once ordered shrimp enchiladas at a Mexican restaurant so I can't for the life of me figure out where the craving came from. But there it was and so off I went to find the perfect recipe.

Shrimp enchiladas

I ended up combining recipes from two of my favorite bloggers and the results were sensational. A word of warning, though - these are a wee bit time consuming for a weeknight. There's nothing complicated about the recipe, it's just a lot to put together between peeling and roasting the shrimp, roasting the poblanos, making the sauce, and cooking the filling. Work has been insane so I've been trying to do dinner prep either early in the morning or late at night. I highly recommend cooking all the components ahead of time. Then you can assemble the enchiladas right before you bake them.

Shrimp enchiladas

Shrimp Enchiladas with Sour Cream Poblano Sauce
From Damn Delicious and Annie's Eats

1 pound medium shrimp, peeled and deveined
2 tablespoons olive oil, divided
Kosher salt and freshly ground black pepper, to taste
1 onion, diced
3 cups coleslaw mix
3 cups baby spinach
1 tablespoons chipotle pepper, in adobo sauce
1/4 teaspoon dried oregano
12 (6-inch) corn or flour tortillas
2 cups shredded Monterey Jack or Mexican cheese

For the sauce:
2 poblano peppers
2 tablespoons butter
2 tablespoons flour
1 1/2 cups chicken broth
1/2 teaspoon garlic powder
Salt and pepper, to taste
3/4 cup sour cream
1/4 cup chopped fresh cilantro

Preheat oven to 400. Place shrimp onto a baking sheet. Add 1 tablespoon olive oil, salt and pepper, and gently toss to combine. Place into oven and roast just until pink, firm and cooked through, about 6 minutes. Remove from oven and let cool before dicing into bite-size pieces. Reduce oven temperature to 375.

Heat remaining 1 tablespoon olive oil in a large skillet. Add onion and cook until the onions become translucent, about 5 minutes. Add coleslaw mix, spinach, chipotle pepper, and oregano. Season with salt and pepper. Cook, stirring occasionally, until the spinach just begins to wilt, about 1-2 minutes. Add shrimp and gently toss to combine.

If you have a gas stove, place the peppers directly on the burner over the flame and roast, turning often, until the skin is blistered and black all over. If you have an electric stove, preheat the oven to 475˚ F. Place the peppers in a baking dish. Bake, turning every 6-8 minutes or so, until the skin is blistered over most of the surface about 20-25 minutes total. Transfer the peppers to a bowl, cover with a plate or plastic wrap and let sit 15 minutes. When cool enough to handle, peel away the skin, stem, seeds and ribs and discard. Coarsely chop the peppers and set aside.

To make the sauce, melt the butter in a medium saucepan. Stir in the chopped poblanos. Sprinkle in the flour and stir, cooking briefly just until golden, about 1-2 minutes. Whisk in the broth and garlic powder. Season with salt and pepper to taste. Let cook over medium heat, stirring frequently, until the mixture bubbles and thickens. Remove from the heat and stir in the sour cream and cilantro.
To assemble the enchiladas, spoon half the sauce over the bottom of a 9x13" baking dish. Lay one tortilla on a flat surface and add some of the cheese, along with some of the shrimp mixture to the center. Roll the tortilla and place seam side down onto prepared baking dish. Repeat with remaining tortillas and shrimp mixture. Pour the rest of the sauce evenly over the top and cover with the remaining cheese. Place into oven and bake, covered, until lightly golden and bubbly, about 20 minutes.
Pin It!

Thursday, September 15, 2016

Pineapple Pulled Pork Tacos

I've mentioned this many times but my slow cooker and I do not get along. Thankfully, I work from home so I can still make delicious, slow-cooked meals like these Pineapple Pulled Pork Tacos. You prepare the recipe like you would in a slow cooker, but the meal cooks low and slow in the oven. The results are just as delicious, although perhaps not as convenient.

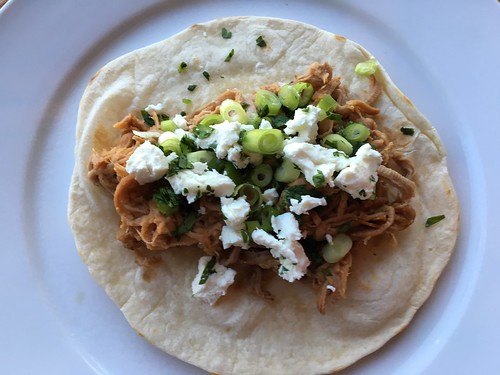
Pork pineapple tacos

The one downside to cooking dinner all day was the smell. Holy moly, did my house smell AMAZING. I was positively ravenous imagining how good these would taste. What drew me to the recipe in the first place was how totally different it was from regular tacos. We all love these flavors and the end result did not disappoint.

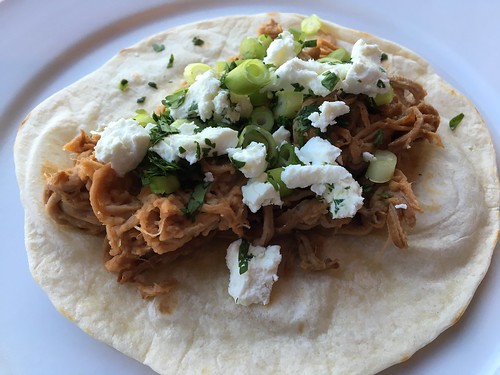
Pork pineapple tacos

The only change I'm suggesting below is to use a piece of pork with more fat. Steve was questioning why I'd cook a lean piece of meat like a tenderloin all day. I thought the pork was still tender, but it was a little dry. Otherwise we all loved these tacos. The subtle pineapple and soy flavor in the pork, the delicious BBQ sauce, the tangy, creamy goat cheese and the bright flavor of the cilantro and scallions. It all works.

The good news is, this makes a ton of food so leftovers are a given. I squirreled away the leftover pork and I'm planning to turn it into a pizza sometime soon - dough, pork and mozzarella cheese baked until golden, topped with scallions, cilantro and goat cheese. I. Can't. Wait!

{Slow Cooker} Pineapple Pulled Pork Tacos
As seen on PreventionRD

Pork:
3 lbs pork loin/shoulder/butt
1 28-oz can pineapple chunks with juice
1/4 cup low-sodium soy sauce
2 tablespoons apricot preserves
1/2 teaspoon garlic powder
1/2 teaspoon black pepper

Pineapple BBQ Sauce:
1/2 cup ketchup
3/4 cup reserved pineapple chunks
2 tablespoons apricot preserves
3 tablespoons brown sugar
1 tablespoon white wine vinegar
juice of 1 lime

To serve:
6-inch taco size tortillas
cilantro, chopped
goat cheese, crumbled
scallions, chopped

If using a slow cooker, place the pork in the slow cooker. If using the oven, preheat to 225 degrees and place the pork in a Dutch oven with a tight-fitting lid.

In a medium-sized bowl, combine the juice from the canned pineapple, the soy sauce, apricot preserves, garlic powder, and black pepper. Whisk to combine and pour over the pork. Reserve 3/4 cup of the pineapple chunks to use in the BBQ sauce. You can place the rest in the slow cooker/Dutch oven with the pork or save in the fridge to serve with the tacos. Cook on low for 6-8 hours.

Remove pork from the oven and shred the meat. Discard all the liquid and return pork to the crock pot/Dutch oven. Cover until ready to serve.

Meanwhile, combine all of the ingredients for the BBQ sauce in a blender or food processor and pulse until smooth. Pour over the pork and gently mix to coat.

Serve the pork with the tortillas. Top with cilantro, goat cheese, and scallions.
Pin It!

Wednesday, September 14, 2016

Warm Mexican Corn Salad {Esquites}

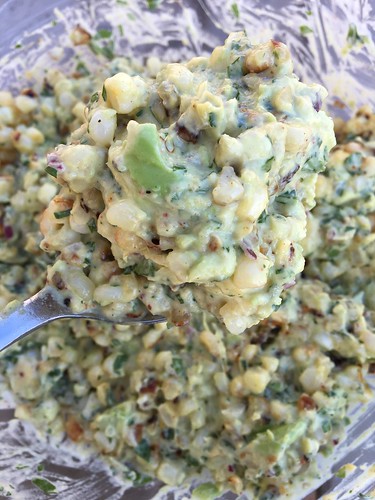
This is probably the fourth or fifth time I've made this Warm Mexican Corn Salad {Esquites} this summer, but I'm only just sharing it now because I never remembered to take a photo. Oops.

Esquites

This is my new go-to side dish whenever I make tacos and for good reason - it's a very simple recipe to make. The hardest part is getting all that darn silk off the corn cobs (I HATE that stuff - so annoying). I've been using fresh corn, but I imagine frozen would work, too. We're getting to the tail end of corn season here in PA, so I'm sure I'll find out soon enough.

I made quite a few changes and omissions to the original recipe to fit our preferences and to use what I had on hand the first time made this. This is one of those side dishes we can't stop eating and always end up fighting over the leftovers. This is enough for the three of us, which means if I ever decide to share I'll need to double or even triple the recipe.

Warm Mexican Corn Salad {Esquites}
Adapted from The Barbee Housewife

2 tablespoons butter
3 cups corn, cut from the cob {about 4 ears}
3 tablespoons mayonnaise
3 tablespoons minced red onion
handful of cilantro, chopped
Juice of 1 lemon
Chili powder, to taste
1 avocado, removed from the peel and diced
salt and pepper, to taste

Melt the butter in a non-stick skillet over medium-high heat. Add the corn. Let it sit, without stirring, so the corn starts to brown. Stir every so often until the corn is brown in spots, about 6-10 minutes.

Let the corn cool slightly, then add it to a bowl along with the mayonnaise, red onion, cilantro, lemon juice, and chili powder. Gently stir in the avocado, then season to taste with salt and pepper.

Serve warm or keep refrigerated until ready to eat.
Pin It!

Monday, August 01, 2016

One Pot Taco Spaghetti

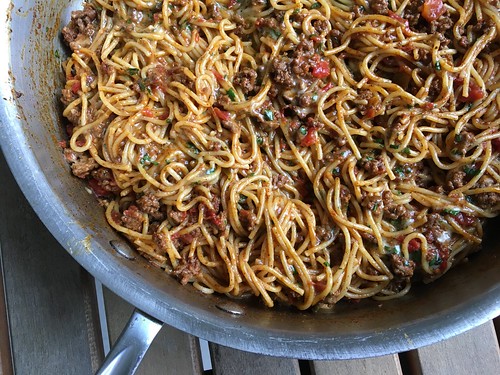
You know you've been a terrible blogger when people start calling you out for your lack of posts. Ooops! A friend asked me to post some a new recipes and since today is her birthday, I figured I'd oblige (hi, Tara!) Unfortunately, the only recipe I photographed recently was this One Pot Taco Spaghetti, so I didn't have much of a choice. The good news is, this was delicious. And a one-pot meal, which is always a good thing to have in your repertoire.

One pot taco spaghetti

The recipe might look long, but it's mostly spices. See, the original recipe calls for a packet of store-bought taco seasoning, but I prefer to make my own. I always have all these spices on my spice rack and, this way, I control the sodium content. Otherwise this is basically meat and pasta, with a little cheese and tomato on top. Delish!

One Pot Taco Spaghetti
As seen on Damn Delicious

1 pound ground beef*
1 medium/large onion, chopped
1 tablespoon chili powder
1/4 teaspoon garlic powder
1/4 teaspoon onion powder
1/4 teaspoon dried oregano
1/2 teaspoon paprika
1 1/2 teaspoons ground cumin
1 teaspoon salt
1 teaspoon ground pepper
1 (10-ounce can) Ro*Tel® Mild Diced Tomatoes & Green Chilies
1 tablespoon tomato paste
8 ounces spaghetti
3 cups water
1/2 cup shredded cheddar cheese
1/2 cup shredded mozzarella cheese
1 Roma tomato, diced
2 tablespoons chopped fresh cilantro leaves

Heat a large Dutch oven over medium high heat. Add the ground beef and cook until the beef just starts to brown. Add the onion and cook for another 3-5 minutes, making sure to crumble the beef as it cooks, until the beef is completely cooked.

If there's excess fat in the pot, turn off the heat and move the beef/onion mixture over to one side. Tilt the pot so all the fat is at the other end. Use crumpled up paper towels to soak up the excess fat. I like to keep the trash can right by the stove when I do this so I can easily throw the paper towels away. Make sure to leave a little bit of fat in the pan. Turn the heat back on and add the dried spices (chili powder through ground pepper). Stir to combine.

Stir in the Ro*Tel®, tomato paste, spaghetti and water. Bring to a boil, then cover. Reduce heat and simmer until pasta is cooked through, about 13-16 minutes, stirring occasionally.

Remove the pot from the heat. Add both the cheeses. Put the cover back on so the cheeses can melt. To serve, place some of the pasta and meat on a plate and top with chopped tomato and cilantro.
*You can also use ground chicken, turkey or pork. If you do, add 1 tablespoon of olive oil to the pan before browning the meat.
Pin It!

Friday, June 10, 2016

Skillet Salsa Chicken with Cilantro Lime Rice

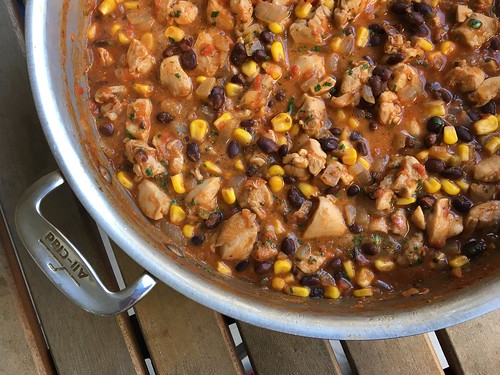
Like most people, I'm a big fan of easy weeknight meals. Obviously I love to cook or I wouldn't have a food blog, but even I have nights where I just don't feel like cooking. That's when a meal like this Skillet Salsa Chicken with Cilantro Lime Rice comes in handy.

Salsa chicken with cilantro lime rice

I've seen recipes for salsa chicken floating around the Internet for years, but they all seem to involve the slow cooker, which I don't use. That's why I was so excited when my friend, Melissa, posted this recipe. A skillet salsa chicken was right up my alley and I knew it would pair beautifully with cilantro lime rice.

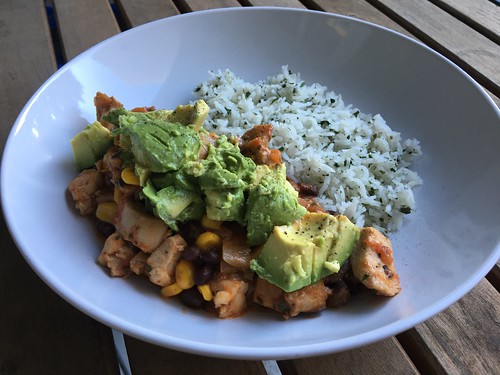
Salsa chicken with cilantro lime rice

What a show-stopper. Katie isn't a picky eater and loves pretty much everything I make, but she couldn't stop raving about this one. After every bite she said some variation of, "Mommy, you are an amazing cooker. I'm so lucky to have you cook for me. Can you make this again soon?" I was right there with her, practically swooning over the delicious flavors, especially when I mixed the rice and chicken together with the creamy avocado. Yum, yum, yum.

And the best part - dinner took almost no time to make so we could play after dinner. That's a win-win in my book.

Skillet Salsa Chicken with Cilantro Lime Rice
Slightly adapted from Hunt, Cook, Eat

1-1/4 pounds boneless skinless chicken thighs, cut into bite sized pieces
1 medium sweet onion, finely chopped
2 cloves garlic, minced (or 1 teaspoon garlic powder)
1 teaspoon cumin
1 teaspoon oregano
1 teaspoon chile powder
1 teaspoon salt
2 cups salsa
1 cup chicken stock or water
1 cup corn kernels
1 can black beans, drained and rinsed
2 tablespoons sour cream
1 tablespoon lime juice
Chopped fresh cilantro, for garnish

1 cup dry basmati rice
1 1/2 tablespoons lime juice
1 teaspoon vegetable oil
2 tablespoons fresh chopped cilantro
1/4 teaspoon salt

Diced avocado, for serving

Heat a large skillet over medium high heat with just a touch of olive oil. Add the chicken and cook for 4-5 minutes until no longer pink. Add the onion and saute for another 2-3 minutes until onion is soft and chicken is cooked through. Add minced garlic (if using) and stir for 30 seconds until fragrant. Add the seasonings, salsa, water, corn and black beans to the pan and stir to combine.

Turn the heat down to medium low and simmer for 10 minutes. Remove the pan from the heat and stir in the sour cream and lime juice. Sprinkle with fresh cilantro.

To make the rice, follow the directions on the package. My basmati calls for soaking the rice beforehand (which I highly recommend). Once you've cooked the rice, drizzle the lime juice and oil over the top while it's still warm. Sprinkle with 2 tablespoons chopped cilantro and salt, then fluff with a fork.

To serve, pile some rice in a shallow bowl and top with some of the chicken. Add diced avocado and serve.
Pin It!

Thursday, October 08, 2015

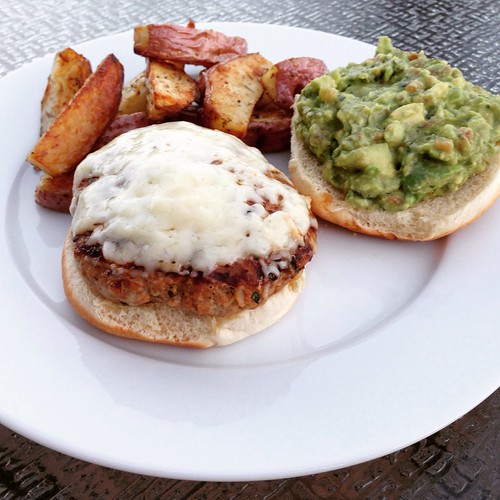
Turkey Burgers with Cheddar and Guacamole

These turkey burgers were a happy accident. See, the plan had been to make my friend Jaida's Turkey Tikka Burgers. I've been thinking about them since she posted the recipe and I couldn't wait to try them. Unfortunately, both the curry paste and mango chutney available in our supermarket weren't safe for Baby Girl since they might contain nuts. Phooey.

Turkey burger with guacamole

Not to be deterred, I looked for a replacement recipe and remembered that I'd been wanting to try this recipe for Jalapeño Cheddar Chicken Burgers with Guacamole that a lot of my favorite bloggers made a couple of years ago. I happened to have everything but the jalapeno, which was fine because Baby Girl doesn't like spicy food.

These were absolutely outstanding. SP said, "this couldn't possibly be a turkey burger. Turkey burgers are dry and flavorless. This is incredible." And Baby Girl gave them two thumbs way up as she inhaled her dinner. I only had one pound of turkey and I graciously allowed SP to take the leftover patty to work today (grumble, grumble) but that just means I need to make them again soon.

Turkey Burgers with Cheddar and Guacamole
Slightly modified from What's Gabby Cooking, seen on Annie's Eats

For the burgers:
1 1/2 lbs. ground turkey (or chicken)
1/2 cup onion, minced
1/3 cup fresh cilantro, minced
2 cloves garlic, minced
1 teaspoon ground cumin
1 teaspoon paprika
Juice of 1/2 small lemon
1/3 cup shredded cheddar cheese, plus more for topping
1/2 teaspoon kosher salt
1/2 teaspoon pepper

To serve:
Burger buns
Guacamole*
Salsa

To make the burgers, combine all the ingredients in a large bowl and mix lightly until evenly combined. Form the mixture into 4-5 patties.

Preheat an outdoor grill and oil the grates. Or, you can cook these on a grill pan or non-stick skillet indoors. Coat whichever pan you're using with cooking spray and heat over medium-high heat.

Cook the patties 3-4 minutes per side, flipping once. A few minutes before the burgers are finished cooking, top with shredded cheddar cheese. Remove the burgers to a plate and let rest a few minutes before serving.

Place one burger on each bottom bun. Put guacamole and/or salsa on the top bun, or on the burger directly, and serve.

*Here's how I made the guacamole for this recipe:

2 ripe avocados
Juice from the other half of the lemon used in the burgers
Minced cilantro
Salt and pepper
A few spoonfuls of prepared salsa

Cut each avocado in half and scoop the flesh into a bowl. Squeeze the lemon juice over the avocado and toss to coat. Add as much cilantro as you like then season with salt and pepper. Add some salsa and stir to combine. Taste and season as needed.
Pin It!

Friday, September 04, 2015

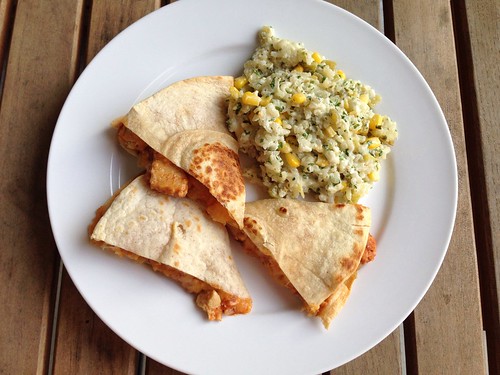
Recipe Redo: Texas BBQ Chicken Quesadillas

I've been making these Texas BBQ Chicken Quesadillas for years but I've never blogged them properly, with an actual recipe and a decent photo. I made them for dinner tonight and figured now was as good a time as any, seeing as some Facebook friends were asking for the recipe.

BBQ chicken quesadillas

Use your favorite BBQ sauce for the chicken. We like Dinosaur sauce.

Texas BBQ Chicken Quesadillas
As seen on Allrecipes

2 tablespoons oil
2 onions, sliced into thin rings
1 tablespoon honey
2-3 chicken breasts, diced
1/2 cup BBQ sauce
cooking spray
4 10-inch (burrito size) flour tortilla
shredded Mexican cheese

Preheat the oven to 350. Line a baking sheet with foil.

Heat 1 tablespoon of the oil in a pan over medium high heat. Add the onions and cook until they begin to caramelize, stirring often, about 20 minutes. Turn the heat down if the onions are browning too quickly. You want them to be soft and deeply brown. Mix in the honey and stir to combine. Remove the onions to a bowl and set aside.

Put the remaining 1 tablespoon oil in the pan and add the chicken. Cook over medium high heat until cooked through, about 5 minutes. Off heat, stir in the BBQ sauce to evenly coat the chicken.

Coat a griddle pan or large, flat skillet with cooking spray and add one of the tortillas. Heat over medium heat until hot, then add one of the tortillas. Cook until the tortilla is lightly browned on both sides. Remove the tortilla to a cutting board and repeat with the other 4 tortillas.

While the other tortillas are cooking, start assembling the quesadillas. Lay one tortilla flat and add some shredded cheese to one half. Top with a quarter of the onions and a quarter of the chicken. Add some more cheese, then fold the tortilla in half. Place on the prepared baking sheet. As the other tortillas brown, assemble in the same way.

Once all the quesadillas have been assembled, put the baking sheet in the oven for about 10-15 minutes to melt the cheese.
Pin It!

Friday, March 13, 2015

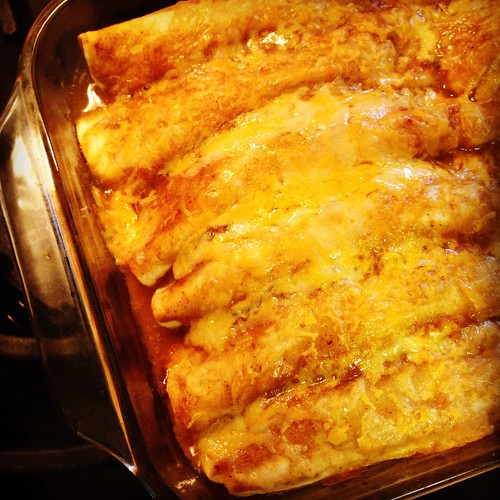
Chicken and Green Chile Enchiladas

As you may have noticed, I've been on a chicken thigh kick recently. The meat is just so tender and flavorful. Take these Chicken and Green Chile Enchiladas from my friend, Melissa. In the past I would have subbed breasts for the thighs. I'm sure the results would have been good, but not great. Instead I used thighs and everyone, even the 5-year-old, was raving about how good they were.

Untitled

My stepdad kept oohing and ahhing over them. And, like many things, they got better the longer they sat. SP took the final two enchiladas for lunch two days later and said they were even better than the first day we ate them.

As luck would have it, my aunt lives in New Mexico, home of the Hatch chile. She knows how much I love to cook, and that I can't get Hatch chiles here in Pennsylvania, so she figured out a way to process them, freeze them and bring them with her when she visited for the holidays. I've had the chiles in my freezer, waiting for the perfect recipe. If you don't have Hatch chiles you can definitely use regular green chiles - you can't really taste the true Hatch chile flavor in the enchiladas anyway. I'm saving the rest of the chiles to use as a burger topping. I can't wait!

Chicken and Green Chile Enchiladas
As seen on Alosha's Kitchen

2 pounds boneless, skinless chicken thighs
Seasoning: ground cumin, dried oregano, garlic powder, salt and pepper
1 tablespoon oil
1 large yellow onion, diced
4 large cloves garlic, minced
1 7-ounce can diced green chiles (or 7 to 8 ounces Hatch chiles if you have them!)

Enchilada sauce:
1 1/2 tablespoons olive oil
1/4 cup all-purpose flour (spooned and leveled)
2 cups chicken broth
1 1/2 tablespoons chili powder
1 small canned chipotle chile in adobo, minced
3/4 cup water

8 ounces cheddar cheese, shredded and divided in half
18 flour tortillas, large taco size
Chopped fresh cilantro (optional)

Preheat oven to 350. Place the chicken on a large baking sheet lined with foil. Season the chicken generously with cumin, oregano, garlic powder, salt and pepper. Bake for 30 minutes.

Meanwhile, heat 1/2 tablespoon oil over medium low in a small skillet. Add the onions and garlic and saute until just soft, about 5 minutes. Add the onion and garlic to a medium mixing bowl along with the diced green chiles.

To make the enchilada sauce: in a medium saucepan, heat 1 1/2 tablespoons oil over medium. Add flour and cook, whisking occasionally, 1 minute. Add broth, chili powder, chipotle, and 3/4 cup water; bring to a boil, whisking constantly. Reduce heat, and simmer until lightly thickened, about 10 minutes.

Once the chicken has finished baking, remove to a cutting board, let cool slightly, then slice/chop the chicken into small bits and add to the mixing bowl. Make sure the mixture is cool enough to not melt the cheese, then add half the cheddar. Toss well to combine.

You'll need two baking dishes (one 9x13" and one smaller, I used an 8x8 square). Spray both dishes with cooking spray. Fill each tortilla with some of the filling, then roll it up and place seam side down in the baking dishes. Repeat with the other tortillas. Pour the sauce evenly over the enchiladas.

Cover the dishes with foil (do not forget this or the sauce will dry out!) and bake in the 350-degree oven for 30 minutes. Remove the pan and discard the foil. Sprinkle the remaining cheddar on top of the enchiladas and return to the oven uncovered for another 10 minutes.

Sprinkle cilantro on top, if desired, and serve immediately.
Pin It!

Friday, September 19, 2014

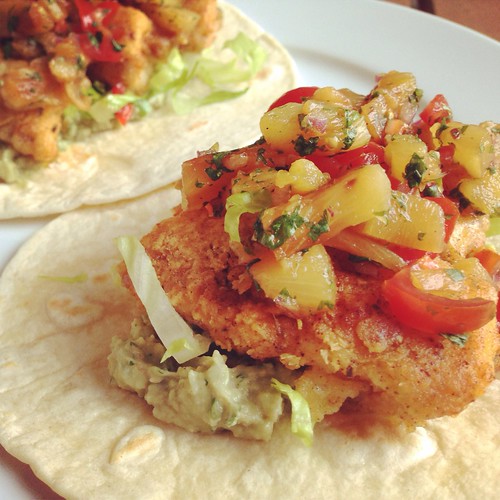
Fish Tacos with Grilled Pineapple Salsa

While I was making the menu for the week I asked SP if he wanted anything specific for dinner. The first thing he said was "know what we haven't had in awhile, fish tacos." I'll admit, I was a bit surprised. We eat fish regularly but not usually in tacos. I was up for the challenge, especially since Josie had just posted a recipe for Grilled Fish Tacos with Grilled Pineapple Salsa. Those tacos were my inspiration for these beauties.

Fish tacos with pineapple salsa

I've mentioned before that we don't own a gas grill, and grilling something as delicate as fish on a charcoal grill would be tricky for a weeknight. My grill pan recently experienced a small catastrophe, so that was out as well. I felt like making a battered fish taco, so I turned to my recipe for tilapia francese. I added a bunch of seasoning to the flour, which resulted in very flavorful fish. When it came to the salsa I knew the peppers had to go since they don't agree with me. I just swapped those out for grape tomatoes. I mashed up some avocado with a little cilantro and lime juice, shredded some lettuce and dinner was served.

We all LOVED these. I had to fight SP for the leftovers. Baby Girl took her taco apart and ate everything separately (such a strange child) but she cleaned her plate. These will definitely be on our permanent rotation. And since I used canned pineapple, we can make these year-round. They'll be such a great burst of summer flavors in the cold depths of winter.

Fish Tacos with Grilled Pineapple Salsa

1 cup flour
1 teaspoon chile powder
1 teaspoon dried oregano
1 teaspoon onion powder
1 teaspoon cumin
1 teaspoon garlic powder
kosher salt and pepper
1 egg
2 tablespoons water
4 pieces tilapia filets, cut into strips
2 tablespoons butter
2 tablespoons extra virgin olive oil

1 can pineapple rings, drained, juice reserved
grape tomatoes, finely diced
3 tablespoons minced fresh cilantro, plus more for serving
1 tablespoon minced red onion

1 avocado, pitted
lime juice, to taste
salt and pepper, to taste

1/2 head romaine lettuce, thinly sliced
Flour tortillas

Place flour in a pie plate and add the chile powder, oregano, onion powder, cumin, garlic powder, salt and pepper. Stir to combine. Beat the egg and water in a second pie plate. Coat each piece of tilapia with flour, then coat with egg, then pit it back in the flour for a second coat.

Heat butter and oil in a large non-stick skillet over medium heat. Place tilapia in pan and cook for about 2-3 minutes on each side until golden brown.

Meanwhile (or you can do this ahead of time), grill the pineapple in a grill pan over medium-high heat until brown on both sides. Transfer the pineapple to a large cutting board and finely chop. In a medium bowl, combine the pineapple, grape tomatoes, cilantro, and red onion. Add a splash of the pineapple juice. Season to taste with salt and pepper.

Grill the tortillas for 30 to 45 seconds per side. Transfer to a plate and cover loosely with a dishtowel or foil.

Mash the avocado in a medium bowl. Add the lime juice, and continue mashing to form a smooth sauce. Season with salt and pepper.

To serve, top tortillas with fish, pineapple salsa, lettuce, avocado, and cilantro.
Pin It!

Monday, August 18, 2014

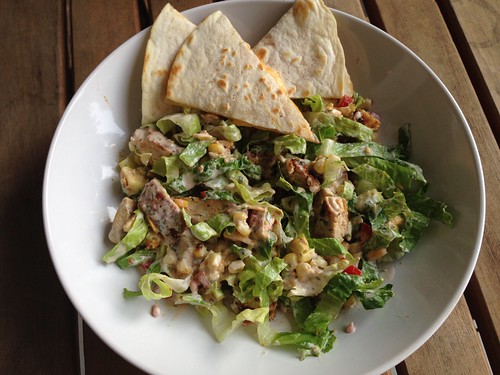
Chicken Taco Salad

I know, I know. I haven't been a great blogger lately. As I said in my July recap post, I've lost my mojo. I'm not making many new recipes and I've had writers block trying to blog the ones I have made.

But this salad...oh man. I love a good dinner salad and this Chicken Taco Salad from Pioneer Woman fit the bill. Lots of fresh veggies mixed with lettuce and grilled chicken.

Chicken taco salad

I opted to grill the chicken rather than cooking it in oil and butter. I also made a quick rub with various spices (chili powder, cumin, garlic powder, onion powder, salt and pepper) rather than use taco seasoning. And since I had some tortillas leftover I decided to make some cheese queadillas as a side dish. Man, there is just something about a plain cheese quesadilla paired with a flavorful salad. Yum.

Chicken Taco Salad
As seen on The Pioneer Woman

Dressing:
3/4 cups ranch dressing
1/4 cup salsa
3 tablespoons finely minced cilantro
Chicken:
2 chicken breasts, cut in half lengthwise
2 tablespoons taco seasoning
cooking spray
Salad:
2 ears corn, shucked
2 romaine hearts, shredded thin
3 roma tomatoes, diced
1/2 cup grated pepper Jack cheese
2 whole avocados, diced
3 scallions, sliced
1/2 cup cilantro
Tortilla chips, crushed slightly

Combine the dressing ingredients in a bowl and stir together. Cover and refrigerate.

Generously season both sides of the chicken breasts with the taco seasoning or spices. Spray a grill pan with cooking spray and heat over medium-high heat. Cook the chicken for 5 minutes, then flip and cook for another 4 minutes. Remove from the grill pan and set aside to cool slightly, then cut it into cubes.

Place the ears of corn on the grill pan. Cook until the corn is browned in spots. Remove from the pan and cut off the kernels with a sharp knife. Set aside.

To assemble the salad, pile the chicken, corn, lettuce, tomatoes, cheese, avocado, scallions, cilantro, and crushed chips on a big platter. Drizzle the dressing all over the top, or serve it on the side so everyone can dress their own salad.
Pin It!

Monday, July 14, 2014

Recipe Redo: Mexican Sour Cream Rice

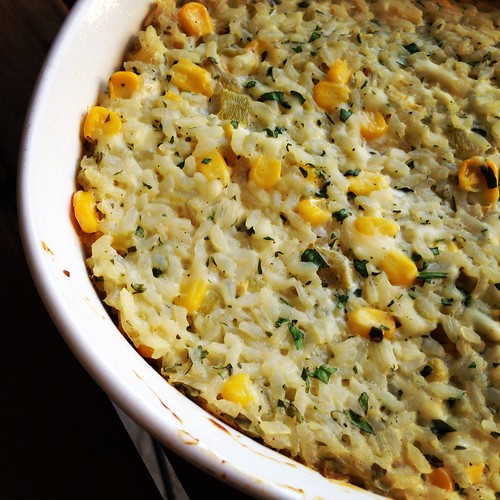
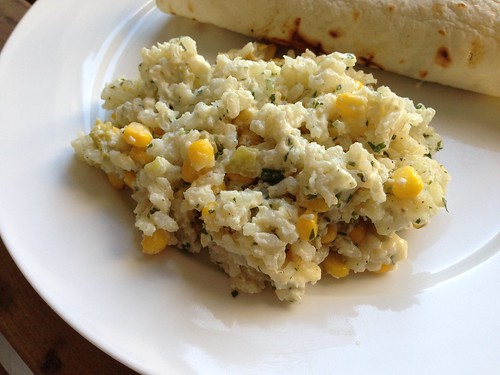
I've been making this Mexican Sour Cream Rice for years. I used to make it any time we had anything even slightly Mexican-inspired for dinner. It was definitely my go-to side dish.

Mexican sour cream rice

I've been recommending the dish to friends a lot recently and I figured it was time to update my blog with some better pictures. Please forgive those early blogging pics - I may not be a professional photographer but I think my photos have come a long way since then.

Mexican sour cream rice

The last time I made this I used regular Monterrey Jack cheese instead of pepper Jack because Baby Girl doesn't like spicy things. We both felt it lost a little something with the milder cheese so next time I'm going to throw caution to the wind and go back to pepper Jack. We don't remember it being super spicy that way so hopefully Baby Girl won't refuse to eat it.

Mexican Sour Cream Rice
Modified from All Recipes

1 3/4 cups chicken broth
1 cup uncooked long grain white rice
1 cup sour cream
1 (4 ounce) can diced green chile peppers
2 cups shredded Monterey or pepper Jack cheese
1 1/2 cups frozen corn
1/4 cup finely chopped fresh cilantro
salt and pepper to taste

Bring the chicken broth to a boil in a large sauce pot. Add the rice, stir and then reduce the heat to low. Cover and simmer for 20 minutes.

Meanwhile, preheat the oven to 350. Lightly grease a 1-1/2 quart casserole dish.

Add the sour cream, green chile peppers, cheese, corn, and cilantro to the pot with the rice. Stir to combine, then season with salt and pepper. Transfer to the greased casserole dish.

Bake uncovered for 30 minutes until the top is lightly browned.
Pin It!

Wednesday, July 02, 2014

Grilled Chicken Tacos with Spiced Mayo and Avocado Salsa

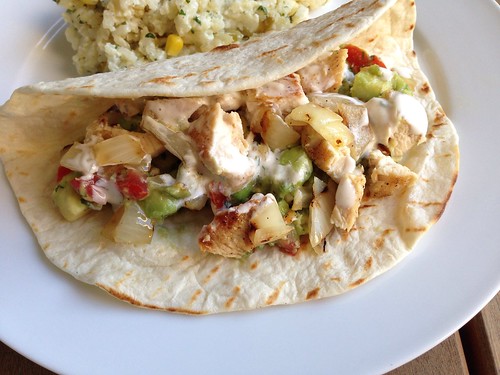
These Grilled Chicken Tacos with Spiced Mayo and Avocado Salsa are, hands down, my new favorite taco. As soon as I saw them I knew I had to make them. I could almost taste them just by reading the recipe.

Chicken tacos

I had to make a slight modification because I refuse to pay $1 for one lime when I can't even be guaranteed the lime will have any juice in it. Have you ever bought a lime and found it completely dry? How does that even happen? Lemons are still cheap so I just swapped it out. I also left out the hot sauce because Baby Girl isn't a fan of spicy food.

I prepared these on my indoor grill pan because, as I've mentioned before, we have a charcoal grill and getting that set up on a weeknight just doesn't happen. Since skewers won't fit on the grill pan I cut the chicken breasts in half lengthwise and grilled them before cutting into cubes. Same for the onion - I grilled it in rings and then chopped them. These tacos were so delicious we barely had enough leftover for one lunch the next day.

Grilled Chicken Soft Tacos with Spiced Mayo and Avocado Salsa
As seen on Seeded at the Table, originally from Weber's New Real Grilling

For the chicken:
zest of 1 lemon
1/2 teaspoon ground cumin
Salt & pepper
Olive oil
4 boneless, skinless chicken breasts, cut in half lengthwise
1 large yellow onion, peeled and cut into 3/4-inch rings

1/2 cup mayonnaise
Juice from 1 lemon
1 teaspoon hot sauce (optional)
1/4 teaspoon cumin

For the Avocado Salsa:
2 large avocados, peeled, pitted and diced
2 medium Roma tomatoes, seeded and finely diced
3 scallions, minced
2 tablespoons fresh lemon juice
1 tablespoon chopped cilantro
1/4 teaspoon hot sauce (optional)
8 taco or fajita-size flour tortillas

Preheat grill pan over medium-high heat.

In a large bowl or plastic food storage bag, combine the lemon zest, 1/2 teaspoon cumin, 1/2 teaspoon salt, 1/4 teaspoon black pepper and a few tablespoons of oil. Place the chicken pieces into the bowl or bag and toss to combine until evenly coated with the seasonings. In a separate bag or bowl, toss the onion rings with some oil, salt and pepper.

In a small bowl, whisk together the mayonnaise, lemon juice, hot sauce (if using), and 1/4 teaspoon cumin. Stir in water, 1 teaspoon at a time, until the mixture can be drizzled.

In another bowl, toss together the salsa ingredients and season with salt and pepper, to taste.

Add the onion rings to the grill pan and cook, turning often, until the onions are soft and blackened in spots. Remove from the grill to a bowl and cover with foil or plastic wrap. Add the chicken to the grill pan and cook 5 minutes on one side, then flip and cook another 4 minutes. Remove from the grill and let rest. Add the tortillas to the grill pan to warm and brown in spots, turning once. Cut the chicken and onions into bite-size pieces. Let everyone assemble their own tacos with the mayo and salsa.

Pin It!

Wednesday, May 28, 2014

Crunchy Baked Tacos

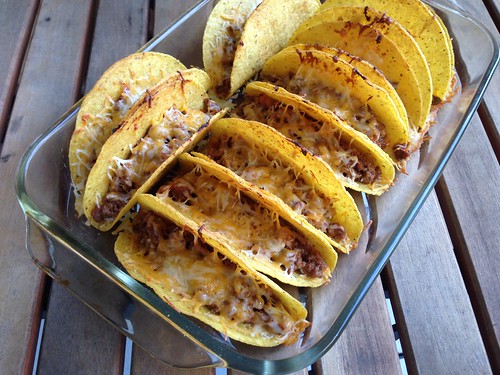
I love tacos but there was always something about them that made me feel like they wouldn't work for a weeknight. I think it was all the prep work for the various toppings, trying not to overfill them at the table and a general dislike of tacos made with soft flour tortillas. Then I saw these Crunchy Baked Tacos from No. 2 Pencil and it was like a light bulb went off in my head. Minimal work and crunchy shells. I was sold.

Crunchy baked tacos

Baking the shells with the meat and cheese already inside was brilliant - I hate when the cheese isn't fully melted and this solves that problem. Plus, you just take a taco from the baking dish and you're ready to eat. I kept the toppings simple - shredded lettuce, diced grape tomatoes and I found an avocado in my crisper so I diced that up, too. Some sour cream at the table and we were set.

Crunchy baked tacos

This is definitely my new favorite taco recipe. I swapped out my filling recipe but kept the method the same. The one thing I didn't like - these don't reheat well the next day. In fact, they were downright awful. My recommendation would be to only make as many as you anticipate eating. The good news is they take hardly any time to cook so you can assemble some more and bake them off quickly if you decide you want a second helping.

Crunchy Baked Tacos
Filling from A Taste of Home Cooking, method from No. 2 Pencil

1 5.8 oz box yellow corn taco shells (12 shells)
1 pound ground beef
1 onion, chopped
1 clove minced garlic
2 teaspoons cumin
2 teaspoons chili powder
Salt and pepper
2 tablespoons tomato paste
1/2 cup salsa
1/4 cup sour cream
2 cups of freshly shredded colby jack cheese
romaine lettuce, shredded
vine-ripened tomatoes, diced
sour cream
taco sauce

Preheat oven to 400 degrees and place shells in a 9x13 baking dish.

Heat a saute pan over medium heat. Add the ground beef and cook, breaking up the large chunks, until just starting to brown. Add the onion and garlic and saute until the onions are soft and the beef is cooked through. Add the cumin, chili powder, salt, pepper and tomato paste. Let cook for about 5 minutes. Off heat, add the salsa and sour cream and stir to incorporate.

Sprinkle half of the cheese in the bottom of each taco shell. Evenly distribute the ground beef in each shell. Top ground beef with remaining shredded cheese.

Bake for 8-10 minutes (mine were done at 8 minutes), or until cheese is melted and shells have started to crisp.

Remove from oven and top with lettuce, tomatoes, sour cream and taco sauce.
Pin It!

Wednesday, May 07, 2014

Recipe Redo: Avocado Enchiladas

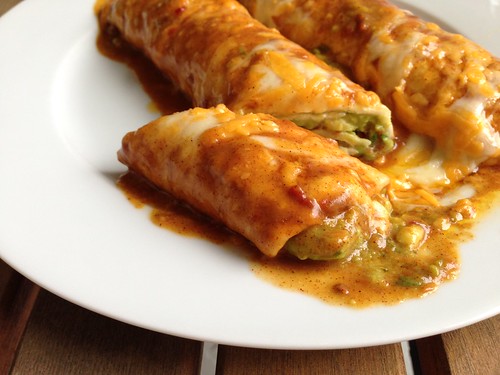
Someone was looking for vegetarian Mexican recipes recently and I recommended these avocado enchiladas. Then I looked at the picture and cringed. I know enchiladas are hard to photograph but I knew I could do at least slightly better. We all love guacamole so I put these on the menu for the weekend.

Untitled

These are basically guacamole-stuffed tortillas topped with homemade enchilada sauce and cheese. Nothing wrong with that. My guacamole recipe is below but you can prepare it however you would normally. I don't add garlic or jalapeno, but some people like that. Whatever you do, make the homemade enchilada sauce. It's a very simple recipe and I love the spice and tang from the chipotle in adobo. It's the perfect compliment to the creamy avocado.

I froze the leftovers in individual portions and can't wait to pull out one of those parcels for a quick lunch or dinner.

Avocado Enchiladas
Modified from ...But where do you get your protein?

1 1/2 tablespoons olive oil
1/4 cup all-purpose flour (spooned and leveled)
1 can (14.5 ounces) reduced sodium chicken broth
1 1/2 tablespoons chili powder
1 small canned chipotle chile in adobo
3/4 cup water
4 ripe avocados, sliced in half, pit removed and flesh scooped out
1/4 cup finely chopped red onion
1/2 cup cilantro leaves, roughly chopped
Lemon juice, to taste
2 tomatoes, seeded and diced
Salt and black pepper to taste
8 fajita-size flour tortillas
8oz grated sharp Cheddar or Monterey Jack cheese
Additional cilantro leaves

Preheat oven to 350 degrees.

In a medium saucepan, heat 1 1/2 tablespoons oil over medium. Add flour and cook, whisking occasionally, 1 minute. Add broth, chili powder, chipotle, and 3/4 cup water; bring to a boil, whisking constantly. Reduce heat, and simmer until lightly thickened, about 10 minutes.

Spray a glass 9x13" baking dish with cooking spray. Mash the avocado in a bowl. Add the onion, cilantro, lemon juice, tomatoes, and salt and pepper. Mix together like you're making guacamole. Taste and adjust seasoning.

Lay one tortilla on a work surface. Spoon 1/8 the avocado mixture into each tortilla and roll them up. Place tortillas in the prepared baking dish and cover with the enchilada sauce. Sprinkle the cheese over the top.

Bake for 20 minutes. Sprinkle with additional cilantro just before serving.
Pin It!

Friday, April 18, 2014

Pork Carnitas

Another pork taco recipe? Yes, I know on Monday I shared a recipe for Cuban Street Tacos. SP actually made these Pork Carnitas back in early March and I'm just getting around to blogging them now. So I hope you guys like pork tacos!

As you may have realized, we've started doing Sunday dinners with my parents again. It started back in September after my stepgrandmother had a stroke and was subsequently moved to a long-term care facility. Things were very rough in the beginning, especially for my parents since my stepdad is the only one local and a lot of the burden of his mother's care fell to him. SP thought it would be a good idea to take food over to their house on Sundays so they could relax, spend time with Baby Girl and not have to worry about dinner for one night. SP and I recently started alternating the cooking so he could try out some new recipes and get back into the kitchen.

Untitled

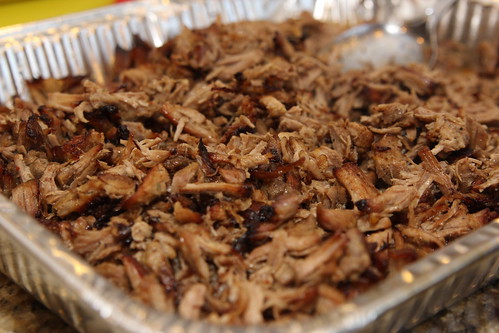
SP actually prepared this whole meal himself while me, Baby Girl and my mom were at the Philadelphia Flower Show for the day. The flavor was outstanding. I was expecting a citrus flavor from the orange juice but all it did was add to the overall depth of flavor. These tacos were meaty and delicious.

Untitled

Pork Carnitas
Williams-Sonoma Mexican cookbook

3 lbs boneless pork shoulder or 3 lbs country-style pork ribs
6 garlic cloves, halved
1 orange, zest of (cut into wide strips using a vegetable peeler)
3/4 cup fresh orange juice
sea salt
1 tablespoon canola oil (if necessary)
12 corn or flour tortillas, warmed
guacamole
salsa fresca
refried beans

Cut off any big pieces of fat from the pork and put the fat into a wide, heavy saucepan or frying pan. Cut the pork into strips about 1 1/2 inches long and 3/4 inch wide. Add the pork to the pan with the garlic, orange zest, orange juice, and 2 teaspoons sea salt. The meat should be in a single layer, if possible. Add water to barely cover the meat and bring to a boil over medium heat. Reduce the heat to medium low, cover partially, and cook, stirring occasionally, until all of the liquid has evaporated, about 1 hour. If the meat is not yet fork tender, add a bit more water, cover and continue cooking.

Uncover the pan and continue cooking the pork until all the fat is rendered and the meat is browning in the melted fat, 10-15 minutes longer. There is usually enough melted fat in the pan, but if necessary, add the 1 tablespoon oil. When the meat is brown and crisp, using a slotted spoon, transfer it to a colander and let any excess fat drain away.

Immediately transfer the pork to a warmed serving bowl. Serve with the warm tortillas, guacamole and salsa to make tacos.
Pin It!

Monday, April 14, 2014

Cuban Street Tacos

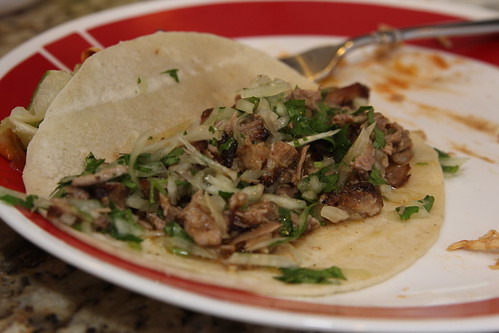
For our Mexican feast last month T made these Cuban Street Tacos. She prepped and cooked it before we got there, so the only thing we had to do was pull the pork and broil it.

pork tacos
Photo credit: T. Casey

This had such great flavor. And I loved the crispy bits so don't skip that step! I definitely ate way too many of these (we all did).

street tacos
Photo credit: T. Casey

Cuban Street Tacos
As seen on Sweet Peas Kitchen, adapted from What's Cookin' Chicago, originally adapted from Cook's Illustrated, June 2008

1 (4-pound) boneless pork butt, cut into 2-inch chunks
1 tablespoon sea salt
1 tablespoon oil
1 cup water
1 cup chicken stock
1/2 teaspoon pepper
1 teaspoon ground cumin
1 teaspoon chili powder
1 teaspoon dried oregano
2 bay leaves
3 large garlic cloves, minced
1 to 2 jalapeños, minced
1 onion, peeled and halved
juice of 1 lime
1 medium orange, halved and juice, rinds reserved
8 corn tortillas
1 small red onion, thinly sliced
1/2 cup chopped cilantro
1 cup Monterey Jack cheese
2 limes, cut into wedges

Rub the pieces of pork shoulder all over with salt. Refrigerate for at least 1 hour.

Preheat oven to 300 degrees F.

Heat oil in a Dutch oven over medium-high heat. Add pork and sear pieces on all sides. Once all the pork is seared and lightly browned, remove from the pot and place in a large bowl. Pour in water and chicken stock, scraping the bottom of the pan with a flat-edged spatula to release all the tasty brown bits. Add pepper, cumin, chili powder, oregano, bay leaves, garlic, jalapenos, onion, lime juice, orange juice and orange rinds and bring to a simmer, stirring occasionally. Add pork pieces and cover the pot and place it in the preheated oven. Bake for 1 hour, take a peek and give the pot a stir to turn the meat. Put the lid back on and let it continue to bake in the oven for another hour.

After 2 hours of baking time, remove the pot from oven. Remove the bay leaves, onion and orange rinds from the pot and discard. Remove the pork and place in a large bowl; set aside. Place the pot on the stove top and let the remaining liquid come to a boil over high heat. Let it boil until it thickens up and is reduced to about 1 cup, about 10 -15 minutes.

Lower racks to near the bottom of the oven and turn oven to broil. In the bowl, pull each piece of pork in half using two forks. Pour the reduced liquid over the pork and add salt and pepper to taste; stir to combine. Place the coated pieces of pork on a wire cooling rack set on a baking sheet. Broil the meat for 5 to 8 minutes on each side until well browned. Serve immediately in warm tortillas. Garnish with red onion slices, cilantro, Monterey Jack cheese, and lime wedges.
Pin It!

Wednesday, April 09, 2014

Salsa Fresca

This is the other salsa recipe I made for the Mexican-themed dinner we had with friends last month. I've been making this one for ages but never thought to take a picture to share with you guys.

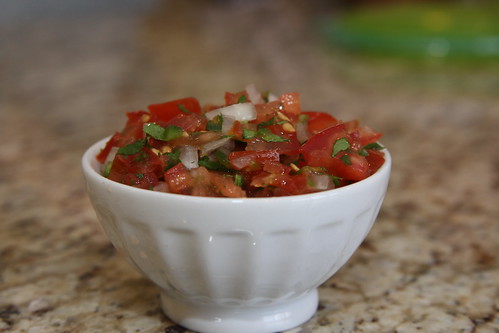
salsa fresca
Photo credit - T. Casey

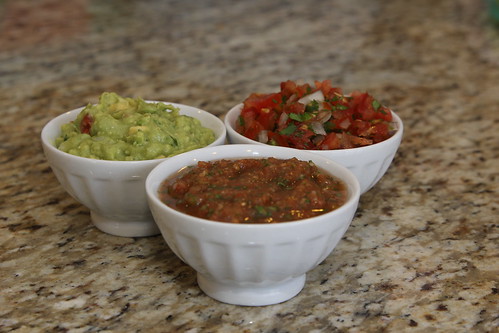
Obviously this one is very different from the grilled salsa. This one is much lighter and chunkier. They're both delicious, just different. I think it was great to have both versions at the dinner. We had no problem inhaling both salsas and the guacamole.

guacamole and two salsas
Photo credit - T. Casey

Salsa Fresca
As seen in the Williams-Sonoma Mexican cookbook

1 lb. ripe tomatoes, cut into 1/4-inch pieces
1/3 cup finely chopped white onion
1/4 cup chopped fresh cilantro
1 jalapeno chiles, finely chopped (ribs and seeds removed if you want it less spicy)
2 teaspoons fresh lime juice
Sea salt to taste

In a bowl, toss together the tomatoes, onion, cilantro, chiles, and lime juice. Sprinkle with salt and toss again. Cover and let stand for 10 to 15 minutes to allow the flavors to mingle, then serve with your favorite chips.

Makes 2 cups.
Pin It!

Monday, April 07, 2014

Orange Margaritas

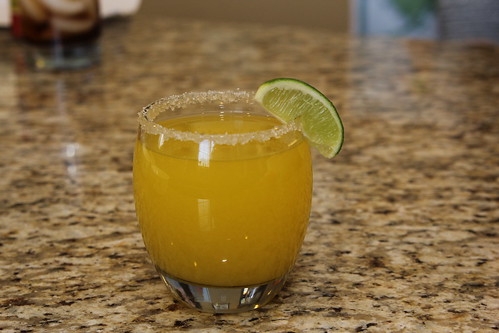
We needed margaritas to go with our Mexican-themed dinner. Since I had a bunch of navel oranges leftover from a previous recipe, I decided to make Orange Margaritas.

orange margarita
Photo credit - T. Casey

I ended up with 24oz of fresh-squeezed orange juice so I quadrupled the original recipe. It was a little heavy on the tequila and we couldn't really taste the orange juice so I've decreased the tequila below. These were delicious and really easy to make - the hardest part was squeezing all the citrus by hand. I definitely got an arm workout.

Orange Margarita
As seen on Confections of a Foodie Bride
Yields: 4 servings

6 oz homemade margarita mix*
6 oz fresh squeezed orange juice
4 oz silver tequila
4 oz orange liqueur
Sugar, for rimming glasses (optional)

Combine all the ingredients in a pitcher or carafe, stirring well.

Run one of the juiced limes or orange halves around the outside edge of the glasses and then dip in sugar. You can also dip the glass in water and then the sugar.

Fill glasses with ice and pour the margarita over the top.

*Homemade Margarita Mix
1/2 cup sugar
1 cup water
1 cup fresh squeezed lime juice

Heat the water and sugar in a small sauce pan over medium heat, stirring often, until the sugar is completely dissolved and the water is clear. Let cool. Pour into a pitcher with the lime juice.

Leftovers will keep 7-10 days in a jar in the fridge.

Pin It!

Wednesday, March 26, 2014

Restaurant Knockoff - Baja Fresh Grilled Salsa

I've been wanting to make Nicole's recipe for Baja Fresh Grilled Salsa for years, I just needed a party with enough people to eat it all. When we decided to do a Mexican-themed dinner with our friends, it was the first thing I knew I wanted to make.

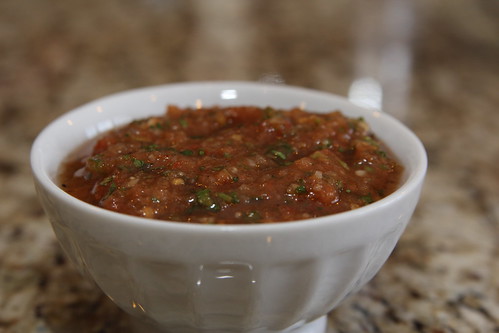
roasted salsa
Photo credit - T. Casey

This could not have been easier. I used my indoor grill pan to char the vegetables and then whirred them up in the food processor. I only used one jalapeno since I wanted this to be mild enough for the kids to enjoy, but unfortunately my jalapeno was pretty spicy. It was great for the grown-ups, though. We inhaled this. Initially SP had been more excited about the salsa fresca I also made but ended up loving this one more. It's positively delicious and I can't wait to make it again.

Baja Fresh Grilled Salsa
As seen on Prevention RD, adapted from My Bizzy Kitchen

2 teaspoons extra virgin olive oil, to coat
6 large tomatoes
1-3 jalapenos (1 for mild, 2 for medium, 3 for hot), stem removed
1 onion, peeled and quartered
4 cloves garlic, peeled
Couple handfuls cilantro
1 teaspoon salt
Juice of 1/2 lime

Pre-heat a grill or grill pan to medium heat. Coat the tomatoes, jalapenos, onion, and garlic in the olive oil.

Grill the vegetables until they are charred, but not falling apart.

Place the vegetables in the bowl of a food processor or blender. Add the cilantro, salt, and lime juice. Blend until smooth. Serve with your favorite tortilla chip.
Pin It!