Showing posts with label cookies. Show all posts

Thursday, October 10, 2019

Salted Chocolate Chunk Cookies

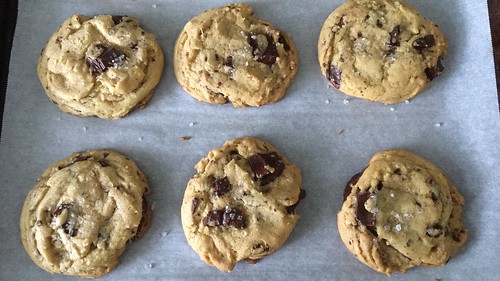
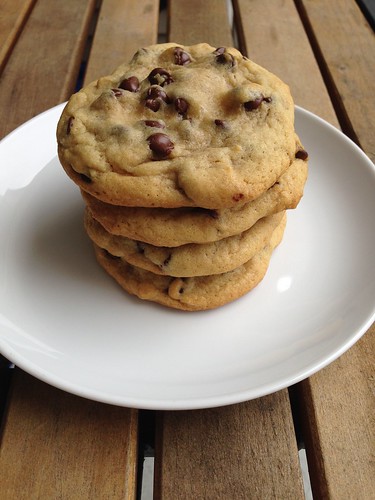
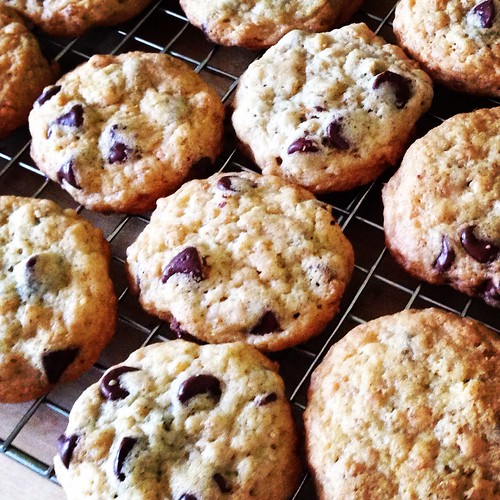
I went through a phase a few summers ago where I made these cookies every few weeks. They're just that addictive. I don't know about you all, but I love a good mash up of salty and sweet. That's where these Salted Chocolate Chunk Cookies shine.

Salted chocolate chunk cookies

Salted Chocolate Chunk Cookies
Smitten Kitchen

1 stick unsalted butter, at room temperature
2 tablespoons granulated sugar
1 cup packed light or dark brown sugar
1 large egg
1 teaspoon vanilla extract
3/4 teaspoon baking soda
Heaped 1/4 teaspoon (1/4 + 1/8 teaspoon) fine sea or table salt
1 3/4 cups flour
1/2 pound semi-or bittersweet chocolate, cut into roughly 1/2-inch chunks with a serrated knife
Flaky sea salt, to finish

Heat oven to 360°F and line two baking sheets with parchment paper.

In a large bowl, cream the butter and sugars together with an electric mixer until very light and fluffy, about 5 minutes. Add egg and vanilla, beating until incorporated, and scraping down the bowl as needed. Beat in salt fine sea or table salt and baking soda until combined, then the flour on a low speed until just mixed. The dough will look crumbly at this point. With a spatula, fold/stir in the chocolate chunks.

Scoop cookies into 1 1/2 tablespoon mounds, spacing them apart on the prepared baking sheet. Sprinkle each with a few flakes of sea salt. Bake for 11 to 12 minutes, until golden on the outside but still very gooey and soft inside. Out of the oven, let rest on baking sheet out of the for 5 minutes before transferring a cooling rack.

Pin It!

Monday, February 15, 2016

Oreo Peppermint Cookies

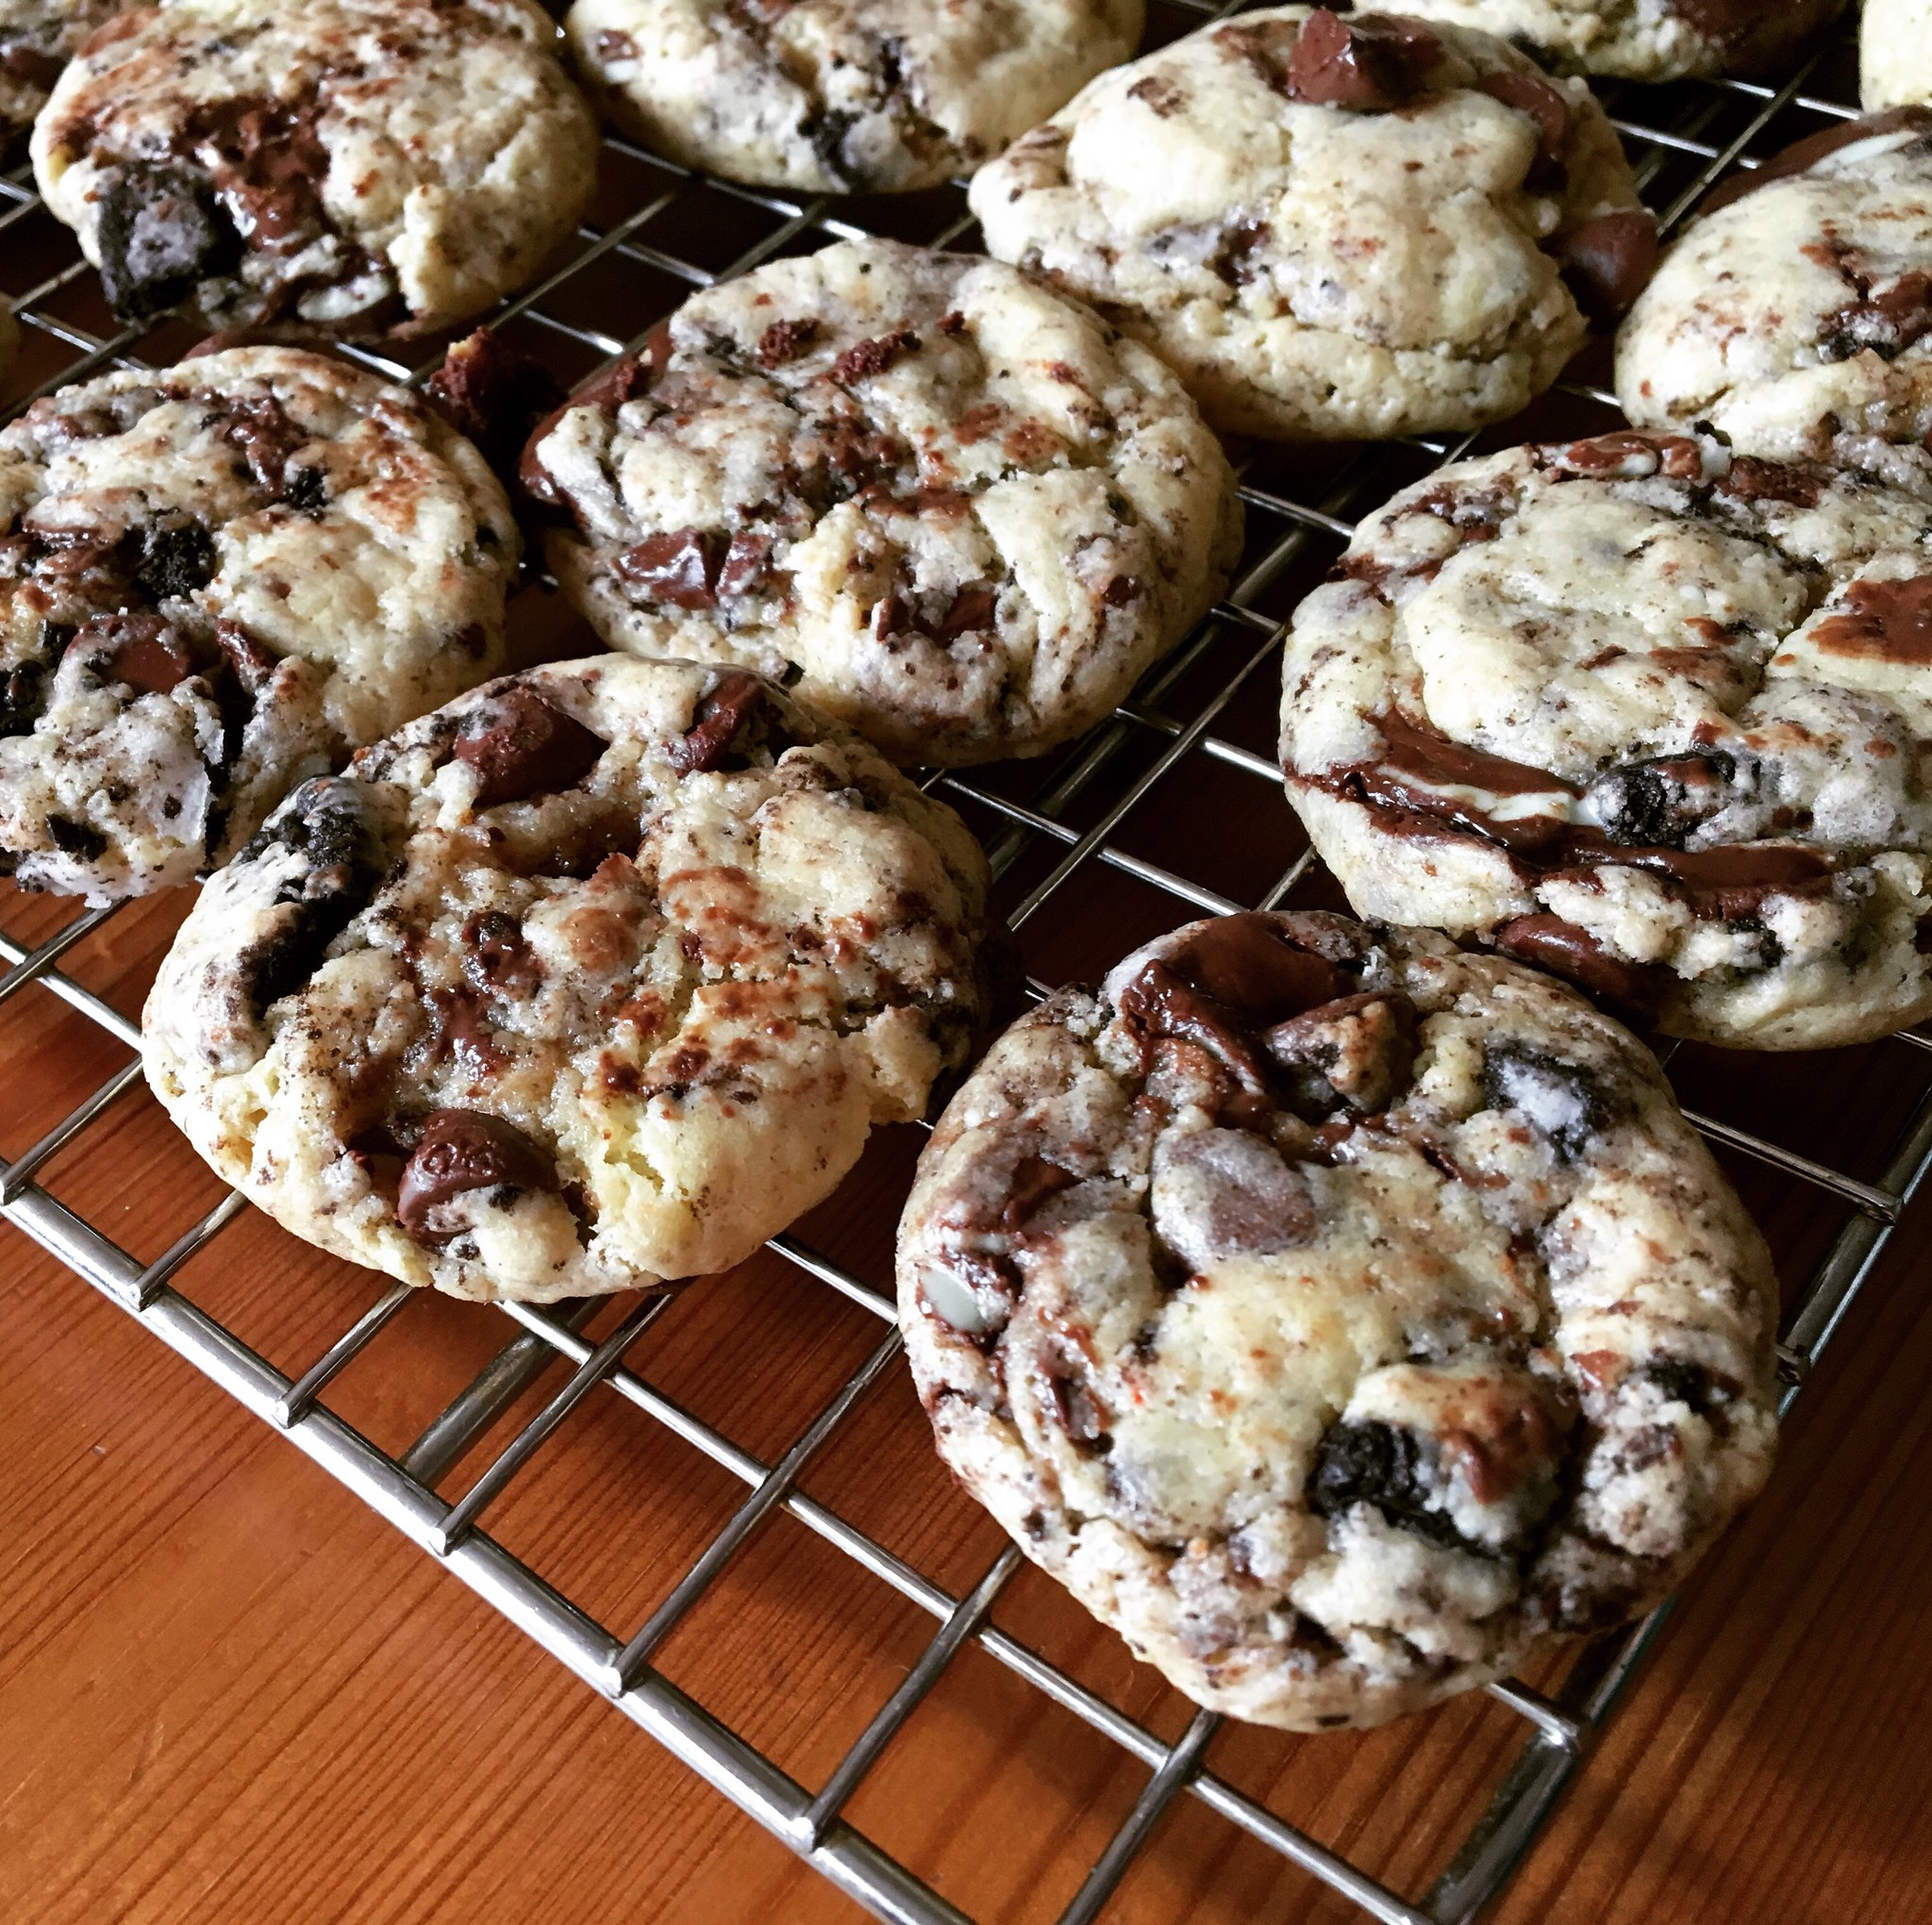
You're going to laugh at me. Do you want to know the reason I made these Oreo Peppermint Cookies? It's because I had half a brick of cream cheese leftover from the weekend of Winter Storm Jonas when we treated ourselves to bagels for breakfast.

That seems silly, right, trading cookies for a bagel. But see, here's the thing - if there's cream cheese in the house, I'll want to buy bagels to use it up. And then it becomes a vicious cycle of buying more cream cheese to finish the bagels and more bagels to finish the cream cheese. The truth is, I have a serious weakness for bagels. I used to eat half an everything bagel with cream cheese for breakfast every morning. In the summer I'd add nice, thick slices of fresh Jersey tomatoes and wash it all down with a tall glass of orange juice. That breakfast was the first thing to go when I decided to get serious about weight loss, exercise and healthier living a few years ago.

Oreo peppermint cookies

But cookies...meh. I can take or leave a cookie. The only dessert I have no willpower over is cake. I figured I'd make these cookies, we'd eat a few and then the rest would go into the office with Steve. Katie and I made the dough one Sunday morning and baked them off that afternoon before we went to my parent's house for Sunday dinner. And, as planned, the rest went to the office Monday morning.

Steve couldn't find the Andes Peppermint Crunch chips listed in the original recipe, so he just got a regular box of Andes mints. I crushed them up like I did for the Oreos and that worked fine and tasted great.

Because of the cake mix, these don't taste like your typical homemade cookie, but everyone who tried them liked them.

Oreo Peppermint Cookies
Slightly modified from Inside BruCrew Life

1 box yellow cake mix
1 stick butter, melted
1 egg
1/2 teaspoon peppermint extract
1/2 teaspoon vanilla extract
4 ounces cream cheese, softened
8 Oreo cookies, crushed into pieces
1 package Andes mints, crushed (or 1 cup Andes Peppermint Crunch pieces)
1/2 cup chocolate chips

Preheat the oven to 350 degrees.

Combine the cake mix, melted butter, egg, and extracts in a large bowl. Using a hand mixer, beat until a soft dough forms. Add the softened cream cheese and beat in gently until combined. Stir in the Oreos, peppermint pieces and chocolate chips. Cover the bowl and refrigerate the dough for at least 30 minutes.

Using a 1 1/2 tablespoon cookie scoop, divide the dough into 36 balls.

Bake on an ungreased cookie sheet for 9 minutes. These didn't spread at all, so I was able to fit 8 dough balls on each sheet. The cookies will be very soft and look under done. Let them sit on the hot cookie sheet for 2 minutes, then gently remove them with a spatula to a cooling rack. Very gently tap the tops of the cookies with the bottom of the spatula to even out the tops. Let them sit until completely cool. Store in an airtight container.
Pin It!

Monday, June 08, 2015

Cut-Out Sour Cream Sugar Cookies

::waves hi:: I hope you guys are still with me. I didn't realize I'd taken such a long break. It was completely unintentional, actually. Here's the short explanation before I tell you about these cookies I made for Christmas.

Long story short, blogging isn't as much fun for me as it used to be. I've never been a big-name blogger but I started to get annoyed that my photos aren't that good, that I always had to try new recipes instead of remaking old favorites, that I wasn't interested in food trends like spiralizers and zoodles. Frankly, blogging became a chore so I just stopped doing it. I can't remember the last time I photographed a meal with the intention of blogging about it. I started remaking dishes I hadn't made in years and just enjoyed eating with my family every night.

Last night I realized it had been more than a month since I blogged and I figured I should see if I had any recipes in my draft folder that I could write about. And I found these Cut-Out Sour Cream Sugar Cookies that I made for Christmas.

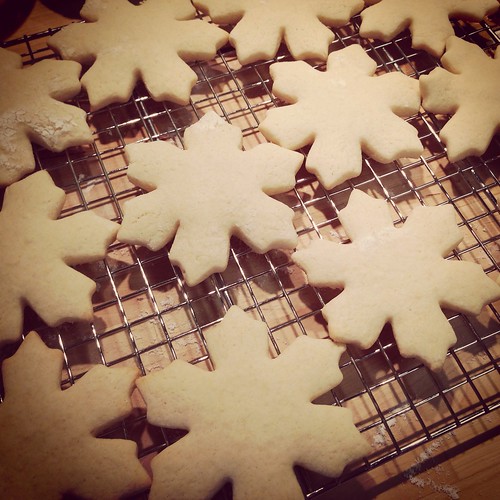
Sour cream sugar cookies

I never even grabbed a shot of these frosted so you'll just have to take my word for it that the frosting was awesome. Baby Girl and I made these together and they were so easy and so delicious. Definitely my go-to cookie recipe for the holidays from now on.

I don't know how often I'll blog in the coming weeks/months, but I'm actually making a new recipe tonight. If it's good, I'll blog about it. If you want to follow me on Instagram you can see all the food photos I do take, although it's not always of things I've cooked.

Cut-Out Sour Cream Sugar Cookies
By Monica

FOR COOKIE DOUGH:
2 3/4 cups flour
1/2 teaspoon baking soda
1/4 teaspoon salt
1/2 cup sour cream, room temperature
1/2 cup butter, softened
1 cup sugar
1 egg
1/2 teaspoon vanilla

FOR FROSTING (makes 1/2 cup of frosting):
1 cup powdered sugar
1 tablespoon butter, softened
1/2 teaspoon vanilla
2 tablespoons half and half
food coloring

In large bowl, whisk together flour, baking soda, and salt; set aside. In second large bowl, with an electric mixer, cream the sour cream and butter at low speed; add sugar, eggs, and vanilla and mix until combined. (It's okay if it's a little lumpy as long as no butter chunks are visible.) Gradually add the flour mixture to the sour cream mixture, mixing until well combined. Dough will be sticky. (You can stir it by hand with a wooden spoon.) Divide dough onto two pieces of plastic wrap; flatten dough, wrap tightly, and refrigerate 1-2 hours. (Make ahead tip: Dough may be made to this point and refrigerated for up to 3 days or frozen for up to 1 month.)

Preheat oven to 350 degrees. Line 2 baking sheets with parchment paper; set aside.

Generously flour your counter and rolling pin. Sprinkle the top of the dough with more flour. Starting at the center, roll the dough out until dough is an even 1/4" thick all over. Dip cookie cutter in flour and cut out dough shapes. Transfer dough shapes to baking sheets.

Bake 2 sheets at a time for 8-10 minutes, rotating and switching pans half way through cooking time. Bake just until they are cooked all the way through but haven't started browning on the bottom. Transfer hot cookies to a baking rack to cool completely.

Combine powdered sugar, softened butter, vanilla, and half of the half and half in a large bowl. Use an electric mixer to combine ingredients on a low speed until you have a thick paste and all of the lumps are gone. Gradually add remaining half and half and continue mixing on medium speed until frosting is a smooth, silky, spreadable consistency. If it's still too thick, add more cream 1/2 teaspoon at a time. Mix in food coloring, if desired. Frost each cookie and decorate with sprinkles while frosting is still wet. Leave out to dry for several hours until dry to touch before storing in an airtight container. If stacking frosted cookies, put waxed or parchment paper between layers.
Pin It!

Wednesday, April 01, 2015

Chewy Café-Style Chocolate Chip Cookies

Chocolate chip cookie recipes are a dime a dozen and everyone seems to have a favorite. I wanted something sweet to bring to our friend's house and remembered Mary Ellen posting this recipe for Chewy Café-Style Chocolate Chip Cookies. She raved about the recipe so I was excited to give it a try.

Chocolate chip cookies

You have to chill the dough, which means planning ahead if you want to make these, but they're worth the wait. I'm still not sure rolling the dough into balls, then tearing them apart and smashing them back together is worth the time and/or energy, but in the interest of following the recipe I did it this time. Next time I may just scoop the dough loosely and see how that works out.

Chocolate chip cookies

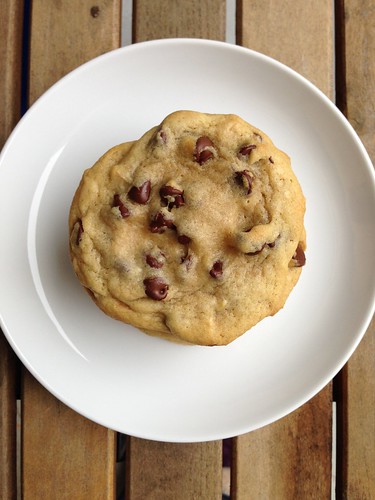
These were delicious (and huge). Full of chocolate chips, crispy on the outside and chewy on the inside. Not too sweet, either. I, unlike most people, didn't have a go-to recipe before this one and I don't think I need to look any further. These were everything I like in a chocolate chip cookie.

Chocolate chip cookies

Chewy Café-Style Chocolate Chip Cookies
As seen on Mary Ellen's Cooking Creations, from Host the Toast

2 cups + 2 tablespoons all purpose flour
1 teaspoon baking soda
2 teaspoons cornstarch
1/2 teaspoon salt
1 1/2 sticks butter, melted and cooled
1 cup light brown sugar, lightly packed
1/2 cup granulated sugar
2 large eggs
2 teaspoons vanilla extract
1 1/2 cups chocolate chips

In a medium-sized bowl, whisk together the flour, baking soda, cornstarch, and salt. Set aside.

In a large bowl, beat together the cooled melted butter and the sugars with a hand mixer for about one minute. Add in the eggs and vanilla extract. Beat until just combined.

Slowly add in the dry ingredients and mix just until there are no flour clumps left. Fold in the chocolate chips. Cover the bowl with plastic wrap and refrigerate for one hour.

Remove the dough from the refrigerator and preheat the oven to 325 degrees, making sure you have one rack in the middle of the oven. Line a few baking sheets with parchment paper (I needed 5, but it you don't have that many you can always reuse them once they've cooled).

Scoop 3 tablespoons of cookie dough at a time and roll into balls. Pull the balls apart by pulling on both sides, then put the two halves together again with the lumpy, torn sides facing up. Place the dough on a baking sheet, making sure the cookies have plenty of space to spread. (I was able to fit 5 cookies per sheet).

Bake for about 12 minutes, rotating half-way through, or until the cookies have spread out and the edges are golden, but the center of the cookie still looks soft and just slightly under-cooked. Remember, every oven is different, so you can start with just one or two cookies on the tray to see what baking time works best for your oven. Mine took 13 minutes.

Let cool on the baking sheets until the cookies are firm enough to remove. Place the cookies on wire cooling racks to cool completely. Repeat with remaining batches, until all cookies are baked. Store in an air-tight container.
Pin It!

Friday, July 18, 2014

Krispie Chocolate Chip Cookies

I needed a dessert for Fourth of July. I've had Stephanie's Krispie Chocolate Chip Cookies printed out for awhile, I even bought the Rice Krispies to make them awhile back, so I figured it was time to make them happen.

Rice Krispie cookies

These cookies take some planning because you need to chill the dough twice before baking. I can't stand when cookies spread because the butter in the dough is too warm, so I appreciate taking the extra time to make sure these don't do that.

Rice Krispie cookies

The Rice Krispies add an interesting texture to these cookies. Even after we finished the batch I still couldn't decide if I was a fan or not. Don't get me wrong, the cookies were delicious, but the cooked cereal gets chewy and I prefer a moist, cakey chocolate chip cookie rather than a chewy one. It didn't stop me from eating them, though. Wink, wink.

Krispie Chocolate Chip Cookies
As seen on Stephanie Cooks

1 1/4 cups all-purpose flour
1 teaspoons baking powder
1/2 teaspoon salt
1/2 teaspoon baking soda
1 stick unsalted butter, at room temperature
3/4 cup granulated sugar
1 large egg, at room temperature
2 teaspoons hot water
2 teaspoons vanilla
1 1/2 cups Rice Krispies
1 cup chocolate chips

Whisk or sift the flour, baking powder, baking soda, and salt together. In a large mixing bowl, beat together the butter and sugar until light and fluffy. Add the egg, beating until just combined. Add the hot water and vanilla and beat until combined.

Add the flour mixture, in two batches, beating just until combined – be sure to scrape down the sides of the bowl. Using a wooden spoon, fold in the chocolate chips and Rice Krispies. Cover and refrigerate for 30 minutes or longer.

Scoop out 1 tablespoon of dough at a time and roll into a ball. Place all the dough balls on one baking sheet and chill at least 30 minutes.

Preheat the oven to 375 degrees.

Remove the dough from fridge and place 12 balls on a cookie sheet, evenly spaced apart. Bake until the middle looks just set and the edges begin to brown, about 8 minutes. Don't overcook. Remove and let sit on the baking sheet for 1 minute. Move the cookies to a wire rack and let cool completely. Repeat with the remaining dough.
Pin It!

Friday, March 07, 2014

Chocolate Pudding

It's recipe swap time again. The theme this month was Blogger's Choice, which can be both fun and nerve wracking. This month I was given Eva's blog. Eva is a baker. I don't bake. I was a little worried.

I spent a great deal of time looking through Eva's blog trying to decide what to make. Unfortunately the first recipe I chose was a flop, but I'm forever grateful because it brought me to this recipe for Chocolate Pudding.

Untitled

Guys, seriously, if you like chocolate pudding you NEED to try this recipe. Thick, rich, and chocolately beyond compare. This is the ultimate chocolate pudding. And simple as all get out. I couldn't believe it used pantry ingredients and took less than 30 minutes, most of which was spent whisking it on the stove while checking Facebook on my phone. Easy peasy lemon squeezy, as Baby Girl would say.

Untitled

We brought this to my parent's house for dessert one Sunday and we were all amazed by how good it was. I was practically licking my ramekin clean. Next time I'll double the recipe because there weren't any leftovers. Thanks for an amazing recipe, Eva!

Chocolate Pudding
As seen on Eva Bakes, originally from The Moosewood Cookbook by Mollie Katzen

1 cup semisweet chocolate chips
3 tablespoons light brown sugar
2 cups milk
a pinch of salt
3 tablespoons cornstarch
1/2 teaspoon vanilla extract

Combine the chocolate, sugar and milk in a medium-sized, heavy saucepan. Heat gently over medium-low heat, whisking constantly, until all the chocolate is melted and the mixture is smooth. Remove from the heat.

Put the salt and cornstarch in a medium-sized bowl. Pour half the milk mixture into the bowl, whisking vigorously until all the cornstarch is dissolved. Whisk the contents of the bowl back into the saucepan.

Return the pan to medium-low heat and whisk constantly for about 10-15 minutes, or until the pudding becomes thick and glossy. Remove the pan from the heat and stir in the vanilla.

Transfer the hot pudding to a serving bowl or individual ramekins. Lay a sheet of waxed paper over the surface of the pudding, pressing down gently, so a skin doesn't form. Chill completely before serving.

To see what other recipes were made click on the links below.


Pin It!

Wednesday, February 26, 2014

Triple Chocolate Cookies

SP is making an effort to get back into the kitchen, at least on weekends. During the week he gets home from work so late I have to have dinner already prepared. We take dinner to my parent's house every Sunday so that's usually a good opportunity for him to make something.

We usually shy away from desserts but he's been itching to make cookies after he came across this recipe for Triple Chocolate Cookies on an app he has on his phone.

Untitled

He decided at 2pm that he wanted to make these so we had to soften the butter in the microwave. As a result, the first batch of cookies spread a bit. I told him to refrigerate the dough and he ended up baking the rest of them while I watched the Downton Abbey season finale (sob!!) I've modified the instructions to include chilling the dough as well as allowing the cookies to cool on the baking sheet for a few minutes before removing them to a cooling rack.

These are incredible. I'm actually a little annoyed that he made them because they're so good and we certainly don't need sweets sitting around the house tempting us. Since I don't like white chocolate he used 2 cups of regular chips, but I think a peanut butter or cinnamon chip (or even a mint chip, if they make those) would be great in these. Since Baby Girl is allergic to nuts peanut butter chips aren't an option for us, but I did spread some peanut butter on one of the cookies and it was delicious.

Triple Chocolate Cookies
As seen on All the Cooks

1 cup butter (2 sticks), softened
2 cups sugar
2 large eggs
2 teaspoons vanilla
1 teaspoon baking soda
1/2 teaspoon salt
1 1/2 cup flour
2/3 cup cocoa
1 cup milk chocolate chips
1 cup white chocolate chips
1/4 cup sugar, for topping

Preheat oven to 350°F.

In a large bowl, cream together the butter and sugar until fluffy using a hand mixer on medium speed. You could also do this in a stand mixer. Add the eggs, one at a time, and beat until evenly incorporated.

Add the vanilla, baking soda and salt. Beat on medium speed for 15 seconds.

Add the cocoa and stir by hand using a wooden spoon. Add the flour and mix to incorporate. Fold in the chocolate chips. Turn the dough out onto a piece of plastic wrap. Wrap tightly and refrigerate for 30 minutes. You can also leave it overnight.

Drop tablespoons of the dough onto an ungreased cookie sheet. Leave at least 2" between the cookies.

Place the 1/4 cup of sugar on a small plate. Dip the bottom of a drinking glass into the unused cookie dough to get it moist (you only need to do this once) then dip the bottom of glass in the plate of sugar. Lightly press the glass down on each mound of cookie dough to flatten it. Repeat for each cookie.

Bake the cookies for 8 minutes. Allow to cool on the baking sheet for 5 minutes before removing them to a wire rack to cool.
Pin It!

Friday, April 06, 2012

Recipe Swap - Lemon-Basil Blueberry Muffin Top Cookies

Want to see what other Fruit recipes were made during the swap? Here is the link to the Fruit Recipe Swap Roundup

Now that spring is here and we're starting to see more fruit in the supermarket I thought fruit would be a great theme for the recipe swap. I submitted a savory recipe (my favorite Thai Pineapple Rice) but many of the participants chose sweet recipes, like this one for Lemon-Basil Blueberry Muffin Top Cookies from my friend Jessica over at The Jey of Cooking.


Jey couldn't stop raving about these cookies when she sent me the link for the swap and when I read her blog post I got even more excited about making them. I loved the idea of the basil mixed with the lemon and blueberry. And muffin tops are my favorite part of the muffin so I knew these would be a hit. I had some basil leftover from my Weeknight Spaghetti and Meatballs, so I decided to make these immediately.


I let Baby Girl have half a cookie as she watched me take these photos and she absolutely loved them. She rarely has cookies (this kid does NOT handle sugar well), but I was impressed that she enjoyed all the complex flavors. These are certainly not your traditional cookies. I also brought about half the batch to church on Sunday since we had signed up to bring food for fellowship after the service. They were a big hit and someone even asked me for the recipe. Yay!


I'll definitely be making these again over the summer when my basil plant gets out of control. Jey's original recipe listed 3 large basil leaves but that alone only yielded 1 tablespoon when chopped, so I used the rest of the plant (about 1/4 cup total) and that was perfect.

Make these soon and you won't be sorry!

Lemon-Basil Blueberry Muffin Top Cookies
The Jey of Cooking

1 1/2 cups flour
1/4 teaspoon baking soda
1/4 teaspoon salt
3/4 cup sugar
Zest of 2 lemons, 1 1/2 tablespoons reserved
1/4 cup fresh basil, finely chopped, 1 tablespoon reserved
6 tablespoons unsalted butter, at room temperature
1 egg
1/2 teaspoon vanilla
1/3 cup buttermilk*
1 cup blueberries
Confectioner’s sugar (powdered sugar)
Juice from about 1/2 lemon

Preheat oven to 350. Line 2 baking sheets with parchment paper.

Combine flour, baking soda and salt in a medium bowl. Add sugar, lemon zest and basil to a small food processor and pulse to combine.

Beat the butter, in a stand mixer or a regular bowl using a hand mixer, until creamy. Add the sugar mixture and beat again until fluffy. Add the egg and vanilla, then turn the mixer down to low. Slowly add in the flour mixture and buttermilk, alternating in batches beginning with 1/3 of the flour, then 1/2 of the buttermilk, 1/3 of the flour, the other half of the buttermilk, then the rest of the flour. Scrape down the sides of the bowl as needed. Fold in blueberries.

Using a cookie scoop or a leveled tablespoon, drop dough onto the baking sheet, leaving about 1 1/2 inches between cookies.

Bake each sheet for 12 minutes. Cool for 2 minutes, then transfer to a cookie rack.

Whisk together confectioner’s sugar (about 1/2 cup), lemon juice and reserved lemon zest and basil until you reach your desired consistency and flavor. Drizzle on top of the cookies. Allow to cool completely and the glaze to harden before serving.

* To make you own buttermilk, put 1 tablespoon of white vinegar or lemon juice into a glass measuring cup. Add enough milk to equal 1 cup. Stir and allow to sit for about 5 minutes, until the milk begins to curdle. Stir before using in a recipe. For this recipe I did 1 tablespoon of white vinegar and enough milk to make 1/3 of a cup.
Pin It!

Friday, March 23, 2012

Recipe Swap - Mint Chocolate Chip Cookies

Want to see what other Secret Recipe Club recipes were made during the swap? Here is the link to the Secret Recipe Club Recipe Swap Part 2 Roundup


The SRC-style Recipe Swap was so popular last time that I decided to make it a regular theme. This go-round I ended up with my good friend Jaida's blog, Sweet Beginnings. Jaida actually reached out to me because of the recipe swaps, which she had seen on my blog. She wanted to start a blog of her own and we found ourselves emailing and chatting on a regular basis. That's one of the things I love about the blogging community - I've met so many great people through my blog. One day I'll make it out to Texas or she'll make it out to PA and we'll actually get to meet in person.


As much as I love being able to choose whatever recipe I want for the SRC-style swap, sometimes having to make that decision can be difficult. Jaida's blog is full of delicious recipes I want to try and narrowing it down was hard. As you'll see in Tuesday's post, I couldn't pick just one thing so I opted to make one savory and one sweet recipe. I recently won a McCormick giveaway on Chocolate Moosey, so I decided to finally bake these Mint Chocolate Chip Cookies I've been drooling over for months. Like Jaida, mint chocolate chip is my favorite ice cream flavor. I've always loved it and 8 out of 10 times that's the flavor I'll pick if we're having ice cream. I couldn't wait to try it in cookie form.


Now we all know I don't bake, so this was a big deal for me. And I decided to bake these on a Wednesday night, which just goes to show how easy they are to make. I started at 7:50pm and had all the cookies baked and cooling by 8:35pm. That's impressive for me. I didn't even need to bust out the KitchenAid stand mixer; I just used my trusty hand mixer and it did a great job. What impressed me the most about this recipe was that the cookies didn't spread in the oven. That's always my biggest complaint when I make cookies. I like a moist, chewy, puffy cookie, not a crispy, thin cookie. These were perfect.

Since the recipe makes approximately 36 cookies I baked them in batches. And as you can see, my cookies aren't green. Sadly, I don't own food coloring (remember, I don't normally bake). I think the green color is fun and definitely alerts folks to the minty flavor, but it isn't necessary for a tasty cookie. I tried one after they'd been cooling for a few minutes and I had to physically restrain myself from eating another. This is why I don't bake, people. The results are just too tempting.

Thanks for a wonderful recipe, Jaida!

Mint Chocolate Chip Cookies
Sweet Beginnings

1 cup sugar
1 cup butter
1 teaspoon vanilla
1/4 teaspoon mint extract
8-10 drops green food coloring
1 egg
2 1/3 cups flour
1 teaspoon baking powder
1 bag (12 oz) semi-sweet chocolate chips

Preheat oven to 350 degrees.

Beat together butter and sugar on low speed (using a hand or stand mixer) until fluffy. Stir in vanilla, food coloring, and egg; mix well. Sift together flour and baking powder in a small bowl and slowly add to the sugar mixture, combining well after each addition. Once combined, stir in chocolate chips using a wooden spoon.

Drop heaping tablespoons onto a foil-lined baking sheet about 2 inches apart. Bake 7-9 minutes until just set. Remove to cooling rack.

Makes approximately 36 cookies
Pin It!

Tuesday, January 17, 2012

Cake Batter Cookies

We all know I don't really bake, so when our friends invited us to their house for dinner and asked that I bring dessert I figured I'd end up buying something at a bakery. Then I remembered seeing these Cake Batter Cookies on Stephanie's Top Ten Recipes of 2011 and thought it would be a nice way to use up some cake mix I had in the pantry and get Baby Girl in the kitchen with me.


These could not have been easier to make since all you are really doing is dumping the cake mix in a bowl and adding baking powder, eggs, oil and chocolate chips. Like Stephanie says, I bet these would be fun using different kinds of cake mix and different add-ins like nuts or M&Ms, raisins or even dried fruit. The possibilities are endless and because the dough is so simple the sky's the limit.

Baby Girl had a blast helping me (she especially loves stirring and dumping things into bowls). She even had her own spoon to take the dough from the bowl and put it on the cookie sheets. I love getting her into the kitchen and she loves helping so it's a win-win. My only complaint is that my cookies spread in the oven. Next time I'll chill the dough a bit before putting it on the cookie sheets. I've modified the directions below.

Cake Batter Cookies
Slightly Modified from Stephanie Cooks

1 (18.25 oz.) box cake mix
1 teaspoon baking powder
2 eggs
1/2 cup vegetable oil
1 cup semisweet chocolate chips

Preheat oven to 350 degrees F (175 degrees C).

In a medium bowl, stir together the cake mix and baking powder. Add eggs and oil, then mix until well blended. Stir in chocolate chips, or your choice of add-ins. Cover the bowl and chill for 30 minutes. Once chilled, drop by rounded spoonfuls onto cookie sheets.

Bake for 10 minutes in the preheated oven. Allow cookies to cool on baking sheets for 5 minutes before transferring to a wire rack to cool completely.

Makes approximately 30 cookies
Pin It!

Wednesday, September 14, 2011

Chocolate Crinkles

When I was a kid we would take frequent trips to a local orchard for pies, apples, donuts and cider. They also sold cookies and one of my favorites was the Chocolate Crinkle. I loved the rich, craggy, chocolate cookie dusted with confectioner's sugar, so when I saw this recipe for Chocolate Crinkle Cookies over at Ommy Noms I thought I'd give it a try.


You all know I'm not a baker, but the recipe was really simple and the results were delicious. I had my doubts, though. The mix looked more like cake batter than cookie dough, even after chilling for 4 hours. And the cookies didn't cook in the 10-12 minutes stated in the recipe, so I had to put them back in the oven. Thankfully, after they cooled the cookies crisped up and finally resembled the beloved chocolate crinkle from my childhood.

Note - This made a ton of cookies, and they were pretty large because I don't own cookie scoops, so I'd cut the recipe in half next time. They also didn't cook in 12 minutes so I upped the cook time to 15 to 18 minutes.

Chocolate Crinkles
Ommy Noms

1 cup unsweetened cocoa powder
2 cups white sugar
1/2 cup vegetable oil
4 eggs
1 tsp vanilla extract
2 cups all-purpose flour
2 tsp baking powder
1/2 tsp salt
1/2 cup confectioners' sugar

In a medium bowl, mix together cocoa, white sugar, and vegetable oil. Beat in eggs one at a time, then stir in the vanilla. Combine the flour, baking powder, and salt; stir into the cocoa mixture. Cover dough, and chill for at least 4 hours. The dough will resemble cake batter and remain sticky, even after chilling.

Preheat oven to 350 degrees. Line cookie sheets with parchment paper. I needed 4 cookie sheets total. Roll dough into one inch balls, using a number 50 size scoop if available. Coat each ball in confectioners' sugar before placing onto prepared cookie sheets.

Bake in preheated oven for 15 to 18 minutes. Let stand on the cookie sheet for a minute before transferring to wire racks to cool.
Pin It!

Monday, February 16, 2009

Big Fat Chewy Chocolate Chip Cookies

The last time I made these Big Fat Chewy Chocolate Chip Cookies they came out flat and crispy, which wasn't at all what I was going for. I asked around and it turns out the recipe I was using (which has made the rounds on lots of blogs and my cooking board) leaves out a crucial step. Since it calls for melted butter you need to refrigerate the dough before baking so the butter has a chance to reharden. This batch of cookies:


... looked like bakery-quality, if you ask me. We all know I don't bake that often so I was really impressed with these cookies. My batch of dough made 16 nice, big cookies.


I brought them to SP's brother's house on Sunday for a meet-and-greet with our nephew who was born in December and they were a huge hit. Now that I know the missing step these will be my go-to cookie recipe from now on.

Best Big, Fat, Chewy Chocolate Chip Cookie
From Allrecipes (with the addition of one step)

2 cups all-purpose flour
1/2 teaspoon baking soda
1/2 teaspoon salt
3/4 cup unsalted butter, melted
1 cup packed brown sugar
1/2 cup white sugar
1 tablespoon vanilla extract
1 egg
1 egg yolk
2 cups semisweet chocolate chips

Preheat the oven to 325 degrees. Grease cookie sheets or line with parchment paper. Sift together the flour, baking soda and salt; set aside.

In a medium bowl, cream together the melted butter, brown sugar and white sugar until well blended. Beat in the vanilla, egg, and egg yolk until light and creamy. Mix in the sifted ingredients until just blended. Stir in the chocolate chips by hand using a wooden spoon. Place the dough on a large piece of wax paper, cover and refrigerate at least 30 minutes or up to one day.

Drop cookie dough 1/4 cup at a time onto the prepared cookie sheets. Cookies should be about 3 inches apart. Bake for 15 to 17 minutes in the preheated oven, rotating the sheets halfway through the cooking time, or until the edges are lightly toasted. Cool on baking sheets for a few minutes before transferring to wire racks to cool completely.
Pin It!

Saturday, January 03, 2009

Baking with Brooke

My office was closed the week between Christmas and New Year's so Brooke and I decided to get together to tackle one of my biggest fears - baking bread. She thought Hawaiian rolls would be a good place to start. After a few minor mishaps involving an errant mixer and needing to run to the store for more yeast this is what we produced:


Delicious, sweet, pineapple-y rolls. SP loved these, especially with a pat of butter. We cheated and used her breadmaker, which gave us this huge ball of dough after an hour and a half:


We separated the dough into two pieces so we each got 9 rolls. We rolled the dough into balls and placed them in baking pans:


After the dough went into the pans it needed to rise another hour so we took the opportunity to make cookies. Since SP loves peanut butter cookies and we all love the combination of peanut butter and chocolate we decided to make these peanut butter cookies.


The cookies are a pretty basic recipe. We added copious amounts of chocolate and peanut butter chips:


... before rolling them in sugar and pressing them down with the tines of a fork. Here they are ready to be baked:


SP said these were the best peanut butter cookies he has ever had, and that says a lot because he loves peanut butter cookies. I have to say, they are truly amazing. We've been rationing them out because we could have eaten them all in one sitting if left to our own devices. Delicious!

Thanks for a fun day, Brooke! We have to do it again sometime. :)
Pin It!

Sunday, July 06, 2008

Big Fat Chewy Chocolate Chip Cookies

On Sunday I made chocolate chip cookies using a bag of peanut butter and chocolate chips I bought recently.


I got this recipe from a cooking board I frequent. I've been meaning to make these for awhile now and they were really good, but not as chewy as I'd hoped. I like a more cakey cookie and these were almost flat.

Best Big, Fat, Chewy Chocolate Chip Cookie
Source: Allrecipes

2 cups all-purpose flour
1/2 teaspoon baking soda
1/2 teaspoon salt
3/4 cup unsalted butter, melted
1 cup packed brown sugar
1/2 cup white sugar
1 tablespoon vanilla extract
1 egg
1 egg yolk
2 cups semisweet chocolate chips


1. Preheat the oven to 325 degrees F (165 degrees C). Grease cookie sheets or line with parchment paper.

2. Sift together the flour, baking soda and salt; set aside.

3. In a medium bowl, cream together the melted butter, brown sugar and white sugar until well blended. Beat in the vanilla, egg, and egg yolk until light and creamy. Mix in the sifted ingredients until just blended. Stir in the chocolate chips by hand using a wooden spoon. Drop cookie dough 1/4 cup at a time onto the prepared cookie sheets. Cookies should be about 3 inches apart.

4. Bake for 15 to 17 minutes in the preheated oven, or until the edges are lightly toasted. Cool on baking sheets for a few minutes before transferring to wire racks to cool completely.
Pin It!

Monday, January 28, 2008

Chocolate Chip Cookies

We needed a dessert for Sunday's dinner and I have a huge bag of chocolate chips in the pantry leftover from Christmas, so SP suggested chocolate chip cookies.

As a disclaimer - regular readers know I'm not a baker. I make cakes using boxed cake mixes and canned frosting. I don't make my own pizza dough. The one thing I feel confident baking is banana bread. I can't even tell you the last time I made cookies (aside from the jam thumbprints at Christmas). I say all this because of this picture:


Not the prettiest cookies in the world, are they? I really had no idea how much they would spread during baking. SP asked me to make them on the larger side, so I did. When I opened the oven to flip the trays all the dough had basically pooled together into one giant cookie. All I could do was laugh.


The good thing is, despite their freakish appearance, they tasted great. Really cakey, with a lot of chips dispersed throughout the dough. Now I just need to work on my technique.
Pin It!

Sunday, December 30, 2007

Homemade Gifts

For Christmas this year we decided to do mostly homemade gifts for family and friends. My college roommate L and her boyfriend D came over for a visit and they helped us tremendously. We couldn't have done it without you guys!!

This year marked the return of the Jam Thumbprint Cookies that were so popular a few years ago:


A shortbread dough is rolled into tiny balls, dipped in egg and then in coconut. The balls are pressed flat with your thumb to make an indentation perfect for holding a dab of jam or preserves. We made ours using all homemade jams/preserves we've received over the years - blueberry, concord grape, raspberry and apricot.


We also experimented with peppermint bark:


The recipe was simple - melt chocolate and spread onto a baking sheet. Pop into the fridge to cool while you melt white chocolate and mix it with crushed candy canes. You can also add peppermint extract, but we couldn't find it in the store. Spread the white chocolate over the regular chocolate and allow to cool for a few hours in the fridge. Break into pieces.

But the real excitement was the BBQ sauce SP made:


We got the recipe from a grilling/smoking cookbook and added a few additional spices. It's tangy and just slightly spicy, with a really good kick from the vinegar. He made a few huge batches and then we canned them in jars (like my mom and I do for the tomatoes) so people could enjoy it over the summer if they wanted to wait that long.

Jam Thumbprint Cookies
Ina Garten

3/4 pound (3 sticks) unsalted butter, at room temperature
1 cup sugar
1 teaspoon pure vanilla extract
3 1/2 cups all-purpose flour
1/4 teaspoon kosher salt
1 egg beaten with 1 tablespoon water, for egg wash
7 ounces sweetened flaked coconut
Raspberry, apricot or any jam you like

Preheat the oven to 350 degrees.

In an electric mixer fitted with the paddle attachment, cream together the butter and sugar until they are just combined and then add the vanilla. Separately, sift together the flour and salt. With the mixer on low speed, add the flour mixture to the creamed butter and sugar. Mix until the dough starts to come together. Dump on a floured board and roll together into a flat disk. Wrap in plastic and chill for 30 minutes.

Roll the dough into 1 1/4-inch balls. (If you have a scale they should each weigh 1 ounce.) Dip each ball into the egg wash and then roll it in coconut. Place the balls on an ungreased cookie sheet and press a light indentation into the top of each with your finger. Drop 1/4 teaspoon of jam into each indentation. Bake for 20 to 25 minutes, until the coconut is a golden brown. Cool and serve.

Makes approximately 32 cookies.
Pin It!

Sunday, October 07, 2007

Spaghetti and Meatballs

Every time we try to plan a fall activity with our friends C & D the weather conspires against us. A few weeks ago we wanted to go apple picking but it was 80+ degrees outside, so we rescheduled for this weekend. And what was the temperature today, a balmy 85. We just can't win.

After much deliberation (in which I hemmed and hawed over the menu so much that SP wanted to rip his hair out) we decided to keep with our original plan for spaghetti and meatballs with garlic bread. SP was in charge of the sauce, which he cooked all day using up various odds and ends from the fridge, including an orange pepper, onions, shallots, garlic, both canned and fresh tomatoes and some oregano.


I made the meatballs the way I always do with a mixture of ground beef, pork and veal, bread crumbs, egg, fresh parsley, garlic and pecorino cheese. I gave them a quick fry in vegetable oil before they finished cooking in the sauce. C & D brought a loaf of good crusty bread that I made into garlic bread both with cheese and without:


... using my special garlic parsley butter and three kinds of cheese (mozzarella, cheddar and pecorino). C & D also brought dessert, a rich tiramisu cake that had just the right balance of sweetness from the mascarpone cheese and kick from the espresso-soaked lady fingers:


An inside shot of all the layers:


SP also baked some cookies using a cookie-in-a-jar mix he got from a speaking engagement he did awhile back:


The cookies are oatmeal with dried cranberries and white chocolate chips.
Pin It!