Friday, December 23, 2011

White Cheddar Chicken Pasta

In one of the "what's for dinner?" posts on Facebook recently my friend Carrie said she was making this White Cheddar Chicken Pasta. The name alone sold me but then I looked at the ingredients and knew I had to make it ASAP.


After Carrie made the recipe she recommended cooking the onions before making the sauce, so I took her advice. I also ended up adding some chicken broth because my sauce was too thick.

We both loved this meal. The sauce is wonderfully flavorful with the sharp cheddar and the spices. I left out the red pepper flakes in the original recipe because spicy food and I don't get along well anymore. The spices on the chicken were perfect and I bet this would be even better with grilled chicken. I can't wait to try that once the weather warms up. Or if I ever get a grill pan.

White Cheddar Chicken Pasta
Modified from Homemade by Holman

1 pound chicken breasts, trimmed and cut into 1 inch pieces
1 teaspoon dry mustard
1 teaspoon dried thyme
1/2 teaspoon salt
1/2 teaspoon pepper
1 tablespoon olive oil
1 pound rotini or other short cut pasta
2 tablespoons butter
1 tablespoon olive oil
2 cloves garlic, minced
1 small onion, finely diced
2 tablespoons flour
1/4 cup dry white wine
1 1/2 tablespoons Dijon mustard
2 cups milk
1 cup chicken stock
8 oz sharp white cheddar cheese, grated
1 teaspoon dried thyme
1 teaspoon dried oregano
Parmesan cheese to taste

Heat olive oil in a large skillet over medium heat. Mix together mustard, thyme, salt and pepper and sprinkle over chicken pieces. When pan is hot, add chicken and brown about 3 minutes per side until cooked through. Remove to a plate and cover with foil.

Cook pasta according to package directions, drain and set aside.

Meanwhile, melt butter and oil in the now-empty skillet you used to cook the chicken. Add garlic and onions and cook until the onions are soft, about 5 minutes. Add the flour and whisk to combine. Add wine and Dijon mustard. Cook about 5 minutes, then reduce heat to low and slowly add milk and chicken stock, stirring to combine. Cook about 5-7 minutes more until mixture begins to thicken. Add cheese, thyme and oregano and stir to melt cheese. Add chicken and pasta and toss to incorporate sauce. Top with Parmesan cheese and serve.
Pin It!

Thursday, December 22, 2011

Smothered Pork Medallions

As the weather gets colder I am all about comfort food meals. I also love an excuse to make mashed potatoes. They're one of my favorite things and Baby Girl is taking after me in that regard. She will happily eat a big bowl full of them whenever I make them. When Melissa posted this recipe for Smothered Pork Medallions what drew me in was a new way to use pork and a sauce that included buttermilk, which I bought for Buttermilk Mac and Cheese and still had in my fridge waiting to be used up.


When shopping this week I realized I've never purchased pork tenderloin. How is that possible? Thankfully my supermarket had it on sale so it wasn't too expensive, but imagine my surprise when I discovered that what I thought was two tenderloins turned out to be four (the club pack came with two packages of pork, but each package contained two tenderloins). That's four meals for about $10. Awesome.

I was hesitant to use the full 2 teaspoons of cayenne pepper to season the flour and I think that was a mistake. The dish was a little too sweet, probably from the onions. The extra cayenne would have helped mitigate that. Even so, this was delicious and we both cleaned our plates. You know SP is a sucker for anything with mushrooms in it. And it couldn't have been easier, which was nice for the Sunday when we decorated our Christmas tree.

Smothered Pork Medallions
Slightly Modified from I Was Born to Cook

3/4 cup flour
3 tablespoons garlic powder
2 teaspoons cayenne pepper
1 teaspoon salt
1/2 teaspoon black pepper
1 pork tenderloin, thinly sliced into medallions
1/4 cup extra virgin olive oil
1 package (10 ounces) mushrooms, sliced
2 medium onions, sliced
1 cup chicken broth
1/2 cup buttermilk
Chopped fresh parsley, for garnish

Put the flour in a gallon food storage bag. Add garlic powder, cayenne, salt and pepper. Mix well. Add the medallions and shake to coat.

Heat oil in a large skillet and add pork in an even layer. Fry pork on each side until golden brown, 2-3 minutes. Remove to a plate. Add a little more oil to the pan, then add the mushrooms and onions. Season with a little salt and pepper and cook until the liquid from the mushrooms has evaporated and the onions are soft, about 10-15 minutes. Add about 1 tablespoon of the seasoned flour to pan drippings. Mix together, then add chicken broth. Once liquid is reduced and slightly thickened, add buttermilk and stir.

Return pork to pan and cover in sauce. Simmer for about 5 minutes, until pork is cooked through. Season with salt and pepper and garnish with parsley to serve.

Pin It!

Wednesday, December 21, 2011

Skillet BBQ Chicken Pasta

I love a good one-pot or skillet meal. There's something infinitely satisfying about being able to cook an entire meal, including the pasta, in one pan. Nicole raved about this Skillet BBQ Chicken Pasta recipe so on to the menu it went.


Don't tell SP, but since the recipe calls for only 12 ounces of penne I took this opportunity to try the Dreamfields pasta one of their reps sent me awhile back. I was really impressed. We weren't fans of the whole wheat spaghetti we tried a few months ago but this penne was great for being low carb. I wouldn't be sad if they wanted to send me more samples. Wink, wink.

Anyway, this was an easy meal to get on the table but I was a little underwhelmed. I had hoped the flavors of the BBQ sauce would be more pronounced. And despite using a nice, sharp cheddar cheese that flavor seemed to be masked by the mozzarella. I've made some changes to the recipe below. I'll definitely try it again because you can't beat the convenience of a one-pot meal.

Skillet BBQ Chicken Pasta
Slightly Modified from Mel's Kitchen Cafe, As Seen on Prevention RD

1 tablespoon extra-virgin olive oil
2 boneless skinless chicken breasts, cut into bite-size chunks
1 red onion, diced
3 cups water
2 1/2 cups chicken broth
1/2 teaspoon salt
12 ounces penne pasta
1 cup barbecue sauce
1/3 cup sour cream
1/2 cup shredded pepperjack cheese
1/2 cup shredded sharp cheddar cheese

In a large 12-inch nonstick skillet heat the olive oil over medium heat. When hot, add the chicken and onions and saute, stirring occasionally, until the chicken is browned and cooked through. Remove the chicken and onions to a plate and set aside.

In the same skillet, add the water, chicken broth, penne and salt. Bring to a boil and simmer for 12 to 15 minutes, until the liquid is almost absorbed, the pasta is tender and the mixture is thick and syrupy. Stir in the barbecue sauce and sour cream. Once mixed, add in the reserved chicken, onions and shredded cheeses. Stir to combine and cook until everything is heated through.

Taste and season with salt and pepper, if needed. Garnish with additional red or green onions and more shredded cheese.
Pin It!

Tuesday, December 20, 2011

Recipe Swap Roundup - Holiday Cookies/Treats

Tis the season for baking. You all know by now that I'm not much of a baker, but I couldn't resist making Holiday Cookies/Treats one of the themes for the recipe swap. I know most of the time people make the same recipes every year, usually by request from hungry friends, family or coworkers, but every once in awhile it's nice to branch out.

Jaida loves mint and chocolate so she was thrilled to get Mint Oreo Fudge:


Melissa celebrated her blog's first birthday with these Mint Chocolate Chip Cookies:


Jenna was hoping her White Chocolate Dipped Spice Cookies would bring back memories of her grandpa's favorite cookie, but they were a little too busy in the flavor department for her tastes:


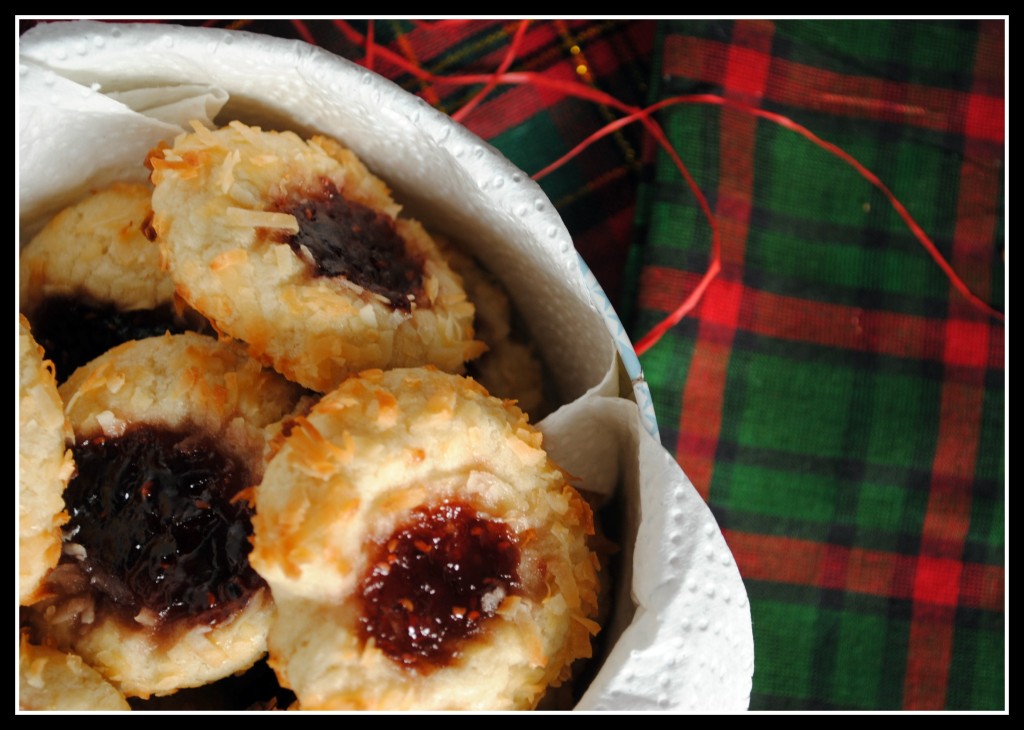
Nicole had my Jam Thumbprint Cookies, which are my all-time favorite holiday cookie. Thankfully, she agreed:


Lishie loves baking and her recipe for Chewy Ginger Molasses Cookies really hit the spot:


Jey's Caramel Chex Party Mix was the perfect mix of sweet, tasty and easy:


Ashley isn't a big fan of fudge but her sister loved the pretty colors in the Candy Cane Fudge:


Cathy's recipe was aptly named Christmas Crack (aka Saltine Toffee Bark):


The Cookaholic Wife is a big fan of chocolate and peanut butter so she loved her recipe for Peanut Butter Cups, even if she had to use a regular size muffin tin to make them:


Coleen had some minor issues with her Oatmeal Cookies, but they were still light, chewy and delicious:


Allison, a newcomer to the swaps, enjoyed her Chocolate Gingerbread Cookies, a spicy treat (especially for breakfast):


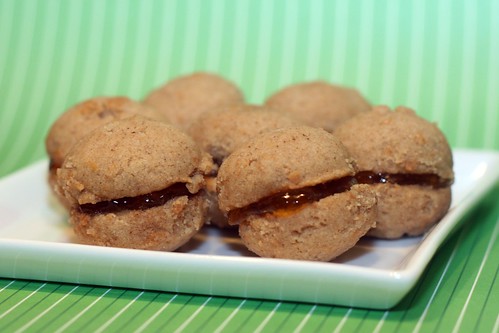
Katie made adorable Spoon Cookies filled with apricot preserves:


After making tons of cookies this holiday season Nicole was happy to do something different with Chocolate Dipped Pretzels:


I had a small issue with my Black Bottoms, so this is my pinch baker's photo:


Diana, a newcomer to the swap, doesn't have a blog but she did take pictures and write a review of her recipe for Pumpkin Seed Cranberry Biscotti:


I adapted this recipe from its original form – subbing out the cranberries and pumpkin seeds. Neither one of these items are liked in my household and with the base recipe the changes were easy to make. I have to say I was a little bit skeptical about making biscotti since I’d never made it before. This was a very easy recipe and I have to say with my minor substitutions this recipe came out delicious. My husband (who never really liked biscotti) likes these.

Pecan Chocolate Chip Biscotti Recipe
Adapted from Delish!

3/4 cup sugar
2 eggs
1/4 cup canola oil
1-1/2 teaspoons pure vanilla extract
1/2 teaspoon almond extract
1-3/4 cups all-purpose flour
1 teaspoon baking powder
1/2 teaspoon salt
1 cup chopped pecans
1/2 cup chocolate chips

In a small bowl, beat the sugar, eggs, oil and extracts. Combine the flour, baking powder and salt; gradually add to sugar mixture and mix well. Stir in pecans and chocolate chips (dough will be sticky).

With lightly floured hands, shape each portion into a 12-in. x 2-in. rectangle. Bake at 350° for 25-30 minutes or until golden brown.

Carefully remove to wire racks; cool for 10 minutes. Transfer to a cutting board; cut diagonally with a serrated knife into 3/4-in. slices. Place cut side down on baking sheets.

Bake for 5 minutes or until firm. Turn and bake 5-10 minutes longer or until lightly browned. Remove to wire racks to cool. Store in an airtight container. Yield: 2-1/2 dozen.
Pin It!

Monday, December 19, 2011

Pasta with Sausage, Beans, and Mascarpone

If you've read this blog for any length of time you know that I have a weakness for cream sauces, especially in pasta dishes. I've seen this recipe for Orecchiette with Sausage, Beans, and Mascarpone floating around the blogosphere for awhile and figured it was time to see what all the fuss was about.


After looking at the ingredient list I knew my first task would be finding a substitute for mascarpone. I'm sure the stuff is great but I'd rather use ingredients that I already keep on hand then spend extra money for a specialty item. A quick Google search led me to this recipe at food.com. I really appreciated the tool to increase or decrease the serving size to adjust for different recipes. The original recipe yielded 10 ounces and I only needed 4 ounces or 1/2 cup. Easy peasy.

I subbed nugget pasta for the orecchiette simply because I had a box at home and, again, didn't want to spend the money for a specialty item when I had something else at home already. Next time pasta is on sale at my supermarket I plan to stock up on mini shells, so next time I'll use those. As the original blogger said, the crevice in the orecchiette/shells is perfect for cradling the sausage and beans, although the nuggets were fine in a pinch.

My only complaint about this dish was that there wasn't more sauce. I'm thinking about upping the amount of mascarpone ingredients next time to see if that helps. Otherwise this was outstanding, if a little spicy from the red pepper flakes. I've made them optional in the recipe below but if you like spice use them. I prefer my cream sauces mild, thankfyouverymuch.

If 1/2 pound of sausage seems like too little for 1 pound of pasta never fear; the beans more than make up for it. I wish I'd taken my own advice, though. I thought the pan seemed a little empty so I used a full pound of sausage and it overwhelmed the finished dish once everything else had been added. Next time I'll stick with a 1/2 pound.

Orecchiette with Sausage, Beans, and Mascarpone
Modified from Stirring the Pot

1 pound orecchiette or shell pasta
2 tablespoons olive oil
1/2 pound Italian turkey sausage, casing removed
1 small onion, chopped
1/2 cup Marsala wine (you can also use brandy, sherry or Madeira)
1 (15-ounce) can cannellini beans, drained and rinsed
1 tablespoon dried oregano
1 teaspoon Italian seasoning
1 teaspoon red pepper flakes (optional)
2 cloves garlic, minced
3 ounces cream cheese
1/8 cup heavy cream
1 tablespoon sour cream
1 teaspoon salt
1/2 teaspoon freshly ground black pepper

Bring a large pot of salted water to a boil over high heat. Add the pasta and cook until tender but still firm to the bite, stirring occasionally, about 8 to 10 minutes. Drain pasta reserving 1 1/2 cups of the cooking liquid.

In a large, heavy skillet warm the olive oil over medium-high heat. Add the sausage and onions. Using a wooden spoon, break up the sausage into bite-sized pieces as it browns. Continue cooking until the sausage is golden and the onions are tender. Add the garlic and stir, cooking about 1 minute until you can smell the garlic. Deglaze the pan with 1/2 cup Marsala wine, scraping up any brown bits from the bottom of the pan.

Add the beans, oregano, Italian seasoning and red pepper flakes (if using) and cook for 2 more minutes. Add 1 cup of the pasta cooking liquid and stir. Add the cream cheese, heavy cream and sour cream and stir until it dissolves into a light sauce. Add the salt, pepper, and hot pasta. Stir until coated and serve.
Pin It!

Sunday, December 18, 2011

Weekly Menu - Week of December 18, 2011


Can you believe next weekend is Christmas? I knew this month would go fast but I wasn't prepared for how fast. Once again we are hosting Christmas dinner, one of my favorite meals of the year. I also look forward to our Christmas Eve dinner, which has become a tradition over the years. Lots of great meals coming up this weekend, but first we have to get through the week.

Sunday - Cheese ravioli, SP's Sunday sauce, Caesar salad

Monday - Cheesy farfalle with spinach and tomatoes, leftover Caesar salad

Tuesday - FFY

Wednesday - Pork Medallions in Balsamic Reduction, rice, green beans

Thursday - Asian turkey burgers with spicy limo mayo, sweet potato fries

Friday - Homemade pizza

Saturday - Asparagus with Fried Egg and Cheese, Baked Stuffed Shrimp, baked potatoes with butter and sour cream

Sunday - Breakfast: Christmas Morning Strata, pancakes, bacon. Dinner: Appetizer platter provided by my step-aunt, Endive Stuffed with Goat Cheese and Walnuts (recipe swap), Roast Beef Tenderloin, mashed potatoes, green beans with almonds, Yorkshire Pudding, Santa Hat Brownies, bread pudding with whiskey sauce and whipped cream
Pin It!

Friday, December 16, 2011

Recipe Swap - Black Bottoms

Want to see what other Holiday Cookies/Treats recipes were made during the swap? Here is the link to the Holiday Cookie/Treats Recipe Swap Roundup

The holiday season is in full swing and for many people that means doing a lot of baking. Many of my favorite food blogs have been posting recipes for cookies and other treats to make for holiday parties and gifts. I thought, what better theme for the swap then Holiday Cookies/Treats!

Since I'm the organizer for these swaps I tend to hold myself to a higher standard. I like to make my recipe early and allow myself plenty of time for any mishaps. I ask the participants to be conscientious so I need to do the same. Imagine my dismay when I realized the swap was due in a week and I had completely forgotten about it. There it was, late Sunday afternoon and I found myself with about an hour to get these Black Bottoms from Katie together. Thankfully I had 4 ounces of cream cheese left in the fridge from another recipe, but I was out of chocolate chips. With no time to run to the store and no chance to make them during the busy workweek, I forged ahead. Not being a baker, I didn't realize how vital the chocolate chips were going to be. I figured they were just an added bonus, but unfortunately my Black Bottoms weren't very good without them. Here is my photo of the Black Bottoms:


My friend Jaida has always said she'd be willing to fill in if someone had an issue with the swaps, so I asked for her help as a pinch baker. Being the great friend and baker that she is, she rose to the occasion. Here is her photo of the Black Bottoms:


And her comments about the little treats: "When the opportunity arose to try out these blackbottoms, I was excited because I love chocolate and I love cream cheese. Not to mention I love miniature-sized desserts! The cake part itself is not too sweet, but the cream cheese topping with the chocolate chips makes it just right!! And, a few of the chocolate chips sneak their way into the chocolate part and when you bite into one, there is a surprise center of melty chocolate – delish!! I refrigerated them overnight due to the cream cheese element, and brought them to work the following morning. I had barely made it through the door when a co-worker accosted me for the day’s baked goods and after one bite she declared, “Oh my God, these are delicious!” So, the verdict is in – these little treats are a winner!"

Katie, I promise to make these again once I pick up some chocolate chips. And a big thanks to Jaida for stepping in and helping a girl out. You rock.

Black Bottoms
So Tasty, So Yummy
Makes 48 miniature cupcakes/24 regular cupcakes

1 1/2 cups flour
1 cup sugar
1/4 cup cocoa
1 tablespoon white vinegar
1/2 teaspoon salt
1/2 cup oil
1 cup water
1 teaspoon vanilla
8 ounces cream cheese
1 egg
1/4 teaspoon salt
1/2 cup sugar
1 cup chocolate chips

Preheat oven to 350.

Mix first eight ingredients (through vanilla) together and set aside.

In a separate bowl, beat the cream cheese, egg, salt and sugar together. Stir the chocolate chips into the cream cheese mixture.

Line two muffin pans with paper liners. Divide chocolate batter evenly. Top evenly with the cream cheese mixture.

Bake for 15 to 20 minutes, until set.
Pin It!

Thursday, December 15, 2011

Southwestern Ranch Open-Faced Turkey Sandwiches

I had planned to make these Southwestern Ranch Open-Faced Turkey Sandwiches with leftover turkey from Thanksgiving, but between sandwiches and soup we used it all up. I didn't want to miss out on these sandwiches so I bought deli turkey, which was just fine.


These are definitely a knife-and-fork sandwich, which disappointed SP. He was hoping for a traditional sandwich. Next time I'll use less ingredients per sandwich and maybe cook them panini-style. I'm also thinking about adding bacon (thanks for the idea, Cassie) and switching the avocado slices to guacamole or an avocado spread for easier eating. No matter how you assemble them, these are truly delicious.

Southwestern Ranch Open-Faced Turkey Sandwiches
Cassie Craves

6 slices sandwich bread
1 packet ranch dressing mix
1/2 teaspoon chili powder
1/4 teaspoon ground cumin
1/2 cup mayonnaise
1/3 cup sour cream
3/4 to 1 pound turkey, thinly sliced
2 medium tomatoes, thinly sliced
3/4 cup shredded cheddar cheese
3/4 cup shredded pepper jack or Monterey Jack cheese, shredded
2 ripe avocados, sliced
Juice of 1 lime

Toast bread in toaster or under the broiler. Preheat oven to 350 degrees.

In a bowl, combine ranch dressing mix, chili powder, and cumin. Stir in mayonnaise and sour cream.

Cover a baking sheet with tinfoil. Place bread on baking sheet and spread 1 tablespoon of the sauce on each slice. Top with sliced turkey and 1 more tablespoon of the sauce. Top with cheese and tomatoes.

Bake for 15 minutes until cheese is melted. Top each sandwich with sliced avocado and a spritz of lime juice.
Pin It!

Wednesday, December 14, 2011

Creamy Baked Fettuccine with Asiago and Thyme

As soon as Maryanna posted her recipe for Creamy Baked Fettuccine with Asiago and Thyme in the recipe swap roundup I knew I had to make it ASAP. It sounded like a baked version of fettuccine alfredo and how could that be bad?


I apologize for the less than stellar photo (look at Maryanna's...it's much nicer).

This dish was exactly as I imagined it would be, except for my own stupidity. Instead of grating the cheeses using my microplane, which would have resulted in feathery-light cheese that would melt easily in the sauce, I grated my cheese on a box grater. I'm not sure what I was thinking. The result was clumps of unmelted cheese throughout the sauce. Not quite the silky, creamy concoction I'd planned. I've modified the recipe below to be more specific. As a friend told me, this just gives me an excuse to make it again, which I definitely will be doing soon.

Oh and for those wondering how the homemade creme fraiche turned out, it was perfect. I was really, really skeptical about leaving dairy out on the counter for 36 hours but it was fine. And I saved over $10 making my own. Score!

Creamy Baked Fettuccine with Asiago and Thyme
Taste and See

1 pound fettuccine pasta
2 cups grated Asiago cheese, plus 1/4 cup (grated using a microplane)
2 (8-ounce) containers creme fraiche (or make your own, recipe below)
1 cup grated Parmesan (grated using a microplane)
1 1/2 tablespoons fresh chopped thyme leaves
1/2 teaspoon salt
1/2 teaspoon freshly ground black pepper

Preheat oven to 375-degrees F.

Bring a large pot of salted water to a boil over high heat. Add the pasta and cook until tender, stirring occasionally, about 8 to 10 minutes. Drain pasta reserving 1 cup of the pasta cooking liquid.

In a large bowl, combine the 2 cups Asiago, creme fraiche, Parmesan, thyme, salt, pepper, cooked pasta, and pasta cooking liquid. Gently toss until all the ingredients are combined and the pasta is coated.

Place the pasta in a buttered baking dish and sprinkle with the remaining 1/4 cup Asiago cheese. Bake until golden on top, about 25 minutes. Let sit for at least 5 minutes, and serve.

Creme Fraiche
2 tablespoons buttermilk, room temp
1 cup heavy whipping cream

Heat heavy whipping cream over very low heat until it reaches body temperature (not to exceed 100-degrees F). Remove from heat and pour into a glass bowl or jar. Add buttermilk, and give it a couple of stirs. Seal the bowl with plastic wrap or jar with a lid, and let it sit in a warm place (about 70-degrees) for 12 to 36 hours until it thickens.

Stir the thickened creme fraiche and store in the refrigerator for up to 10 days.

Note - If using for the above recipe, double the amount of buttermilk and heavy cream.
Pin It!

Tuesday, December 13, 2011

Cheese Ravioli with Broccoli Rabe and Sausage

Melissa recently shared this recipe for Cheese Ravioli with Broccoli Rabe and Pancetta as a fast, easy weeknight meal. I was looking for something simple to make the night before Thanksgiving and thought I'd give it a try.


I adapted the recipe to include sausage instead of pancetta since I had some in the freezer that needed to be used up. I also blanched the broccoli rabe before adding it to the skillet to remove some of the bitterness. I loved the simplicity of this meal but SP tends to like pasta dishes with sauce and this didn't really have one. Even so, I'll make this again and just tweak the amount of oil and cheese to make a sauce.

Ravioli with Broccoli Rabe & Sausage
Adapted from I Was Born to Cook

1 bag cheese ravioli
1 bunch broccoli rabe, ends trimmed
3 garlic cloves, chopped
3-4 tablespoons extra virgin olive oil
1/2 teaspoon crushed red pepper (more if you like it spicy)
1/2 lb Italian sausage, casing removed
Salt and pepper to taste
Grated pecorino romano cheese

Bring a large pot of water to a boil. Add a generous sprinkling of salt. Cook ravioli according to package directions. Remove ravioli with a strainer to a bowl. Bring water back to a boil. Chop broccoli rabe into large pieces and add to boiling water. Cook 5 minutes, then drain.

Meanwhile, heat oil in a large deep skillet over medium high heat. Crumble sausage into skillet and cook until no longer pink. Add garlic and crushed red pepper, stirring constantly. Add broccoli rabe and heat through. Turn heat down to low, then add ravioli to the skillet. Season with salt and pepper to taste. Mix everything together until ravioli are coated with all ingredients. Add cheese, toss quickly and serve.
Pin It!

Monday, December 12, 2011

Sweet Pork Tacos with Cilantro Ranch Dressing

I've decided the way to successfully use my crockpot is to only cook with it when I'm home to monitor it. Yes, I realize this defeats the overall purpose of the crockpot, but until I feel like shelling out money for a new one this has become my only feasible option to prevent burnt food. Since I didn't want to miss out on this recipe for Sweet Pork Tacos with Cilantro Ranch Dressing, I made it on a Sunday. It was perfect because I didn't really have to do anything except keep an eye on it and flip the meat over a few times so the side that wasn't completely submerged in the liquid didn't dry out.


With all the Thanksgiving leftovers taking up space in my fridge I couldn't fit the crockpot insert in there as well, so I double-bagged two galloon freezer bags and put them into a Corningware dish to sit in the fridge overnight. I was a little skeptical of the three cans of Coke, but all it added was a nice sweetness. The pork is definitely sweet, but the tanginess from the cilantro ranch dressing helps offset it.

I served my tacos with shredded cheddar and pepper Jack cheeses, with some extra sprigs of cilantro as a garnish. Absolutely delicious and even better the next day. This made a lot of food so I froze about half of it for another time. I'm thinking about making quesadillas with the leftovers - melty cheese, the sweet meat and maybe some tomatoes for freshness, all dipped in the delicious sauce. Yum!

Sweet Pork Tacos with Cilantro Ranch Dressing
Cassie Craves

For the pork:
2 to 3 pound pork roast
3 cans Coca-Cola
1 cup brown sugar
2 cloves garlic
1 can diced green chilies
1 15-ounce can tomato sauce
1 packet taco seasoning

For the dressing:
1 cup salsa verde
1 packet ranch dressing mix
1/3 cup cilantro
1/3 cup mayonnaise
1/3 cup sour cream
1 clove minced garlic
1/2 teaspoon salt
1 tablespoon fresh lime juice
1/4 teaspoon cumin
1/4 cup sugar

Tortillas and shredded cheese for serving

The night before you want to serve, place pork in the bottom of a slow cooker. Mix together all other ingredients for the pork and pour over the roast. Cover the slow cooker and refrigerate overnight.

Cook pork mixture on low for 6 to 8 hours, or until the pork shreds easily with a fork. Remove pork from crockpot and shred. Spoon some of the cooking liquid onto the shredded pork to moisten it.

Blend all dressing ingredients in a food processor or blender. Serve drizzled over pork.
Pin It!

Sunday, December 11, 2011

Weekly Menu - Week of December 11, 2011


Only a few more weeks until 2012. Can you believe it? I can't. Every year seems to go by faster than the last. I'll be celebrating another birthday in less than a month and that doesn't seem possible either.

Sunday - Cheeseburger meatloaf muffins, mashed potatoes and broccoli - I've made cheeseburger meatloaf before but never in muffin form. This is mostly for lunch on Monday since we had a late lunch at a birthday party.

Monday - White cheddar chicken pasta and side salads - My friend Carrie posted on Facebook that she was making this recipe and I couldn't wait to get it on my menu.

Tuesday - FFY

Wednesday - Honey Dijon salmon over arugula, roasted potatoes - I love the idea of honey and Dijon with salmon, especially when it's served on a bed of arugula.

Thursday - My company's holiday Christmas party

Friday - Pretzel Ranch chicken tenders, stovetop mac and cheese - Cassie said these were a big hit with her boys so I'm hoping the same holds true for Baby Girl. And what better to serve them with then mac and cheese.
Pin It!

Friday, December 09, 2011

Thanksgiving Recipes: Whiskey-Glazed Carrots

I made these Whiskey-Glazed Carrots last year for Thanksgiving but for some reason I didn't blog about them beyond the standard Thanksgiving recap. Big mistake. These carrots need their own post so I can rave about them. UPDATE - I made them again for Thanksgiving 2011 and took a much better photo.


These are AMAZING. The whiskey, brown sugar and butter make the most delicious glaze I've ever tasted. I serve these with roasted chicken and love dipping pieces of chicken into the extra glaze. I cut down on the amount of butter and sugar from the original recipe, but that doesn't make these healthy by any means. SP always jokes that I've managed to make carrots bad for you.

Whiskey-Glazed Carrots
Slightly Modified from Pioneer Woman

4 tablespoons butter, divided
3 pounds carrots, peeled and cut into thick circles
1/2 cup Jack Daniels Whiskey
3/4 cup brown sugar
Salt and pepper, to taste
Chopped chives, optional garnish

Melt 1 tablespoon butter in a large skillet over high heat. Add carrots and cook about 2 minutes until they start to brown in spot.

Pour in whiskey and allow to evaporate 30 seconds. Reduce heat to medium, and add remaining butter. When butter melts, sprinkle brown sugar over the top. Stir together to coat the carrots.

Cook about 15-20 minutes more, stirring often, so the sauce thickens into a glaze and the carrots cook through. Season with salt and pepper.

Pour onto a platter and serve immediately. Sprinkle with chopped chives if desired.
Pin It!

Thursday, December 08, 2011

Thanksgiving Recipes: Creamed Onions with Thyme and Sage

You probably know by now that I'm a sucker for anything in a cream sauce. So what's not to love about creamed onions? These Creamed Onions with Thyme and Sage are so simple to make but pack great flavor.


Since I use frozen pearl onions these require next to no effort. The most time-consuming part is chopping the herbs. And the recipe gets bonus points for being make-ahead friendly.

Creamed Onions with Thyme and Sage
Adapted from Food and Wine

2 tablespoons unsalted butter
1 bag frozen pearl onions
1 1/2 teaspoons chopped thyme
1 1/2 teaspoons chopped sage
1/2 teaspoon freshly grated nutmeg
1/2 teaspoon freshly ground pepper
1 1/2 cups heavy cream
Salt

In a large skillet, melt the butter. Add the onions and cook over moderately low heat, stirring occasionally, until softened, about 30 minutes. Add the thyme, sage, nutmeg and white pepper and cook, stirring, for 2 minutes. Add the cream and bring to a boil. Simmer over low heat, stirring occasionally, until thickened, about 5 minutes. Season with salt, transfer to a bowl and serve.
Make Ahead - The onions can be refrigerated for up to 2 days. Reheat gently.
Pin It!

Wednesday, December 07, 2011

Thanksgiving Recipes: Thanksgiving Stuffing

I have to admit, stuffing is not my favorite Thanksgiving side dish. Why fill up on carbs when there's turkey and veggies to eat? Even so, I know most people love it and I needed a great recipe for my first year hosting. My friend Melissa recommended this Thanksgiving Stuffing recipe from the Pioneer Woman.


Unfortunately my supermarket was out of cornbread so I had to make this with just hearty white bread. I think the cornbread would have added a whole other dimension to this stuffing and next year I'll either make my own or go out of my way to buy some. This was good, but I can only imagine how much better it'll be with the cornbread.

Thanksgiving Stuffing
Adapted from Pioneer Woman

2 loaves hearty bread
1 stick butter
1 medium onion, diced
2 cups celery, chopped
4 cups chicken broth
1/2 teaspoon dried basil
1/2 teaspoon thyme
2 teaspoons (to 3 Teaspoons) fresh rosemary, chopped
1/4 cup fresh parsley, chopped
Salt and pepper

Chop bread into 1-inch cubes. Spread them out on two baking sheets and let them dry for approximately 24 hours.

Heat a large skillet over medium heat and add butter. When it’s melted add the onion and celery and cook for a few minutes until onions are almost translucent. While it’s cooking chop up any fresh herbs you will be using.

Add 4 cups of chicken broth and bring to a boil. Add 1/2 teaspoon of basil, 1/2 teaspoon of thyme, a few teaspoons of fresh chopped rosemary and 1/4 cup chopped fresh parsley. Stir until combined.

Place dried bread cubes into a large bowl. Gradually ladle the broth mixture into the bread, tossing lightly as you go. Keep gradually adding the broth mixture, tasting as you go and adding more seasoning and herbs if needed. Add salt carefully. You don’t want to over-salt your stuffing. If the mixture is not quite moist enough add a bit more chicken broth and stir.

Butter a large baking dish. Add stuffing and bake at 350 degrees for 20 to 25 minutes or until golden brown on top.

Make Ahead - The bread should be air-dried at least 24 hours ahead so it has plenty of time to stale. Cook the veggies the night before and put the stuffing in a greased baking dish, covered with plastic wrap and stored in the fridge. Moisten with additional chicken stock before baking.
Pin It!

Tuesday, December 06, 2011

Weekly Menu- Week of December 4, 2011


Now that December is here I feel like we're on a downward slide to Hanukkah, Christmas and celebrating the New Year. It may only be early December now but before we know it we'll be opening presents and ringing in 2012. In fact, we bought our Christmas tree over the weekend and decorated it Sunday night. I love that warm glow in the living room.

Like most people this time of year, our weekends are quickly filling up with errands and parties or events. Add working full time and keeping a curious toddler from destroying the Christmas tree and I am one tired cook. I'm trying to keep our menus simple and make at least one meal at week that requires very little effort in order to maintain my sanity.

Sunday - Smothered Pork Medallions, mashed potatoes, green beans - In my quest to find good pork recipes, this one from my friend Melissa sounded easy, delicious and a great way to use up some the buttermilk I still have lurking in my fridge.

Monday - Cheese ravioli, sauce and garlic bread

Tuesday - FFY

Wednesday - Orecchiette with Sausage, Beans, and Mascarpone - I'm really excited for this recipe because of the creamy factor. I'm actually going to make my own mascarpone using ingredients I always keep on hand instead of buying the expensive stuff.

Thursday - Skillet BBQ Chicken Pasta - I won't be going as healthy as Nicole with the whole wheat pasta and low-fat everything, but the original recipe sounds right up our alley.

Friday - Homemade pizza
Pin It!

Monday, December 05, 2011

Recipe Swap Roundup - Thanksgiving Desserts

With Thanksgiving falling right in the middle of the two weeks participants have to make their recipe for the swap I thought a theme of Thanksgiving Desserts would be perfect. Pumpkin pie might be the traditional sweet treat, but judging from these recipes below it certainly isn't the end-all, be-all of Thanksgiving desserts. Check out the recipes below and see if one catches your eye for next year's feast.

Melissa was worried her recipe for Pumpkin Roulade with Buttercream would be difficult to make, but it was actually easy and delicious:


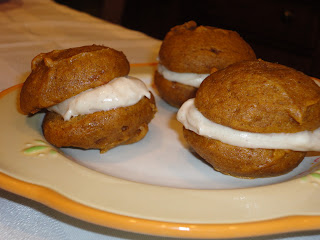
Patrizia, a newcomer to the swaps, really enjoyed her recipe for Pumpkin Whoopie Pies, despite her initial hesitancy about the "fall" flavors:


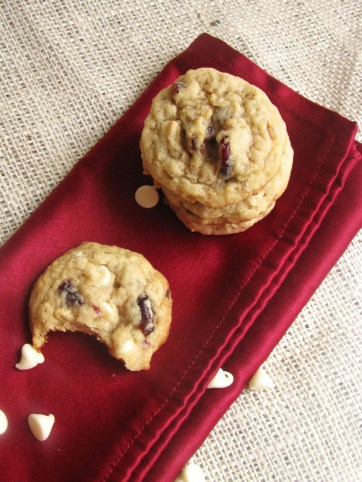
Chrissy loves anything with white chocolate in it, so her Cranberry White Chocolate Oatmeal Cookies were a big hit:


Ashley really stepped out of her comfort zone with Triple Chocolate Cheesecake, which was a big hit with her husband and family:


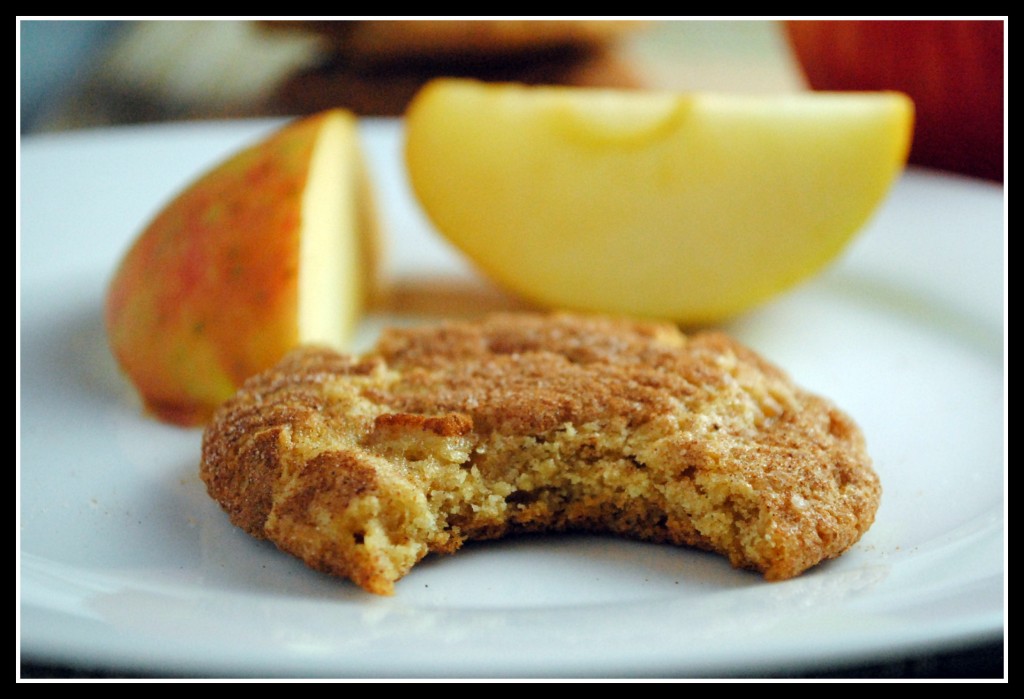
Nicole's Caramel Appledoodles were so good they solicited a marriage proposal:


My stepdad went back for seconds of these Pumpkin Cheesecake Cupcakes, which is a testament to how good they were:


Jaida was happy to break away from the pumpkin craze she's been on with Nantucket Cranberry Pie:


Ellie's Pumpkin Chocolate-Chip Squares were perfectly moist and utterly delicious:


Jenna modified my recipe for Butterscotch Pumpkin Cupcakes and they were a big hit:


Lishie had a lighter holiday dessert, Meringue Nests, that were melt-in-your-mouth delicious:


The Cookaholic Wife doesn't have good luck with layer cakes, but that didn't stop her from enjoying her Vermont Spice Cake with Cream Cheese Frosting, with two layers instead of four:


Coleen wasn't able to make her recipe for No Bake Pumpkin Cheesecake for Thanksgiving as planned because her son decided to arrive two weeks early (congrats!!):


Nicole loves baking bar treats so she loved her recipe for Pumpkin S'mores Bars:


Christine's Cranberry White Chocolate Almond Cookies were devoured by her hungry relatives:


Jey's Chocolate Hazelnut Tart was a huge hit at Thanksgiving dinner:

Pin It!

Saturday, December 03, 2011

Classic Chicken Noodle Soup

I don't usually post over the weekend but sometimes things come up.


I "know" Annie through my cooking board. While I've never met her in person, when I heard that on Thanksgiving she lost her father suddenly I felt so sad for her and her family. Instead of sharing a delicious meal, she and her loved ones grieved.

The ladies on the cooking board got together and came up with a plan to dedicate comfort food posts to Annie, to help with her healing. What could be more comforting than a big bowl of Classic Chicken Noodle Soup? I made this with the last of my Thanksgiving turkey and even Baby Girl liked it.

Annie, you and your family are in my thoughts.

Classic Chicken Noodle Soup
Slightly Modified from Smells Like Home

2 tablespoons extra virgin olive oil
1 cup medium-diced celery (2 stalks)
1 cup medium-diced carrots (3 carrots)
1 cup medium-dice onion (1 medium onion)
3/4 teaspoon Kosher salt
1/2 teaspoon freshly ground black pepper
2 quarts chicken/turkey stock
2 cups wide egg noodles
2-3 cups cooked shredded chicken (or turkey)
1/4 cup chopped fresh parsley

Heat oil in a large pot or dutch oven over medium-high heat. Add the celery, carrots, onions, salt, and pepper and cook for 10-12 minutes until softened. Pour in the stock, bring to a boil over high heat, and add the noodles. Cook the noodles for 10 minutes, then add the chicken (or turkey) and parsley. Allow the chicken/turkey to heat through. Taste and season with more salt and pepper, if needed. Serve hot.
Pin It!

Friday, December 02, 2011

Recipe Swap: Pumpkin Cheesecake Cupcakes

Want to see what other Thanksgiving Dessert recipes were made during the swap? Here is the link to the Thanksgiving Dessert Recipe Swap Roundup

In honor of Thanksgiving I thought a Thanksgiving Dessert recipe swap would be a great way for people to bring something new to the holiday table. This was the first year that I hosted Thanksgiving dinner so I was happy to have one part of the meal decided for me, especially when I ended up receiving Pumpkin Cheesecake Cupcakes from The Cookaholic Wife. I love cheesecake and I love pumpkin, so combining the two was perfect.


In my family dessert is usually secondary to the turkey with all the trimmings. In the past my mom would make a pumpkin pie, but by the time we got to dessert everyone was so stuffed we'd just have a small taste. Since these cupcakes are individual portions it worked out well.

We all know I'm not a baker, but these were very easy to assemble (I did it the night before because they had to chill for at least 4 hours). The recipe says it will make 24 cupcakes, but I ended up with batter leftover, enough for probably another 2-3 cupcakes. And I even thought I had overfilled the tins, so this is fair warning that you might get more than 24 cupcakes out of this recipe.

You know something is a hit when my stepdad goes back for seconds. He rarely eats dessert but he had two of these cupcakes and took more home with the rest of the leftovers. Everyone else thought they were delicious and really liked the pumpkin swirl in the center instead of the entire cheesecake being pumpkin-flavored. I thought the filling was a tad too sweet so I cut down the sugar in the recipe below. I will definitely make these again. Thanks, Cookaholic Wife!

Pumpkin Cheesecake Cupcakes
Very Slightly Modified from The Cookaholic Wife

Pumpkin Mixture:
1 15 oz. can pumpkin
3 teaspoon sour cream
1/3 cup sugar

Filling:
2 8 oz. bricks cream cheese, softened
1 cup sugar
4 eggs, at room temperature
1 teaspoon vanilla extract
1/8 teaspoon salt

Crust:
1 package graham crackers, plus 2 crackers
4 tablespoons butter
2 teaspoons sugar

Preheat the oven to 325. Line cupcake pans with liners. You might end up with more than enough batter for 24 cupcakes, so if you have an extra cupcake tin be prepared to use it.

Use a food processor to grind up the graham crackers. Melt the butter. Add the sugar and butter to the graham cracker crumbs. Stir to combine. Put 1 tablespoon of the graham cracker mixture into each cupcake liner. Use a glass to press down. Bake for 5 minutes and then transfer to a cooling rack.

Using the paddle attachment in a stand mixer, beat the cream cheese on medium speed until fluffy. Add the sugar and mix until smooth. Add the vanilla and the salt. Next, add the eggs one at a time making sure that they are fully combined before adding the next one. Scoop approximately 1 1/2 tablespoons of the cream cheese mixture into each of the cupcake liners.

In a medium bowl, combine the pumpkin, sugar and sour cream. Stir until well combined. Scoop approximately 1 tsp. of the pumpkin mixture into the center of the cheesecake. Swirl with a toothpick.

Bake for 25 minutes, rotating the pans half way through. Let the cupcakes cool to room temperature on cooling racks, then transfer to the refrigerator and chill for at least 4 hours.
Pin It!

Thursday, December 01, 2011

Thanksgiving Recipes: Yam Gratin with Gruyere

The weekend before Thanksgiving my supermarket was giving out a ton of free samples. As I was standing at the green bean bin picking through the beans, I listened to the woman handing out samples of a Yam Gratin with Gruyere. She touted it as being simple (only 4 ingredients, including salt) and a nice change from the traditional sweet potatoes with marshmallow topping. Of course I got a sample and after one bite I knew I had to change my plans and add it to our menu.


The store was selling pre-sliced yams, but since I'd already gotten my own yams to roast I just sliced them myself. Make sure to cut the slices to an even thinness so the gratin cooks through completely. I had a few rogue pieces that were a little crunchy. This was absolutely amazing and so simple. I will definitely make this again (although cut in half since this made a ton of food), whenever I roast a chicken this winter.

Yam Gratin with Gruyere
Wegmans

2 1/2 cups heavy cream
1 1/2 teaspoons salt
4 lbs yams/sweet potatoes, peeled
3/4 cup shredded gruyere

Preheat oven to 350 degrees. Spray 9 x 9 baking dish with nonstick cooking spray. Place baking dish on baking sheet.

Stir together heavy cream and salt in large bowl. Thinly slice sweet potatoes using either a mandoline or a sharp knife. Add to bowl with the heavy cream and salt.

Layer 1/3 of yams in baking dish. Sprinkle with half of the cheese. Repeat with another 1/3 of yams and the remainder of cheese. Top with remaining yams. Pour any remaining yam-cream mixture over top.

Bake uncovered on center rack of oven for 30 minutes. Remove from oven and press a spatula, carefully, against the top layer to allow liquid to flow over the "crust." Replace pan in oven and bake an additional 30 minutes. Remove pan, press top layer and replace pan in oven. Bake for another 40-45 minutes or until yams are tender. Remove from oven, let rest 15 minutes, then serve.
Make Ahead - The sweet potatoes can be sliced and stored in a plastic food storage bag up to 2 days in advance. The gratin can be assembled the night before baking, covered with plastic wrap and stored in the fridge.
Pin It!