I know, I know. You're looking at the calendar and thinking "it's August 4. Why is she posting a July recap now?" As you may have noticed, I've been a little lax about blogging lately. Honestly, my heart's just not in it these days. I haven't gone through a phase like this in awhile so I guess I was due. I'm not making a lot of new dishes and I can't find the time or energy to blog the few new things I have made. I'm sure I'll snap out of it soon.
So...July. It was another busy month for us. Baby Girl is still taking swim lessons and this month she finally decided she wasn't scared of jumping in the pool. SP and I ran a 5K race on July 4 and had a great time. Work has been busy for both of us. The weather has been a bit on the cool side, not very summery, so we haven't spent as much time at the pool. And that's about it in a nutshell. On to the food!
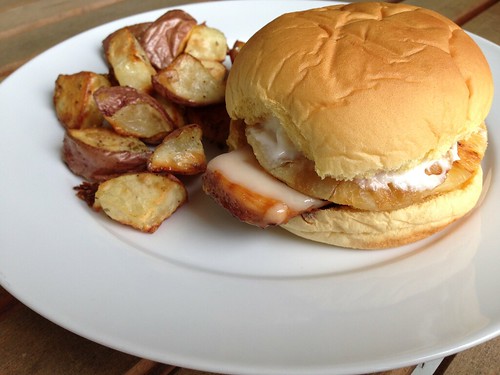
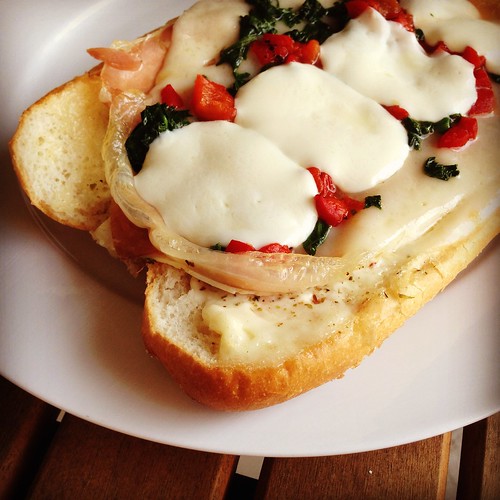
Whenever I get a craving for pineapple I turn to these Hawaiian chicken sandwiches. There is just something about the combination of the marinade that makes these delectable.
And, of course, I can't serve the sandwiches without roasted potatoes on the side. Such a foolproof method. They come out perfect every single time.
I decided to combine a few individual servings of spicy pork and asparagus stir fry I had socked away in the freezer for dinner one night. I served edamame and egg rolls on the side and we relived the height of asparagus season.
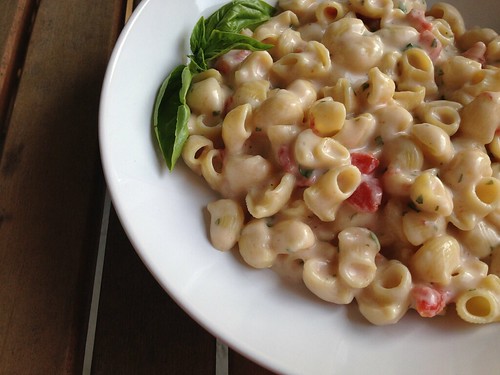
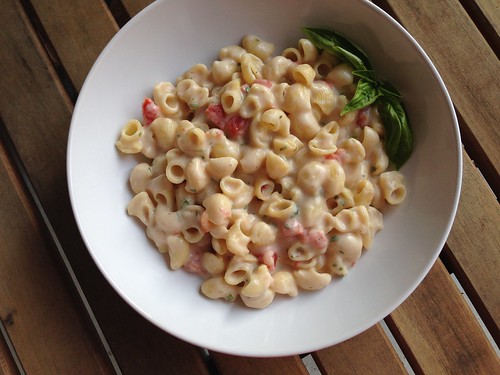
I rediscovered my love for this antipasti pasta salad this month. I've made it at least three times. It's so good and so easy.
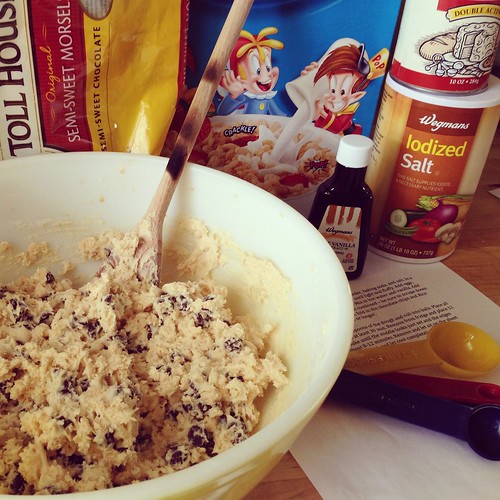
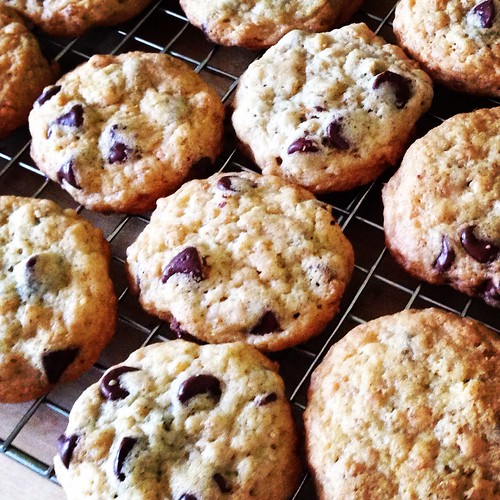
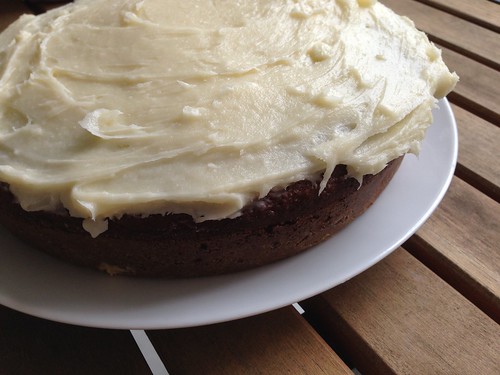
I brought these sopapilla cheesecake bars to my friend MaryEllen's house for dinner. She loved them so much she didn't fight me about keeping the leftovers and ended up serving them to her parents for breakfast the next day.
These crunchy baked tacos are our new favorite beef taco. We all love the crispy shell and I love how easy they are to make.
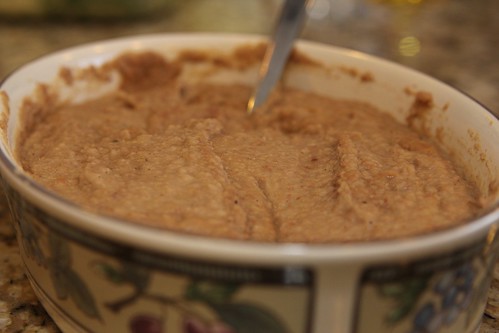
No Mexican night is complete without these homemade refried beans.
Once again, I made this recipe into fish sticks. I was never a fan of the frozen kind as a kid but these are head and shoulders above those. Positively addicting.
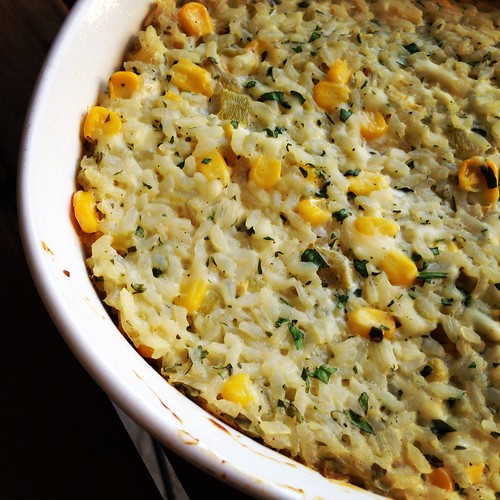
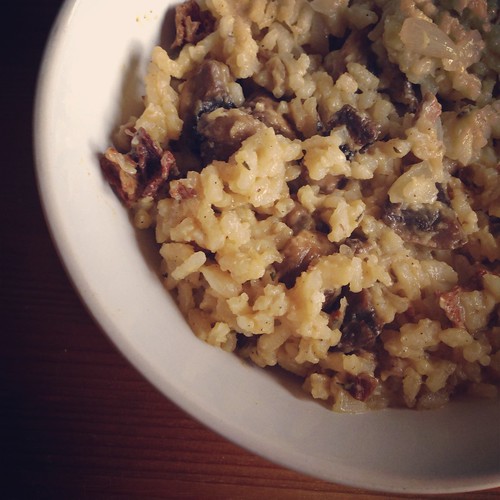
We've been loving cheesy zucchini rice now that zucchini is in season. I need to get this made a few more times before Fall.
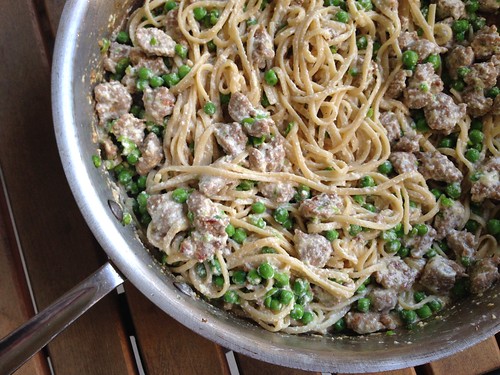
I was cleaning out the freezer and found a package of meat sauce bolognese tucked away. Perfect for an easy weeknight meal.
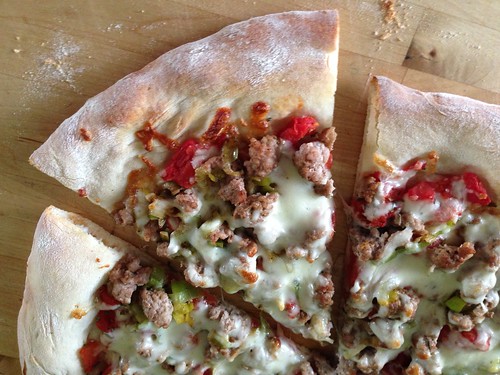
Now that it's warmer I'm alternating making burgers and these flatbread pizzas on Fridays. I love roasting the tomatoes so they get super sweet. And the flatbreads are such a perfect vehicle for the tomatoes and cheese.
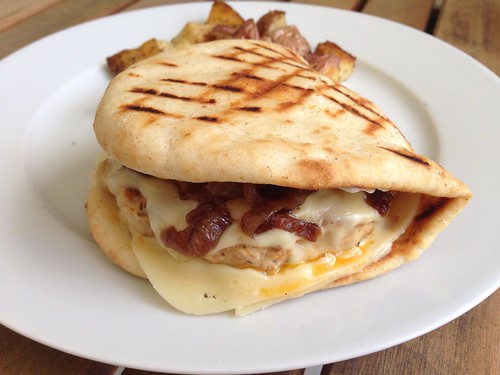
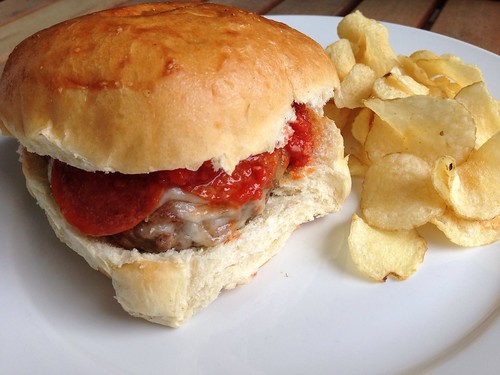
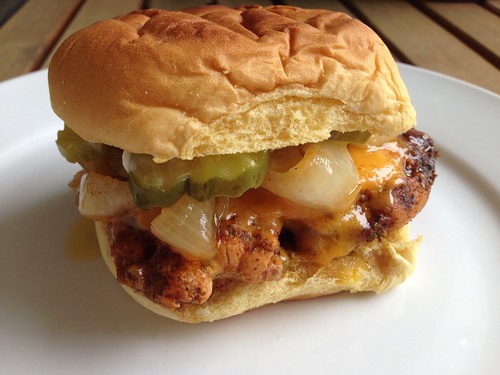
When I was cleaning out the freezer I made an amazing discovery - a lone package of homemade chorizo. I thought I'd used it all up, which was very sad since it meant no more chicken chorizo patty melts. Of course I had to make them and they were just as divine as ever. One of our all-time favorites.
I was stumped for an easy sandwich idea for dinner until Baby Girl turned on The Pioneer Woman. She was making these hot roast beef sandwiches so I added them to the menu for the following week. Yum!
These citrus chicken burritos require a lot of work, but are so, so worth it. Another all-time favorite recipe around here.
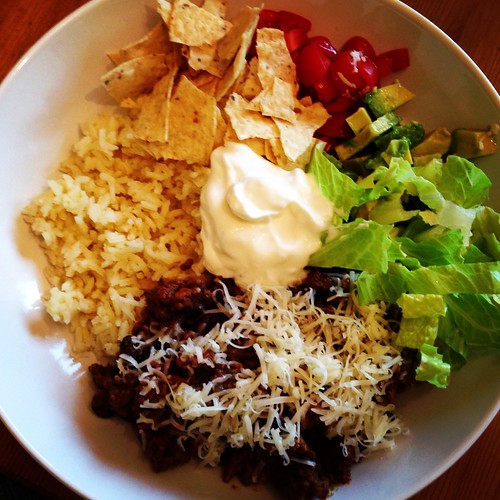
As much as we love regular tacos, taco rice is a nice change of pace. We all love mixing all the ingredients together in the bowl.
I wanted something healthy, bright and flavorful and SP said we hadn't had black bean patties in awhile. I decided to make these black bean patties with corn and avocado cream because I love, love, love the corn salsa and the avocado cream (and the patties, too. The whole meal is great).
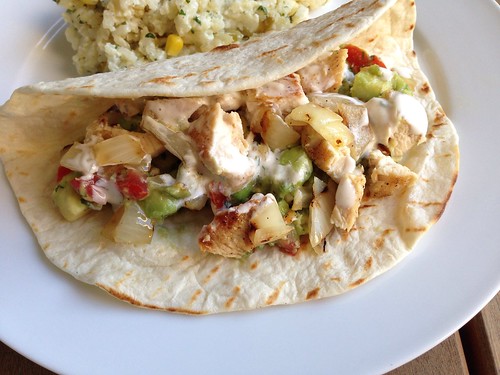
I wanted an easy chicken taco recipe and remembered how much we liked these grilled chicken tacos with spiced mayo. I love how easy these are to make. I turned the leftovers into a quesadilla for lunch the next day and I think I may make them that way from now on.
Monday, August 04, 2014
Monday, July 21, 2014
Junk Yard Special
This sandwich. Oh, this sandwich. Nichole posted this recipe for Sarcone Deli's Junk Yard Special awhile back and I've had it on my short list to make. I've been trying to use up things I've squirreled away in my freezer, so when I found some prosciutto I'd been saving I knew I wanted to finally make this sandwich.
This was so, so worth the wait. Everything combines together beautifully to make one awesome sandwich. My only (minor) complaint is that the spinach gets lost in the flavor profile because of the roasted red peppers. I'd consider swapping out some of the peppers for sliced tomato next time, just so the spinach has a chance to shine through.
Junk Yard Special
As seen on The Cookaholic Wife, from Sarcone's Deli
4 hoagie rolls
1/2 cup mayo
2 tablespoons red wine vinegar
1/2 teaspoon dried Italian seasoning
1 tablespoon olive oil
1 8-oz bag baby spinach
salt and pepper
dash of nutmeg
16 slices prosciutto
16 slices deli turkey
8 slices provolone cheese
8oz fresh mozzarella, thinly sliced
1 cup minced roasted red peppers
fresh basil, shredded
Preheat the oven to 350. Line a baking sheet with foil.
Cut a slit into each roll lengthwise, leaving the bread hinged at one end. Mix the mayo, red wine vinegar and Italian seasoning together in a small bowl.
Heat the oil in a non-stick skillet over medium heat. Add a few handfuls of the spinach to the pan, turning to wilt the leaves. Season with salt and pepper and a dash of nutmeg. Add more leaves once the first batch of leaves are wilted enough that there's space in the pan. Cook until all the spinach is wilted. Set aside.
Spread some of the mayo onto each roll. Place 4 slices each of prosciutto and turkey on each sandwich. Add two slices of Provolone cheese, 1/4 of the mozzarella, 1/4 of the roasted red peppers, and 1/4 of the sauteed spinach to each sandwich. Sprinkle each sandwich with 1/4 of the fresh basil.
Place the sandwiches on the baking sheet and bake for 10 minutes or until the bread is crusty and the cheese is melted. Serve warm.
Friday, July 18, 2014
Krispie Chocolate Chip Cookies
I needed a dessert for Fourth of July. I've had Stephanie's Krispie Chocolate Chip Cookies printed out for awhile, I even bought the Rice Krispies to make them awhile back, so I figured it was time to make them happen.
These cookies take some planning because you need to chill the dough twice before baking. I can't stand when cookies spread because the butter in the dough is too warm, so I appreciate taking the extra time to make sure these don't do that.
The Rice Krispies add an interesting texture to these cookies. Even after we finished the batch I still couldn't decide if I was a fan or not. Don't get me wrong, the cookies were delicious, but the cooked cereal gets chewy and I prefer a moist, cakey chocolate chip cookie rather than a chewy one. It didn't stop me from eating them, though. Wink, wink.
Krispie Chocolate Chip Cookies
As seen on Stephanie Cooks
1 1/4 cups all-purpose flour
1 teaspoons baking powder
1/2 teaspoon salt
1/2 teaspoon baking soda
1 stick unsalted butter, at room temperature
3/4 cup granulated sugar
1 large egg, at room temperature
2 teaspoons hot water
2 teaspoons vanilla
1 1/2 cups Rice Krispies
1 cup chocolate chips
Whisk or sift the flour, baking powder, baking soda, and salt together. In a large mixing bowl, beat together the butter and sugar until light and fluffy. Add the egg, beating until just combined. Add the hot water and vanilla and beat until combined.
Add the flour mixture, in two batches, beating just until combined – be sure to scrape down the sides of the bowl. Using a wooden spoon, fold in the chocolate chips and Rice Krispies. Cover and refrigerate for 30 minutes or longer.
Scoop out 1 tablespoon of dough at a time and roll into a ball. Place all the dough balls on one baking sheet and chill at least 30 minutes.
Preheat the oven to 375 degrees.
Remove the dough from fridge and place 12 balls on a cookie sheet, evenly spaced apart. Bake until the middle looks just set and the edges begin to brown, about 8 minutes. Don't overcook. Remove and let sit on the baking sheet for 1 minute. Move the cookies to a wire rack and let cool completely. Repeat with the remaining dough.
Wednesday, July 16, 2014
Caprese Macaroni and Cheese
It's no secret that I love all things caprese. So when Stephanie posted this recipe for Caprese Macaroni and Cheese I was intrigued. Why had it never occurred to me to combine two of my favorite things into one dish?
This will come as no surprise, but this dish was outstanding. The gooey, cheesy mozzarella, the bright tomatoes and the fresh basil all worked so well with the creamy sauce. In an effort to make this a wee bit healthier I omitted the cream and upped the amount of milk. I also upped the amount of flour so the sauce would thicken. I used canned diced tomatoes, but if you've got tomatoes and basil in your garden I highly recommend using those instead. When I made this my basil plant hadn't started growing yet but thankfully my neighbors were overrun with basil and gladly shared some with me.
Caprese Macaroni and Cheese
As seen on Stephanie Cooks
1/2 pound elbows (or other short-cut pasta)
2 tablespoons butter
2 cloves garlic (I omitted)
2 tablespoons flour
1 1/2 cups whole milk
1/2 cup chicken broth
1 teaspoon garlic salt
Black pepper
1 1/2 cups shredded mozzarella cheese
1 cup diced tomatoes (fresh or canned)
minced fresh basil, to taste
Cook pasta according to package directions. Drain and place back in the pot.
In a large saucepan, melt the butter and garlic (if using), stirring well. Add the flour, mixing, until a paste forms. Slowly whisk in the milk, broth, garlic salt, and black pepper. Bring to a boil.
Remove the saucepan from the heat and stir in the mozzarella cheese, tomatoes and basil. Taste and season with salt and pepper, if needed. Add the cooked pasta, stirring, until covered in cheese sauce. Serve immediately.
Labels:
Italian,
mac and cheese,
pasta,
toddler-approved,
tomatoes
Monday, July 14, 2014
Recipe Redo: Mexican Sour Cream Rice
I've been making this Mexican Sour Cream Rice for years. I used to make it any time we had anything even slightly Mexican-inspired for dinner. It was definitely my go-to side dish.
I've been recommending the dish to friends a lot recently and I figured it was time to update my blog with some better pictures. Please forgive those early blogging pics - I may not be a professional photographer but I think my photos have come a long way since then.
The last time I made this I used regular Monterrey Jack cheese instead of pepper Jack because Baby Girl doesn't like spicy things. We both felt it lost a little something with the milder cheese so next time I'm going to throw caution to the wind and go back to pepper Jack. We don't remember it being super spicy that way so hopefully Baby Girl won't refuse to eat it.
Mexican Sour Cream Rice
Modified from All Recipes
1 3/4 cups chicken broth
1 cup uncooked long grain white rice
1 cup sour cream
1 (4 ounce) can diced green chile peppers
2 cups shredded Monterey or pepper Jack cheese
1 1/2 cups frozen corn
1/4 cup finely chopped fresh cilantro
salt and pepper to taste
Bring the chicken broth to a boil in a large sauce pot. Add the rice, stir and then reduce the heat to low. Cover and simmer for 20 minutes.
Meanwhile, preheat the oven to 350. Lightly grease a 1-1/2 quart casserole dish.
Add the sour cream, green chile peppers, cheese, corn, and cilantro to the pot with the rice. Stir to combine, then season with salt and pepper. Transfer to the greased casserole dish.
Bake uncovered for 30 minutes until the top is lightly browned.
Labels:
Mexican,
rice,
side dish,
toddler-approved
Friday, July 11, 2014
Pepperoni Pizza Burgers
As much as I love summer, I always miss Pizza Fridays once the hot weather arrives. I just can't justify cranking my oven to 500 degrees when it's in the 90s. I needed a plan for Friday night and found myself craving both pizza and burgers. A quick spin around the interwebs brought me to Pioneer Woman's Pepperoni Pizza Burgers.
Because of the sausage in these burgers you have to cook them all the way through. Thankfully the fat from the sausage helps keep these burgers from drying out. SP was a bit skeptical of topping a burger with pizza sauce, pepperoni and cheese but he admitted these were good. I was a big fan. I loved the combo of the meats in the patty, the sauce, gooey cheese and tangy pepperoni. I even dipped my burger in some of the leftover sauce as I ate. Yes!
Pepperoni Pizza Burgers
As seen on Pioneer Woman Cooks
1-1/2 pound ground beef
1/2 pound Italian sausage
1/2 teaspoon Italian seasoning
8 slices (or 1/2 cup shredded) mozzarella cheese
Pepperoni slices
Pizza sauce
Grated Parmesan cheese
4 whole rolls/buns, toasted
Combine ground beef, Italian sausage, and Italian seasoning in a bowl. Knead it together and then form into four patties.
Heat a large skillet or grill pan over medium heat. Add the burgers and cook on one side for several minutes, then turn the burgers. Lay 2 slices of cheese (or a mound of shredded cheese) on each patty, followed by several slices of pepperoni. Allow the burgers to cook all the way through while the cheese melts and the pepperoni warms.
Spread both halves of each roll with some pizza sauce and sprinkle the sauce with Parmesan cheese. Lay the patties on the bottom buns, then top with the top buns.
Wednesday, July 09, 2014
Pasta with Smashed Peas, Sausage, and Ricotta Cheese
We had an almost-full container of ricotta cheese in the fridge, so I asked SP to search for a recipe to use it up. He found this one for Tagliatelle with Smashed Peas, Sausage, and Ricotta Cheese that sounded both easy and delicious.
Like I do with most pasta recipes these days, I only used a half pound instead of the full pound. Cutting down on the pasta while keeping the filler ingredients the same is an easy way for us to get our pasta fix without going overboard. I also cut the peas down from a full pound to a half pound because, wow a pound is a lot of peas. SP wanted the sauce to be smoother. We couldn't taste the ricotta at all, which was disappointing, but we still enjoyed it.
Pasta with Smashed Peas, Sausage, and Ricotta Cheese
Giada De Laurentiis
1/2 pound fresh or dried tagliatelle pasta (or other wide, long pasta)
2 tablespoons olive oil
2 cloves garlic, chopped
1 pound hot Italian sausage, casings removed
1/2 pound frozen peas, thawed
1 cup whole milk ricotta cheese
1 bunch fresh basil leaves chopped (about 3/4 cup)
1/4 cup fresh grated Pecorino Romano cheese
salt and pepper, to taste
Bring a large pot of salted water to a boil over high heat. Cook the pasta according to package directions. Drain, reserving 1 cup of the pasta cooking water.
Meanwhile, in a large, heavy skillet heat the olive oil and garlic over medium-high heat and add the sausage. Use a wooden spoon to break up the sausage into bite-sized bits.
Once the sausage has browned, about 5 minutes, remove and set aside. Add the peas to the pan and, using the back of the wooden spoon, smash the peas.
Turn off the heat. Add the ricotta cheese along with the cooked pasta and toss to coat, adding the pasta cooking water in 1/4 cup additions, if needed, to make the pasta moist. Return the sausage to the pan. Add the basil, Pecorino Romano cheese, and salt. Toss gently to coat and serve immediately
Labels:
Italian,
pasta,
peas,
sausage,
toddler-approved,
vegetables
Wednesday, July 02, 2014
Grilled Chicken Tacos with Spiced Mayo and Avocado Salsa
These Grilled Chicken Tacos with Spiced Mayo and Avocado Salsa are, hands down, my new favorite taco. As soon as I saw them I knew I had to make them. I could almost taste them just by reading the recipe.
I had to make a slight modification because I refuse to pay $1 for one lime when I can't even be guaranteed the lime will have any juice in it. Have you ever bought a lime and found it completely dry? How does that even happen? Lemons are still cheap so I just swapped it out. I also left out the hot sauce because Baby Girl isn't a fan of spicy food.
I prepared these on my indoor grill pan because, as I've mentioned before, we have a charcoal grill and getting that set up on a weeknight just doesn't happen. Since skewers won't fit on the grill pan I cut the chicken breasts in half lengthwise and grilled them before cutting into cubes. Same for the onion - I grilled it in rings and then chopped them. These tacos were so delicious we barely had enough leftover for one lunch the next day.
Grilled Chicken Soft Tacos with Spiced Mayo and Avocado Salsa
As seen on Seeded at the Table, originally from Weber's New Real Grilling
For the chicken:
zest of 1 lemon
1/2 teaspoon ground cumin
Salt & pepper
Olive oil
4 boneless, skinless chicken breasts, cut in half lengthwise
1 large yellow onion, peeled and cut into 3/4-inch rings
1/2 cup mayonnaise
Juice from 1 lemon
1 teaspoon hot sauce (optional)
1/4 teaspoon cumin
For the Avocado Salsa:
2 large avocados, peeled, pitted and diced
2 medium Roma tomatoes, seeded and finely diced
3 scallions, minced
2 tablespoons fresh lemon juice
1 tablespoon chopped cilantro
1/4 teaspoon hot sauce (optional)
8 taco or fajita-size flour tortillas
Preheat grill pan over medium-high heat.
In a large bowl or plastic food storage bag, combine the lemon zest, 1/2 teaspoon cumin, 1/2 teaspoon salt, 1/4 teaspoon black pepper and a few tablespoons of oil. Place the chicken pieces into the bowl or bag and toss to combine until evenly coated with the seasonings. In a separate bag or bowl, toss the onion rings with some oil, salt and pepper.
In a small bowl, whisk together the mayonnaise, lemon juice, hot sauce (if using), and 1/4 teaspoon cumin. Stir in water, 1 teaspoon at a time, until the mixture can be drizzled.
In another bowl, toss together the salsa ingredients and season with salt and pepper, to taste.
Add the onion rings to the grill pan and cook, turning often, until the onions are soft and blackened in spots. Remove from the grill to a bowl and cover with foil or plastic wrap. Add the chicken to the grill pan and cook 5 minutes on one side, then flip and cook another 4 minutes. Remove from the grill and let rest. Add the tortillas to the grill pan to warm and brown in spots, turning once. Cut the chicken and onions into bite-size pieces. Let everyone assemble their own tacos with the mayo and salsa.
Labels:
chicken,
easy weeknight meal,
Mexican,
tacos,
toddler-approved
Monday, June 30, 2014
June Re-Make Recap
I've been a horrible blogger lately. I've been remaking so many recipes I haven't had enough content for new blog posts. And I can't find the time to blog about the new things I have made. Sunday night I vowed to get a blog post done and when I went to schedule it for Monday I realized Monday was the end of June. Eeeek. How did that happen? For some reason June always flies by for me. I truly cannot believe it's already June 30 and tomorrow is July 1. At my previous job we had a big annual meeting mid-June and I always thought that being caught up in preparing for and running the meeting was the reason June flew by, but I haven't been at that job for a few years now and June still flies.
Unfortunately we only made it to the pool once this month and it wasn't even a good pool day - windy and overcast and not quite warm enough. Baby Girl is still taking swim lessons and gaining more confidence. She started summer camp at her daycare this month and has gone on a few field trips already. Today is their first swimming lesson in our community pool. Work has been busy for both of us as well. Today we're getting a new roof. Yay for home ownership!
As I said, I've been remaking a lot of family favorites and this month was no exception.
I've been wanting to remake these chicken nuggets with honey mustard dipping sauce for ages and finally got the chance this month. These are so good I have to make way more chicken then I think we'll eat because we have no self control. Absolutely delicious.
And to go with the nuggets, cheesy zucchini rice. This is my favorite summertime side dish because it's a starch and vegetable in one. Plus we all love it.
Baby Girl had one request this month: pasta with asparagus and peas. It's an easy, light dinner, perfect for summer. Asparagus is no longer in season so this wasn't as good as it was a few months ago, but we still enjoyed it (without the egg this time).
No roundup is complete without the TRH salad.
I brought these salted fudge brownies to C&T's house for our BBQ cookout and they were a big hit, even if I did undercook them.
I love the ease of these crunchy baked tacos. I had some leftover taco filling frozen from the previous batch so all I had to do was defrost it and chop up the toppings.
We can't have Mexican food without homemade refried beans.
Whenever I'm in the mood for a big dinner salad I turn to the california club blue cheese chopped salad. We had blue cheese leftover from C&T's BBQ, but I think I might prefer this salad with feta. It's milder and doesn't overpower the other flavors.
I needed an easy dinner one night. I had some cooked pork tenderloin in the freezer and immediately thought of pork with noodles. I made a few changes - used fettuccine instead of rice noodles and added chopped bok choy and shiitake mushrooms to bulk up the dish. We all loved the changes so I think that's how I'll make it from now on.
I found two more balls of pizza dough in the freezer so of course I had to make 3 cheese pepperoni pizza. Unfortunately I was out of rosemary, but those two pizzas were still delicious. I don't want to rush through summer but I'm definitely looking forward to revisiting this pizza when the weather turns cool again.
I actually made these bang bang chicken skewers twice this month - once for dinner with our new neighbors and again for my parents for Sunday dinner. The original recipe calls for red pepper, but we're not big pepper fans. I actually like to grill zucchini, grape tomatoes, red onion and mushrooms. I always serve it with couscous to soak up the extra sauce.
Another meal we can't get enough of lately is crispy fish. This month I turned them into fish sticks and we ate them with more of the cheesy zucchini rice. The tangy dipping sauce is perfect.
Taco rice is one of those meals that never gets old around here.
You probably know by now that whenever I buy a bag of tilapia filets I have to make crispy fish and tilapia francese.
Now that we aren't doing pizza on Fridays I'm bringing back flatbreads. This month we had our old standby, chicken caesar flatbreads.
Friday, June 20, 2014
Cooler Corn on the Cob
For our recent BBQ-themed dinner with C&T we had something I'd never heard of before - cooler corn on the cob. T had seen the idea on Pinterest when looking for camping meal ideas and figured it would be fun to try for our backyard BBQ. This would be awesome for parties - you can make a large amount of perfectly-cooked corn in no time flat and it keeps warm for hours.
Photo credit - T. Casey
The "recipe" is not really a recipe, just a method, but I had to share it with you guys. I'm going to offer to bring cooler corn to the next BBQ we're invited to, just to try it out for myself.
Cooler Corn on the Cob
1 cooler (small or large depending on how much corn you're making)
Corn on the cob
Wash the cooler well. Shuck the corn, removing all the outer levels and silk. Place the shucked corn in the cooler.
Bring a large pot of water to a boil. Pour over the corn. You want to submerge the corn. Close the lid of the cooler and let it sit for at least 30 minutes.
The corn can sit in the cooler for a couple hours. When you're ready to eat, just drain off the water and enjoy.
Monday, June 16, 2014
Roasted Mushroom Risotto {Review}
I recently received a variety of rice from RiceSelect to sample. One of the samples was an arborio blend with mushrooms. We love risotto around here, so as soon as I saw this recipe for Roasted Mushroom Risotto I knew the arborio blend with mushrooms would be perfect.
This was an outstanding risotto. The roasted mushrooms had great flavor but I think my favorite part was the dried chanterelles. I was a little hesitant to buy them since half an ounce was $4.99, but it was well worth it. They added a great depth of flavor that really brought the whole dish together.
We love RiceSelect products (I'm a big fan of their pearl couscous, even though I haven't been able to find it for ages) so I knew their arborio would be a hit. And it was. Baby Girl, who up until this point has been hit or miss with mushrooms, positively loved this. She told me she was a big fan and cleaned her plate.
Roasted Mushroom Risotto
As seen on Rachel Cooks
1/2 ounce dried chanterelle mushrooms
24 ounces white mushrooms cut in halves or quarters
4 tablespoons extra virgin olive oil, divided
1 tablespoon fresh thyme leaves, roughly chopped
Salt and pepper to taste
6 cups vegetable broth/stock
4 tablespoons unsalted butter, divided
1 clove garlic, minced
1/2 yellow onion, finely diced
1 1/4 cups Arborio rice
1/2 cup dry white wine (e.g. Chardonnay)
1/2 cup freshly grated Parmesan cheese more for garnish, if desired
Preheat oven to 425°F.
Place the dried chanterelle mushrooms and pour boiling water over them. Let them soak for twenty minutes. Drain and rinse, then set aside.
Place the white mushrooms on a large rimmed sheet tray and toss with 3 tablespoons olive oil, thyme and a sprinkle of salt and pepper. Spread into a single layer and place in preheated oven. Roast for 15 minutes, stir, and roast for another 10-15 minute or until golden brown.
Meanwhile, bring stock to a simmer in a saucepan.
In a deep, heavy skillet, melt 2 tablespoons butter and 1 tablespoon oil over medium-high heat. Add the rehydrated chanterelles, garlic and onion and saute for about 5 minutes or until onions are translucent. Add the rice and cook for another 2-3 minutes to toast the rice, stirring frequently.
Add the white wine and bring to a boil. Add 1 cup of the simmering stock, and keep stirring nearly constantly, making sure to push down any rice stuck to the edges of the pans. Once the liquid is nearly absorbed, add another 1 cup of stock. Continue to do this until the rice is cooked but still slightly chewy, about 25 minutes. Taste the rice frequently to check the consistency.
Remove from heat and stir in 2 tablespoons butter, Parmesan cheese and roasted mushrooms. Taste and add more salt and pepper, as needed. Serve immediately.
Disclaimer: I received free samples of RiceSelect rice. I was not paid to write this review and all opinions are my own.
Labels:
mushrooms,
risotto,
toddler-approved,
vegetarian
Friday, June 13, 2014
Pork Ribs
If I had known ribs were this easy to make at home I would have been making them once a week.
We recently had a BBQ-themed dinner with our friends C&T. Among other things, T made four racks of ribs. I probably had half a rack myself and when she asked if we wanted to take some home I jumped at the chance. I knew I had to blog about these because (1) they're so delicious and (2) they're so easy to make.
Photo credit - T. Casey
T gave me basic instructions for the ribs and told me she used Pioneer Woman's recipe for BBQ sauce. I can't wait to make these myself this summer. I've also talked her into making another rack or two for our next themed dinner in August.
Pork Ribs
pork rib racks (4 racks will feed an army)
pork rub (T used McCormick Grill Mates pork rub)
BBQ sauce
Preheat the oven to 225 degrees.
Rub the ribs on both sides with some of the pork rub. Lay each rack in a double layer of foil. Add 1/4 cup of water and then seal the foil around the ribs.
Bake for 2 hours.
While the ribs are baking, make the BBQ sauce (recipe below or use your own). Once the ribs are done, remove them from the foil. Spread some of the BBQ sauce on each rack.
Preheat a grill to high. Lay each rack on the grill. You want to leave them alone so they get a nice crust.
Remove the ribs from the grill. Place one rack at a time on a cutting board. Slather with more sauce on both sides. Using a very sharp, long knife, cut the ribs between the bones. Pile on a serving platter and have lots of napkins on hand.
Homemade BBQ Sauce
As seen on Pioneer Woman
1 tablespoon canola oil
2 cloves garlic, minced
1/2 onion, diced
1 cup ketchup
1/3 cup molasses
1/3 cup brown sugar
4 tablespoons minced chipotle peppers in adobo sauce (or a few shakes of red pepper flakes)
4 tablespoons distilled vinegar
1 tablespoon Worcestershire sauce
Dash salt
Heat the oil in a saucepan over medium-low heat. Add the garlic and onions and cook for 5 minutes, stirring, being careful not to burn them. Reduce the heat to low. Add the ketchup, molasses, brown sugar, chipotle peppers or red pepper flakes, vinegar (or less to taste), Worcestershire sauce and salt and stir.
Allow to simmer for 20 minutes. Taste after simmering and add whatever ingredient it needs (more spice, more sugar, etc.).
Yield: 2 cups
Friday, June 06, 2014
Pizza Fridays: Pizza with Ground Pork, Leeks and Rosemary
I had 8oz of ground pork in the freezer and absolutely no idea what to do with it. Then Coleen posted this Pizza with Ground Lamb, Leeks and Rosemary and I figured I could sub pork for the lamb.
I forgot to season the pork with salt and pepper while it was cooking, but otherwise this was a pretty good pizza. I really enjoyed experimenting with different toppings this winter and I'd definitely make this one again. Now that it's warm I'll be switching to flatbread pizzas or burgers on Fridays since cranking the oven to 550 degrees when it's 90+ outside isn't appealing.
Pizza with Ground Pork, Leeks and Rosemary
Slightly modified from The Reheaded Baker
8 ounces ground pork
salt
freshly ground black pepper
2 tablespoons olive oil, divided
1 leek (white and light green parts only), rinsed, halved and sliced 1/4-inch thick
1 lb pizza dough
1 (14-ounce) can diced tomatoes, drained
Pinch of red pepper flakes
shredded mozzarella
2 stalks fresh rosemary
In a large nonstick skillet, heat 1 tablespoon oil over medium-high heat. Add the ground pork and cook, breaking up clumps with a wooden spoon or spatula, until fully browned. Season with salt and pepper. Remove from the skillet to a paper-towel-lined plate to drain the fat. Wipe out the skillet.
Heat the remaining tablespoon of oil in the same skillet over medium heat; add the leeks and a pinch each of salt and pepper, and cook, stirring frequently, until the leeks are soft, about 8 minutes.
Place a pizza stone in your oven and preheat the oven to 475 degrees.
Season the diced tomatoes with pepper and red pepper flakes. Strip the rosemary leaves off of the stems; discard the stems. Roughly chop the leaves.
Lay a sheet of parchment paper the size of your pizza stone on a work surface. Lightly dust with flour. Roll or stretch the dough into a 12- to 14-inch circle on the parchment paper. Spread the tomatoes in a thin layer over the dough, leaving a half-inch margin around the outer edges. Sprinkle half the mozzarella over the tomatoes, then sprinkle on the chopped rosemary.
Transfer the pizza to the hot pizza stone. Bake for 8-10 minutes, until the cheese is bubbling and the crust starts to appear dry. Partially remove the pizza from the oven, very carefully sprinkle the ground pork and leeks over the pizza, then sprinkle on the remaining half of the mozzarella cheese. Return the pizza to the oven to bake another 2 to 4 minutes, until the top layer of cheese has melted and the crust is golden brown.
Remove the pizza from the oven, let it cool for about 5 minutes before slicing and serving.
Wednesday, June 04, 2014
Grilled BBQ Chicken Sandwiches with Brown Sugar Grilled Onions
From the moment Cassie posted these Grilled BBQ Chicken Sandwiches with Brown Sugar Grilled Onions on Instagram I fell in love. I hounded her to write up a blog post so I could make them and, happily, she obliged.
I was finally able to put them on the menu recently and all I can say is wow. These are incredible. Absolutely delicious. The citrus from the orange juice really comes through and I love the tang of the BBQ sauce with the pickles and the sweet onions. Heaven.
The only change I made was to sub the Italian dressing in Cassie's recipe for olive oil and the seasonings that go into the dressing. We don't keep bottled Italian dressing on hand and since I had almost all the spices I needed I figured I'd just make my own marinade.
You have got to try these sandwiches. You won't be sorry. I'm already plotting when I can make them again.
Grilled BBQ Chicken Sandwiches with Brown Sugar Grilled Onions
As seen on Cassie Craves, spice mixture adapted from allrecipes
4 chicken breasts
olive oil
1 teaspoon garlic salt
1 teaspoon onion powder
1 teaspoon white sugar
2 teaspoons dried oregano
1/4 teaspoon ground black pepper
1/4 teaspoon dried basil
1 teaspoon dried parsley
dash of seasoned salt
1 tablespoon Worcestershire sauce
Juice of 1 orange
2 teaspoons chili powder
BBQ sauce
1-2 large sweet Vidalia onions, sliced into thick rings
2 tablespoons olive oil
2 tablespoons brown sugar
1/2 teaspoon salt
1/4 teaspoon freshly-ground black pepper
1 cup shredded cheddar cheese
4 sandwich buns, cut in half
Butter
Sliced pickles
Mayonnaise
In a large food storage bag, combine the oil, seasonings, Worcestershire, orange juice, and chili powder. Add the chicken, close the bag, and toss to combine. Marinate overnight.
Heat grill pan over medium-high heat. Toss together the onion rings, olive oil, brown sugar, and salt and pepper in a bowl. Add the onions and cook until they are tender and charred. Remove to a bowl and cover to keep warm.
Add the chicken to the grill. Cook chicken 5 minutes on one side, brush with BBQ sauce, then flip and cook 4 minutes. Brush the other side with BBQ sauce. With one minute left to cook, top each chicken breast with some of the cheese. Cover the grill pan with foil and let the cheese melt. Remove from the pan.
While the chicken is cooking, butter the cut side of the buns and toast them.
Serve each chicken breast topped with a pile of onions, some more BBQ sauce, pickles and mayonnaise.
Labels:
chicken,
easy weeknight meal,
grill,
onions,
sandwiches
Monday, June 02, 2014
Banana Cake with Cream Cheese Frosting
I've mentioned before that SP has been trying to get back into the kitchen. Recently he decided he wanted to use some of our overripe bananas to make this Banana Cake with Cream Cheese Frosting.
He and Baby Girl made this together, which was so cute to watch. Due to her nut allergy we had to leave out the walnuts, but we didn't miss them. Being a chocolate lover, I had hoped SP would be open to adding chocolate chips instead but he wanted the banana to really shine.
This was excellent. The cake was moist and flavorful and cream cheese icing is pretty darn fantastic. The recipe made a nice, thick layer of it, too. This takes a bit of planning since you need very ripe bananas and the ingredients have to come to room temperature, but otherwise it's very simple.
Banana Cake with Cream Cheese Frosting
Ina Garten, from Barefoot Contessa How Easy is That?
3 very ripe bananas, mashed
3/4 cup granulated sugar
1/2 cup light brown sugar, lightly packed
1/2 cup vegetable oil
2 extra-large eggs, at room temperature
1/2 cup sour cream
1 teaspoon pure vanilla extract
Grated zest of 1 orange
2 cups all-purpose flour
1 teaspoon baking soda
1/2 teaspoon kosher salt
1/2 cup coarsely chopped walnuts (optional)
Cream Cheese Frosting (recipe follows)
Walnut halves, for decorating (optional)
Cream Cheese Frosting:
6 ounces cream cheese, at room temperature
6 tablespoons (3/4 stick) unsalted butter, at room temperature
1 teaspoon pure vanilla extract
2 1/2 cups sifted confectioners' sugar (1/2 pound)
Preheat the oven to 350 degrees. Grease and flour a 9 by 2-inch round cake pan.
In the bowl of an electric mixer fitted with the paddle attachment, mix the bananas, granulated sugar, and brown sugar on low speed until combined. With the mixer still on low, add the oil, eggs, sour cream, vanilla, and orange zest. Mix until smooth.
In a separate bowl, sift together the flour, baking soda, and salt. With the mixer on low, add the dry ingredients and mix just until combined. Stir in the chopped walnuts, if using. Pour the batter into the prepared pan and bake for 45 to 50 minutes, until a toothpick inserted in the center comes out clean. Cool in the pan for 15 minutes, turn out onto a cooling rack, and cool completely.
Spread the frosting thickly on the top of the cake and decorate with walnut halves, if using.
Cream Cheese Frosting:
Mix the cream cheese, butter, and vanilla in the bowl of an electric mixer fitted with the paddle attachment on low speed until just combined. Don't whip! Add the sugar and mix until smooth. Yield: frosting for one 9-inch cake.
Subscribe to:
Posts (Atom)


