Friday, April 08, 2011

Recipe Swap Roundup - Pasta

I host a weekly recipe swap on my cooking board and thought it might be nice to have all the recipes in one central location. Introducing the latest component of the recipe swap - the blog roundup!

This week's theme was pasta and man, were there some awesome submissions. Just putting this post together is making me drool. This roundup isn't mandatory since some of the ladies participating don't have blogs.

First up, Pasta with Swiss Chard and Italian Sausage from Cassie, which was a spin on the traditional pasta with sausage and broccoli rabe:


Kate got a comfort food classic, Chicken Spaghetti:


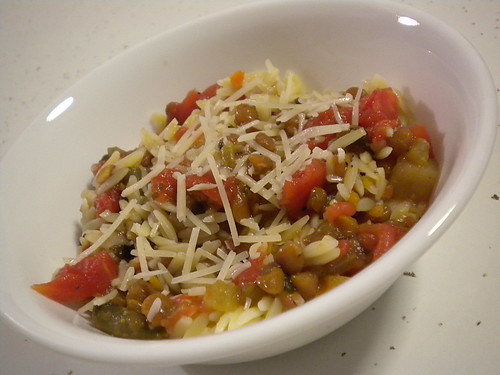
Melissa's recipe was for Pasta with Lentils:

Jey tackled Cincinnati Chili, a regional take on a winter staple:


Jillian conquered making her own pasta for Butternut Squash & Goat Cheese Ravioli:


Katie made Spicy Artichoke & Sun Dried Tomato Pasta:
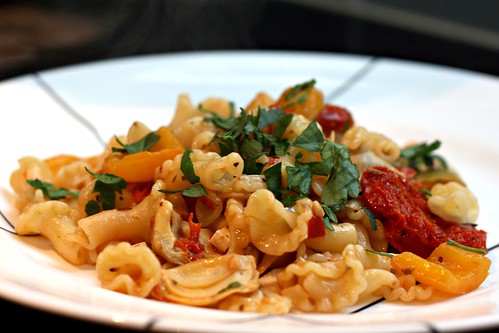

Carrie enjoyed Chicken, Pea and Pasta Salad:


Christine had traditional spaghetti and meatballs:


The title of Mary Ellen's recipe, Penne Alla Vecchia Bettola, was quite a mouthful but the result was delicious:


Melissa had another comfort food classic, Four Cheese Stuffed Shells:


Delia made a quick and easy One Pot Pasta:


Heather had my recipe for Creamy Tomato Chicken:


Lisa tried something new with Fusilli with Creamy Leek Sauce:


The Cooking Nurse added her own twist to Chicken, Spinach and Artichoke Pasta Bake:


Kimmicooks made Baked Campanelle with Spinach and Meatballs:


And here is my recipe, which was for Bacon, Spinach and Goat Cheese Pasta:


Last, but not least, is Linguine with Clams, as made by Jenna:


Since Jenna doesn't have a blog I'm including her write-up here.

I made Linguine and Clams from Hezzi-D's food blog. I have to admit that I don't cook with seafood that often and so when I saw this recipe in the swap e-mail, I was a little scared. But, I rounded up all of the ingredients and started cooking. Halfway through the cooking process, the kitchen smelled so good. I couldn't wait to eat it, and J made several comments about how good it smelled too. When I served it, J examined it like it was a dish from a foreign country. I just told him to eat it and not worry about the ingredients. I sat down and swirled my first bite up onto my fork and was in pasta heaven when I put it in my mouth. It tasted like something I'd expect to get at Olive Garden and the flavors were complex but not overwhelming. It was such a great dish and so easy to make. I'm excited to put this into my regularly made recipe list.
Pin It!

Wednesday, April 06, 2011

Recipe Swap - Bacon, Spinach and Goat Cheese Pasta

Want to see what other pasta dishes were made during the swap? Here is the link to the Pasta Recipe Swap Roundup.

Another week, another recipe swap. I'm enjoying these swaps so much, partly because I get to try new things and branch out from my comfort zone, but also because I like knowing that one or two meals a week are decided for me.

This week's cooking board swap theme was pasta. I'm in charge of this swap, which means I get to see all the recipes that are submitted. Since pasta is one of my favorite meals, I was really excited to see all the recipes. I got this one for Bacon, Spinach and Goat Cheese Pasta, which was actually a recipe Melissa got for a previous swap and liked so much she passed it on.


I was a little worried that SP wouldn't be a fan since he prefers pasta with a substantial sauce, but he loved it. I only made one change, which was to add a can of diced tomatoes. After reading the ingredient list I was worried it might be a little heavy and tomatoes always seem to lighten and brighten up a dish.

Bacon, Spinach and Goat Cheese Pasta

1 lb short-cut pasta
8 slices thick center cut bacon
1 bag baby spinach
1 15-oz can diced tomatoes, with juice
4 oz soft goat cheese, crumbled
1 tablespoon olive oil
1 teaspoon lemon zest
1 pinch crushed red pepper
salt and pepper

Cook pasta according to directions on the box. Drain, reserving 1 cup cooking water, and return to pot.

While pasta is cooking, cook bacon in a skillet until crisp, drain on paper towels and roughly chop.

Add spinach and diced tomatoes with juice to pasta and cover for 5 minutes to allow spinach to wilt. Add crumbled goat cheese, olive oil, lemon zest and crushed red pepper. Stir until the goat cheese is melted, thinning with pasta cooking water as needed. Add bacon and toss. Add salt and pepper to taste.
Pin It!

Friday, April 01, 2011

Recipe Swap - Mongolian Beef

The theme for this week's recipe swap was Asian food. I received Cooking Light's Mongolian Beef from Amanda.


I didn't want to buy hoisin sauce since ingredients I don't use often end up dying a slow death in my fridge, so I searched online for a similar recipe and found this one for P. F. Chang's Mongolian Beef.

I've never had Mongolian Beef before so I can speak to how close the end result was to the restaurant version, but it was a good meal. It was a little sweet for my taste and I think I let the cornstarch sit too long on the meat because it didn't add a crispy coating, but SP loved it. I served it with rice and steamed broccoli.

Thanks Amanda!

P.F. Chang's Mongolian Beef

2 teaspoons vegetable oil
1/2 teaspoon minced ginger
1 tablespoon chopped garlic
1/2 cup soy sauce
1/2 cup water
3/4 cup dark brown sugar
1 cup vegetable oil
1 lb flank steak
1/4 cup cornstarch
2 large green onions, sliced

Make the sauce by heating 2 teaspoons of vegetable in a medium saucepan over medium-low heat. Add ginger and garlic to the pan and quickly add the soy sauce and water before the garlic scorches. Dissolve the brown sugar in the sauce, then raise the heat to about medium and boil the sauce for 2 to 3 minutes or until the sauce thickens. Remove it from the heat.

Slice the flank steak against the grain into thin slices. Tilt the blade of your knife at about a forty five degree angle to the top of the steak so that you get wider cuts.

Dip the steak pieces into the cornstarch to apply a very thin dusting to both sides of each piece of beef. Let the beef sit for about 10 minutes so that the cornstarch sticks.

As the beef sits, heat up one cup of oil in a wok (you may also use a skillet for this step as long as the beef will be mostly covered with oil). Heat the oil over medium heat until it's nice and hot, but not smoking.

Add the beef to the oil and saute for just two minutes, or until the beef just begins to darken on the edges. Stir the meat around a little so that it cooks evenly. After a couple minutes, use a large slotted spoon or a spider to take the meat out and onto paper towels, then pour the oil out of the wok or skillet. Put the pan back over the heat, dump the meat back into it and simmer for one minute. Add the sauce, cook for one minute while stirring, then add all the green onions. Cook for one more minute, then remove the beef and onions with tongs or a slotted spoon to a serving plate. Leave the excess sauce behind in the pan.
Pin It!

Thursday, March 31, 2011

Restaurant Knock-Off: Texas Roadhouse House Salad

I love the House Salad at Texas Roadhouse so when I was stumped for what to serve with dinner one night I decided to recreate it at home.


It's a very simple salad made infinitely better by their homemade Ranch dressing and croutons made from their delicious rolls (two things I haven't tried recreating at home yet). It's just greens (romaine), tomato, hardboiled eggs, cheddar cheese and croutons.

Next step - make my own Ranch dressing and find a knock-off for their rolls.
Pin It!

Friday, March 25, 2011

Recipe Swap - Green Chile Cheeseburgers

Want to see what other Easy Weeknight Meals were made during the swap? Here is the link to the Easy Weeknight Recipe Swap Roundup.

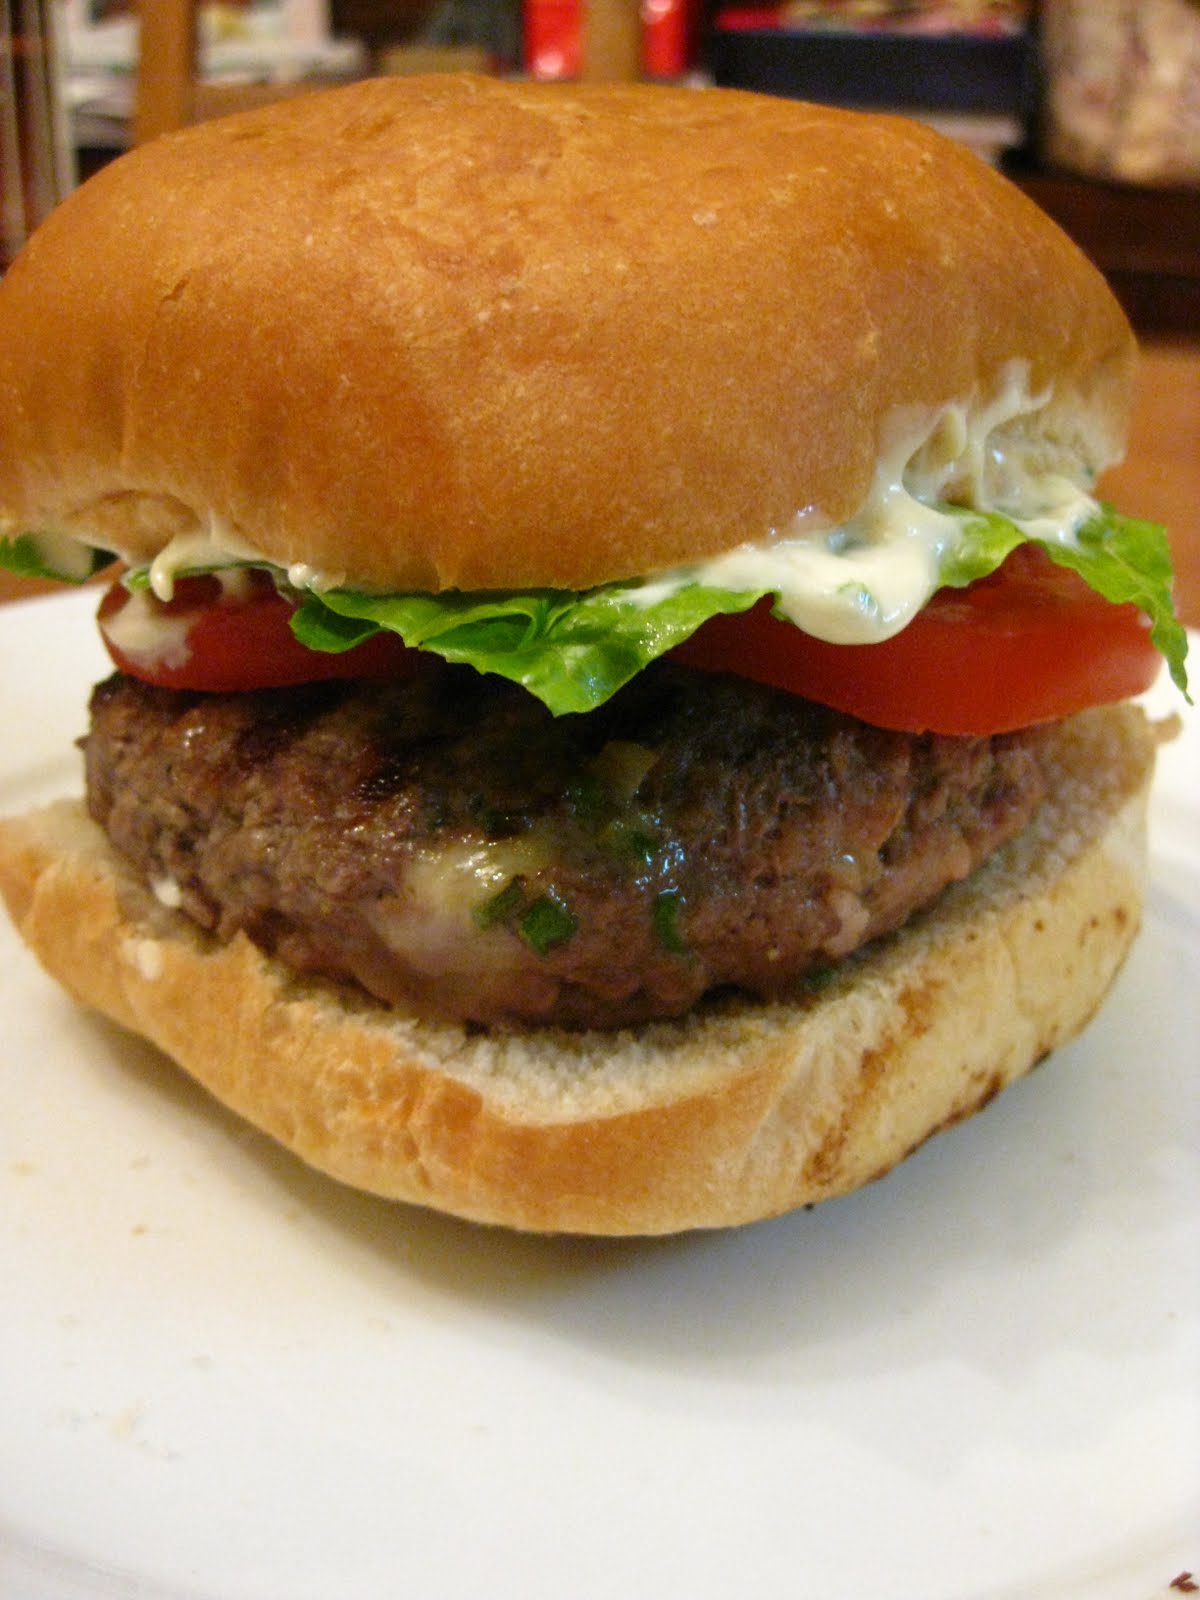
This week's cooking board recipe swap theme was Easy Weeknight Meals. I was thrilled to end up with a burger recipe, especially one as simple as Green Chile Cheeseburgers. The original Bobby Flay recipe sounds great, but too labor-intensive for me. Thankfully, Jenna simplified it into something I could easily make over and over again.


Whenever I see a green chile cheeseburger on a Food Network or Travel channel show they keep it simple with the cheeseburger, chiles, bun and mayo so I did the same. I'm sure it's because this recipe calls for canned chiles, but I thought the burgers could use even more chiles on top. Next time I'd use 2 cans for 4 burgers.

Green Chile Cheeseburgers
Adapted from Bobbly Flay

2 pounds ground chuck
1 teaspoon kosher salt
1 teaspoon freshly ground black pepper
8 thin slices provolone
4 hamburger buns, toasted
2 cans green chiles
Mayo
Romaine lettuce leaves, optional
4 thick slices tomatoes, optional

Heat grill to high. Form meat into 4 (8-ounce) burgers and season each burger on both sides with 1/4 teaspoon of salt and a 1/4 teaspoon of pepper. Grill until charred on both sides and cooked to desired doneness.

Divide the cans of green chiles onto the burgers. Place 2 slices of the cheese on each burger, close the lid or tent with foil, and cook until the cheese has just melted and chiles are warmed, about 1 minute. Place burgers on buns and top with mayo, lettuce and tomato, if desired.
Pin It!

Thursday, March 24, 2011

Caesar Salad Dressing

I love Caesar salad, especially now that I've taken to making my own dressing. I served these salads with the Portobello Parmesan I made for the vegetarian recipe swap.


I combined two recipes awhile ago to make use of ingredients I always have on hand. I usually throw everything into my mini food processor. I've started grating large slices of Pecorino cheese over the lettuce and croutons and it's been a huge hit.

Caesar Salad Dressing

1 tablespoon lemon juice
2 teaspoons anchovy paste (or 2 anchovy filets)
1/4 cup grated Parmesan cheese
1/2 cup mayo
2 cloves garlic
1 tablespoon white wine vinegar
1 tablespoon Worcestershire sauce
1/2 cup olive oil
salt and pepper

Combine lemon juice, anchovy paste, cheese, mayo, garlic, white wine vinegar and Worcestershie sauce in blender. Blend until smooth and then drizzle in oil while blender is on. Season with salt and pepper.
Pin It!

Wednesday, March 23, 2011

Recipe Swap - Portobello Parmesan

I love participating in recipe swaps but I have to admit I was nervous about doing the vegetarian-themed one. We are a meat and potatoes family and I was worried we'd end up with something involving a lot of ingredients I don't normally cook with. Imagine my relief when my recipe was for Portobello Parmesan, courtesy of Lishie over at DeLish!


As you know by now, SP is a serious mushroom fan so this was right up his alley. And it couldn't be easier to make. I think it took me 10 minutes from wiping the mushrooms to putting the casserole dish in the oven. I love meals like that! Thanks for a real winner, Lishie!

Portobello Parmesan
DeLish!

8 small OR 4 large portobello mushrooms, wiped, stems removed
olive oil
salt & pepper
3-4 cups marinara sauce
1/2 cup mozzarella, shredded
1/4 cup shredded parmesan

Pre-heat oven to 400 degrees.

Heat a large skillet or grill over medium heat. Brush the portobello caps with the olive oil on both sides. Salt and pepper each cap. Place in the skillet or grill about 5 minutes per side.

In an oiled baking dish, spread 1 cup marinara sauce. Place the mushroom caps, bottom facing up, on the sauce. Ladle more sauce into each cap. Place shredded mozzarella onto each cap, then top with shredded parmesan cheese.

Bake for 15-20 minutes or until cheese is melted, bubbling and browned
Pin It!

Monday, March 21, 2011

Spicy Scallion and Brie Burgers

I love a good burger. This is nothing new if you've read my blog recently. Someone on my cooking board recently asked for burger recommendations and these Spicy Scallion and Brie Burgers were mentioned. I immediately put them on the menu for the following week. I love anything with Brie in it.


I left out the jalapeno in the scallion paste. It was still spicy from the cayenne and I figured that was enough heat for me. The Brie melted nicely and added a really nice flavor to the meat.

Spicy Scallion and Brie Burgers
1 1/2 pounds ground beef
Salt and freshly ground pepper
4 ounces Brie, rind removed, cheese cut into 4 slices
1/4 cup Spicy Scallion Paste (recipe below)
Vegetable oil, for brushing
1/4 cup mayonnaise
4 hamburger buns, split
Tomato slices and lettuce, for serving

Light a grill. Season the ground beef with salt and pepper and form into eight 4-inch patties that are slightly thicker in the center. Top 4 of the patties with a slice of Brie and a scant tablespoon of the scallion paste. Top with the 4 remaining patties, pinching the edges to seal.

Brush the burgers with oil and grill over high heat, turning once or twice, about 8 minutes for medium-rare meat.

Meanwhile, mix the mayonnaise with the remaining scallion paste. Grill the buns until toasted. Spread the mayonnaise on the bottoms of the buns and top with the burgers, tomatoes and lettuce. Close the burgers and serve.

Spicy Scallion Paste
4 scallions, thinly sliced
2 garlic cloves, minced
1 fresh hot chile, seeded and minced
1/2 teaspoon finely grated lemon zest
1/4 teaspoon cayenne pepper
2 tablespoons extra-virgin olive oil
1/2 teaspoon salt

In a small bowl, combine the scallions with the garlic, chile, lemon zest and cayenne, mashing slightly with the back of a spoon. Stir in the olive oil and salt. The paste can be refrigerated for up to 2 days.

I served the burgers with oven fries:


I used a new recipe from Cook's Country and did a much better job getting them evenly brown. I'm still working on cutting the fries evenly.

Crispy Oven Fries
Cook's Country

4 russet potatoes (6 to 8 oz. each), peeled and cut into 1/2" slices
6 tablespoon vegetable oil
1 tablespoon cornstarch
1 teaspoon salt

Adjust oven rack to lowest position and heat oven to 450 degrees.

Place potatoes in a bowl, wrap tightly with plastic, and microwave until translucent around edges, 3 to 5 mins, shaking bowl half-way through to redistribute potatoes.

Transfer potatoes to cooling rack and thoroughly blot dry with paper towels. Coat rimmed baking sheet with 5 tablespoons of oil. Transfer to oven and heat until just smoking, 5 to 7 mins. Meanwhile, whisk remaining oil,cornstarch and salt in large bowl. Add potatoes and toss to coat.

Arrange in single layer on hot baking sheet and bake till deep, golden brown and crisp, 25 to 35 mins, flipping potatoes half-way through cooking time. Transfer to paper towel-lined plate and blot with additional paper towels.
Pin It!

Saturday, March 19, 2011

Pork Chop and Hashbrown Bake

I haven't eaten pork chops in a very long time. I can't remember how long it's been, but I think it was before I was pregnant with Baby Girl. I'll admit, when I saw this recipe for Pork Chop and Hashbrown Bake on Carrie's blog I considered making it with chicken instead, but SP talked me into using pork chops. I'm glad he did - this was a great dinner.


This is not the most photogenic meal, and it calls for something a lot of food bloggers turn their nose up at, but it was absolutely delicious. Seriously. SP cleaned his plate and told me I could make this dish once a week for him. High praise!

Pork Chop and Hashbrown Bake
Modified from Carrie's Sweet Life

Vegetable oil
Salt and pepper
24oz frozen shredded hashbrowns, thawed
6 boneless pork chops, 1 1/2-2 inches thick
1 can cream of mushroom soup
1/2 cup milk
1/2 cup sour cream
1 cup shredded cheddar
1 large can dried onion pieces

Preheat oven to 350 degrees.

Heat oil in a large non-stick skillet over medium-high heat. Add thawed hashbrowns. Season with salt and pepper and cook until evenly browned, stirring occassionally. Remove to a large bowl, reserving skillet.

Add 1 tablespoon vegetable oil to the now empty skillet. Pat each pork chop dry and season with salt and pepper. Brown pork in skillet. Don't cook through since the pork will be cooking in the oven.

Combine soup, milk and sour cream and add to the bowl with the hashbrowns. Add half of the cheese and half of the onion pieces. Spoon mixture into prepared 9×13 baking dish. Arrange pork over potato mixture. Cover with foil.

Bake, covered, for 30 minutes. Top with remaining onion pieces and cheese. Bake, uncovered, for 5 minutes.
Pin It!

Friday, March 18, 2011

Nutty Chicken Stir-Fry and Egg Drop Soup

I really wanted to like this recipe for Nutty Chickn Stir-Fry. It looked delicious and smelled even better, but the flavors just weren't there. I've yet to find a recipe for noodles or stir-fry involving peanut butter that really wows me. It never has enough peanut flavor for me.


It didn't help that the recipe failed to specify what type of stir-fry vegetables to use. The bag of Asian stir-fry veggies in my freezer didn't match the picture, so my guess is there's another mix that might be better suited for this dish. In the magazine where I first saw this recipe they pair it with Egg Drop Soup, so I did, too.


I'm pretty sure my chicken broth wasn't low-sodium but it might as well have been for the absolute absence of flavor. Even adding salt at the table did little to save this soup from flavor boredom. Maybe this is a sign that I need to just give up trying to cook Chinese food at home and stick with our favorite local take-out.
Pin It!

Thursday, March 17, 2011

Pizza Friday - Buffalo Chicken Pizza

Of all the pizzas I make, Buffalo Chicken Pizza is SP's favorite. Now that I've reinstated Pizza Fridays this was his first choice when I asked him what kind of pizza he wanted.


I recently stocked up on frozen dough from my favorite Italian bakery (one of these days I need to try making my own dough), and I'm so glad I did. I missed their perfect crust. I was particularly proud of this pizza, especially its roundness and thin, crispy crust.

Pin It!

Wednesday, March 16, 2011

Recipe Swap - Indian Chicken Curry

Want to see what other chicken dishes were made during the swap? Here is the link for the Chicken Recipe Swap Roundup.

I've been enjoying the recipe swap I've been participating in so much I decided to see if the women on the cooking board I frequent wanted to start one. The response was overwhelmingly positive so off we went. I hosted this week's swap and chose chicken as the theme. I don't know about you, but I'm always looking for new and exciting chicken recipes, like this one for Indian Chicken Curry from J Bean Cuisine.


I knew SP would love this dish and it didn't disappoint. I served it with basmati rice and store-bought naan. The only change I made was to use dry spices for the cinnamon, cloves and cardamom since that's what I had on hand.

We've found that, for some reason, curry dishes tend to taste better the next day. We had the leftovers for lunch the next day and it was outstanding - nice depth of flavor and everything came together. Next time I'll make this dish the day before we want to eat and reheat before serving.

Chicken Curry
JBean Cuisine

Marinade:
3 tbsp olive oil
2 tsp grated ginger
2 tsp grated garlic
1 tsp grated green jalapeño
3 tsp garam masala
3 tsp cumin
1 tsp red chili powder
1 tsp turmeric powder
2 tsp salt
3 lbs of chicken (thighs and breasts), chopped into bite-sized pieces

Sauce:
2 tbsp olive oil
2 cinnamon sticks
2 cardamoms
2 cloves
4 black peppercorns
3 medium onions, diced
1 cup of water
1 medium tomato, diced
1.5 cups of plain tomato sauce

In a large glass or metal bowl, make a paste by mixing 3 tbsp of olive oil with the ginger, garlic, jalapeño, garam masala, thana jeeroo, red chili powder, turmeric powder and salt.

Add chicken pieces to the paste and mix very well, ensuring that each piece of chicken is coated with marinade. Cover and marinade in fridge for 2hrs.

In a large dutch oven, heat remaining 2 tbsp of olive oil for one minute over medium heat. Add the cassia sticks, cardamoms, cloves and black peppercorns. Allow spices to infuse the oil for 2–3 minutes. Add the chopped onions to the oil mixture and sauté until translucent (about 10 minutes). A bit of color on the onions is fine.

Add the marinated chicken and stir well. Cover and cook over medium heat for 20 minutes, stirring occasionally. Be careful not to have the heat too high, as your chicken will stick.

After 20 minutes, add 1 cup of water to the chicken. Give a good stir and scrape any bits of flavour off the bottom of your pan. After a minute or so, add tomato sauce and diced tomato to the chicken curry.

Cover again, lower heat to a simmer and cook for an additional 20 – 30 minutes. Garnish with cilantro and serve with basmati rice, naan, roti or paratha.
Pin It!

Tuesday, March 15, 2011

And the winner is...

The winner of the Redpack gift set is Melissa at I Was Born to Cook!


Melissa, please email me your mailing address and I will forward it to Redpack. I hope you enjoy your prize!

Look for my next giveaway in April.
Pin It!

Saucy Garlic Chicken

Sometimes I see a recipe in a magazine and it sounds so delicious I can almost taste it. Saucy Garlic Chicken was one of those dishes.


I made the sauce over the weekend so all I had to do was cook the chicken, assemble the dish and bake. I loved the combination of the roasted garlic sauce, the spinach and the fresh tomato. Since I prefer bite-size pieces of chicken, next time I'll cut up the chicken breasts and mix it with the sauce.

Saucy Garlic Chicken
Taste of Home Magazine

4 whole garlic bulbs
2 tablespoons olive oil, divided
1 package (9 ounces) fresh baby spinach
3/4 teaspoon salt, divided
1/2 teaspoon coarsely ground pepper, divided
6 boneless skinless chicken breast halves
6 tablespoons butter, cubed
6 tablespoons all-purpose flour
3 cups 2% milk
2 1/2 cups grated Parmesan cheese, divided
1/8 teaspoon nutmeg
Hot cooked pasta
Chopped tomato and minced fresh parsley, optional

Remove papery outer skin from garlic (do not peel or separate cloves). Cut tops off of garlic bulbs; brush bulbs with 1 tablespoon oil. Wrap each bulb in heavy-duty foil. Bake at 425° for 30-35 minutes or until softened. Cool for 10-15 minutes.

Meanwhile, place spinach in a greased 13-in. x 9-in. baking dish; sprinkle with 1/4 teaspoon each of salt and pepper. In a large skillet, brown chicken in remaining oil on both sides; place over spinach.

In a large saucepan, melt butter. Stir in flour until smooth; gradually add milk. Bring to a boil; cook and stir for 1-2 minutes or until thickened. Stir in 2 cups cheese, nutmeg and remaining salt and pepper. Transfer to a blender; squeeze softened garlic into blender. Cover and process until smooth. Pour mixture over chicken.

Cover and bake for 30-35 minutes or until a meat thermometer reads 160° and sauce is bubbly. Uncover; sprinkle with remaining cheese. Bake 5 minutes longer. Serve with pasta. Sprinkle with tomato and parsley if desired.
Pin It!

Monday, March 14, 2011

Fried Chicken and Herbed Veggie Mix-Up

This was not one of my best meals.

I wanted something to make with my Recipe Swap recipe other then the typical roast chicken. In retrospect, I should have gone traditional because those potatoes probably work best with that meal. I asked SP for his thoughts and he said fried chicken. Since all I had were boneless, skinless chicken breasts I went to Google for inspiration. I found this recipe on epicurious.com and gave it a whirl, along with a recipe for Herbed Veggie Mix-Up I've been wanting to try.


All the different components of the meal were good on their own, but put together into one meal and they failed to meld into a cohesive dinner. SP wasn't a fan of the veggies at all, but he liked the fried chicken quite a bit. I'll make that recipe again, just not with these sides.
Pin It!

Friday, March 11, 2011

Pork Roll, Egg and Cheese Sandwich

My friend Melissa over at I Was Born to Cook recently posted about the infamous Pork Roll, Egg and Cheese Sandwich. Those of you from the NJ area are probably quite familiar with this NJ diner classic.


Reading her blog post sent my stomach into craving overdrive. And my shameful secret is that I was never a big fan of pork roll, despite growing up in NJ. I know, I know, how is that possible?

SP picked up some Taylor Ham (aka pork roll) for me at the supermarket and I made us both pork roll, egg and cheese sandwiches. I opted for two eggs, one slice of pork roll and a slice of American cheese with salt and pepper on a toasted, buttered roll. It was heavenly. I can't wait to make another.
Pin It!

Wednesday, March 09, 2011

Giveaway - Redpack Tomato Gift Set

I am SO excited about this giveaway. I've been a fan of Redpack Tomatoes for years, ever since hearing a rumor that one of my favorite restaurants uses them on their tomato pies. When they go on sale at my supermarket I buy them by the case.


This gift set is pretty amazing. For starters, everything comes in a large tin shaped like a can of Redpack tomatoes. When you open it up you see a pool of red confetti packing material made to simulate a can full of sauce. As you dig through you'll find two cans of tomatoes, a can opener, a mini spatula, a pasta server, a pizza cutter and Redpack magnets.

Redpack will ship an identical gift set to the winner of this giveaway. Pretty sweet, huh?

To enter the giveaway: leave a comment on this post telling me your favorite recipe using canned tomatoes. Please include the link to a blog post if you have one to share.

For a second entry: leave another comment on this post telling me which canned tomato product you use most often when cooking - whole, diced, crushed, stewed, tomato sauce, tomato paste or tomato puree.

The Rules: Maximum of two entries per person, U.S. residents only. Each question should be answered in a separate post for you to receive credit for each entry. Commenting will close on Friday, March 11, at 4:00 pm, EST. Entries that do not follow the entry requirements will not be considered. One winner will be chosen at random and announced next week. The winner must be willing to provide a mailing address. Good luck!

Disclaimer: This is not a paid post. All opinions expressed are soley my own and were not influenced in any way by Redpack. I am not responsible for the winner receiving the gift set, which will be sent directly from Redpack.
Pin It!

Tuesday, March 08, 2011

Recipe Swap - Ruth's Chris Sweet Potato Casserole

This week's recipe swap theme was side dishes. Even though I love sweet potatoes I only cook them once a year at Thanksgiving. This recipe was reminiscent of the traditional sweet potato casserole, which I've never had (my family simply roasts the potatoes and serves them with butter).


Even though I eliminated the butter and sugar from the sweet potato mixture, the topping made the dish too sweet for my tastes. I think this would be really good as a side at Thanksgiving since there are so many other savory dishes to cut the sweetness.

Ruth's Chris Sweet Potato Casserole

CRUST
1 cup brown sugar
1/3 cup flour
1 cup chopped nuts (pecans preferred, I used walnuts)
1/4 cup butter, melted

SWEET POTATO MIXTURE
3 cups mashed sweet potatoes (about 3 large sweet potatoes)
1 cup sugar (I eliminated this)
1/2 teaspoon salt
1 teaspoon vanilla
2 eggs, well beaten
1/2 cup butter, melted (I eliminated this)

Preheat oven to 400 degrees.

Scrub potatoes, prick all over with a fork, place on foil-lined baking sheet and roast for an hour. Allow to coil, peel and mash. Lower oven to 350 degrees.

Combine brown sugar, flour, nuts and butter in mixing bowl. Set aside.

Combine sweet potatoes, salt, vanilla and eggs (and butter and sugar, if using) in a mixing bowl. Mix thoroughly. Pour mixture into buttered baking dish. Sprinkle the surface of the sweet potato mixture evenly with the crust mixture.

Bake for 30 minutes. Allow to set at least 30 minutes before serving.
Pin It!

Monday, March 07, 2011

Fire Island Ziti

This recipe for Fire Island Ziti is my current favorite throw-together meal. It's always delicious and comes together in the time it takes to cook the pasta.


I made the mistake of cooking the whole 1-lb box of pasta so I used a 28-oz can of diced tomatoes instead of a 15-oz. It actually worked well, despite only having a pound of sausage and two broccoli crowns cut into florets.

Fire Island Ziti
Modified from Taste of Home

1 15oz can diced tomatoes, juice reserved
2 tablespoon olive oil
2 garlic cloves, minced
1 teaspoon salt
8 ounces uncooked ziti
2 broccoli crowns cut into florets
1 pound Italian sausage links, cut into 1/2-inch slices
1/4 teaspoon crushed red pepper flakes
Grated Parmesan cheese

Cook ziti according to package directions, adding broccoli during the last 4 minutes.

Meanwhile, in a large skillet over medium heat, cook sausage in oil until no longer pink. Add pepper flakes; cook 1 minute longer. Stir in tomatoes with the juice and heat through.

Drain ziti mixture; toss with sausage mixture. Sprinkle with cheese.
Pin It!

Friday, March 04, 2011

Grilled Chicken & Pineapple Quesadillas

I love quesadillas. They're so versatile. You can put pretty much anything between two tortillas, add some cheese and you've got a delicious and easy dinner.

I never liked pineapple before I was pregnant with Baby Girl, but now I can't get enough of it. Before seeing this recipe for Grilled Chicken & Pineapple Quesadillas, I never would have thought to add it to a quesadilla but you know what, it works. It really works.


I've been thinking about these quesadillas all week and can't wait to make them again. Even SP loved them and he was pretty skeptical about the recipe when he saw it on this week's menu.

I left out the sliced jalapenos because I just can't handle spice the way I used to, but I'm sure they'd make a nice addition to counter the sweetness of the pineapple. Make these tonight! And if you have leftovers, they're even better the next day reheated in the oven.

Grilled Chicken & Pineapple Quesadilla
Pioneer Woman

8 whole Flour Tortillas
Butter Or Margarine
2 cups Grilled Pineapple, Sliced
3 whole Boneless, Skinless Chicken Breasts
Salt And Pepper, to taste
3 cups Monterey Jack Cheese, Grated
1 whole Jalapeno, Sliced
Cilantro
3 Tablespoons Barbecue Sauce

To grill pineapple: cut wedges, stick on skewers, and grill over low heat. Cut into slices.

Sprinkle chicken with salt and pepper and Cajun spice (or cumin/cayenne, etc.) Drizzle olive oil on a grill pan and grill on both sides until done, brushing with barbecue sauce. Set aside and slice into very thin slices.

Warm griddle over medium heat and put sizzling butter or margarine in the pan. Slightly warm and toast tortillas on both sides, then remove from griddle and set aside.

To assemble, sprinkle four browned tortillas with grated Monterey Jack. Arrange chicken slices evenly over the surface. Add pineapple slices and jalapeno slices. Sprinkle on cilantro. If desired, drizzle extra barbecue sauce over the top. Add second browned tortilla on top of each one. (You’ll have four complete quesadillas at this point.)

Add to oven to warm, or back to skillet to warm, until cheese is melted. Cut each quesadilla into six wedges. Serve with sour cream, pico de gallo, and lime wedges.
Pin It!

Tuesday, March 01, 2011

Pot Roast and Popovers

I love Sunday dinners. I love spending the day in the kitchen cooking and I really love the wonderful smells that come from long-simmering dishes like pot roast. As much as I'm excited for the bounty of produce that heralds the start of spring and summer, I'm going to miss meals like this one.


I served the pot roast with mashed potatoes, green beans and the carrots, onion and mushrooms from the sauce. I also made these popovers that are basically the same as the Yorkshire Pudding I make at Christmas and were just as delicious:


I love how they puff up and get golden brown. SP and I fought over these.

Pot Roast
Adapted from Vintage Victuals and Food Network

1 tablespoon cooking oil
1/4 cup flour
Salt and pepper to taste
1 1 1/2 - 2 lb. chuck roast
4-6 carrots, peeled and cut into 3″ pieces
1 large onion, cut into wedges
1 cup mushrooms, stems removed and sliced in half
1 large can crushed tomatoes
16 ounces beef broth
2 bay leaves
1/4 teaspoon dried thyme

Heat oil in a large Dutch oven over medium-high heat. Meanwhile, mix the flour, salt and pepper on a plate. Dry the roast and then coat all sides in the flour mixture. Brown the roast on all sides in the hot oil.

Pour in the tomatoes and the beef broth. Scatter the vegetables, thyme and bay leaves around the pot roast and season with salt and pepper. Cover the pot and reduce the heat to low. Braise for about 3 hours, basting every 30 minutes with the pan juices, until the beef is fork tender.

Slice the pot roast and arrange on platter surrounded by the vegetables. Serve with the pot juices.
Pin It!

Monday, February 28, 2011

Pizza Friday: The Works

Pizza Friday has returned to A Taste of Home Cooking! I'm very excited about this because (1) I'd grown tired of spending so much money on takeout pizza and (2) because I love finding new pizza recipes to try.

To get back into the swing of things I kept it simple with an old favorite - The Works:


Unfortunately the pepperoni looked a little funny so I had to leave it off. This pizza usually involves pepperoni, sausage, mushrooms, onion, green pepper and olives. Delicious.

Question: What pizza toppings do you enjoy? Please leave me a comment so we can broaden our pizza horizons!
Pin It!

Saturday, February 26, 2011

Ultimate Sriracha Burgers and Oven Fries

I love burgers. I could eat one a week and be perfectly happy. Besides being delicious, they're so versatile. You can switch up the meat from beef to chicken or something more exotic, the topping choices are endless and they're fun to eat. Come on, who doesn't like eating with their hands?

I've never cooked with Sriracha before, but I had a small bottle in the pantry for a recipe I still haven't gotten around to making, so when the Ultimate Sriracha Burger was raved about on my cooking board I thought I'd give it a shot.


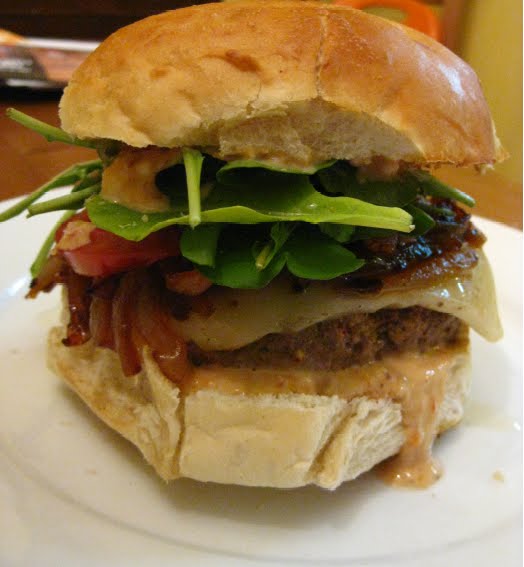
Since I've never cooked with Sriracha (and therefore had no clue how mild or spicy it was), I should have listened to my gut and reduced the amount of Sriracha in the blue cheese sauce. I just can't handle spice the way I could before having Baby Girl. Otherwise, this was a perfect burger. You can never go wrong with bacon, and the caramelized onions added a nice sweetness. There was a good kick from the Sriracha, which I would have enjoyed more if the blue cheese had been able to come through, and I love peppery arugula and sliced tomato. The Swiss didn't melt enough, but that was my error.

Ultimate Sriracha Burger
Oishii

1 1/2 lbs. ground beef
2 TBS. soy sauce
5 TBS. Sriracha, divided
2 tsp. freshly ground black pepper
4 slices thick cut bacon
1 large sweet onion
3/4 cup blue cheese dressing
4 brioche buns
4 thick slices Swiss cheese
1 tomato, sliced
several handfuls of arugula

In a large mixing bowl, combine the ground beef, soy sauce, 2 1/2 TBS. of the Sriracha, and the pepper. Be careful not to overmix. Form the mixture into 4 patties, and set aside, on a parchment-lined plate, covered, in the refrigerator.

Preheat a charcoal or gas grill to medium high heat. In a medium frying pan over medium-low heat, cook the bacon, turning as necessary. While the bacon is cooking, peel and quarter the onions. Cut each section into 1/4-inch slices. Once the bacon is cooked through and slightly crispy, remove the slices from the pan, cut each in half crosswise, and drain onto paper towels, reserving the remaining bacon fat in the pan. Cook the sliced onions in the bacon fat over medium-low heat until they caramelize, 20 to 25 minutes.

Grill the burgers, turning once, 4 to 41/2 minutes on each side or until a meat thermometer registers 130° to 135°F for medium-rare.

While the burgers are cooking, combine the blue cheese dressing with the remaining 2 1/2 TBS. Sriracha in a small bowl.

Lightly toast the buns on the grill during the last minute of cooking time. Spread the blue cheese mixture on both halves of each hamburger bun. Stack a burger patty, slice of Swiss cheese, bacon, caramelized onions, slice of tomato, and a small handful of arugula between each hamburger bun.

I served the burgers with oven fries. I've been searching for a good oven fry recipe for a long time and these were delicious (if not as evenly brown as I would have liked).


SP practically inhaled his burger and fought me over the last few fries. He's a very good sport when it comes to my cooking, especially when I'm trying a new recipe, but he definitely has his favorites and has no qualms about offering constructive criticism. The only issue he had was wishing I'd done a better job melting the cheese and keeping the caramelized onions warm.
Pin It!

Friday, February 25, 2011

Cape Cod Chopped Salad

A friend recently posted a photo of Ina Garten's Cape Cod Chopped Salad on her Facebook page and I fell in love. Her photo is much better, but the takeaway message here is MAKE THIS SALAD. Seriously. It's delicious. Even SP, who isn't usually enthusiastic about salads, loved this salad.


Cape Cod Chopped Salad
Ina Garten

8 ounces thick-cut bacon
8 ounces baby arugula
1 large Granny Smith apple, peeled and diced
1/2 cup toasted walnut halves, coarsely chopped
1/2 cup dried cranberries
6 ounces blue cheese, such as Roquefort, crumbled

Dressing:
3 tablespoons good apple cider vinegar
1 teaspoon grated orange zest
2 tablespoons freshly squeezed orange juice
2 1/2 teaspoons Dijon mustard
2 tablespoons pure maple syrup
Kosher salt
1/2 teaspoon freshly ground black pepper
2/3 cup good olive oil

Preheat the oven to 400 degrees. Place a baking rack on a sheet pan and lay the bacon slices on the rack. Roast the bacon for about 20 minutes, until nicely browned. Allow to cool.

In a large bowl, toss together the arugula, apple, walnuts, cranberries, and blue cheese.

For the dressing, whisk together the vinegar, orange zest, orange juice, mustard, maple syrup, 1 1/2 teaspoons salt, and the pepper in a bowl. Slowly whisk in the olive oil.

Chop the bacon in large pieces and add it to the salad. Toss the salad with just enough dressing to moisten. Sprinkle with 1/2 teaspoon salt and toss well. Serve immediately.
Pin It!

Thursday, February 24, 2011

Ham, Ranch Mac and Cheese, Roasted Broccoli

I love macaroni and cheese. What's not to like about creamy, cheesy pasta? My college actually had pretty good food and one of my favorite lunches was macaroni and cheese. I'd stalk the online menu for weeks looking for it to reappear and when it did I would savor each and every bite. It took me a long time to find the perfect recipe and then I found another that was slightly different, but also perfect.

But that doesn't mean I won't try other macaroni and cheese recipes. Sometimes you want something different and this recipe for Ranch Macaroni and Cheese sounded fun.


I served it with ham steaks and roasted broccoli topped with Pecorino. The Ranch dressing added a nice tang and even Baby Girl loved it. Since I prefer baked macaroni and cheese I put the pasta and sauce into a casserole dish and topped it with the crushed Ritz, then baked it for about 30 minutes.
Pin It!

Tuesday, February 22, 2011

White Chicken Enchiladas with Green Chile Sour Cream Sauce

I've been on a Mexican food kick lately. I love that most of the recipes are easy to make but still have great flavor. This recipe for White Chicken Enchiladas with Green Chile Sour Cream Sauce was no exception.


I actually cooked the chicken and made the green chile sauce over the weekend so all I had to do was assemble the enchiladas and put them in the oven alongside the Mexican Sour Cream Rice, which I also made over the weekend to save time during the week.

The only thing I'd change next time is add some of the sauce to the chicken filling. They were a little dry and really needed the sauce to bring everything together.


White Chicken Enchiladas with Green Chile Sour Cream Sauce

Cassie Craves

8-10 soft taco size flour tortillas
2 cups shredded Monterey jack cheese, divided
2 cups shredded cooked chicken
3 tablespoons butter
3 tablespoons flour
1 can chicken broth
1 cup sour cream
1 7-ounce can diced green chiles
Cilantro for garnish, if desired

Preheat oven to 425 degrees.

In a skillet or saucepan, melt the butter. Stir in the flour and cook for 1 minute. Add the chicken broth, whisking until smooth. Cook over medium heat until thick and bubbly. Stir in sour cream and green chiles.

Mix together 1 cup of the cheese, 1 cup of the sauce and the chicken. Place an equal amount of the mixture into each tortilla, roll up and place seam side down into a 9 x 13-inch pan. Pour remaining sauce over the top of the enchiladas; sprinkle with remaining shredded cheese.

Bake for 20 to 25 minutes. Sprinkle with cilantro, if desired.
Pin It!

Sunday, February 20, 2011

And the winner is...

Drumroll please...

The winner of my first blog giveaway is CRS!


Congratulations!! Please email me within 48 hours to claim your prize. Make sure to include the name and email address you used to sign up with Giftcard Rescue so they can credit your account.

Thank you to everyone who participated in the giveaway. I can't wait to host my next one!
Pin It!

Friday, February 18, 2011

First Giveaway!

My new Facebook page has reached 75 likes. Thank you to everyone who shared the page! In honor of this milestone, I'm hosting my very first blog giveaway.

Gift Card Rescue is an online marketplace for people to sell their unwanted gift cards for cash or for Amazon.com credits. Then, they sell these cards on the website for up to 30% off their face value.

Win It!

Gift Card Rescue is giving one lucky A Taste of Home Cooking reader a $50 credit to buy any gift card on their website!

Please leave a separate comment for each entry below.

Required Entry

* Head over to Gift Card Rescue and make an account. Leave a comment telling me you've created the account.
You’ll receive the $50 credit to the account you made.

Additional Entries

* "Like” A Taste of Home Cooking on Facebook. Leave a comment telling me you've liked the page.
* “Like” Gift Card Rescue on Facebook. Leave a comment telling me you've liked the page.
* Share A Taste of Home Cooking on your Facebook wall. Leave a comment telling me you've shared the page.
.
I was not compensated for this post, nor did I receive anything from Gift Card Rescue. I am not responsible for the winner receiving the credit. This giveaway will end on February 19, 2011 at midnight eastern time. Must be 18+ and a US resident. The winner will be notified via email and will have 48 hours to respond or another winner will be chosen.
Pin It!

Chicken Salad

I love chicken salad, especially since I discovered the beauty of fruit and nuts as add-ins. I love the sweetness from the fruit and the crunch from the nuts. I knew I'd found a new recipe to add to my growing chicken salad collection when I saw this recipe for Chicken Salad at Sing for Your Supper. It has two of my favorite fruits - grapes and pineapple - as well as almonds. I whipped up a batch this weekend to have for lunches during the week, but I was feeling hungry while I spent a marathon day in the kitchen so I made myself a sandwich. Delicious.


Chicken Salad
Modified from Sing for Your Supper

3 boneless, skinless chicken breasts
2 stalks celery, chopped
1 can pineapple chunks, each piece cut into quarters (crushed would be fine as well)
1 handful green grapes, sliced into halves
1/2 cup sliced almonds
1/2 cup mayonnaise
1/4 cup sour cream
1 squirt lemon juice
salt and pepper, to taste

Place the chicken breasts in a large pot and fill with enough water to cover the tops. Boil on medium heat for approximately 30 minutes, until chicken is very tender. Remove the chicken and let cool.

Once the chicken is cool, shred the meat into small pieces. Place in a large bowl. Add in celery, pineapple, grapes and almonds.

In a small bowl, make the sauce. Stir together the mayonnaise, yogurt and lemon juice. Season with salt and pepper. Pour over the chicken mixture and stir until combined. Taste for seasoning.
Pin It!

Thursday, February 17, 2011

Shrimp and Grits

I wanted to make a special dinner on Saturday and I've had my eye on this recipe for Shrimp and Grits for awhile now.


It was an easy dish to make, which was great since I didn't fully commit to making dinner until after 5pm. I was able to cook the grits in the time it took for the shrimp to thaw, and the rest of the dish came together in no time. It was very tasty, but too rich, so I'm still on the hunt for the perfect shrimp and grits recipe.

Bar Americain's Shrimp and Grits
Modified from Bobby Flay's recipe

Grits (I used quick-cooking grits so I followed the directions on the package)
Salt and pepper
1 cup grated Cheddar
3 green onions, thinly sliced, for garnish

Sauteed Shrimp:
1/2 pound bacon, cut into lardons
2 tablespoons olive oil
1-lb large (21 to 24 count) shrimp, shelled and deveined
3 cloves garlic, finely chopped
Salt and freshly ground black pepper

Cook the grits according to the package directions. I cooked mine in chicken broth for extra flavor. Once the grits are cooked, add the cheese and whisk until smooth; season with salt and pepper.

Place bacon in a medium pan over medium heat and cook until golden brown and crisp and the fat has rendered. Remove bacon with a slotted spoon to a plate lined with paper towels.

Remove all but 2 tablespoons of the bacon fat from the pan and place back on the heat. Add the olive oil and increase the heat to high. Season the shrimp with salt and pepper, and add to the pan with the garlic. Saute until golden brown on both sides and just cooked through, 1 to 2 minutes per side. Remove shrimp to a plate. Reserve the garlic oil to drizzle over the finished dish.

Put the grits on the plate and top with shrimp. Drizzle with some of the bacon-garlic oil (that the shrimp were sauteed in) and sprinkle with green onion.
Pin It!

Wednesday, February 16, 2011

Meatloaf Muffins, Scalloped Potatoes and Green Beans

I'm sorry for all these horrible photos. I blame, in no particular order, rushing the take photos so we can eat, lack of natural light and unphotogenic food.

Meatloaf muffins are one of my favorite dinners to make because they're so simple yet so delicious.


I mixed meatloaf mix, some salsa, one beaten egg, and bread crumbs in a bowl, then put some of the mix into each cup of a greased muffin tin. I baked them, along with the potatoes, at 425 degrees for about 30 minutes. The green beans were simply steamed and tossed with butter, salt and pepper.
Pin It!

Tuesday, February 15, 2011

A Taste of Home Cooking is now on Facebook!

In an effort to keep myself more accountable with blogging, as well as reach a wider audience, I've started a Facebook page for this blog.

I would be delighted if all my readers, regulars and lurkers alike, would "like" my page. Once I reach 75 "likes" I will be hosting my very first giveaway! I'm very excited to do regular giveaways as my fan base grows, so please share the page with your friends and family.

Here is the link to the Facebook page.
Pin It!

Chicken, Avocado and Tomato Quesadilla

I've been on a quesadilla kick lately. They're so easy to make and I can easily keep the ingredients on hand. I saw this recipe for Chicken, Avocago and Tomato Quesadillas over at Sing for Your Supper and was intrigued by the addition of BBQ sauce. Unfortunately my photo isn't nearly as pretty as her's:


And we couldn't taste the BBQ sauce on the chicken once it was inside the quesadilla. I used my new Griddler to grill the chicken, but maybe the outdoor grill would have been better. But no matter, these will definitely be on the regular rotation.
Pin It!

Monday, February 14, 2011

Recipe Swap - Brisket

This was my first experience with a recipe swap and I really enjoyed it. The subject for this swap was an easy weeknight meal - something that could be made in less than 30 minutes, or prepped quickly and thrown in the crockpot.


When I first saw the recipe I knew it would be perfect for Sunday dinner. I also knew I would need to make some modifications. For starters, my crockpot and I have a love/hate relationship, so I decided to cook this in my Le Creuset dutch oven. I was also worried about buying 4lbs of meat for just the two of us. And an entire bottle of red wine seemed like too much for our tastes. I found a similar recipe online (see below) and ended up blending the two together.

The brisket cooked for a few hours in the oven and the smells wafting through the house were intoxicating. We both cleaned our plates (Baby Girl loved the mashed potatoes, but I couldn't convince her to try the brisket), saying we were happy to try something different. Thanks, Laurie!!

Here is the original recipe I was given:
Brisket
Laurie's Kitchen

2 large garlic cloves (chopped or whole)
1/2 teaspoon kosher salt, plus more for seasoning
4 sprigs fresh rosemary, needles striped (sometimes I use dried)
1/4 cup extra-virgin olive oil
1 (4 pound) beef brisket, first-cut
Coarsely ground black pepper
5 large carrots, cut in 3-inch chunks
5 celery stalks, cut in 3-inch chunks
1 large red onion, halved
1 Bottle dry red wine (more or less depending on what fits in your crock pot)
1 (16-ounce) can whole tomatoes, hand-crushed
1 handful fresh flat-leaf parsley leaves (dried is ok)
3 bay leaves (dried)
Beef or vegetable Broth (as needed to cover brisket if wine is not enough or if you are not a fan of a strong wine flavor)

Season both sides of the brisket with a fair amount of kosher salt and ground black pepper. Place a large pan over medium-high flame and coat with half of the olive oil. Put the brisket in the pan and sear to form a nice brown crust on both sides. Should only take a couple minutes per side. Transfer the brisket to your crock pot lay the vegetables,garlic and onions all around the brisket. Add the wine and tomatoes and beef broth if necessary; toss in the parsley, rosemary and bay leaves. Cook on low for about 6 to 8 hours until the beef is fork tender.

Remove the brisket to a cutting board and let it rest for 15 minutes. Scoop the vegetables out of the roasting pan and onto a platter.

And here is the recipe I ended up making (the original is linked below):
Zinfandel-Braised Beef Brisket with Onions
The Kitchen Sink

2 cups zinfandel or other fruity dry red wine
1/2 cup chicken broth
1/4 cup tomato paste
1 (2 1/2-pound) beef brisket, trimmed
2 teaspoons salt, divided
1/2 teaspoon freshly ground black pepper, divided
Cooking spray
4 medium sliced sweet onions
2 tablespoons sugar
1 teaspoon dried thyme
6 garlic cloves, thinly sliced
1 - 2-lb bag carrots, peeled and cut into (1/2-inch-thick) slices
4 celery stalks, cut into (1/2-inch-thick) slices
Chopped fresh parsley

Preheat oven to 325°. Combine first 3 ingredients, stirring with a whisk.

Heat a large Dutch oven over medium-high heat. Sprinkle beef with 3/4 teaspoon salt and 1/4 teaspoon black pepper. Coat pan with cooking spray. Add beef to pan; cook for 8 minutes, browning on all sides. Remove beef from pan; cover and set aside.

Add 1/2 teaspoon salt, 1/4 teaspoon black pepper, onion, sugar, and 1 teaspoon thyme to pan. Cook 20 minutes or until onions are tender and golden brown, stirring occasionally. Add garlic, carrots, and celery; cook 5 minutes, stirring occasionally. Place beef on top of onion mixture; pour wine mixture over beef. Cover and place in oven. Bake at 325° for 1 3/4 hours.

Remove dutch oven from oven and turn beef over. Place back in the oven for 45 minutes or until beef is tender. Remove beef from oven and cut across the grain into thin slices. Serve with onion mixture and sprinkle parsley on top.

I served the brisket over mashed potatoes with buttermilk biscuits on the side. I've never cooked a brisket before and according to the other ladies in the swap, this gave us all a chance to make something we wouldn't normally have made. I can't wait for the next one!
Pin It!

Thursday, February 10, 2011

Fire Island Ziti

I got a free subscription to Taste of Home magazine and was pretty surprised to find some good recipes. This one for Fire Island Ziti has become a regular around our house because it's easy and delicious. I made a few changes to make it even simpler and doubled it so we have leftovers.


Fire Island Ziti
Modified from Taste of Home

1 15oz can diced tomatoes, juice reserved
2 tablespoon olive oil
2 garlic cloves, minced
1 teaspoon salt
8 ounces uncooked ziti
2 broccoli crowns cut into florets
1 pound Italian sausage links, cut into 1/2-inch slices
1/4 teaspoon crushed red pepper flakes
Grated Parmesan cheese

Cook ziti according to package directions, adding broccoli during the last 4 minutes.

Meanwhile, in a large skillet over medium heat, cook sausage in oil until no longer pink. Add pepper flakes; cook 1 minute longer. Stir in tomatoes with the juice and heat through.

Drain ziti mixture; toss with sausage mixture. Sprinkle with cheese.
Pin It!

Wednesday, February 09, 2011

French Dip Sandwiches

I know these sandwiches aren't the most photogenic, but the recipe couldn't be easier and is delicious every single time. That's a big deal in our house these days, so these have made it on the menu twice in the last month. Yum!


French Dip Sandwiches
Very slightly modified from Rachael Ray

2 tablespoons butter
1 shallot, chopped
1 tablespoon flour
1/4 cup dry sherry or brandy
2 cans beef broth
1 1/2 pounds deli sliced roast beef
salt and pepper
4 sandwich rolls, split
1/4 pound deli slice provolone cheese

In a large, shallow skillet over moderate heat, melt butter. Add shallots to butter and saute 2 minutes. Add flour to butter and shallot and cook a minute longer. Whisk in sherry (or brandy) and cook liquid out. Whisk in broth in a slow stream. Bring sauce to a bubble and allow to simmer over low heat until ready to serve sandwiches.

Pile meat loosely across your cutting board or a large work surface. Season meat with salt and black pepper. Add to sauce to heat through. Set out ramekins or small soup cups for dipping sauce.

Toast the rolls if you desire. Using a pair of kitchen tongs, pile meat onto rolls. Top with slices of provolone cheese and broil to melt the cheese. Set ramekins or cups with extra dipping sauce alongside the sandwiches.
Pin It!