Friday, September 26, 2014

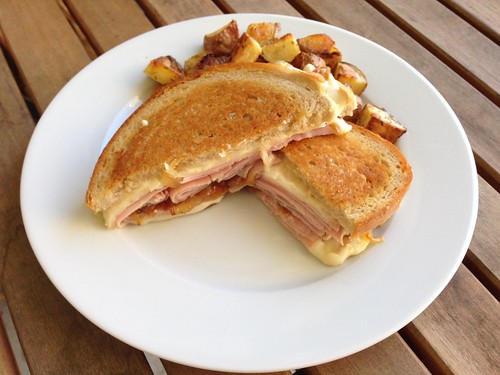
Grilled Ham and Cheese Sandwiches with Caramelized Onions

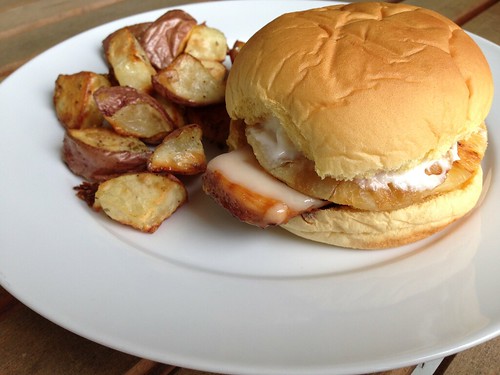
I like to put at least one sandwich on the menu each week. They're usually easy to make and we all enjoy them (although Baby Girl likes to deconstruct her sandwiches/burgers so she can eat each ingredient separately. Don't ask.) I saw these Hot Ham and Cheese Sandwiches with Bacon and Caramelized Onions on Pinch of Yum and thought they'd make a great grilled cheese sandwich.

Ham and Swiss sandwiches

I asked SP to get a loaf of rye bread at the store and it was the perfect bread for these sandwiches. Even though everything is better with bacon, I ended up skipping the bacon on these since they already had ham. The caramelized onions added just the right amount of sweetness to cut through the savory sauce. Delicious.

Grilled Ham and Cheese Sandwiches with Caramelized Onions
Modified from Pinch of Yum

1 yellow onion
1 tablespoon butter
1/4 cup mayo
2 teaspoons Dijon mustard
1 teaspoon Worcestershire sauce
spreadable butter
8 slices of bread (I used rye)
1 pound sliced deli ham
1/2 pound sliced Swiss cheese

Slice the onion into thin strips. Melt 1 tablespoon butter in a small skillet; add onions and cook over very low heat for 30 minutes, stirring occasionally. The onions will turn a deep golden color.

Whisk the mayo, mustard and Worcestershire sauce together.

Spread some of the spreadable butter on each slice of bread. Flip each slice over and spread 1/4 of the sauce on each of four slices, then top those slices with 1/4 of the ham, onions, and cheese. Complete the sandwiches with the other four slices of bread to make four sandwiches, butter side out.

Heat a griddle over medium-low heat. Add the sandwiches and cook until the bread is golden brown on both sides and the cheese melts. You want to go low and slow so the cheese and filling have a chance to warm through before the bread burns.

Cut in half and serve immediately.
Pin It!

Wednesday, September 24, 2014

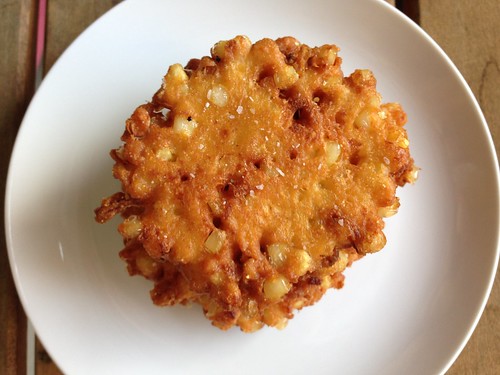
Recipe Remake: Farmstand Corn Fritters

I can't believe I've been making these corn fritters for 7 years already. They're so easy and the flavor is incredible. The last few times I've made them Baby Girl helped by stirring all the ingredients together in the bowl.

Corn fritters

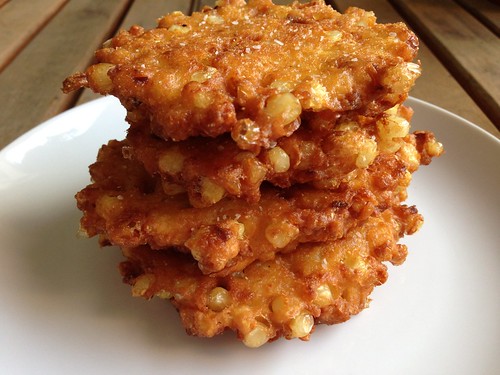
My original post didn't even include a photo (what was I thinking?) and since that post was back in 2007 I figured it was time to bring it back from the archives while corn was still in season (although I'm cutting it a bit close). We usually eat them plain, but you could serve them with a dipping sauce or top them with mozzarella, tomato and basil. We rarely have leftovers but if you did, you could serve them with a fried egg the next morning.

Corn fritters

If you can still get farm-fresh corn you need to make these ASAP. I'm kicking myself for not putting corn on the shopping list this week.

Farmstand Corn Fritters
As seen in Cook's Country magazine Aug/Sept 2005

3-4 ears of corn, husks and silk removed
1 large egg, beaten lightly
3 tablespoons flour
3 tablespoons cornmeal
2 tablespoons half-and-half (can also use heavy cream)
1/2 small shallot, minced
1/2 teaspoon salt
1/2 cup corn or vegetable oil, as needed

Using a chef's knife, cut the kernels from 1 to 2 ears of corn (depending on size) and place in a large bowl. You should have about 1 cup of whole kernels. Grate the kernels from the remaining ears of corn on the large holes of a box grater. You should have a generous 1/2 cup of grated kernels. Add to the bowl with the whole kernels. Using the back of a butter knife, scrape any remaining pulp from all the cobs and put in the bowl. Stir in the egg, flour, cornmeal, cream, shallot, and salt.

Heat oil in a large heavy-bottomed non-stick skillet over medium-high heat until shimmering. Drop 6 heaping tablespoons of batter into the pan. Fry until golden brown, about 5 minutes per side. Leave them alone until you see them starting to brown around the edges, then carefully flip them over to cook on the second side.

Transfer fritters to a plate lined with paper towels. Sprinkle with some salt. Fry the remaining batter. Serve immediately.
Pin It!

Monday, September 22, 2014

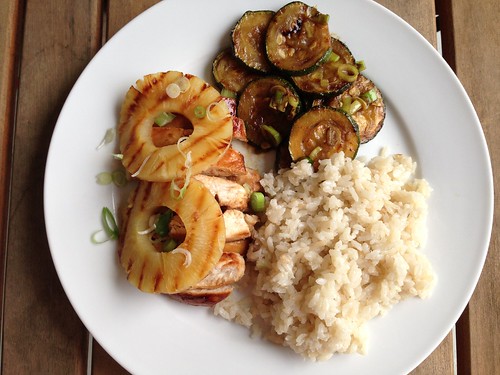
Grilled Hawaiian Chicken with Coconut Rice

As soon as Ashley posted this recipe for Grilled Hawaiian Chicken with Coconut Rice I knew I had to make it as soon as possible. I could practically taste the coconut rice. The only problem is, Baby Girl is allergic to nuts and that includes coconut. Luckily, she was heading to my parent's house for a sleepover so I put it on the menu for that Saturday night.

Hawaiian chicken and coconut rice

Do you remember when I mentioned my grill pan suffered a small catastrophe recently? This was the recipe that did it. The brown sugar in the marinade caramelized on the pan and has been next to impossible to remove. Next time we'll be cooking this one on the outdoor grill. And there will definitely be a next time. We couldn't stop oohing and ahhing over this meal. It was absolutely delicious. The rice was our favorite part - the coconut milk adds such a wonderful, rich, creamy, mellow flavor. The rice, combined with the chicken and pineapple, made for a five-star restaurant-quality meal. So, so good. I really wish Baby Girl could join us in eating this one. I know she would love it.

Grilled Hawaiian Chicken with Coconut Rice
As seen on Cheesecurd in Paradise

4 boneless, skinless chicken breasts
1/3 cup soy sauce
1/4 cup pineapple juice (from the pineapple rings)
1/2 cup water
1/2 cup brown sugar
4 scallions, chopped
3 cloves garlic, minced
2 teaspoons fresh ginger, minced
1 teaspoon olive oil
1 can pineapple rings, drained, juice reserved

For the coconut rice:
2 tablespoons butter
1 1/2 cup long grain white rice
1 can coconut milk
water

2 scallions, finely chopped

Place the chicken in a plastic food storage bag. Add the soy sauce, pineapple juice, water, brown sugar, scallions, garlic, and oil, seal the bag and gently toss to coat the chicken in the marinade. Marinate for at least 8 hours, preferably overnight.

Preheat a grill or grill pan over medium heat. Grill the chicken for about 5-6 minutes per side. Remove the chicken from the grill. While it rests, grill the pineapple to give it a slight char. You can serve the chicken whole or slice it into strips before serving.

For the rice: melt the butter in a medium saucepan over medium-high heat. Add the rice, and cook for about 3 minutes stirring occasionally. Pour the can of coconut milk into a measuring cup, then add enough water to equal 3 cups of liquid. Add the coconut milk and water to the rice and stir to combine. Bring to a boil, stir once more and cover the pot. Reduce the heat to low and cook for 20 minutes. Remove the lid and fluff the rice with a fork.

Serve the chicken on a bed of the coconut rice topped with some of the grilled pineapple. Scatter some of the finely chopped scallion over the dish before serving.
Pin It!

Friday, September 19, 2014

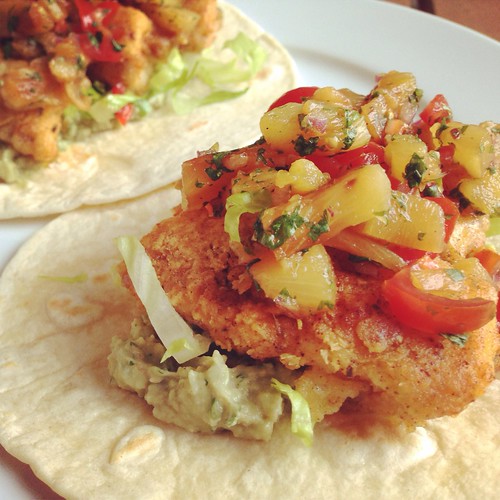
Fish Tacos with Grilled Pineapple Salsa

While I was making the menu for the week I asked SP if he wanted anything specific for dinner. The first thing he said was "know what we haven't had in awhile, fish tacos." I'll admit, I was a bit surprised. We eat fish regularly but not usually in tacos. I was up for the challenge, especially since Josie had just posted a recipe for Grilled Fish Tacos with Grilled Pineapple Salsa. Those tacos were my inspiration for these beauties.

Fish tacos with pineapple salsa

I've mentioned before that we don't own a gas grill, and grilling something as delicate as fish on a charcoal grill would be tricky for a weeknight. My grill pan recently experienced a small catastrophe, so that was out as well. I felt like making a battered fish taco, so I turned to my recipe for tilapia francese. I added a bunch of seasoning to the flour, which resulted in very flavorful fish. When it came to the salsa I knew the peppers had to go since they don't agree with me. I just swapped those out for grape tomatoes. I mashed up some avocado with a little cilantro and lime juice, shredded some lettuce and dinner was served.

We all LOVED these. I had to fight SP for the leftovers. Baby Girl took her taco apart and ate everything separately (such a strange child) but she cleaned her plate. These will definitely be on our permanent rotation. And since I used canned pineapple, we can make these year-round. They'll be such a great burst of summer flavors in the cold depths of winter.

Fish Tacos with Grilled Pineapple Salsa

1 cup flour
1 teaspoon chile powder
1 teaspoon dried oregano
1 teaspoon onion powder
1 teaspoon cumin
1 teaspoon garlic powder
kosher salt and pepper
1 egg
2 tablespoons water
4 pieces tilapia filets, cut into strips
2 tablespoons butter
2 tablespoons extra virgin olive oil

1 can pineapple rings, drained, juice reserved
grape tomatoes, finely diced
3 tablespoons minced fresh cilantro, plus more for serving
1 tablespoon minced red onion

1 avocado, pitted
lime juice, to taste
salt and pepper, to taste

1/2 head romaine lettuce, thinly sliced
Flour tortillas

Place flour in a pie plate and add the chile powder, oregano, onion powder, cumin, garlic powder, salt and pepper. Stir to combine. Beat the egg and water in a second pie plate. Coat each piece of tilapia with flour, then coat with egg, then pit it back in the flour for a second coat.

Heat butter and oil in a large non-stick skillet over medium heat. Place tilapia in pan and cook for about 2-3 minutes on each side until golden brown.

Meanwhile (or you can do this ahead of time), grill the pineapple in a grill pan over medium-high heat until brown on both sides. Transfer the pineapple to a large cutting board and finely chop. In a medium bowl, combine the pineapple, grape tomatoes, cilantro, and red onion. Add a splash of the pineapple juice. Season to taste with salt and pepper.

Grill the tortillas for 30 to 45 seconds per side. Transfer to a plate and cover loosely with a dishtowel or foil.

Mash the avocado in a medium bowl. Add the lime juice, and continue mashing to form a smooth sauce. Season with salt and pepper.

To serve, top tortillas with fish, pineapple salsa, lettuce, avocado, and cilantro.
Pin It!

Wednesday, September 10, 2014

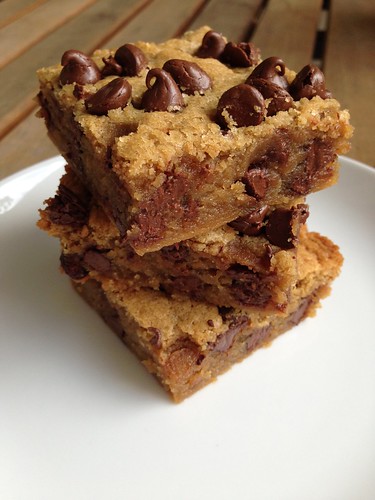
Peanut Butter Chocolate Chip Bars

When I posted a picture of these Peanut Butter Chocolate Chip Bars on social media I simply said "I did a bad, bad thing." That pretty much sums up these squares of ridiculousness. Easy to make, sinfully rich, decadent beyond words.

Peanut butter chocolate bars

Now, you all know I rarely bake. So you may be asking yourself why I made these. I made them because I couldn't stop thinking about them. I was innocently scrolling through my Facebook news feed one evening when I came across a photo of these bars. After clicking through to the recipe I couldn't stop thinking about them. I knew I had to make them when Baby Girl wasn't home. My plan was to freeze them and clean the kitchen thoroughly since they contain peanut butter, which she's allergic to.
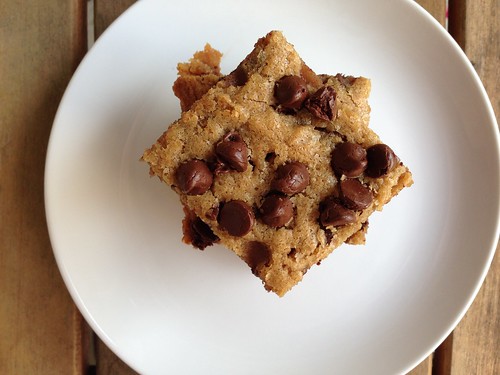
Peanut butter chocolate bars

You know what's bad about these bars? They're too easy to make. Melt better, mix in the rest of the ingredients, bake, let cool, done. Like I said, too easy.
Just posting a picture of these got two of my friends to make them that same night. I wonder how many more people will try them after seeing this post? Sorry. You're welcome.

Peanut Butter Chocolate Chip Bars
As seen on Averie Cooks
YIELD: one 8x8 pan, cut into 9 or 12 squares

1 stick unsalted butter
1/3 heaping cup peanut butter
1 large egg
1 cup light brown sugar, packed
1 tablespoon vanilla extract
1 cup all-purpose flour
1 cup semi-sweet chocolate chips + 2 tablespoons, for sprinkling

Preheat oven to 350. Line an 8-by-8-inch baking pan with aluminum foil. Spray the foil with cooking spray; set aside.

In a large, microwave-safe bowl, melt the butter. This should take about 1 minute on high power. You may need more or less time depending on your microwave. Let cool for 2 minutes.

Add the peanut butter, egg, brown sugar, vanilla to the butter and whisk until smooth. Add the flour and stir until just combined. Don't over mix. Stir in 1 cup of the chocolate chips.

Spoon the batter into the prepared pan, smoothing the top lightly with a spatula. Sprinkle evenly with the remaining 2 tablespoons of chocolate chips.

Bake for about 25 to 30 minutes, or until done. A toothpick inserted in the center should come out clean, or with a few moist crumbs, but no batter. Mine took 30 minutes.

Allow the bars to cool in the pan for at least 30 minutes before slicing and serving.

Bars will keep airtight at room temperature for up to 1 week, or in the freezer for up to 6 months.
Pin It!

Friday, September 05, 2014

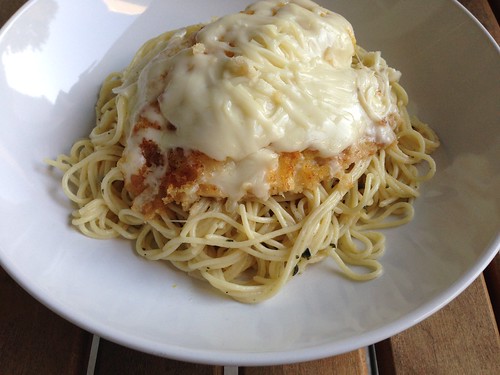
Lemon Tilapia Parmesan

My friend Jaida recently posted this recipe for Lemon Chicken Parmesan that looked so good I could almost taste it. We eat a lot of chicken, though, so I've been trying to replace some of our favorite chicken dishes with fish for some variety. I'm really into tilapia - it's so versatile and Baby Girl loves it, too. I figured it would be easy to swap out the chicken for tilapia in this recipe.

Lemon chicken parm

Since tilapia is so thin and quick-cooking, I didn't need to bake it. I just cooked the pasta, tossed it with the sauce and served the fish on top. Super simple and so delicious. I know you may think melted mozzarella and fish is a strange combo, but it was so good. The lemon sauce was so bright and flavorful, too. I may try this with chicken next time, just to see which protein we prefer.

Lemon Tilapia Parmesan
Modified from Sweet Beginnings

Pasta:
8 oz angel hair pasta
1 tablespoon butter
1 tablespoon grated lemon zest
1/4 cup grated Parmesan cheese
salt and pepper, to taste
Fish:
4 tilapia filets
1 large egg, beaten with 1 tablespoon water
3/4 cup Panko bread crumbs
1/4 cup grated Parmesan cheese
1 teaspoon dried basil
1/2 cup flour
2 tablespoons butter
1/4 cup freshly squeezed lemon juice
1 teaspoon minced garlic
3/4 cup shredded mozzarella cheese

Cook the pasta according to the package directions. Reserve 1 cup of the cooking water, then drain. Return the pasta to the pot and stir in the butter, lemon zest, and Parmesan. Season with salt and pepper.

Whisk the egg and water in a shallow dish. In another shallow dish combine the Panko, Parmesan, dried basil, salt and pepper.

Place the flour in a plastic food storage bag. Add the fish filets, seal the bag, and toss to coat the filets in the flour. Working with one piece at a time, dip a filet into the egg, then into the bread crumb mixture, pressing to adhere the crumbs. Repeat with all the filets.

Heat the butter in a large skillet over medium-high heat. Add the lemon juice and garlic. Add the fish filets and cook for 3-4 minutes per side, until golden brown. Distribute the mozzarella between the 4 filets and cover the pan briefly so the cheese melts. Remove to filets to a plate.

Add the pasta to the pan and toss to coat, thinning the sauce with some of the pasta cooking water. Serve some pasta in a shallow bowl topped with a piece of fish per person.


Pin It!

Wednesday, September 03, 2014

August Re-Make Recap

Sigh. I'm not ready for summer to be over. I know we technically have another 3 weeks until the official end of summer, but now that September has arrived we're on the downward slope into fall and winter. This is always a tough time of year for me. Fall will bring a lot of fun things (Baby Girl's 5th birthday, our trip to Disney World, our 11th wedding anniversary, Halloween, Thanksgiving in California) but it also means cold weather is right around the corner. And I'm not a fan of cold weather. Or the loss of natural light. So I'll be enjoying the last few weeks of warm weather and daylight after 5pm while it lasts.

Once again, August was another month of remakes. I've been making a few new things but still having trouble finding the enthusiasm to blog. Plus, I've made so many great things over the life of this blog and I like rediscovering old favorites.

Crunchy baked tacos

Ever since I discovered these crunchy baked tacos I've been obsessed. I love how easy they are to make. I actually served these twice in August.

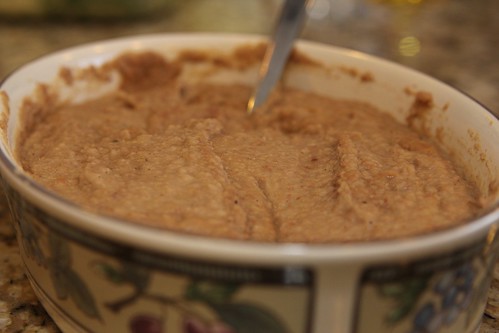
Refried beans

I'm sure you're all tired of seeing these refried beans on my recaps, but we love them. So easy I don't even need to look at the recipe anymore.


And you all know how much I love tilapia francese. This month's rendition was superb - perfectly cooked fish, flavorful sauce, a nice crispy coating. Mmmm.


I made this grilled corn, avocado and tomato salad all the time a few summers ago, but not much in recent years. It's always a family favorite. The smoky flavor from the grilled corn is my favorite part.

chicken nuggets3

We all love these homemade chicken nuggets with honey mustard dipping sauce. What's not to love about crispy chicken and a tangy dipping sauce? I always make a ton of chicken so we have plenty leftover.


This cheesy zucchini rice is our summer go-to side dish. I can't get enough when zucchini is in season.

crispy potatoes

I'm continually amazed by these roasted potatoes. They come out perfect every single time.


For me, summer means tomatoes and basil. That's where caprese pasta comes in. I grow basil every summer so throwing this pasta together is super simple.


We eat this restaurant knockoff Texas Roadhouse salad at least once a week. So far we haven't tired of it. I think it's so funny that Baby Girl thinks that all salads include these ingredients.


Antipasti pasta salad is almost a meal in itself, but I usually serve it as a side dish. This recipe makes a ton but we rarely have much leftover. It's addictive.

flatbreadpizza

I've been alternating burgers and flatbread pizzas on Fridays this summer. Always a favorite, especially with a variety of toppings.

Untitled

We all loved this corn casserole the first time I made it, so I made it again for one of our Sunday dinners with my parents. Between the five of us we ate almost the whole thing.

Shrimp pasta with lemon cream sauce

I love the base sauce in this pasta with shrimp in lemon cream sauce so I'm always looking for ways to make it without buying shrimp. I've done chicken before and this month I tried tilapia. I cooked the tilapia separately and served it on top of the pasta. The sauce is simple but oh so good.

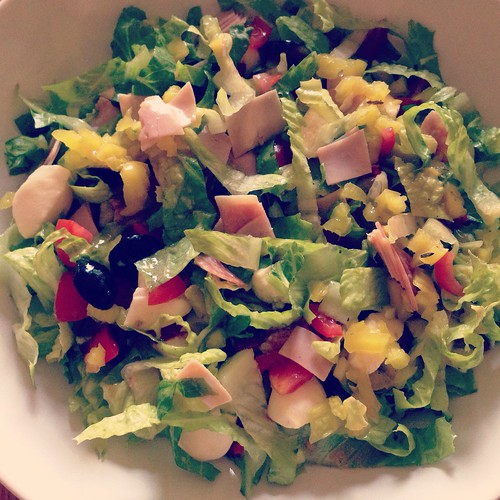
Antipasto salad

I've been making this antipasto salad as a chopped dinner salad lately and it's a family favorite.

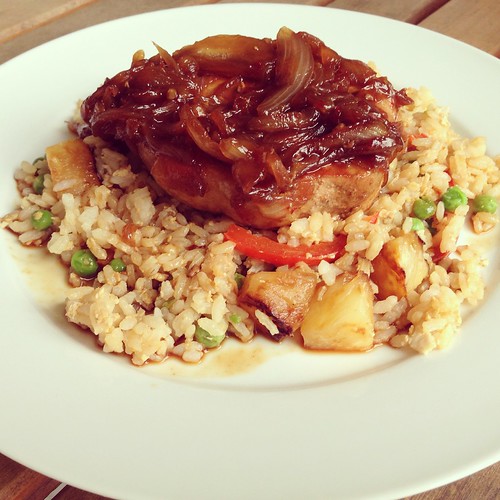
Pork chops pineapple rice

I had some pork chops in the freezer and decided to remake pork chops with pineapple fried rice. The first time I made this recipe it was good, but not great. This time it was incredible. So flavorful. Beyond words, really. I wished I'd had a second stomach so I could have another serving.


I can't believe it's been years since I made these corn fritters. I've been obsessed with corn recently and these fritters are the epitome of summer. And easy, to boot.


I had a craving for creamy mac and cheese so I revisited Paula Deen's recipe. It's creamy and cheesy and delicious.


Pin It!

Friday, August 29, 2014

Blueberry Lemon Bread

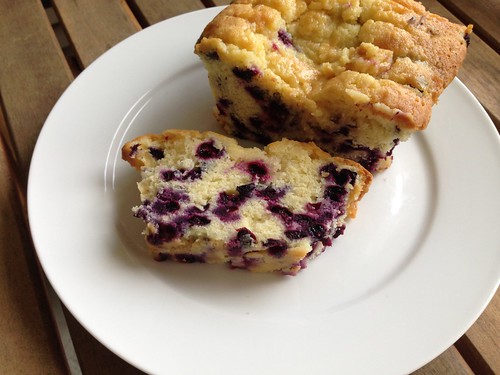
Baby Girl's camp went blueberry picking last month and she brought home a huge container of blueberries. I had already planned to make this Blueberry Lemon Bread that Melissa has been raving about for years.

Blueberry lemon bread

I'm not sure what happened but my bread was very, very moist. When I turned it out onto the cooling rack it cracked and almost fell apart. It was inverted on the rack for only a few seconds, but it was enough time for the wire to leave deep grooves in the top. But, all that aside, this was still a delicious dessert and a great way to use up the blueberries.

Blueberry Lemon Bread
As seen on Alosha's Kitchen

1 1/2 cups all purpose flour
1 teaspoon baking powder
1/4 teaspoon Kosher salt
6 tablespoons unsalted butter, softened to room temperature
1 cup + 1/3 cup granulated sugar
2 large eggs
2 teaspoons lemon zest (zest of one medium lemon)
1/2 cup whole milk
1 1/2 cups fresh blueberries
3 tablespoons lemon juice

Preheat oven to 325 degrees.

Butter and sugar a 9- or 10-inch loaf pan; set aside. Whisk together flour, baking powder and salt in a small bowl; set aside.

Using an electric mixer, cream the butter and 1 cup of the sugar together until light and fluffy. Add eggs one at a time, beating well after each addition. Add the lemon zest. Slowly mix in the flour mixture, alternating with the milk, beginning and ending with the flour mixture.

Lightly coat blueberries with a small amount of flour. Gently fold in blueberries into the batter. Spoon batter into loaf pan.

Bake for about one hour, or until golden brown and a wooden toothpick inserted into the center comes out clean.

When the bread has about 5 minutes cooking time left, bring remaining 1/3 cup of sugar and lemon juice to boil in a small saucepan, stirring until sugar dissolves. Once removed from the oven, pierce the top of the hot loaf several time with a cooking chopstick (or knife) without touching the bottom of the loaf in pan. Pour the hot sugar mixture over the loaf.

Cool for 30 minutes in pan on a wire rack, then turn bread out of pan and cool completely on rack.
Pin It!

Wednesday, August 27, 2014

Chicken Parmesan Salad

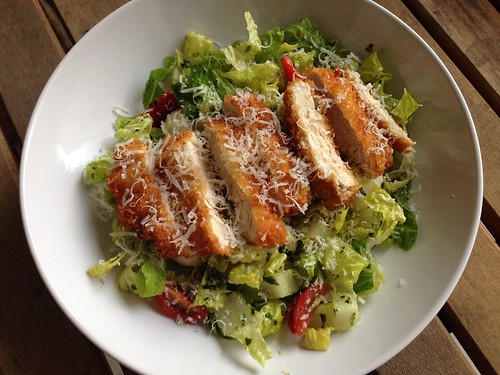
A few weeks ago I received an issue of Cook's Country magazine. I used to be a subscriber, but in an effort to save money I cancelled my subscription awhile back. I'm not sure if this was a teaser issue to try to entice me back, but it doesn't have a date on it so I'm assuming that's what it is. SP went through it and picked out a few recipes for me to make, including this one for Chicken Parmesan Salad.

Chicken parm salad

I made a few modifications - I switched up the breading method since I've found that panko adheres better when you coat the chicken in flour first, and I swapped out arugula for Romaine hearts since I always have a package on hand. If only I could buy arugula that didn't spoil immediately...

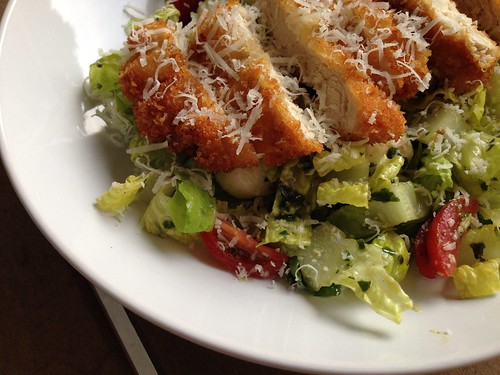
Chicken parm salad

This was a great salad. We were all big fans. I mean, what's not to like about crispy chicken and the summer trinity of tomatoes, mozzarella and basil? Because of Baby Girl's nut allergy I didn't make traditional pesto, simply processed basil leaves with a little oil, salt and pepper and then grated in some Pecorino cheese. I have to be honest - I haven't made pesto with nuts in years and I don't notice a difference.

Chicken Parmesan Salad
As seen in Cook's Country magazine

1 large egg
1 cup flour
1 cup panko
salt and pepper
4 chicken cutlets
6 tablespoons vegetable oil
1/4 cup pesto
1 teaspoon grated lemon zest plus 1 tablespoon juice
12 ounces cherry tomatoes, halved
5 ounces baby arugula, mixed greens or finely shredded Romaine hearts
4 ounces bocconcini, halved

Beat the egg in a shallow dish with a splash of water. Add the flour to a second shallow dish. Combine panko, 1/4 teaspoon salt and 1/4 teaspoon pepper in a third shallow dish. Season each chicken cutlet with salt and pepper. Working with one cutlet at a time, coat the cutlet in flour, then dip into the egg, and finally coat in the panko, pressing to adhere.

Heat 3 tablespoons of vegetable oil in a non-stick skillet over medium-high heat until shimmering. Cook 2 cutlets at a time until golden brown and crispy, about two minutes per side. Transfer to a paper towel-lined plate. Repeat with the remaining oil and chicken. Tent the chicken loosely with foil and let rest for 5 minutes.

Whisk the pesto and lemon zest and juice together in a large bowl. Add the tomatoes, arugula and bocconcini and toss to combine. Season with salt and pepper. Arrange the salad on a serving platter. Slice the chicken into strips and arrange on the salad. Serve.

Pin It!

Monday, August 25, 2014

Buttermilk Scones

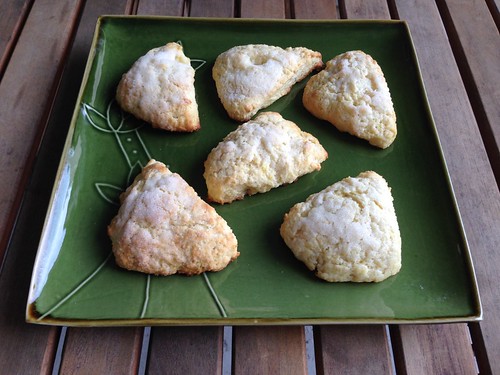
Whenever I buy buttermilk for a recipe there's always a lot leftover. Usually I can find ways to use it up but this time SP called dibs on it so he could make Buttermilk Scones.

Buttermilk scones

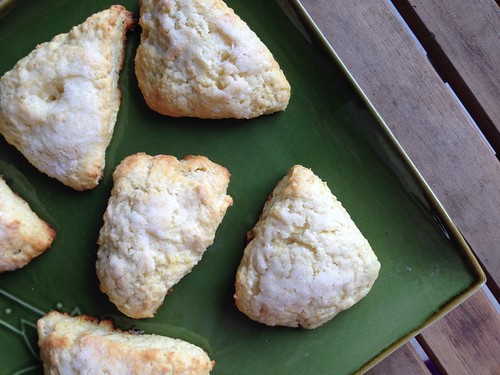
I woke up on Sunday morning to the smell of these baking. Mmmm. While the second batch was cooking I fried up some bacon and then we all sat down to enjoy the delicious, hot scones and crispy, salty bacon. These were incredible fresh from the oven, so light and flaky. Unfortunately, by the time we got them to my parent's house that evening they were a bit mushy and tough. If you aren't going to eat these right away, definitely freeze them so they don't lose their texture.

Buttermilk scones

I've already asked SP to make a savory version with bacon, cheddar and scallions, modeled after an episode of Diners, Drive-Ins and Dives where Guy Fieri had savory scones with a bacon gravy. I can almost taste them.

Buttermilk Scones
As seen on All the Cooks

3 cup all-purpose flour
1/3 cup sugar
1 tablespoon baking powder
1/2 teaspoon baking soda
3/4 teaspoon salt
1 1/2 sticks unsalted butter, cold, cut into small pieces
1 cup buttermilk
1 tablespoon lemon zest

1/2 stick unsalted butter, melted for brushing
1/4 cup sugar, for dusting

Preheat the oven to 425.

In a medium bowl, combine the flour, sugar, baking powder, baking soda, and salt with a fork. Add the cold butter pieces and, using your fingertips (or a pastry blender or two knives), work the butter into the dry ingredients until the mixture resembles course cornmeal. It's okay if you have some larger pieces of butter, it makes the scones flaky.

Add the buttermilk and lemon zest and mix with a fork until the ingredients are just moistened. The dough will be soft. If the dough looks dry, add another tablespoon of buttermilk.

Gather the dough into a ball, pressing it gently so it holds together, and turn it out onto a lightly floured work surface. Knead it very briefly (about a dozen turns) then cut in half.

Roll one of the dough halves into a 1/2-inch thick circle about 7 inches across. Brush the dough with half of the melted butter and sprinkle with 2 tablespoons of the sugar. Cut the dough into 6 triangles and place the triangles on a baking sheet lined with parchment paper. Repeat with the other half of the dough.

Bake the scones for 10 to 12 minutes, until both the tops and bottoms are golden. Transfer the scones to a rack to cool slightly.

NOTE: These are best served warm or at room temperature. But they do not last long. If you aren't going to eat them immediately, wrap each scone in plastic wrap and put in a freezer bad. They'll stay fresh for one month. To serve, defrost the scones in the plastic wrap, then unwrap and reheat on a baking sheet for 5 minute in a 350-degree oven.
Pin It!

Friday, August 22, 2014

Mozzarella Stuffed Meatballs

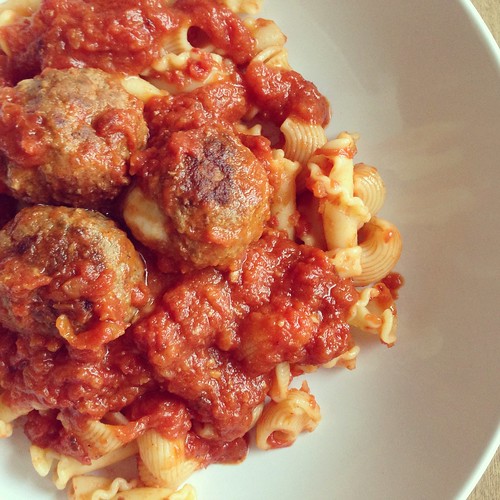
You know a recipe is good when it pushes you out of your blogging slump. These Mozzarella Stuffed Meatballs did just that. I couldn't wait to share them with you guys and I managed to schedule a few more posts while I was at it.

Mozzarella stuffed meatballs

I saw these meatballs on my friend Jaida's blog and she raved about them, so I figured I'd give them a shot. I've been in a cooking rut lately, remaking a lot of old favorites rather than trying new stuff. We've been on a fresh mozzarella kick lately and I knew you couldn't go wrong stuffing it into a meatball. This was an incredibly easy meal to make, perfect for a weeknight. It took less than 10 minutes to make the meatballs and, bonus, I had frozen sauce in the freezer. It took longer to chop the ingredients for the salad I served on the side.

Mozzarella stuffed meatballs

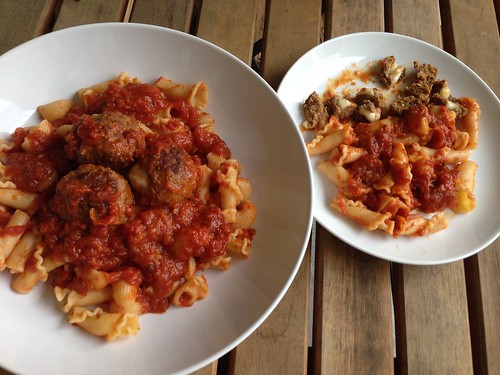
What I didn't expect was for these to be the most flavorful meatballs I've ever made. We were all blown away. Baby Girl said, "these aren't just good, Mommy. They're amazing, awesome and wonderful." It's been awhile since I've photographed dinner outside, so Baby Girl jumped at the chance to have her plate next to mine for a picture.

Mozzarella stuffed meatballs

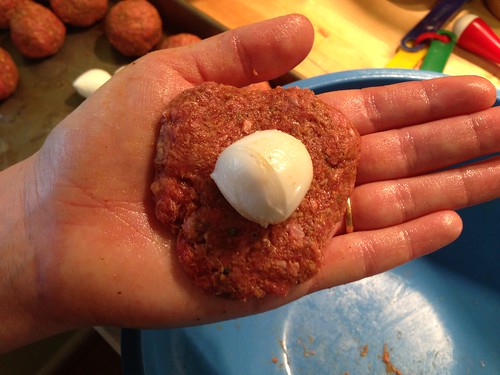
Despite the fact that I thought I'd sealed the meatballs well, most of mine broke open while they cooked. Fortunately, the cheese didn't really melt or leak out. Just make sure you really, really seal them well. I had 14 mozzarella balls, but you may want to stick with the 10-12 in the recipe below so there's more meat to fully encase the cheese.

Mozzarella Stuffed Meatballs
As seen on Sweet Beginnings

1 egg
1/3 cup Italian seasoned bread crumbs
1 lb lean ground beef
1 teaspoon chili powder
1/2 teaspoon paprika
1 teaspoon dried Italian seasoning
1 teaspoon salt
1/2 teaspoon black pepper
1 teaspoon minced garlic
10-12 mini balls fresh mozzarella (bocconcini), or fresh mozzarella cut in small pieces
3 cups pasta sauce

Whisk the egg in a large bowl. Add the bread crumbs, ground beef, chili powder, paprika, Italian seasoning, salt, black pepper, and garlic and mix with your hands until combined.

Divide the meat into 10-12 balls (a couple of tablespoons each). Flatten each section of meat, then wrap it around one mozzarella ball. Squish the edges together to be sure it's sealed. Repeat this process until you've used up all the meat.

Heat a large, non-stick skillet over medium heat (no need to add oil, there's plenty of fat in the meat). Add the meatballs and cook for a couple of minutes on each side, until well-browned.

Add the pasta sauce (enough to coat the bottom and come up about halfway up the meatballs) to the skillet. Simmer for about five minutes, turning the meatballs occasionally to coat them in the sauce.

Serve the meatballs over pasta or rice, as a sandwich, or by themselves.
Pin It!

Wednesday, August 20, 2014

Breaded Pork Sandwich

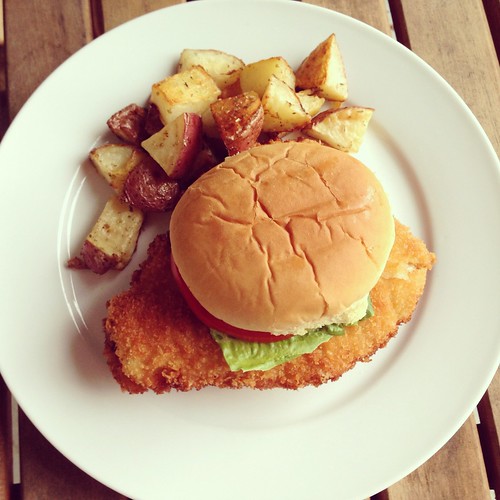
SP and I love to watch Diners, Drive-Ins and Dives. On one episode, Guy Fieri was visiting a restaurant in Indiana that made these massive Breaded Pork Sandwiches. The pork was lightly breaded and fried until crispy, served on a bun with lots of fresh veggies. I haven't been able to get it out of my head since. I finally decided to put them on the menu and boy, am I glad I did.

Breaded chicken sandwich

Words cannot describe how amazing this was. The crispy pork, the tang from the mustard and pickles, the crunch of the lettuce. Everything came together perfectly. The only way to eat this is to start with the pork that hangs over the edges, but when you finally get a bite of everything together it's incredible.

You want to get the pork as thin as possible. I thought I'd gotten it pretty thin but it puffed a bit while it was cooking. You want a very, very thin pork cutlet for this sandwich.

Breaded Pork Tenderloin Sandwich
As seen on The Cooking Channel

4 pieces boneless pork chops
1 cup buttermilk
1 teaspoon kosher salt, plus more for seasoning
1/2 teaspoon ground black pepper, plus more for seasoning
1/2 teaspoon garlic powder
1/2 teaspoon onion powder
1/4 teaspoon sweet paprika
1/4 teaspoon sugar
1 cup all-purpose flour
2 large eggs, beaten
2 cups Panko
Vegetable oil, for frying
4 hamburger buns, toasted on cut sides
lettuce leaves, tomato slices, red onion slices, dill pickle slices, mayonnaise, mustard

Pound each pork chop with a mallet until 1/4-inch thick and 6 to 8 inches across.

Whisk together the buttermilk, salt, black pepper, garlic powder, onion powder, paprika and sugar in a shallow dish. Add the pork cutlets. Make sure all the pieces are coated well with the buttermilk marinade. Cover and keep refrigerated for at least 4 hours and up to overnight.

Heat 1/2-inch oil in a large high-sided skillet until shimmering. Set up a breading station of three shallow dishes consisting of the flour in the first dish, eggs in the second and Panko in the third. Sprinkle all three dishes with salt and pepper.

Dredge each cutlet in the flour first, then in the egg and finally in the breadcrumbs. Gently place into the hot oil without overcrowding the skillet. You will need to fry the cutlets in batches. When the cutlets are golden brown on one side, about 2 minutes, carefully flip and cook for another 2 minutes. Drain well on a paper-towel-lined plate.

Build the sandwiches by putting the cutlets between the burger buns and garnishing with lettuce, tomato, onion, pickle, mayonnaise and mustard. The cutlet should hang generously over the bun.
Pin It!

Monday, August 18, 2014

Chicken Taco Salad

I know, I know. I haven't been a great blogger lately. As I said in my July recap post, I've lost my mojo. I'm not making many new recipes and I've had writers block trying to blog the ones I have made.

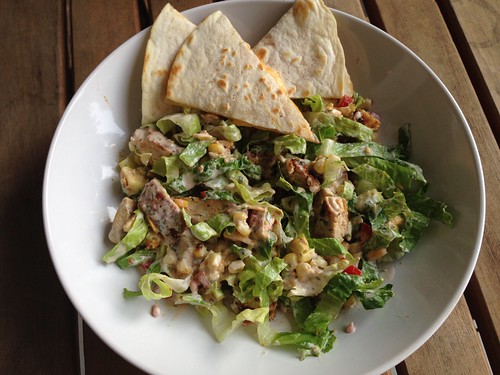
But this salad...oh man. I love a good dinner salad and this Chicken Taco Salad from Pioneer Woman fit the bill. Lots of fresh veggies mixed with lettuce and grilled chicken.

Chicken taco salad

I opted to grill the chicken rather than cooking it in oil and butter. I also made a quick rub with various spices (chili powder, cumin, garlic powder, onion powder, salt and pepper) rather than use taco seasoning. And since I had some tortillas leftover I decided to make some cheese queadillas as a side dish. Man, there is just something about a plain cheese quesadilla paired with a flavorful salad. Yum.

Chicken Taco Salad
As seen on The Pioneer Woman

Dressing:
3/4 cups ranch dressing
1/4 cup salsa
3 tablespoons finely minced cilantro
Chicken:
2 chicken breasts, cut in half lengthwise
2 tablespoons taco seasoning
cooking spray
Salad:
2 ears corn, shucked
2 romaine hearts, shredded thin
3 roma tomatoes, diced
1/2 cup grated pepper Jack cheese
2 whole avocados, diced
3 scallions, sliced
1/2 cup cilantro
Tortilla chips, crushed slightly

Combine the dressing ingredients in a bowl and stir together. Cover and refrigerate.

Generously season both sides of the chicken breasts with the taco seasoning or spices. Spray a grill pan with cooking spray and heat over medium-high heat. Cook the chicken for 5 minutes, then flip and cook for another 4 minutes. Remove from the grill pan and set aside to cool slightly, then cut it into cubes.

Place the ears of corn on the grill pan. Cook until the corn is browned in spots. Remove from the pan and cut off the kernels with a sharp knife. Set aside.

To assemble the salad, pile the chicken, corn, lettuce, tomatoes, cheese, avocado, scallions, cilantro, and crushed chips on a big platter. Drizzle the dressing all over the top, or serve it on the side so everyone can dress their own salad.
Pin It!

Monday, August 04, 2014

July Re-Make Recap

I know, I know. You're looking at the calendar and thinking "it's August 4. Why is she posting a July recap now?" As you may have noticed, I've been a little lax about blogging lately. Honestly, my heart's just not in it these days. I haven't gone through a phase like this in awhile so I guess I was due. I'm not making a lot of new dishes and I can't find the time or energy to blog the few new things I have made. I'm sure I'll snap out of it soon.

So...July. It was another busy month for us. Baby Girl is still taking swim lessons and this month she finally decided she wasn't scared of jumping in the pool. SP and I ran a 5K race on July 4 and had a great time. Work has been busy for both of us. The weather has been a bit on the cool side, not very summery, so we haven't spent as much time at the pool. And that's about it in a nutshell. On to the food!

Hawaiian chicken sandwiches

Whenever I get a craving for pineapple I turn to these Hawaiian chicken sandwiches. There is just something about the combination of the marinade that makes these delectable.

crispy potatoes

And, of course, I can't serve the sandwiches without roasted potatoes on the side. Such a foolproof method. They come out perfect every single time.

spicypork

I decided to combine a few individual servings of spicy pork and asparagus stir fry I had socked away in the freezer for dinner one night. I served edamame and egg rolls on the side and we relived the height of asparagus season.


I rediscovered my love for this antipasti pasta salad this month. I've made it at least three times. It's so good and so easy.

sopapilla2

I brought these sopapilla cheesecake bars to my friend MaryEllen's house for dinner. She loved them so much she didn't fight me about keeping the leftovers and ended up serving them to her parents for breakfast the next day.

Crunchy baked tacos

These crunchy baked tacos are our new favorite beef taco. We all love the crispy shell and I love how easy they are to make.

Refried beans

No Mexican night is complete without these homemade refried beans.

crispy fish

Once again, I made this recipe into fish sticks. I was never a fan of the frozen kind as a kid but these are head and shoulders above those. Positively addicting.


We've been loving cheesy zucchini rice now that zucchini is in season. I need to get this made a few more times before Fall.

bolognese

I was cleaning out the freezer and found a package of meat sauce bolognese tucked away. Perfect for an easy weeknight meal.

flatbreadpizza

Now that it's warmer I'm alternating making burgers and these flatbread pizzas on Fridays. I love roasting the tomatoes so they get super sweet. And the flatbreads are such a perfect vehicle for the tomatoes and cheese.

Untitled

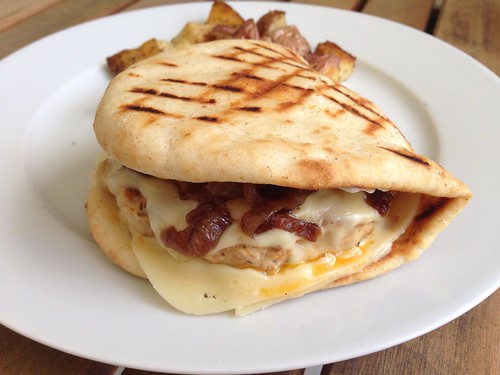
When I was cleaning out the freezer I made an amazing discovery - a lone package of homemade chorizo. I thought I'd used it all up, which was very sad since it meant no more chicken chorizo patty melts. Of course I had to make them and they were just as divine as ever. One of our all-time favorites.

hamsandwich

I was stumped for an easy sandwich idea for dinner until Baby Girl turned on The Pioneer Woman. She was making these hot roast beef sandwiches so I added them to the menu for the following week. Yum!

citrus chicken burrito

These citrus chicken burritos require a lot of work, but are so, so worth it. Another all-time favorite recipe around here.

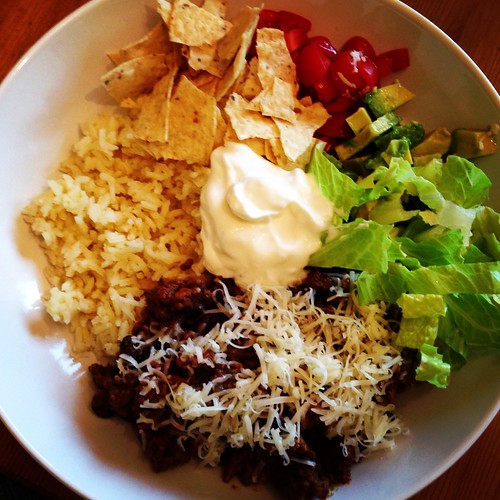
Taco Rice

As much as we love regular tacos, taco rice is a nice change of pace. We all love mixing all the ingredients together in the bowl.


I wanted something healthy, bright and flavorful and SP said we hadn't had black bean patties in awhile. I decided to make these black bean patties with corn and avocado cream because I love, love, love the corn salsa and the avocado cream (and the patties, too. The whole meal is great).

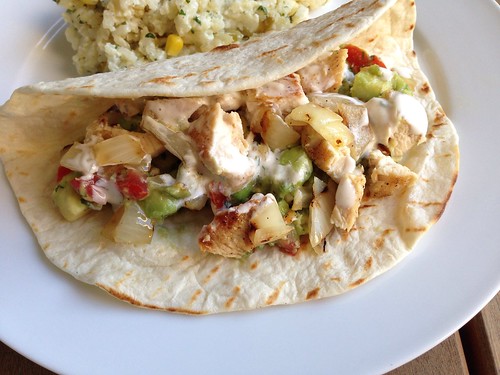
Chicken tacos

I wanted an easy chicken taco recipe and remembered how much we liked these grilled chicken tacos with spiced mayo. I love how easy these are to make. I turned the leftovers into a quesadilla for lunch the next day and I think I may make them that way from now on.

Pin It!