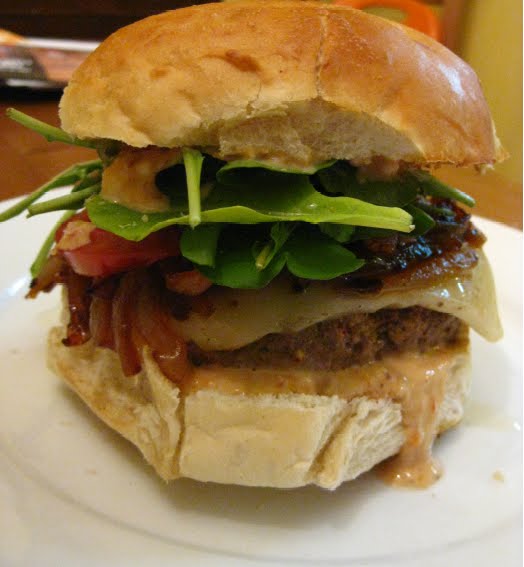
I love a good chicken burger. My all-time favorite are these Chicken Burgers with Garlic-Rosemary Mayo, but I was looking for something a little different. I've had my eye on Elly's Chicken and Pancetta Burgers with Fried Egg for awhile, but I've been putting off making them until I planted my rosemary. I finally got that done recently so these went straight on the menu.
I decided to sub bacon for the pancetta because we always have bacon in the house. The flavors were a tad smokier but that was alright by me. I love the smell of fresh rosemary that permeates the whole burger - so good. And you can't go wrong topping anything with a fried egg. Such a decadent touch. SP opted to enjoy his without the egg but Baby Girl, a child after my own heart, was adamant about having an egg.
This is a messy sandwich but so, so good. The gooey cheese and the flavorful patty combined with the fried egg and peppery arugula made for a delicious sandwich. Baby Girl, sadly, wasn't a fan of the arugula (too spicy, she said) but polished off the rest of her burger. I'm already salivating thinking about the leftovers for lunch.
Oh and get used to seeing a photo that includes Baby Girl's portion. She's VERY big on being included on the blog right now and, really, how adorable is that?
Chicken and Bacon Burgers with Fried Egg
Slightly modified from Elly Says Opa, adapted from Nigel Slater’s The Kitchen Diaries
4 oz. bacon (or pancetta), diced
1 small onion, diced
2 cloves garlic, minced
2-3 sprigs fresh rosemary, minced
1 lb. ground chicken
Salt and pepper
4 slices provolone cheese
4 eggs
4 buns or rolls, split and toasted
Mayo
Arugula
Heat a skillet over medium heat. Add the bacon and cook until starting to brown at the edges. Add the onion, cooking until translucent. Add the garlic and rosemary. Continue cooking until the bacon is golden brown. Remove the mixture from the pan and set aside to cool for a few minutes.
Once cooled, add the mixture to the ground chicken, along with salt and pepper to taste. Lightly mix everything together and form into 4 patties. Let the patties sit for about half an hour on the counter, or for longer in the fridge.
Wipe out the skillet and place it over medium heat. Add the patties to the pan and cook for about 5 minutes, then flip and cook another 4 minutes. During the last minute, add a slice of cheese to each burger and let it melt. Remove the patties from the skillet.
Crack the eggs into another small skillet and cook to your liking.
To serve, Place a burger patty and a fried egg on each roll.
Friday, June 28, 2013
Wednesday, June 26, 2013
Chicken Quesadillas with Avocado Corn Salsa
Ever have one of those days where you're super excited to make dinner only to discover you're out of one of the main ingredients? In my case I was all set to make this Chopped Chicken Taco Salad with Cheese Quesadilla Strips when I discovered the bag of Romaine hearts I thought I had in the fridge was actually half a heart that I needed for another recipe anyway. Oops.
It ended up being a happy accident, though, because these Chicken Quesadillas with Avocado Corn Salsa were born. And that's a very, very good thing.
Really all I did was keep the recipe the same but instead of making it into a chopped salad I took the grilled chicken and added it to the quesadillas. Then I turned the rest of the salad ingredients into a corn, tomato and avocado salsa reminiscent of this grilled corn salad we all absolutely love. Win-win all around.
Once again Baby Girl asked if I'd photograph her plate, too. This kid, she kills me with the cuteness. Also note, see how she has one triangle of quesadilla on her plate? Yeah, she ended up loving these so much she ate one of my triangles and one of SP's for a total of 3 pieces (aka almost an entire quesadilla to herself). Must be a growth spurt coming on...
Chicken Quesadillas with Avocado Corn Salsa
Inspired by How Sweet It Is
2 tablespoons olive oil
2 limes, juiced
2 garlic cloves, minced
2 teaspoons ground cumin
2 teaspoons smoked paprika
1/2 teaspoon chili powder
1/4 teaspoon salt
1/4 teaspoon pepper
2 chicken breasts, cut in half lengthwise and trimmed of fat
cooking spray
4 burrito-size tortillas
4 ounces Monterey Jack cheese, grated
4 ounces cheddar cheese, grated
1 avocado, peeled and diced
1 cup sweet corn
1/2 pint grape tomatoes, quartered
1/4 red onion, diced
1/4 teaspoon salt
1/4 teaspoon pepper
1 tablespoon olive olive
1 lime, juiced
The night before (or a few hours before) combine olive oil, lime juice, garlic, cumin, paprika, chili powder, salt and pepper in a large plastic food storage bag. Add chicken and toss to coat evenly. Marinate in the fridge for 2-24 hours.
Heat a grill pan over medium-heat heat. Add chicken and cook for 5 minutes, then flip and cook for another 4 minutes. Remove to a plate and let cool for a few minutes, then cut into chunks.
Spray a large non-stick skillet with cooking spray and heat over medium heat. Add a tortilla and cook both sides until they're spotty brown. Combine the shredded Monterey Jack and cheddar, then add 1/4th of the cheese and 1/4th of the chicken chunks. Fold the tortilla in half and cook until the cheese melts. Remove from the skillet and repeat with the remaining tortillas and chicken. Cut each quesadilla into triangles.
Combine the avocado, corn, tomatoes, and onion in a bowl, then toss with the salt and pepper. Add olive oil and lime juice, tossing well to coat. Season to taste and serve on top of the quesadillas.
It ended up being a happy accident, though, because these Chicken Quesadillas with Avocado Corn Salsa were born. And that's a very, very good thing.
Really all I did was keep the recipe the same but instead of making it into a chopped salad I took the grilled chicken and added it to the quesadillas. Then I turned the rest of the salad ingredients into a corn, tomato and avocado salsa reminiscent of this grilled corn salad we all absolutely love. Win-win all around.
Once again Baby Girl asked if I'd photograph her plate, too. This kid, she kills me with the cuteness. Also note, see how she has one triangle of quesadilla on her plate? Yeah, she ended up loving these so much she ate one of my triangles and one of SP's for a total of 3 pieces (aka almost an entire quesadilla to herself). Must be a growth spurt coming on...
Chicken Quesadillas with Avocado Corn Salsa
Inspired by How Sweet It Is
2 tablespoons olive oil
2 limes, juiced
2 garlic cloves, minced
2 teaspoons ground cumin
2 teaspoons smoked paprika
1/2 teaspoon chili powder
1/4 teaspoon salt
1/4 teaspoon pepper
2 chicken breasts, cut in half lengthwise and trimmed of fat
cooking spray
4 burrito-size tortillas
4 ounces Monterey Jack cheese, grated
4 ounces cheddar cheese, grated
1 avocado, peeled and diced
1 cup sweet corn
1/2 pint grape tomatoes, quartered
1/4 red onion, diced
1/4 teaspoon salt
1/4 teaspoon pepper
1 tablespoon olive olive
1 lime, juiced
The night before (or a few hours before) combine olive oil, lime juice, garlic, cumin, paprika, chili powder, salt and pepper in a large plastic food storage bag. Add chicken and toss to coat evenly. Marinate in the fridge for 2-24 hours.
Heat a grill pan over medium-heat heat. Add chicken and cook for 5 minutes, then flip and cook for another 4 minutes. Remove to a plate and let cool for a few minutes, then cut into chunks.
Spray a large non-stick skillet with cooking spray and heat over medium heat. Add a tortilla and cook both sides until they're spotty brown. Combine the shredded Monterey Jack and cheddar, then add 1/4th of the cheese and 1/4th of the chicken chunks. Fold the tortilla in half and cook until the cheese melts. Remove from the skillet and repeat with the remaining tortillas and chicken. Cut each quesadilla into triangles.
Combine the avocado, corn, tomatoes, and onion in a bowl, then toss with the salt and pepper. Add olive oil and lime juice, tossing well to coat. Season to taste and serve on top of the quesadillas.
Labels:
chicken,
corn,
easy weeknight meal,
quesadillas,
toddler-approved
Monday, June 24, 2013
Asparagus, Goat Cheese and Lemon Pasta
I love pasta. SP loves pasta. Baby Girl loves pasta. That said, we eat pasta at least once a week in this house. I'm always on the lookout for new recipes and after seeing various versions of this Asparagus, Goat Cheese and Lemon Pasta I decided to go to the source and see what we were missing.
This came together so quickly Baby Girl and I were scrambling the finish mixing the cheese and seasonings before the pasta and asparagus finished cooking. It took some tweaking to get the seasonings right - this needed a generous amount of salt and pepper to bring out all the flavors, plus a healthy dose of lemon juice. The pasta water really helped thin out the sauce and make it extra creamy. I ended up adding a full 8-oz log of goat cheese because, well, I'd already opened the package. I also added a fried egg to my lunch the next day - heavenly. So delicious and creamy, with a nice bite from the goat cheese and zing of the lemon juice. It tickles me that Baby Girl enjoys things like goat cheese - she was helping me crumble the cheese and then licked her fingers to get every last bit off.
A note about the above photo - Baby Girl has seen me take pictures of my food since I started cooking and blogging again after she was born. During the months when I'm able to take advantage of natural light I go out on the porch to take my photos. The night we made this, Baby Girl insisted on bringing her own bowl outside so I could photograph her portion. My heart melted.
What a perfect, easy weeknight meal. I've seen people sub spinach for the asparagus but I'm a sucker for those spears.
Asparagus, Goat Cheese and Lemon Pasta
As seen on Smitten Kitchen, adapted from Bon Appetit
1 pound spiral-shaped pasta
1 pound slender asparagus spears, trimmed, cut into 1- to 1 1/2-inch pieces
1/4 cup olive oil
1 tablespoon finely grated lemon zest
2 teaspoons chopped fresh tarragon, thyme or basil) plus more for garnish
1 8-ounce log soft fresh goat cheese (the pre-crumbled stuff will not melt as well)
Salt and pepper
Fresh lemon juice to taste
Cook the pasta in a large pot of well-salted water. Three minutes before the pasta is done (according to the package directions) add the asparagus and cook until firm-tender. Drain both pasta and asparagus together, reserving one cup of pasta water.
Meanwhile, combine the olive oil, lemon zest, thyme (or herb of choice) and goat cheese in a large bowl, breaking up the goat cheese as you put it in. Add the hot pasta and asparagus to the bowl, along with some of the pasta water. Toss until combined, adding more pasta water if needed. Taste and season generously with salt, pepper, and lemon juice. Keep adjusting the seasonings, if needed. Serve hot or room temperature.
This came together so quickly Baby Girl and I were scrambling the finish mixing the cheese and seasonings before the pasta and asparagus finished cooking. It took some tweaking to get the seasonings right - this needed a generous amount of salt and pepper to bring out all the flavors, plus a healthy dose of lemon juice. The pasta water really helped thin out the sauce and make it extra creamy. I ended up adding a full 8-oz log of goat cheese because, well, I'd already opened the package. I also added a fried egg to my lunch the next day - heavenly. So delicious and creamy, with a nice bite from the goat cheese and zing of the lemon juice. It tickles me that Baby Girl enjoys things like goat cheese - she was helping me crumble the cheese and then licked her fingers to get every last bit off.
A note about the above photo - Baby Girl has seen me take pictures of my food since I started cooking and blogging again after she was born. During the months when I'm able to take advantage of natural light I go out on the porch to take my photos. The night we made this, Baby Girl insisted on bringing her own bowl outside so I could photograph her portion. My heart melted.
What a perfect, easy weeknight meal. I've seen people sub spinach for the asparagus but I'm a sucker for those spears.
Asparagus, Goat Cheese and Lemon Pasta
As seen on Smitten Kitchen, adapted from Bon Appetit
1 pound spiral-shaped pasta
1 pound slender asparagus spears, trimmed, cut into 1- to 1 1/2-inch pieces
1/4 cup olive oil
1 tablespoon finely grated lemon zest
2 teaspoons chopped fresh tarragon, thyme or basil) plus more for garnish
1 8-ounce log soft fresh goat cheese (the pre-crumbled stuff will not melt as well)
Salt and pepper
Fresh lemon juice to taste
Cook the pasta in a large pot of well-salted water. Three minutes before the pasta is done (according to the package directions) add the asparagus and cook until firm-tender. Drain both pasta and asparagus together, reserving one cup of pasta water.
Meanwhile, combine the olive oil, lemon zest, thyme (or herb of choice) and goat cheese in a large bowl, breaking up the goat cheese as you put it in. Add the hot pasta and asparagus to the bowl, along with some of the pasta water. Toss until combined, adding more pasta water if needed. Taste and season generously with salt, pepper, and lemon juice. Keep adjusting the seasonings, if needed. Serve hot or room temperature.
Labels:
asparagus,
easy weeknight meal,
goat cheese,
pasta,
toddler-approved,
vegetarian
Friday, June 21, 2013
Recipe Swap: Champagne Chicken Pasta
I didn't get carded when I bought the champagne for this recipe. I have to admit, I was a little bummed. Now granted, I'm more than a decade past being underage...but I digress.
When I got Caroline's blog for the last Blogger's Choice swap this Champagne Chicken Pasta was one of the finalists in the long list of recipes I wanted to make. I was really excited that she submitted it for the Cooking/Baking with Alcohol swap so I had an excuse to make it.
We all enjoyed this. I never think to use angel hair but it's one long pasta SP actually likes. The man doesn't enjoy spaghetti, I think he's crazy. The sauce is light and flavorful and it all comes together very quickly. Next time I'll add a bit more cheese to the chicken because I couldn't really taste it. I also subbed thyme for the tarragon because SP isn't a big fan of tarragon.
Initially I was worried about the price of the champagne, but the nice man at the liquor store steered me toward an inexpensive bottle. It worked well in the recipe but wasn't exactly drinkable, unfortunately. I'd look for some mid-range next time because you only need 1/2 - 1 cup so there's a lot leftover to drink and it was a shame to waste it. SP also thought a regular white wine would work well, although the name of the dish is champagne chicken pasta so I feel like champagne is kinda, sorta necessary.
I didn't realize this would only make enough for three portions plus some for Baby Girl, so double it if you want more leftovers.
Champagne Chicken Pasta
As seen on The Barbee Housewife
Serves 2-3
8 oz. pasta, angel hair or fettuccine
1/4 cup plus 2 tablespoons flour
1/2 teaspoon salt
1/4 teaspoon pepper
1/4 cup Parmesan cheese, grated
2 chicken breasts, pounded to 1/2 inch thickness
2 tablespoons olive oil
2 tablespoons butter
1/2 lb. mushrooms, quartered
1/2 cup dry champagne
3/4 cup half and half
1/4 teaspoon red pepper flakes
1/4 teaspoon chopped fresh thyme
Cook the pasta according to package directions. Drain and set aside.
While the pasta is cooking, mix together the 1/4 cup flour, salt, pepper, and Parmesan in a shallow bowl or pie plate. Dredge the chicken in the mixture, until well coated.
Heat the olive oil and butter in a large non-stick skillet over medium-high heat. Brown the chicken on both sides, until cooked thoroughly. Remove the chicken to a plate and cover loosely to keep warm.
Add the mushrooms and 2 tablespoons of flour to the pan, sauteing for about a minute. Add the champagne and scrape up any browned bits. Reduce the sauce by half, then add the half and half, red pepper flakes, and thyme. Season to taste with salt and pepper.
Toss the pasta with the sauce. Slice the chicken into strips and serve over the pasta.
When I got Caroline's blog for the last Blogger's Choice swap this Champagne Chicken Pasta was one of the finalists in the long list of recipes I wanted to make. I was really excited that she submitted it for the Cooking/Baking with Alcohol swap so I had an excuse to make it.
We all enjoyed this. I never think to use angel hair but it's one long pasta SP actually likes. The man doesn't enjoy spaghetti, I think he's crazy. The sauce is light and flavorful and it all comes together very quickly. Next time I'll add a bit more cheese to the chicken because I couldn't really taste it. I also subbed thyme for the tarragon because SP isn't a big fan of tarragon.
Initially I was worried about the price of the champagne, but the nice man at the liquor store steered me toward an inexpensive bottle. It worked well in the recipe but wasn't exactly drinkable, unfortunately. I'd look for some mid-range next time because you only need 1/2 - 1 cup so there's a lot leftover to drink and it was a shame to waste it. SP also thought a regular white wine would work well, although the name of the dish is champagne chicken pasta so I feel like champagne is kinda, sorta necessary.
I didn't realize this would only make enough for three portions plus some for Baby Girl, so double it if you want more leftovers.
Champagne Chicken Pasta
As seen on The Barbee Housewife
Serves 2-3
8 oz. pasta, angel hair or fettuccine
1/4 cup plus 2 tablespoons flour
1/2 teaspoon salt
1/4 teaspoon pepper
1/4 cup Parmesan cheese, grated
2 chicken breasts, pounded to 1/2 inch thickness
2 tablespoons olive oil
2 tablespoons butter
1/2 lb. mushrooms, quartered
1/2 cup dry champagne
3/4 cup half and half
1/4 teaspoon red pepper flakes
1/4 teaspoon chopped fresh thyme
Cook the pasta according to package directions. Drain and set aside.
While the pasta is cooking, mix together the 1/4 cup flour, salt, pepper, and Parmesan in a shallow bowl or pie plate. Dredge the chicken in the mixture, until well coated.
Heat the olive oil and butter in a large non-stick skillet over medium-high heat. Brown the chicken on both sides, until cooked thoroughly. Remove the chicken to a plate and cover loosely to keep warm.
Add the mushrooms and 2 tablespoons of flour to the pan, sauteing for about a minute. Add the champagne and scrape up any browned bits. Reduce the sauce by half, then add the half and half, red pepper flakes, and thyme. Season to taste with salt and pepper.
Toss the pasta with the sauce. Slice the chicken into strips and serve over the pasta.
Labels:
alcohol,
chicken,
mushrooms,
pasta,
recipe swap,
toddler-approved
Wednesday, June 19, 2013
Recipe Redo - Taco Rice
I first made this Taco Rice in January 2012 and felt it needed a bit of work. The original recipe didn't have any sauce and that's a big no-no in this house. I was craving tacos but wanted something slightly different. Time for a recipe redo!
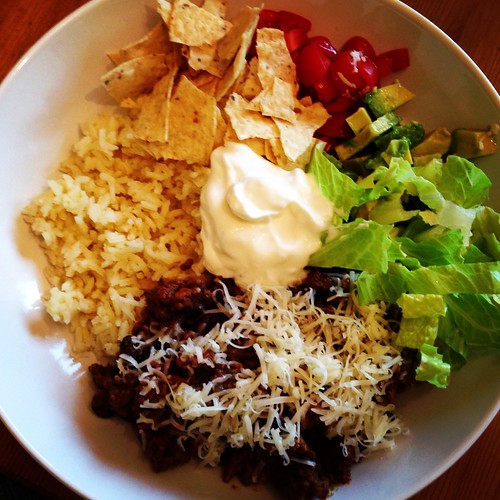
The result: delicious. This was perfect. I had barely finished eating and was already thinking about when I could make it again. The tweaks I made - adding tomato paste, salsa and sour cream to the beef mixture - were just what we wanted. I also decided to add some frozen corn, mainly because I'm on a corn kick lately and thought the little kernels would be nice in the dish. I also added crushed tortilla chips for a bit of crunch and texture and they provided the perfect, salty accompaniment.
Something to note - there's no oil in this dish. I've been saying it a lot lately but my friend Melissa has worked hard to cut oil out of most of her recipes. Ground beef is perfect for this method since the beef has plenty of fat already in it. If you add the onion and garlic to the pan at the same time as the beef they all cook together beautifully (and then there's no need to drain off the fat later). I've loved cutting unnecessary calories from our diet.
UPDATE April 2014 - new picture I posted on Instagram:
Taco Rice
Modified from Cassie Craves
1 onion, chopped
1 clove minced garlic
1 pound ground beef
2 teaspoons cumin
2 teaspoons chili powder
Salt and pepper
2 tablespoons tomato paste
1/2 cup salsa
1/4 cup sour cream,
4 cups steamed rice
Toppings: shredded lettuce, chopped tomatoes, crushed tortilla chips and shredded cheddar
Heat a saute pan over medium heat. Add the onion, garlic and ground beef and saute until the onions are soft and the beef is cooked through, breaking the beef into small chunks as it cooks. Add the cumin, chili powder, salt and pepper and tomato paste. Let this simmer for about 5 minutes. Combine salsa and sour cream and stir into the ground beef.
Spread 1/2 to 1 cup of the steamed rice on each plate. Top with the seasoned beef. Top with shredded lettuce, tomatoes, crushed chips and cheese.
The result: delicious. This was perfect. I had barely finished eating and was already thinking about when I could make it again. The tweaks I made - adding tomato paste, salsa and sour cream to the beef mixture - were just what we wanted. I also decided to add some frozen corn, mainly because I'm on a corn kick lately and thought the little kernels would be nice in the dish. I also added crushed tortilla chips for a bit of crunch and texture and they provided the perfect, salty accompaniment.
Something to note - there's no oil in this dish. I've been saying it a lot lately but my friend Melissa has worked hard to cut oil out of most of her recipes. Ground beef is perfect for this method since the beef has plenty of fat already in it. If you add the onion and garlic to the pan at the same time as the beef they all cook together beautifully (and then there's no need to drain off the fat later). I've loved cutting unnecessary calories from our diet.
UPDATE April 2014 - new picture I posted on Instagram:
Taco Rice
Modified from Cassie Craves
1 onion, chopped
1 clove minced garlic
1 pound ground beef
2 teaspoons cumin
2 teaspoons chili powder
Salt and pepper
2 tablespoons tomato paste
1/2 cup salsa
1/4 cup sour cream,
4 cups steamed rice
Toppings: shredded lettuce, chopped tomatoes, crushed tortilla chips and shredded cheddar
Heat a saute pan over medium heat. Add the onion, garlic and ground beef and saute until the onions are soft and the beef is cooked through, breaking the beef into small chunks as it cooks. Add the cumin, chili powder, salt and pepper and tomato paste. Let this simmer for about 5 minutes. Combine salsa and sour cream and stir into the ground beef.
Spread 1/2 to 1 cup of the steamed rice on each plate. Top with the seasoned beef. Top with shredded lettuce, tomatoes, crushed chips and cheese.
Labels:
beef,
Mexican,
recipe redo,
rice,
tacos,
toddler-approved
Monday, June 17, 2013
Blue Cheese Chicken Salad
I love chicken salad, especially when it's full of fruit and veggies. My friend Emily recently mentioned making a blue cheese chicken salad for dinner and I immediately asked her for details so I could recreate it at home. She gave me a list of ingredients and I improvised based on my standard chicken salad method.
This was so amazing. I never would have thought to add blue cheese to chicken salad but it totally worked. It was just subtle enough to add that distinctive blue cheese flavor without overwhelming the other ingredients. Baby Girl ate her whole sandwich and said it was delicious. I loved the crunch of the apple and celery and the sweetness from the red grapes mixed with the bite of the red onion and blue cheese. The lemon juice brightened up the whole sandwich. If Baby Girl wasn't allergic to nuts I would have added roasted almonds or walnuts, but I didn't miss them.
Blue Cheese Chicken Salad
Inspired by Emily
2 chicken breasts, roasted*
1 Granny Smith apple, cored and diced
3/4 cup red grapes, quartered (or as much as you want)
2 tablespoons minced red onion
1 rib celery, diced
Roasted almonds or walnuts (optional)
1/4 cup mayo
2 tablespoons sour cream
Freshly squeezed lemon juice
Blue cheese crumbles
To serve:
Toasted kaiser rolls or mixed greens
Sliced tomato
Romaine lettuce leaves
Dice the chicken and add to a large bowl. Add the apple, grapes, red onion, celery, and nuts (if using). Mix together, then add mayo and sour cream. Add lemon juice to taste and as much blue cheese as you'd like. Stir together, taste and adjust seasonings as needed.
Serve on toasted kaiser rolls with lettuce and tomato or on top of mixed greens.
*Preheat the oven to 375 degrees. Cover a baking sheet with tin foil then arrange chicken breasts in a single layer in the center. Sprinkle with salt and pepper. Fold the aluminum foil over the chicken breasts, and enclose them to form a packet. Bake the chicken (on the baking sheet) 35-45 minutes, or until it is cooked through.
This was so amazing. I never would have thought to add blue cheese to chicken salad but it totally worked. It was just subtle enough to add that distinctive blue cheese flavor without overwhelming the other ingredients. Baby Girl ate her whole sandwich and said it was delicious. I loved the crunch of the apple and celery and the sweetness from the red grapes mixed with the bite of the red onion and blue cheese. The lemon juice brightened up the whole sandwich. If Baby Girl wasn't allergic to nuts I would have added roasted almonds or walnuts, but I didn't miss them.
Blue Cheese Chicken Salad
Inspired by Emily
2 chicken breasts, roasted*
1 Granny Smith apple, cored and diced
3/4 cup red grapes, quartered (or as much as you want)
2 tablespoons minced red onion
1 rib celery, diced
Roasted almonds or walnuts (optional)
1/4 cup mayo
2 tablespoons sour cream
Freshly squeezed lemon juice
Blue cheese crumbles
To serve:
Toasted kaiser rolls or mixed greens
Sliced tomato
Romaine lettuce leaves
Dice the chicken and add to a large bowl. Add the apple, grapes, red onion, celery, and nuts (if using). Mix together, then add mayo and sour cream. Add lemon juice to taste and as much blue cheese as you'd like. Stir together, taste and adjust seasonings as needed.
Serve on toasted kaiser rolls with lettuce and tomato or on top of mixed greens.
*Preheat the oven to 375 degrees. Cover a baking sheet with tin foil then arrange chicken breasts in a single layer in the center. Sprinkle with salt and pepper. Fold the aluminum foil over the chicken breasts, and enclose them to form a packet. Bake the chicken (on the baking sheet) 35-45 minutes, or until it is cooked through.
Labels:
chicken salad,
sandwiches,
toddler-approved
Friday, June 14, 2013
Chili Cornbread Skillet
My friend Melissa has been raving about this Chili Cornbread Skillet for months. She makes it every single week for dinner. I admit, I'm not that into chili. It's fine, it's just not something I crave, but after seeing it week after week on her tumblr page I decided I needed to see what all the fuss was about. Plus SP loves chili and Baby Girl could probably eat a whole pan of cornbread herself so this seemed like a win all around.
This is a great weeknight dinner - it takes almost no time to prepare and tastes great. I found the chili a bit salty, so I cut back on the salt in the recipe below and I think next time I'll leave out the green pepper because they just don't agree with me. SP wanted the chili a bit spicier but I always err on the mild side since Baby Girl eats what we eat.
We all enjoyed this and the leftovers were even more delicious. I had half an avocado in the fridge so I diced it up to eat with my leftovers. I think sour cream, maybe even some cheddar cheese, would be great as well - really whatever toppings you like on your chili would be great with this. Thanks for the push to make this, Melissa!
Chili Cornbread Skillet
As seen on Alosha's Kitchen, from Very Culinary
1 pound ground beef
1 medium sweet onion, finely diced
1 green bell pepper, finely diced
3 large cloves garlic, minced
1/2 tablespoon cumin
1/2 tablespoon oregano
1/2 tablespoon chile powder
1/2 tablespoon smoked paprika
1 teaspoon kosher salt
1 (10-ounce) can condensed tomato soup
1 15-ounce can kidney beans, rinsed and drained
1/4 cup salsa
2 tablespoons ketchup
1 package (8.5 ounce) Jiffy corn muffin mix
1 egg
1/3 cup milk
Toppings: grated cheddar, sour cream, diced avocado, etc.
Preheat oven to 400 degrees.
Heat a 10 or 12-inch ovenproof skillet over medium-high heat. Add the beef, onion, bell pepper, garlic, spices and salt to the pan. Cook, breaking up the chunks of beef with a wooden spoon, stirring occasionally, until the meat is no longer pink and the vegetables are softened, about 5 to 6 minutes. Add the beans, soup, salsa, and ketchup and stir until thoroughly combined. Remove from heat.
In a medium bowl, whisk together the corn muffin mix, egg, and milk. Let sit for 2 minutes. Spoon the corn muffin mix over the beef.
Bake, uncovered, for 15-20 minutes until cornbread is golden brown. Remove from oven and let sit 5 minutes, then break into cornbread top to serve. Top with cheese, sour cream, etc., if desired.
This is a great weeknight dinner - it takes almost no time to prepare and tastes great. I found the chili a bit salty, so I cut back on the salt in the recipe below and I think next time I'll leave out the green pepper because they just don't agree with me. SP wanted the chili a bit spicier but I always err on the mild side since Baby Girl eats what we eat.
We all enjoyed this and the leftovers were even more delicious. I had half an avocado in the fridge so I diced it up to eat with my leftovers. I think sour cream, maybe even some cheddar cheese, would be great as well - really whatever toppings you like on your chili would be great with this. Thanks for the push to make this, Melissa!
Chili Cornbread Skillet
As seen on Alosha's Kitchen, from Very Culinary
1 pound ground beef
1 medium sweet onion, finely diced
1 green bell pepper, finely diced
3 large cloves garlic, minced
1/2 tablespoon cumin
1/2 tablespoon oregano
1/2 tablespoon chile powder
1/2 tablespoon smoked paprika
1 teaspoon kosher salt
1 (10-ounce) can condensed tomato soup
1 15-ounce can kidney beans, rinsed and drained
1/4 cup salsa
2 tablespoons ketchup
1 package (8.5 ounce) Jiffy corn muffin mix
1 egg
1/3 cup milk
Toppings: grated cheddar, sour cream, diced avocado, etc.
Preheat oven to 400 degrees.
Heat a 10 or 12-inch ovenproof skillet over medium-high heat. Add the beef, onion, bell pepper, garlic, spices and salt to the pan. Cook, breaking up the chunks of beef with a wooden spoon, stirring occasionally, until the meat is no longer pink and the vegetables are softened, about 5 to 6 minutes. Add the beans, soup, salsa, and ketchup and stir until thoroughly combined. Remove from heat.
In a medium bowl, whisk together the corn muffin mix, egg, and milk. Let sit for 2 minutes. Spoon the corn muffin mix over the beef.
Bake, uncovered, for 15-20 minutes until cornbread is golden brown. Remove from oven and let sit 5 minutes, then break into cornbread top to serve. Top with cheese, sour cream, etc., if desired.
Labels:
chili,
cornbread,
easy weeknight meal,
one-pot,
toddler-approved
Wednesday, June 12, 2013
Pasta with Lemony Chicken and Asparagus
When you have a food blog you tend to be the one who does most of the cooking in your house. This works well for us - I work from home now but even when I was commuting to an office I was always home before SP. He is a fantastic cook, his first job was working in a restaurant, but his schedule has made it difficult for him to get in the kitchen these last few years. Recently he asked me to make it possible for him to cook one meal on a weekend (usually Sunday). He spent a lot of time looking through my back issues of Cook's Country before choosing this recipe for Pasta with Lemony Chicken and Asparagus.
As agreed, I stayed out of the kitchen and let him do his thing. Baby Girl helped trim the asparagus (she loves snapping off the woody ends) and I consulted when he had any questions but this meal was entirely his. And it was fantastic, light and flavorful with the brightness of the lemon and the kick from the garlic. The asparagus were perfect - not to thin and not to thick, cooked until tender but not mushy. The chicken was nicely browned and we both loved the campanelle pasta even if it was almost twice the price of our usual store brand. I can't say enough good things about this meal. Even the leftovers were awesome.
The original recipe calls for 4 chicken breasts (1 1/2 lbs) and only half a pound of pasta. I convinced SP to cut it down to 3 chicken breasts and it was still a lot of chicken. I'm modifying the recipe to only 2 chicken breasts. I also think a bunch of asparagus is less than a pound (we didn't weigh it) so you might want to buy two bunches - you can never have too much asparagus.
I can't wait to see what he'll make next!
Pasta with Lemony Chicken and Asparagus
Cook's Country Magazine April/May 2008
8 ounces campanelle pasta
Salt and pepper
2 boneless, skinless chicken breasts, cut into 1/4"-thick slices
4 tablespoons unsalted butter
1 pound asparagus, trimmed and cut into 1" pieces
8 garlic cloves, minced
1/4 fresh squeezed lemon juice
1 cup grated Parmesan cheese
1/4 cup chopped fresh parsley
Bring water to a boil in a large pot. Add 1 tablespoon salt and pasta to boiling water and cook according to package directions. Drain and reserve 1/2 cup of the pasta cooking water. Return pasta to the pot and set aside.
Pat chicken dry with paper towels and season with salt and pepper. Melt 1 tablespoon butter in a large non-stick skillet over medium-high heat. Cook half the chicken until golden brown, about 1-2 minutes per side. Remove to a plate and repeat with another tablespoon of butter and the remaining chicken.
Add 1 tablespoon of butter to the now-empty pan and add the asparagus. Cook until tender, about 5 minutes, then add the garlic and cook until fragrant, about 30 seconds.
Add the remaining 1 tablespoon of butter, chicken, asparagus, lemon juice, cheese and parsley to the pot with the pasta and toss to combine, adding the 1/2 cup of pasta cooking water as needed to make a sauce. Taste and season with salt and pepper, if needed, then serve.
As agreed, I stayed out of the kitchen and let him do his thing. Baby Girl helped trim the asparagus (she loves snapping off the woody ends) and I consulted when he had any questions but this meal was entirely his. And it was fantastic, light and flavorful with the brightness of the lemon and the kick from the garlic. The asparagus were perfect - not to thin and not to thick, cooked until tender but not mushy. The chicken was nicely browned and we both loved the campanelle pasta even if it was almost twice the price of our usual store brand. I can't say enough good things about this meal. Even the leftovers were awesome.
The original recipe calls for 4 chicken breasts (1 1/2 lbs) and only half a pound of pasta. I convinced SP to cut it down to 3 chicken breasts and it was still a lot of chicken. I'm modifying the recipe to only 2 chicken breasts. I also think a bunch of asparagus is less than a pound (we didn't weigh it) so you might want to buy two bunches - you can never have too much asparagus.
I can't wait to see what he'll make next!
Pasta with Lemony Chicken and Asparagus
Cook's Country Magazine April/May 2008
8 ounces campanelle pasta
Salt and pepper
2 boneless, skinless chicken breasts, cut into 1/4"-thick slices
4 tablespoons unsalted butter
1 pound asparagus, trimmed and cut into 1" pieces
8 garlic cloves, minced
1/4 fresh squeezed lemon juice
1 cup grated Parmesan cheese
1/4 cup chopped fresh parsley
Bring water to a boil in a large pot. Add 1 tablespoon salt and pasta to boiling water and cook according to package directions. Drain and reserve 1/2 cup of the pasta cooking water. Return pasta to the pot and set aside.
Pat chicken dry with paper towels and season with salt and pepper. Melt 1 tablespoon butter in a large non-stick skillet over medium-high heat. Cook half the chicken until golden brown, about 1-2 minutes per side. Remove to a plate and repeat with another tablespoon of butter and the remaining chicken.
Add 1 tablespoon of butter to the now-empty pan and add the asparagus. Cook until tender, about 5 minutes, then add the garlic and cook until fragrant, about 30 seconds.
Add the remaining 1 tablespoon of butter, chicken, asparagus, lemon juice, cheese and parsley to the pot with the pasta and toss to combine, adding the 1/2 cup of pasta cooking water as needed to make a sauce. Taste and season with salt and pepper, if needed, then serve.
Labels:
asparagus,
chicken,
cook's country,
pasta,
toddler-approved
Friday, June 07, 2013
Recipe Swap: Sopapilla Cheesecake Bars
The theme for this recipe swap was Mexican food and I lucked out with the only dessert recipe submitted, these incredibly addicting Sopapilla Cheesecake Bars. We were heading to my parent's house for Memorial Day and since we didn't have anything planned for dessert I figured I'd whip these up and bring them over for everyone to share.
Holy cow. These are incredibly simple but so fantastic. Anything with cream cheese in it is an automatic plus in my book but add in flaky crescent roll dough and cinnamon sugar and you've got a real winner. Like Nichole, this was my first experience with sopapilla and I'm sad that I've missed out all these years.
I have to give thanks for my friend Cassie for alerting me to an awesome new product, the Pillsbury Crescent Recipe Creations Seamless Dough Sheet. After failing to pinch together the perforated dough for these chicken suiza pockets, Cassie told me Pillsbury got wise to cooks using their crescent rolls for other dishes and came out with seamless dough. Brilliant. And no, I'm not being paid to endorse this product, I'm just really thankful I didn't have to fight with the dough when making these bars.
I admit to being a little sad about sharing these but that was a good decision for our waistlines. I heated my leftover pieces in the microwave for 30 seconds (my microwave is old and busted so things take longer to cook), and I definitely prefer it warm. SP and Baby Girl liked them cold. Whichever way you prefer, go out and buy the ingredients for these so you can make them ASAP. You'll thank me.
Sopapilla Cheesecake Bars
As seen on The Cookaholic Wife, from Pillsbury
Cooking spray
2 packages Pillsbury Crescent Recipe Creations Seamless Dough Sheet
2 bricks cream cheese, at room temperature
1 1/4 cups sugar, divided
1 teaspoon vanilla
1 stick butter, melted
1/2 tablespoon ground cinnamon
Preheat the oven to 350. Spray a 9x13 baking dish with cooking spray. Press one sheet of the crescent dough into the prepared baking dish.
Combine the cream cheese, 1 cup of the sugar and vanilla in the bowl of a stand mixer and beat on medium speed until light and fluffy. Alternatively, you can beat the ingredients using a hand mixer.
Spread the cream cheese mixture evenly over the crescent dough and then top with the other sheet of crescent dough. Pour the melted butter over the top of the dough.
Stir together the remaining 1/4 cup of sugar and the cinnamon. Sprinkle over the melted butter.
Bake for 30 minutes then let cool to room temperature. Refrigerate for at least 1 hour and cut into bars. Serve cold or warmed in the microwave for 5-10 seconds.
Loading InLinkz ...
Holy cow. These are incredibly simple but so fantastic. Anything with cream cheese in it is an automatic plus in my book but add in flaky crescent roll dough and cinnamon sugar and you've got a real winner. Like Nichole, this was my first experience with sopapilla and I'm sad that I've missed out all these years.
I have to give thanks for my friend Cassie for alerting me to an awesome new product, the Pillsbury Crescent Recipe Creations Seamless Dough Sheet. After failing to pinch together the perforated dough for these chicken suiza pockets, Cassie told me Pillsbury got wise to cooks using their crescent rolls for other dishes and came out with seamless dough. Brilliant. And no, I'm not being paid to endorse this product, I'm just really thankful I didn't have to fight with the dough when making these bars.
I admit to being a little sad about sharing these but that was a good decision for our waistlines. I heated my leftover pieces in the microwave for 30 seconds (my microwave is old and busted so things take longer to cook), and I definitely prefer it warm. SP and Baby Girl liked them cold. Whichever way you prefer, go out and buy the ingredients for these so you can make them ASAP. You'll thank me.
Sopapilla Cheesecake Bars
As seen on The Cookaholic Wife, from Pillsbury
Cooking spray
2 packages Pillsbury Crescent Recipe Creations Seamless Dough Sheet
2 bricks cream cheese, at room temperature
1 1/4 cups sugar, divided
1 teaspoon vanilla
1 stick butter, melted
1/2 tablespoon ground cinnamon
Preheat the oven to 350. Spray a 9x13 baking dish with cooking spray. Press one sheet of the crescent dough into the prepared baking dish.
Combine the cream cheese, 1 cup of the sugar and vanilla in the bowl of a stand mixer and beat on medium speed until light and fluffy. Alternatively, you can beat the ingredients using a hand mixer.
Spread the cream cheese mixture evenly over the crescent dough and then top with the other sheet of crescent dough. Pour the melted butter over the top of the dough.
Stir together the remaining 1/4 cup of sugar and the cinnamon. Sprinkle over the melted butter.
Bake for 30 minutes then let cool to room temperature. Refrigerate for at least 1 hour and cut into bars. Serve cold or warmed in the microwave for 5-10 seconds.
Labels:
dessert,
Mexican,
recipe swap,
toddler-approved
Wednesday, June 05, 2013
Shake Shack Burgers
I knew I wanted to take advantage of the gorgeous weather and traditional start of the grilling season over Memorial Day weekend by grilling burgers, but I thought I'd kick it up a notch by finally trying these make-at-home Shake Shack Burgers.
The original recipe calls for cooking the burgers in a skillet, but I was set on grilling so that's what I did. When you look at the ingredients this is a very traditional burger that's elevated by the cooking method and the sauce. The sauce is what makes these burgers. I loved it, SP wasn't a fan. I will definitely be making these again and just letting SP dress his own burger. One of these days I hope to try an actual Shake Shack burger.
Shake Shack Burgers
As seen on What's Brewing in the Kitchen, originally from Serious Eats
1/4 cup mayonnaise
1/2 tablespoon ketchup
1/2 tablespoon yellow mustard
2 slices kosher dill pickle, finely chopped
1/8 teaspoon garlic powder
1/8 teaspoon paprika
Pinch cayenne pepper
1 1/4 pounds ground sirloin
Kosher salt and fresh-ground black pepper
1/2 teaspoon vegetable oil
1 tablespoon butter, softened
4 burger rolls, preferably potato
4 leaves lettuce, tops of leaves only
4 slices ripe tomatoes, center-cut preferred
4 slices yellow American cheese
Combine mayo, ketchup, mustard, chopped pickle, garlic powder, paprika and cayenne in a bowl. Set aside.
Form the ground beef into 4 patties. Sprinkle the top side heavily with salt and pepper.
Using a wadded up paper towel, rub vegetable oil on a large stainless steel skillet, then place over medium-high heat until just beginning to smoke.
Split the buns and spread the softened butter on the tops and bottoms of all 4 rolls. Place under the broiler or toast until golden brown. Once toasted, top with 1-2 teaspoons of sauce on each bun. On the top bun, add one leaf of lettuce and one slice of tomato. Set prepped buns on parchment paper.
When skillet is barely smoking, place beef patties in, seasoned side down. Using the back of a spatula, flatten the patties to 4 inches wide. You want the beef to stick and get a nice crust. Season the top side with salt and pepper. Cook until crisp crust forms, about three minutes. Flip burgers and top each with one slice American cheese. Cover and cook until cheese melts.
Transfer patties to bottoms of burger buns and cover with toppings and bun tops. Wrap in parchment paper and let sit for 1-2 minutes to let the juices from the burgers sink into the buns and the sauce to meld with the other toppings and cheese. Don't skip this step, it really makes a difference! Unwrap and serve immediately.
The original recipe calls for cooking the burgers in a skillet, but I was set on grilling so that's what I did. When you look at the ingredients this is a very traditional burger that's elevated by the cooking method and the sauce. The sauce is what makes these burgers. I loved it, SP wasn't a fan. I will definitely be making these again and just letting SP dress his own burger. One of these days I hope to try an actual Shake Shack burger.
Shake Shack Burgers
As seen on What's Brewing in the Kitchen, originally from Serious Eats
1/4 cup mayonnaise
1/2 tablespoon ketchup
1/2 tablespoon yellow mustard
2 slices kosher dill pickle, finely chopped
1/8 teaspoon garlic powder
1/8 teaspoon paprika
Pinch cayenne pepper
1 1/4 pounds ground sirloin
Kosher salt and fresh-ground black pepper
1/2 teaspoon vegetable oil
1 tablespoon butter, softened
4 burger rolls, preferably potato
4 leaves lettuce, tops of leaves only
4 slices ripe tomatoes, center-cut preferred
4 slices yellow American cheese
Combine mayo, ketchup, mustard, chopped pickle, garlic powder, paprika and cayenne in a bowl. Set aside.
Form the ground beef into 4 patties. Sprinkle the top side heavily with salt and pepper.
Using a wadded up paper towel, rub vegetable oil on a large stainless steel skillet, then place over medium-high heat until just beginning to smoke.
Split the buns and spread the softened butter on the tops and bottoms of all 4 rolls. Place under the broiler or toast until golden brown. Once toasted, top with 1-2 teaspoons of sauce on each bun. On the top bun, add one leaf of lettuce and one slice of tomato. Set prepped buns on parchment paper.
When skillet is barely smoking, place beef patties in, seasoned side down. Using the back of a spatula, flatten the patties to 4 inches wide. You want the beef to stick and get a nice crust. Season the top side with salt and pepper. Cook until crisp crust forms, about three minutes. Flip burgers and top each with one slice American cheese. Cover and cook until cheese melts.
Transfer patties to bottoms of burger buns and cover with toppings and bun tops. Wrap in parchment paper and let sit for 1-2 minutes to let the juices from the burgers sink into the buns and the sauce to meld with the other toppings and cheese. Don't skip this step, it really makes a difference! Unwrap and serve immediately.
Monday, June 03, 2013
Herb Grilled Chicken with Creamy Broccoli Orzo
I recently bought broccoli crowns that I ended up not cooking, so when Tara posted this recipe for Herb Grilled Chicken with Creamy Broccoli Orzo it sounded like a great way to use them up. It was also perfect because I've had half a box of orzo lurking in my pantry forever.
As I was reading over the recipe I realized two things - (1) a full pound of orzo would make way too many leftovers and (2) there's no mention of cooking the broccoli before adding it to the orzo so I decided to cook it with the tomatoes before tossing everything together.
The result was amazing. This was a great dish, light from the substitution of Greek yogurt for heavy cream and bright, fresh flavors. I don't know why I don't cook with orzo more often. Baby Girl absolutely loved this, practically shoveling the orzo and chicken into her mouth. A winner all around.
Herb Grilled Chicken with Creamy Broccoli Orzo
As seen on Smells Like Home
8 oz orzo (rice-shaped pasta)
Extra-virgin olive oil
1 1/2 lbs boneless skinless chicken breasts, cut in half lengthwise
2 teaspoons herbes de Provence
Kosher salt and freshly ground black pepper
2 tablespoon extra-virgin olive oil
1 large shallot, finely chopped
2 cloves garlic, minced
1/2 cup low-sodium chicken broth
1 (14.5 oz) can diced tomatoes, undrained
2 cups fresh broccoli florets
6 oz plain fat-free or low-fat Greek yogurt
1/4 cup heavy cream
3/4 cup freshly grated Parmesan plus extra for sprinkling
Kosher salt and freshly ground black pepper
Cook orzo according to package directions. Drain and set aside.
Drizzle the olive oil over the chicken and season with herbes de Provence, salt and pepper; set aside.
Heat a grill or grill pan over medium-high heat.
While the grill heats and right after you drop the orzo in the water, heat the 2 tablespoons of oil in a heavy large skillet over medium heat. Add the shallot and garlic, and saute until tender and fragrant, about 1 1/2 minutes. Add the broth and tomatoes and scrape any bits off the bottom of the pan. Simmer the tomatoes for 2 minutes, then add the broccoli. Cook until broccoli is tender, about 8-10 minutes, stirring occasionally.
Start grilling the chicken while the broccoli cooks, turning after 4-5 minutes and grilling for another 3-4 minutes. Remove the chicken from the grill and allow to rest for 5 minutes, then cut into slices.
Stir the yogurt and cream into the tomato and broccoli mixture. Add the drained orzo and toss to coat. Remove the skillet from the heat. Add the Parmesan and toss until the sauce coats the pasta thickly. Season the orzo with salt and pepper to taste. Sprinkle on extra Parmesan, if desired. Serve with the grilled chicken.
As I was reading over the recipe I realized two things - (1) a full pound of orzo would make way too many leftovers and (2) there's no mention of cooking the broccoli before adding it to the orzo so I decided to cook it with the tomatoes before tossing everything together.
The result was amazing. This was a great dish, light from the substitution of Greek yogurt for heavy cream and bright, fresh flavors. I don't know why I don't cook with orzo more often. Baby Girl absolutely loved this, practically shoveling the orzo and chicken into her mouth. A winner all around.
Herb Grilled Chicken with Creamy Broccoli Orzo
As seen on Smells Like Home
8 oz orzo (rice-shaped pasta)
Extra-virgin olive oil
1 1/2 lbs boneless skinless chicken breasts, cut in half lengthwise
2 teaspoons herbes de Provence
Kosher salt and freshly ground black pepper
2 tablespoon extra-virgin olive oil
1 large shallot, finely chopped
2 cloves garlic, minced
1/2 cup low-sodium chicken broth
1 (14.5 oz) can diced tomatoes, undrained
2 cups fresh broccoli florets
6 oz plain fat-free or low-fat Greek yogurt
1/4 cup heavy cream
3/4 cup freshly grated Parmesan plus extra for sprinkling
Kosher salt and freshly ground black pepper
Cook orzo according to package directions. Drain and set aside.
Drizzle the olive oil over the chicken and season with herbes de Provence, salt and pepper; set aside.
Heat a grill or grill pan over medium-high heat.
While the grill heats and right after you drop the orzo in the water, heat the 2 tablespoons of oil in a heavy large skillet over medium heat. Add the shallot and garlic, and saute until tender and fragrant, about 1 1/2 minutes. Add the broth and tomatoes and scrape any bits off the bottom of the pan. Simmer the tomatoes for 2 minutes, then add the broccoli. Cook until broccoli is tender, about 8-10 minutes, stirring occasionally.
Start grilling the chicken while the broccoli cooks, turning after 4-5 minutes and grilling for another 3-4 minutes. Remove the chicken from the grill and allow to rest for 5 minutes, then cut into slices.
Stir the yogurt and cream into the tomato and broccoli mixture. Add the drained orzo and toss to coat. Remove the skillet from the heat. Add the Parmesan and toss until the sauce coats the pasta thickly. Season the orzo with salt and pepper to taste. Sprinkle on extra Parmesan, if desired. Serve with the grilled chicken.
Labels:
chicken,
easy weeknight meal,
orzo,
toddler-approved
Friday, May 31, 2013
May Re-Make Recap
How is it the end of May already? I feel like I was just lamenting the cold temps in February and March and now here we are, almost to summer, temps in the 70s and 80s and the humidity quickly setting in. Crazy how time flies, isn't it?
I couldn't get enough of asparagus while it was in season (and, let's be honest, I'm going to continue to enjoy it throughout the summer). The linguine with Alfredo, asparagus, peas and poached egg was just as good the second time around. I love a poached egg on top of, well, just about anything really.
When I need a quick, tasty dinner these grilled chicken Caesar flatbreads are my go-to. In fact, after typing up this post I decide to add it to my weekly menu. So good.
I've made this antipasto salad countless time but recently I've become obsessed with chopped salads where all the ingredients are finely chopped. I turned this salad into a chopped salad and man, oh man was it good.
I've also been on a burger kick lately and in looking back through some of the burgers I've made I stumbled upon these ultimate sriracha burgers. The fact that I've gone more than two years without remaking these is a crime. Such a fantastic, flavorful burger.
Whenever I make burgers I have to make these oven fries. The method takes a little bit of time but the results are worth it.
For a healthy dish this bacon broccoli mac and cheese packs a lot of flavor. I always love adding veggies to my mac and cheese because I feel less guilty eating it.
I went all out for Cinco de Mayo this year, starting with these delectable citrus chicken fajitas. I marinate the chicken for a couple of hours in the citrus marinade and the flavors are incredible. You can really taste the lemon, lime and orange.
And what Mexican meal would be complete without these homemade refried beans. I cannot stress enough how good these are. And so, so simple. I implore anyone who buys canned refried beans to try this recipe. They even freeze beautifully (or so I hear, I never have leftovers).
I had to make the spicy pork and asparagus stir fry again while asparagus was in season and it never fails to amaze me how a recipe with such simple ingredients can be so flavorful. We all love this one. A lot.
I went a long time between making these Philly cheesesteak sloppy Joes for the first time and finally remaking them, but now that I have we've rediscovered our love for this simple sandwich. I've been serving mine with lettuce, tomato and raw onion, along with a red wine vinegar, oregano and mayo sauce, to be like a cheesesteak hoagie. Delicious.
After seeing this recipe for orange chicken on another blog recently I had to make it. And then I realized I already had. Ha! Just goes to show it had been too long. It's a little time consuming but that crispy coating bathed in the delicious, spicy orange sauce is so worth it.

These Sausage and Spinach Breakfast Sandwiches were so delicious I decided to try another combination - ham, asparagus and goat cheese. All I can say is wow. The flavors were perfect and I can't wait to try other variations soon.
We had quite a few overripe bananas sitting on the counter so SP suggested I make banana bread. I added chocolate chips and was reminded why I like this recipe so much. Good thing we have more bananas in the freezer.
I really struggle with side dishes, especially in the spring and summer when my old standby of mashed potatoes won't cut it. This chickpea salad with tomatoes, lemon, and herbs is flavorful and healthy and reminded me why I love beans so much.
We had a cookout with my parents to celebrate Memorial Day and I brought one of my favorite sides - beets with goat cheese and arugula. In looking back through my blog to find a post about this salad I realized I've never actually done one. If I'd known I would have taken a photo of the gorgeous platter of food. I bought both regular and golden beets and they were delicious. It's a good thing we eat this salad all summer.
I wanted to make an easy side dish for Memorial Day and since we've been eating a lot of potato salad lately I thought macaroni salad would be perfect. This recipe is so easy and simple.
Baby Girl is allergic to nuts so Chinese food is off-limits due to the risk of cross-contamination. It's a good thing I've got recipes like this beef and broccoli that taste almost as good as what we can get from our favorite local restaurant.
I needed a quick dinner since the girls from my bootcamp class have decided to get together to exercise once a week, so this California club blue cheese chopped salad was perfect. This time I subbed hard boiled eggs for the chicken, which I think was a great idea.
I couldn't get enough of asparagus while it was in season (and, let's be honest, I'm going to continue to enjoy it throughout the summer). The linguine with Alfredo, asparagus, peas and poached egg was just as good the second time around. I love a poached egg on top of, well, just about anything really.
When I need a quick, tasty dinner these grilled chicken Caesar flatbreads are my go-to. In fact, after typing up this post I decide to add it to my weekly menu. So good.
I've made this antipasto salad countless time but recently I've become obsessed with chopped salads where all the ingredients are finely chopped. I turned this salad into a chopped salad and man, oh man was it good.
I've also been on a burger kick lately and in looking back through some of the burgers I've made I stumbled upon these ultimate sriracha burgers. The fact that I've gone more than two years without remaking these is a crime. Such a fantastic, flavorful burger.
Whenever I make burgers I have to make these oven fries. The method takes a little bit of time but the results are worth it.
For a healthy dish this bacon broccoli mac and cheese packs a lot of flavor. I always love adding veggies to my mac and cheese because I feel less guilty eating it.
I went all out for Cinco de Mayo this year, starting with these delectable citrus chicken fajitas. I marinate the chicken for a couple of hours in the citrus marinade and the flavors are incredible. You can really taste the lemon, lime and orange.
And what Mexican meal would be complete without these homemade refried beans. I cannot stress enough how good these are. And so, so simple. I implore anyone who buys canned refried beans to try this recipe. They even freeze beautifully (or so I hear, I never have leftovers).
I had to make the spicy pork and asparagus stir fry again while asparagus was in season and it never fails to amaze me how a recipe with such simple ingredients can be so flavorful. We all love this one. A lot.
I went a long time between making these Philly cheesesteak sloppy Joes for the first time and finally remaking them, but now that I have we've rediscovered our love for this simple sandwich. I've been serving mine with lettuce, tomato and raw onion, along with a red wine vinegar, oregano and mayo sauce, to be like a cheesesteak hoagie. Delicious.
After seeing this recipe for orange chicken on another blog recently I had to make it. And then I realized I already had. Ha! Just goes to show it had been too long. It's a little time consuming but that crispy coating bathed in the delicious, spicy orange sauce is so worth it.
These Sausage and Spinach Breakfast Sandwiches were so delicious I decided to try another combination - ham, asparagus and goat cheese. All I can say is wow. The flavors were perfect and I can't wait to try other variations soon.
We had quite a few overripe bananas sitting on the counter so SP suggested I make banana bread. I added chocolate chips and was reminded why I like this recipe so much. Good thing we have more bananas in the freezer.
I really struggle with side dishes, especially in the spring and summer when my old standby of mashed potatoes won't cut it. This chickpea salad with tomatoes, lemon, and herbs is flavorful and healthy and reminded me why I love beans so much.
We had a cookout with my parents to celebrate Memorial Day and I brought one of my favorite sides - beets with goat cheese and arugula. In looking back through my blog to find a post about this salad I realized I've never actually done one. If I'd known I would have taken a photo of the gorgeous platter of food. I bought both regular and golden beets and they were delicious. It's a good thing we eat this salad all summer.
I wanted to make an easy side dish for Memorial Day and since we've been eating a lot of potato salad lately I thought macaroni salad would be perfect. This recipe is so easy and simple.
Baby Girl is allergic to nuts so Chinese food is off-limits due to the risk of cross-contamination. It's a good thing I've got recipes like this beef and broccoli that taste almost as good as what we can get from our favorite local restaurant.
I needed a quick dinner since the girls from my bootcamp class have decided to get together to exercise once a week, so this California club blue cheese chopped salad was perfect. This time I subbed hard boiled eggs for the chicken, which I think was a great idea.
Wednesday, May 29, 2013
BLT Spaghetti Carbonara
You all know how much I love carbonara. I've made quite a few versions over the years but this BLT Spaghetti Carbonara might just be my new favorite.
In this recipe, traditional carbonara is paired with tomatoes and spinach for an awesome twist. The tomatoes and spinach cut the richness of the carbonara (and we can pretend this is semi-healthy because of the veggies, right? Right). Baby Girl was a big fan, which is saying something because so far she hasn't been into spinach. Mixed with ingredients she loves - bacon, tomatoes and, of course, pasta - made it more palatable.
Even SP, not the biggest fan of carbonara, loved this one. He kept asking me what I did differently with the bacon and said it was perfectly seasoned, creamy and delicious. I have to agree. If you love carbonara, you've got to try this version.
BLT Spaghetti Carbonara
Modified from Nigella Lawson and Tide and Thyme
1 pound spaghetti
6 slices bacon, chopped into bite-size pieces
2 large onions, sliced
1 15-oz can diced tomatoes, drained
1 6 oz bag baby spinach leaves
1/4 cup dry white wine or vermouth
4 eggs
1 1/2 cups freshly grated Parmesan
1/4 cup heavy cream
Freshly ground black pepper
Freshly ground nutmeg
Cook pasta according to package directions. Drain and set aside.
In a large skillet that will fit the pasta later, cook the bacon until crispy but not crunchy. Add the onions and cook until softened and starting to caramelize, about 15 minutes. Add the tomatoes and spinach and cook for a few minutes to wilt the spinach, then add the white wine or vermouth and let it bubble so that, after a few minutes, you have a small amount of thick syrup left.
In a bowl, beat together the eggs, Parmesan, cream, pepper and nutmeg.
Add the pasta to the pan with the bacon, tossing well to coat with the syrupy sauce. Take the pan off the heat (remove from the stove completely, don't just turn off the burner) and add the eggs and cheese mixture, swiftly tossing everything with tongs to mix. Grind over some more pepper and grated cheese, if desired. Serve.
In this recipe, traditional carbonara is paired with tomatoes and spinach for an awesome twist. The tomatoes and spinach cut the richness of the carbonara (and we can pretend this is semi-healthy because of the veggies, right? Right). Baby Girl was a big fan, which is saying something because so far she hasn't been into spinach. Mixed with ingredients she loves - bacon, tomatoes and, of course, pasta - made it more palatable.
Even SP, not the biggest fan of carbonara, loved this one. He kept asking me what I did differently with the bacon and said it was perfectly seasoned, creamy and delicious. I have to agree. If you love carbonara, you've got to try this version.
BLT Spaghetti Carbonara
Modified from Nigella Lawson and Tide and Thyme
1 pound spaghetti
6 slices bacon, chopped into bite-size pieces
2 large onions, sliced
1 15-oz can diced tomatoes, drained
1 6 oz bag baby spinach leaves
1/4 cup dry white wine or vermouth
4 eggs
1 1/2 cups freshly grated Parmesan
1/4 cup heavy cream
Freshly ground black pepper
Freshly ground nutmeg
Cook pasta according to package directions. Drain and set aside.
In a large skillet that will fit the pasta later, cook the bacon until crispy but not crunchy. Add the onions and cook until softened and starting to caramelize, about 15 minutes. Add the tomatoes and spinach and cook for a few minutes to wilt the spinach, then add the white wine or vermouth and let it bubble so that, after a few minutes, you have a small amount of thick syrup left.
In a bowl, beat together the eggs, Parmesan, cream, pepper and nutmeg.
Add the pasta to the pan with the bacon, tossing well to coat with the syrupy sauce. Take the pan off the heat (remove from the stove completely, don't just turn off the burner) and add the eggs and cheese mixture, swiftly tossing everything with tongs to mix. Grind over some more pepper and grated cheese, if desired. Serve.
Monday, May 27, 2013
Pepperoni Pizza Sliders
If you've been reading this blog for awhile you know we usually make homemade pizza on Fridays. Now that the temps are climbing I'm less interested in heating the oven to 550 degrees but I still had a hankering for pizza flavors. Enter these Pepperoni Pizza Sliders, a knock-off of the Sweet Ham and Swiss sliders that have been so popular in the blogosphere lately.
These did not disappoint. They were incredibly easy to assemble and tasted great. Between the three of us we ate all 12 sliders. Whoops! Next time I'll serve them with a Caesar or antipasto salad on the side to make more of a complete meal.
Pepperoni Pizza Sliders
As seen on What's Cookin, Chicago?
For the sandwiches:
12 slider rolls
3/4 cup pizza sauce
24-36 slices pepperoni
1 cup shredded mozzarella cheese
For the topping:
4 tablespoons unsalted butter, melted
1/2 tablespoon onion powder
1/2 tablespoon garlic powder
1/2 tablespoon Italian seasoning
1/4 teaspoon Worcestershire sauce
Preheat the oven to 350 degrees.
Separate each roll, then spread a little pizza sauce onto both halves. Place 2-3 slices of pepperoni and a large piece of shredded cheese on each roll. Close rolls and place them close together in a 9x13" baking dish.
In a small bowl, whisk together all of the sauce ingredients. Brush evenly over all of the sandwiches, just enough to cover the tops; let sandwiches sit for 10 minutes to absorb the butter and seasonings. At this point, sandwiches can be assembled a day ahead, covered and kept in the fridge ready to bake.
Cover with foil and bake for 15 minutes or until cheese is melted. Uncover and cook for 5 additional minutes or until tops are slightly brown and crispy. Serve warm.
These did not disappoint. They were incredibly easy to assemble and tasted great. Between the three of us we ate all 12 sliders. Whoops! Next time I'll serve them with a Caesar or antipasto salad on the side to make more of a complete meal.
Pepperoni Pizza Sliders
As seen on What's Cookin, Chicago?
For the sandwiches:
12 slider rolls
3/4 cup pizza sauce
24-36 slices pepperoni
1 cup shredded mozzarella cheese
For the topping:
4 tablespoons unsalted butter, melted
1/2 tablespoon onion powder
1/2 tablespoon garlic powder
1/2 tablespoon Italian seasoning
1/4 teaspoon Worcestershire sauce
Preheat the oven to 350 degrees.
Separate each roll, then spread a little pizza sauce onto both halves. Place 2-3 slices of pepperoni and a large piece of shredded cheese on each roll. Close rolls and place them close together in a 9x13" baking dish.
In a small bowl, whisk together all of the sauce ingredients. Brush evenly over all of the sandwiches, just enough to cover the tops; let sandwiches sit for 10 minutes to absorb the butter and seasonings. At this point, sandwiches can be assembled a day ahead, covered and kept in the fridge ready to bake.
Cover with foil and bake for 15 minutes or until cheese is melted. Uncover and cook for 5 additional minutes or until tops are slightly brown and crispy. Serve warm.
Labels:
easy weeknight meal,
pizza,
toddler-approved
Friday, May 24, 2013
Recipe Swap: Cowgirl Chicken Sandwich
It's Blogger's Choice recipe swap time again and this round I was assigned Ali's blog, Sparks From the Kitchen. I spent a lot of time looking through her blog before deciding on this Cowgirl Chicken Sandwich. I've been on a serious sandwich kick lately, eating one at least once a week, and SP was just asking me to make something with BBQ sauce.
I wanted to add a few toppings to the sandwich so I mashed up an avocado with a little lemon juice, salt and pepper and added crispy Romaine and sliced tomato. Baby Girl loved this sandwich, making all kinds of happy noises while she was eating. SP and I liked it, too, although I forgot to add additional BBQ sauce to our sandwiches and we both thought they needed it for that extra kick. It's a simple sandwich that tastes great.
Cowgirl Chicken Sandwich
As seen on Sparks From the Kitchen
2 large chicken breasts, cut in half lengthwise
Salt and pepper
Olive oil
8 pieces cooked bacon
Cheddar cheese, sliced thin
BBQ sauce
Kaiser rolls
1 avocado
Juice of half a lemon
Romaine lettuce
Sliced tomato
Preheat grill pan or grill over medium high heat.
Season the chicken on both sides with salt and pepper and drizzle with olive oil. Add to the grill and cook 4-5 minutes on the first side, the flip and cook 3 minutes on the other side. Brush chicken with the BBQ sauce and then add the cheese. Turn off the heat and tent loosely with foil to melt the cheese.
Cut the avocado in half, remove the pit and scoop the flesh into a bowl. Mash the avocado with the lemon juice and season with salt and pepper, to taste.
Split the rolls in half. Put some of the mashed avocado on the top half of each roll. Place a little sauce on the bottom piece of bread, top with chicken, bacon slices, lettuce and tomato. Add the top piece of bread and serve.
I wanted to add a few toppings to the sandwich so I mashed up an avocado with a little lemon juice, salt and pepper and added crispy Romaine and sliced tomato. Baby Girl loved this sandwich, making all kinds of happy noises while she was eating. SP and I liked it, too, although I forgot to add additional BBQ sauce to our sandwiches and we both thought they needed it for that extra kick. It's a simple sandwich that tastes great.
Cowgirl Chicken Sandwich
As seen on Sparks From the Kitchen
2 large chicken breasts, cut in half lengthwise
Salt and pepper
Olive oil
8 pieces cooked bacon
Cheddar cheese, sliced thin
BBQ sauce
Kaiser rolls
1 avocado
Juice of half a lemon
Romaine lettuce
Sliced tomato
Preheat grill pan or grill over medium high heat.
Season the chicken on both sides with salt and pepper and drizzle with olive oil. Add to the grill and cook 4-5 minutes on the first side, the flip and cook 3 minutes on the other side. Brush chicken with the BBQ sauce and then add the cheese. Turn off the heat and tent loosely with foil to melt the cheese.
Cut the avocado in half, remove the pit and scoop the flesh into a bowl. Mash the avocado with the lemon juice and season with salt and pepper, to taste.
Split the rolls in half. Put some of the mashed avocado on the top half of each roll. Place a little sauce on the bottom piece of bread, top with chicken, bacon slices, lettuce and tomato. Add the top piece of bread and serve.
Wednesday, May 22, 2013
Hamburger Steak with Onion & Mushroom Gravy
With the weather quickly changing from spring to summer I knew I had to take advantage of a cool day to make this Hamburger Steak with Onion & Mushroom Gravy.
This one was right up SP's alley with the mushrooms and mashed potatoes but my stomach is definitely in light summer mode and it seemed too heavy. It was delicious, so I'll definitely make it again in the fall or winter.
Hamburger Steak with Onion & Mushroom Gravy
As seen on Our Best Bites, adapted from Cooking Light
1 pound ground sirloin
kosher salt and freshly ground pepper
1 teaspoon butter
1 large white onion, vertically sliced (about 1 1/2 cups)
1 cup sliced baby portobello mushrooms
4-5 cloves garlic, minced
1 tablespoon all-purpose flour
1 1/2 cups low-sodium beef stock
1 teaspoon red wine vinegar
Divide the meat into 4 1/2″-thick patties. Season both sides with salt and pepper. Set aside.
Heat a large non-stick skillet over medium heat. When the pan is hot, add the patties and cook for 4-5 minutes and then flip and cook for another 4-5 minutes or until cooked through. Remove the patties from the pan and set aside. Drain off any excess fat/grease.
Heat the teaspoon of butter in the skillet. When melted, add the onions and sprinkle lightly with salt and freshly ground pepper. Cook, stirring frequently, until they become tender and start to caramelize, about 5-7 minutes (you may need to add an additional teaspoon of oil if the onions are burning or sticking). Add the mushrooms and garlic and cook until the mushrooms are tender, being careful not to let the garlic burn.
When the onions and mushrooms are cooked, sprinkle them with 1 tablespoon of flour and stir quickly to combine. Add the broth and vinegar and cook until thickened. Add the beef patties and heat through. Serve each patty over mashed potatoes and top with mushrooms, onions, and gravy.
This one was right up SP's alley with the mushrooms and mashed potatoes but my stomach is definitely in light summer mode and it seemed too heavy. It was delicious, so I'll definitely make it again in the fall or winter.
Hamburger Steak with Onion & Mushroom Gravy
As seen on Our Best Bites, adapted from Cooking Light
1 pound ground sirloin
kosher salt and freshly ground pepper
1 teaspoon butter
1 large white onion, vertically sliced (about 1 1/2 cups)
1 cup sliced baby portobello mushrooms
4-5 cloves garlic, minced
1 tablespoon all-purpose flour
1 1/2 cups low-sodium beef stock
1 teaspoon red wine vinegar
Divide the meat into 4 1/2″-thick patties. Season both sides with salt and pepper. Set aside.
Heat a large non-stick skillet over medium heat. When the pan is hot, add the patties and cook for 4-5 minutes and then flip and cook for another 4-5 minutes or until cooked through. Remove the patties from the pan and set aside. Drain off any excess fat/grease.
Heat the teaspoon of butter in the skillet. When melted, add the onions and sprinkle lightly with salt and freshly ground pepper. Cook, stirring frequently, until they become tender and start to caramelize, about 5-7 minutes (you may need to add an additional teaspoon of oil if the onions are burning or sticking). Add the mushrooms and garlic and cook until the mushrooms are tender, being careful not to let the garlic burn.
When the onions and mushrooms are cooked, sprinkle them with 1 tablespoon of flour and stir quickly to combine. Add the broth and vinegar and cook until thickened. Add the beef patties and heat through. Serve each patty over mashed potatoes and top with mushrooms, onions, and gravy.
Labels:
beef,
easy weeknight meal,
toddler-approved
Monday, May 20, 2013
Southern-Style Mustard Potato Salad
I have a go-to potato salad I've been making for years, but when my friends Paula and Melissa recently discussed the beauty of Paula's Southern-Style Mustard Potato Salad I figured it was worth a shot.
The two recipes aren't really that different, mine has celery seed and sour cream where Paula's doesn't, but that's about it. I was looking for an easy side dish to serve with my Philly Cheesesteak Sloppy Joes and since I already had some hard boiled eggs and celery in the fridge I quickly boiled some potatoes, chopped up the other ingredients and tossed them all together.
This was fantastic. Even Baby Girl ate her entire serving, which was a big deal since she hasn't liked any other potato salad. It takes next to no time to prepare and tastes outstanding. Definitely make it a day in advance so the flavors have time to meld.
Southern-Style Mustard Potato Salad
Slightly adapted from The Saucy Southerner
1 1/2 pounds russet potatoes, peeled and cubed
5 eggs, hard-cooked, peeled and very finely chopped
3/4 cup celery, finely diced
1/2 cup red or sweet onion, minced
1/2 cup chopped dill pickles
2 tablespoons dill pickle juice
3 tablespoons yellow mustard
1/2 cup + 2 tablespoons mayonnaise
salt and ground black pepper, to taste
Cook the potatoes in boiling, salted water until just about to fall apart. Drain well in a colander then added back to the hot pan to dry out for 5 minutes.
Place the potatoes, eggs, celery, onion, dill pickles and pickle juice into a large bowl. Add the mustard and mayonnaise, stirring gently so you don't over mix. Try to keep the potatoes unmashed. Add salt and pepper, adjusting to taste.
Refrigerate until ready to serve. Make it a day ahead for best results!
The two recipes aren't really that different, mine has celery seed and sour cream where Paula's doesn't, but that's about it. I was looking for an easy side dish to serve with my Philly Cheesesteak Sloppy Joes and since I already had some hard boiled eggs and celery in the fridge I quickly boiled some potatoes, chopped up the other ingredients and tossed them all together.
This was fantastic. Even Baby Girl ate her entire serving, which was a big deal since she hasn't liked any other potato salad. It takes next to no time to prepare and tastes outstanding. Definitely make it a day in advance so the flavors have time to meld.
Southern-Style Mustard Potato Salad
Slightly adapted from The Saucy Southerner
1 1/2 pounds russet potatoes, peeled and cubed
5 eggs, hard-cooked, peeled and very finely chopped
3/4 cup celery, finely diced
1/2 cup red or sweet onion, minced
1/2 cup chopped dill pickles
2 tablespoons dill pickle juice
3 tablespoons yellow mustard
1/2 cup + 2 tablespoons mayonnaise
salt and ground black pepper, to taste
Cook the potatoes in boiling, salted water until just about to fall apart. Drain well in a colander then added back to the hot pan to dry out for 5 minutes.
Place the potatoes, eggs, celery, onion, dill pickles and pickle juice into a large bowl. Add the mustard and mayonnaise, stirring gently so you don't over mix. Try to keep the potatoes unmashed. Add salt and pepper, adjusting to taste.
Refrigerate until ready to serve. Make it a day ahead for best results!
Friday, May 17, 2013
Sausage and Spinach Egg Bake
I've had my eye on Melissa's Sausage and Spinach Breakfast Sandwiches ever since she posted them a year ago. Melissa makes a batch of this egg bake every Sunday for her and her husband to enjoy for breakfast during the week. It sounded like a great idea and something we'd love, but every Sunday would roll around and I wouldn't have enough eggs or it would be 9pm when I remembered I wanted to make a batch. After Melissa mentioned them again recently I figured enough was enough and I needed to have these sandwiches in my life, so I added an extra dozen eggs to my shopping list.
I whipped this up on a Sunday afternoon and, seriously, this could not be easier. It's such an easy method it's almost ridiculous - all you need to do is cook your add-ins (if necessary, see below), whisk up some eggs and bake it off. I portioned out 4 servings for SP and I to eat during the week and froze the other 6 squares (see method below). SP ate his plain, I made mine into a sandwich and added some hot sauce with each bite.
The possible variations are only limited to your imagination. Bacon, ham, broccoli, tomatoes, asparagus, different cheeses like feta or goat cheese, the possibilities sound delicious. I'll definitely be experimenting soon. Thank you so much for this one, Melissa!
Breakfast Sandwiches
As seen on Alosha's Kitchen, originally from Foodie with Family
3/4 lb breakfast sausage
1/4 cup finely minced onion
1 large clove garlic, minced
Nonstick cooking spray
1/2 to 1 cup chopped cooked spinach
2 cups shredded cheese, divided
10 eggs
1/4 cup milk
freshly ground black pepper and salt to taste
For serving:
1 slice of bread, toasted
Hot sauce or ketchup
Preheat oven to 350°F.
Heat a medium skillet over medium heat. Add the sausage, breaking it into small chunks with a wooden spoon as it browns. Cook until no longer pink, then add the minced onion and garlic and saute until slightly browned and fragrant, another 2 to 3 minutes. Remove from heat and set aside.
Spray a 9x13 baking dish with non-stick cooking spray. Be sure to get the corners and sides well, too. Evenly distribute the sausage mixture over the bottom of the prepared baking dish. Scatter the spinach, if using, over one or both sides and top with half the cheese.
Crack all of the eggs into a large mixing bowl. Add the 1/4 cup of milk and freshly ground black pepper and salt to taste. Whisk to beat together until the mixture is an even color. Pour gently and evenly over the contents of the baking dish. Top with the rest of the cheese.
Bake for 25 minutes or until the eggs are set in the center (just a little jiggle to them) and golden brown around the edges.
Remove the pan from the oven and let cool for 10 minutes before using a thin spatula to run around the edges and loosen the cooked egg. Using two spatulas, gently pull out the egg bake in once piece onto a cutting board. Allow it to cool for 10 more minutes before slicing into 10 pieces.
Eat immediately on toasted bread with hot sauce or ketchup OR:
To Refrigerate:
Place each piece of egg bake in a small Tupperware or wrap in plastic wrap and refrigerate. When ready to eat, toast the bread, microwave the egg bake on high for 30 seconds to one minute depending on your microwave, assemble on toast and serve.
To Freeze:
Place a single layer of plastic wrap on a baking sheet. Arrange the pieces of egg bake on the plastic wrap with a little space between them. Cover loosely with plastic wrap and set in the freezer until solid. When they are firmly frozen, wrap each piece of egg bake with plastic wrap. Transfer the wrapped pieces to a resealable freezer bag. Mark the date and contents and freeze for up to 6 months. When ready to eat, unwrap the egg bake and microwave on high for 1 1/2 - 3 minutes, depending on your microwave. Assemble on toasted bread and serve.
I whipped this up on a Sunday afternoon and, seriously, this could not be easier. It's such an easy method it's almost ridiculous - all you need to do is cook your add-ins (if necessary, see below), whisk up some eggs and bake it off. I portioned out 4 servings for SP and I to eat during the week and froze the other 6 squares (see method below). SP ate his plain, I made mine into a sandwich and added some hot sauce with each bite.
The possible variations are only limited to your imagination. Bacon, ham, broccoli, tomatoes, asparagus, different cheeses like feta or goat cheese, the possibilities sound delicious. I'll definitely be experimenting soon. Thank you so much for this one, Melissa!
Breakfast Sandwiches
As seen on Alosha's Kitchen, originally from Foodie with Family
3/4 lb breakfast sausage
1/4 cup finely minced onion
1 large clove garlic, minced
Nonstick cooking spray
1/2 to 1 cup chopped cooked spinach
2 cups shredded cheese, divided
10 eggs
1/4 cup milk
freshly ground black pepper and salt to taste
For serving:
1 slice of bread, toasted
Hot sauce or ketchup
Preheat oven to 350°F.
Heat a medium skillet over medium heat. Add the sausage, breaking it into small chunks with a wooden spoon as it browns. Cook until no longer pink, then add the minced onion and garlic and saute until slightly browned and fragrant, another 2 to 3 minutes. Remove from heat and set aside.
Spray a 9x13 baking dish with non-stick cooking spray. Be sure to get the corners and sides well, too. Evenly distribute the sausage mixture over the bottom of the prepared baking dish. Scatter the spinach, if using, over one or both sides and top with half the cheese.
Crack all of the eggs into a large mixing bowl. Add the 1/4 cup of milk and freshly ground black pepper and salt to taste. Whisk to beat together until the mixture is an even color. Pour gently and evenly over the contents of the baking dish. Top with the rest of the cheese.
Bake for 25 minutes or until the eggs are set in the center (just a little jiggle to them) and golden brown around the edges.
Remove the pan from the oven and let cool for 10 minutes before using a thin spatula to run around the edges and loosen the cooked egg. Using two spatulas, gently pull out the egg bake in once piece onto a cutting board. Allow it to cool for 10 more minutes before slicing into 10 pieces.
Eat immediately on toasted bread with hot sauce or ketchup OR:
To Refrigerate:
Place each piece of egg bake in a small Tupperware or wrap in plastic wrap and refrigerate. When ready to eat, toast the bread, microwave the egg bake on high for 30 seconds to one minute depending on your microwave, assemble on toast and serve.
To Freeze:
Place a single layer of plastic wrap on a baking sheet. Arrange the pieces of egg bake on the plastic wrap with a little space between them. Cover loosely with plastic wrap and set in the freezer until solid. When they are firmly frozen, wrap each piece of egg bake with plastic wrap. Transfer the wrapped pieces to a resealable freezer bag. Mark the date and contents and freeze for up to 6 months. When ready to eat, unwrap the egg bake and microwave on high for 1 1/2 - 3 minutes, depending on your microwave. Assemble on toasted bread and serve.
Subscribe to:
Posts (Atom)