Tuesday, January 17, 2012

Cake Batter Cookies

We all know I don't really bake, so when our friends invited us to their house for dinner and asked that I bring dessert I figured I'd end up buying something at a bakery. Then I remembered seeing these Cake Batter Cookies on Stephanie's Top Ten Recipes of 2011 and thought it would be a nice way to use up some cake mix I had in the pantry and get Baby Girl in the kitchen with me.


These could not have been easier to make since all you are really doing is dumping the cake mix in a bowl and adding baking powder, eggs, oil and chocolate chips. Like Stephanie says, I bet these would be fun using different kinds of cake mix and different add-ins like nuts or M&Ms, raisins or even dried fruit. The possibilities are endless and because the dough is so simple the sky's the limit.

Baby Girl had a blast helping me (she especially loves stirring and dumping things into bowls). She even had her own spoon to take the dough from the bowl and put it on the cookie sheets. I love getting her into the kitchen and she loves helping so it's a win-win. My only complaint is that my cookies spread in the oven. Next time I'll chill the dough a bit before putting it on the cookie sheets. I've modified the directions below.

Cake Batter Cookies
Slightly Modified from Stephanie Cooks

1 (18.25 oz.) box cake mix
1 teaspoon baking powder
2 eggs
1/2 cup vegetable oil
1 cup semisweet chocolate chips

Preheat oven to 350 degrees F (175 degrees C).

In a medium bowl, stir together the cake mix and baking powder. Add eggs and oil, then mix until well blended. Stir in chocolate chips, or your choice of add-ins. Cover the bowl and chill for 30 minutes. Once chilled, drop by rounded spoonfuls onto cookie sheets.

Bake for 10 minutes in the preheated oven. Allow cookies to cool on baking sheets for 5 minutes before transferring to a wire rack to cool completely.

Makes approximately 30 cookies
Pin It!

Monday, January 16, 2012

Orange and Rosemary Pork Tenderloin

I had a pack of two pork tenderloins in the freezer that I wanted to use up and no real recipe in mind. SP asked for something simple with bold flavors, preferably not Asian-inspired (i.e. no soy sauce, ginger, etc.) A quick Google search led me to Orange and Rosemary Pork Tenderloin. Sold!


I was in love with this recipe after I mixed up the marinade. It smelled absolutely intoxicating. I am so happy my rosemary plant is still doing well because fresh rosemary was wonderful in the marinade. After reading through the recipe I decided to modify the cooking method for the pork because (1) a quick sear always adds nice color and flavor and (2) I couldn't see the tenderloins cooking through after only 25 minutes in the oven.


The result was absolutely delicious. The pork had just a hint of pink in the middle and was moist, juicy and flavorful. And the sauce. Oh the sauce. The citrus burst with the touch of cream was perfect. Next time I'll double the marinade recipe (quantity changes reflected below) because I wished there was more sauce. I served the pork with mashed potatoes and steamed broccoli. The extra sauce would have been great over both, which is why there'll be more next time.

Orange and Rosemary Pork Tenderloin
Modified from Chocolate and Zucchini

1 pork tenderloin

For the marinade:
4 oranges, juiced
4 tablespoons olive oil
2 tablespoons white wine vinegar
2 rounded teaspoons honey
4 cloves garlic, finely chopped
2 tablespoons fresh rosemary, chopped
1/2 teaspoon kosher salt
Freshly ground black pepper

For finishing:
1/2 cup heavy cream
Salt
A handful parsley, coarsely chopped

Cut the tenderloins in 3 or 4 equal portions and place them in a plastic food storage bag. Whisk together the marinade ingredients and pour them over the meat. Cover and refrigerate for at least 4 hours, preferably overnight.

Preheat the oven to 360 degrees. Remove the pork from the fridge and pour the marinade into a small saucepan.

Heat a cast-iron or other heavy bottomed, oven-safe skillet over medium-high heat. Place the pork pieces into the skillet and sear on all sides, about 10 minutes total. Put the skillet in the oven and roast for 20 minutes, until cooked through but not dried out (the meat should be pale pink in the center; if using a meat thermometer, the recommended safe internal temperature is 160°F), flipping the meat a couple of times during the roasting.

While the meat is roasting, put the saucepan with the remaining marinade over medium-high heat and bring to a boil. Keep boiling, uncovered, stirring regularly, until the marinade has reduced. Add in the cream, salt and parsley. Stir, and keep warm over low heat.

When the meat is ready, remove the skillet from the oven, and transfer the meat to a cutting board. If there are any juices in the skillet add them to the sauce and bring back to a boil. Cut the meat pieces into thick slices and serve with the sauce.
Pin It!

Sunday, January 15, 2012

Weekly Menu - Week of January 15, 2012


I love meal planning. In the 6 years I've been doing it I know it's helped save us money, time and hassle. I started planning weekly menus when we were saving to buy a house. It was purely about saving money at that point. And, to be honest, I can't even remember how we grocery shopped or cooked before that. Without a list of recipes and ingredient lists, how the heck did I know what to buy? Or cook on a Tuesday?

That being said, there are plenty of weeks I struggle to create a meal plan. Sometimes, like this week, I'm so inspired by blog posts or cravings that I have my meal plan done early in the week. Other weeks it's Friday afternoon and I'm desperately trying to finalize our shopping list when nothing sounds appealing. But I still meal plan because at this point I don't know any other way to cook meals for my family.

Sunday - Pork Chop and Hash Brown Bake: I didn't get to make this last week so I'm carrying it over. The mystery casserole from the freezer will have to wait another week.

Monday - Chicken with Creamy Chive Sauce, mashed potatoes, green beans: I first saw this recipe on Jessy's blog but have since seen others on my cooking board make it and rave about it. I can't wait to try it.

Tuesday - Hoagies

Wednesday - Taco Rice: Another Cassie recipe that I know won't steer me wrong. I love tacos and whenever I make them SP is always asking for rice on the side, so this is brilliant and perfect for us.

Thursday - Crispy Parmesan and Garlic Chicken, pasta and salad: I finally joined Pinterest and this was one of my first pins.

Friday - Homemade pizza
Pin It!

Friday, January 13, 2012

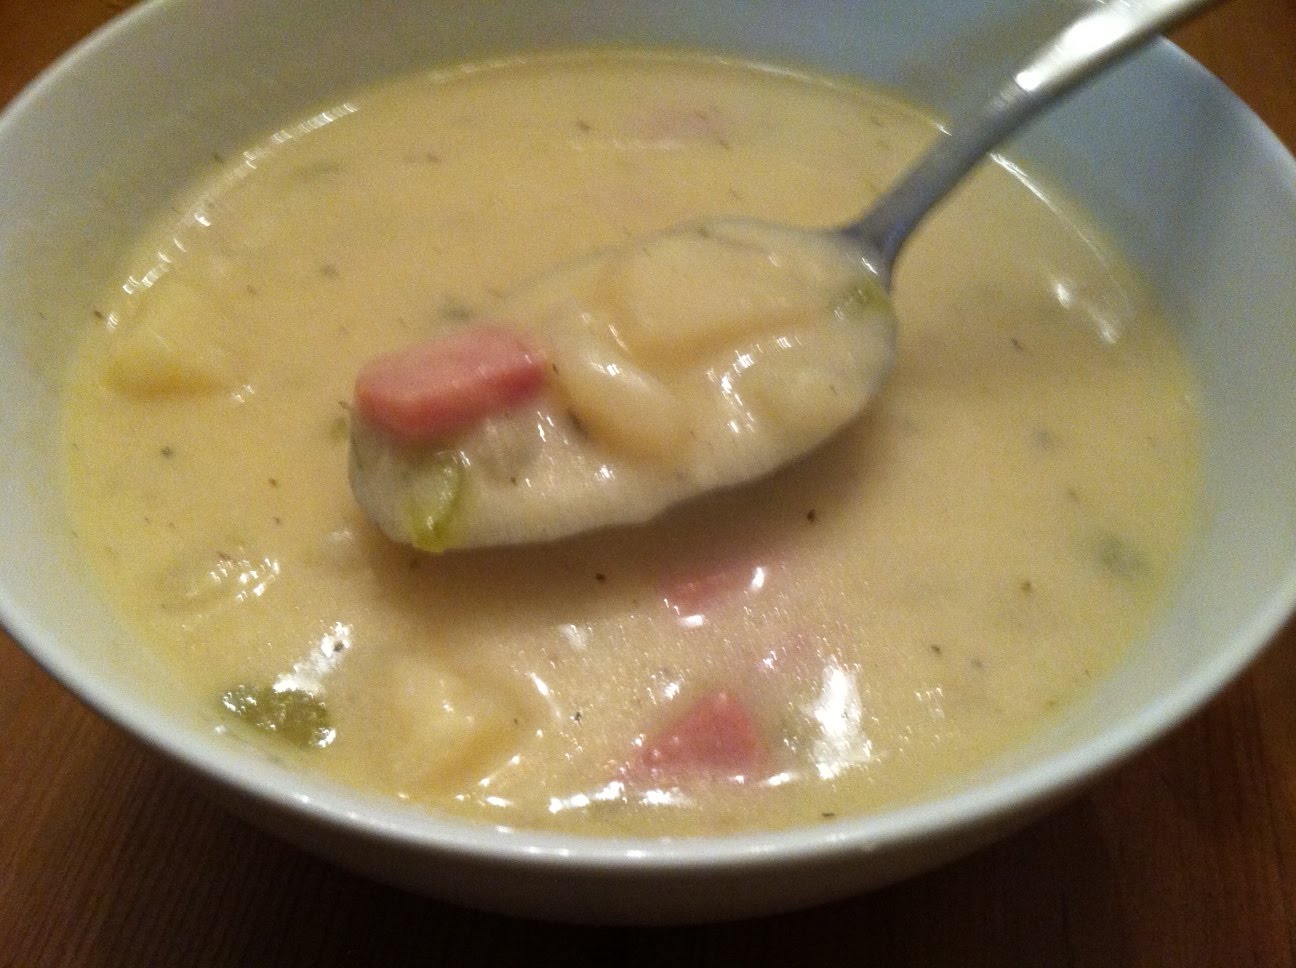
Recipe Swap - Hearty Ham and Potato Soup

Want to see what other SRC-style recipes were made during the swap? Here is the link to the SRC-style Recipe Swap Roundup

If you are a food blogger you've probably heard of the Secret Recipe Club (SRC). I've been a member for a few months and it's a lot of fun. Some of the ladies on the cooking board have been trying to get into the club, but there's a very long wait list at this point. Enter the SRC-style theme for the most recent installment of the recipe swap. Judging from the number of participants I'm planning to do this type of swap (swapping whole blogs instead of specific recipes) every 2 months or so.

I received The Cooking Nurse, the blog that brought me one of my all-time favorite soups - Chicken Gnocchi Soup. I spent some time browsing through the various categories and had such a tough time narrowing it down that I finally told SP to decide. He chose this Hearty Ham and Potato Soup. Perfect for a cold winter day...except we haven't been having typical January temps. Still, it was close to 40 degrees the night I made this, as opposed to the almost 60-degree days we've been having lately. Not that I'm complaining, because I most certainly am not. I love this weather.


This was a delicious, easy soup to make. I prepped the ingredients ahead of time so all I had to do when I got home was cook it. I upped the amount of ingredients so we were sure to have enough leftover for lunch the next day. I've said before that I'm not a big fan of soup but that's changed lately. A big bowl of hearty soup with bread for dipping is pretty darn good in my book. And PS, Baby Girl pronounced this soup "delicious," which is an automatic "make again" in my book.

This post is actually doing double duty as both my recipe for the SRC-style swap and my entry into Branny's Charity Souper Bowl. As many of you know, we had to say goodbye to our beloved cat, Dusty, on New Year's Eve. I know it's only been about two weeks but we still miss him every day. The house is too quiet. I find myself stepping around his non-existent food and water bowls in the kitchen, propping our doors with door stops to keep him from banging them open and doing my usual "locate the cat" scan of the house when I get home from work. Dusty came to us from our local SPCA so it's very fitting that I dedicate my Charity Souper Bowl post to him. We love you, pal.


Please consider blogging about a soup and submitting it to Branny for the Souper Bowl. Shelter animals will always hold a special place in my heart and organizations like the SPCA always need help caring for animals.

Hearty Ham and Potato Soup
Slightly Modified from The Cooking Nurse

2 tablespoons butter
2 ribs celery, diced (about 1 cup)
1 medium onion, diced (about 1 cup)
1 1/2 lbs potatoes, peeled and diced
1 1/2 cups diced ham steak
6 cups chicken broth
1/2 teaspoon salt
1/2 teaspoon pepper
1 teaspoon dried thyme
5 tablespoons butter
5 tablespoons flour
2 cups milk
1 cup shredded cheddar

Melt butter in a large stockpot over medium heat. Add the onions and celery and cook until just tender. Add the potatoes, ham and chicken stock. Bring to a boil, then cook over medium heat until potatoes are tender, 10 to 15 minutes. Season with salt, pepper and thyme.

In a separate saucepan, melt butter over medium heat. Whisk in flour and cook, stirring constantly until thick, about 1 minute. Whisk in milk and cook over medium heat, stirring constantly, until thick, 4 to 5 minutes.

Stir the milk mixture into the stockpot and continue cooking soup until heated through and bubbly. Add cheddar cheese and stir to melt.
Pin It!

Thursday, January 12, 2012

Santa Hat Brownies

As soon as I saw my friend Jessy's post for Santa Hat Brownies I knew they needed to be part of our Christmas dinner. I emailed my mom to ask her to make the brownies and bring the rest of the ingredients to our house for dinner so Baby Girl could help her assemble them.


Watching the two of them assemble the brownies was priceless. Baby Girl loved helping and the resulting brownies were adorable. But man, are they rich! I don't eat dessert that often but I could barely finish one of these. I think the buttercream was very, very sugary and heavy so I, personally, would prefer whipped cream. I don't know how they whipped cream would hold up, but at least it would be lighter. Even so, these are a really cute addition to any Christmas table.

Santa Hat Brownies
Gourmet Day to Day

1 pan of brownies, baked and cooled
20-24 small strawberries
1 batch of buttercream frosting (or a frosting of your choice)

Buttercream Frosting
(you will have some extra buttercream left with this recipe)

3 cups confectioners’ sugar
1 cup butter (softened but not melted)
1 teaspoon vanilla extract
1 to 2 tablespoons whipping cream

In a standing mixer fitted with a whisk, mix together sugar and butter. Mix on low-speed until well blended and then increase speed to medium and beat for another 3 minutes.

Add vanilla and cream and continue to beat on medium speed for 1 minute more, adding more cream if needed for spreading consistency.

To Assemble Brownies:

Using a small round cookie cutter or a small drinking glass, cut out brownies. Clean and remove stems from strawberries, cut the stems off flat so it will sit flat on the brownie. Place strawberries point side up on the center of each brownie circle.

Using a piping bag (or zip-top bag with the corner snipped to create a piping bag in a pinch) Pipe the frosting around the strawberry for the white rim of Santa’s hat and top each strawberry point with a small drop of frosting.

Note for storage: If you plan on refrigerating these cuties, make sure you chill them uncovered first. This will allow the buttercream to harden so you don’t you lose your cute Santa hat topper to plastic wrap!
Pin It!

Wednesday, January 11, 2012

Pretzel Ranch Chicken Tenders

Another simple, easy and delicious dinner from Cassie - Pretzel Ranch Chicken Tenders. I love how the salty pretzels and the Ranch combine to make a perfectly seasoned chicken tender.


Pretzel Ranch Chicken Tenders
Cassie Craves

1-2 pounds chicken breasts, sliced into strips
Ranch dressing
Pretzels

Place chicken tenders in a bowl and cover with ranch dressing; stir to combine. Let sit for 5 or 10 minutes or cover and refrigerate overnight.

Process pretzels in a food processor until they are fine crumbs. Coat chicken tenders in pretzel crumbs. Cook over medium heat in a skillet with a small amount of oil, or bake in a 350-degree oven, until cooked through.

Serve with additional ranch dressing for dipping.
Pin It!

Tuesday, January 10, 2012

Weekly Menu - Week of January 8, 2012


I'm sorry I haven't been keeping up with our weekly meal plan. Now that the holidays are officially over (in our house they extend to my birthday), I'm getting back into the swing of things. It's hard for me to believe it's January already. Aside from the freak Halloween snowstorm we haven't even had snow yet. But that's the Northeast for you. We don't usually get measurable snow until after the New Year. I'm envisioning lots of comfort food in the coming months!

Sunday - Final birthday celebration = SUSHI and cupcakes!

Monday - Orange and Rosemary Pork Tenderloin, mashed potatoes, steamed broccoli: The marinade alone smelled amazing. I can't wait to try what I hope will be a flavorful pork dish.

Tuesday - Hoagies: I'll finally come clean and admit that we've been getting these weekly since I started taking my exercise class. Oops. We each eat half of a hoagie and take the other half for lunch the next day. One of their Italian hoagies was the first thing I ate after giving birth and it always hits the spot to this day.

Wednesday - Hearty Ham and Potato Soup, ciabatta for dipping: This recipe is doing double duty as my recipe swap recipe and my entry into Branny's Souper Bowl Challenge

Thursday - Pork Chop and Hashbrown Bake, green beans or salad (or maybe salad with green beans): This is one of SP's favorite dishes and he was very excited to hear it's on this week's menu.

Friday - Homemade pizza (if I remember to pick up pizza dough sometime this week)

Saturday - Italian Nachos: We usually have a big lunch on Saturdays so this will be perfect for dinner.
Pin It!

Monday, January 09, 2012

Rigatoni with Chicken, Bacon and Mushrooms

By now you all now how much I love pasta. And cream sauces. And chicken. So when a dish combines all three, with the added bonus of mushrooms and bacon for SP, it's guaranteed to be a winner in our house. Cassie recently had this Rigatoni with Chicken, Bacon and Mushrooms on her weekly meal plan and I immediately added it to ours as well.


With the exception of our New Year's Eve dinner (which I'm sad I didn't photograph because SP said it was the best meal I've made in a very long time) this is one of the only meals I've cooked. After Christmas dinner I haven't spent much time in the kitchen between leftovers, takeout, and my birthday. It felt good to actually cook a proper meal. And bonus points for using only one skillet (and a pot to boil the pasta). Thanks for yet another winner, Cassie.

Rigatoni with Chicken, Bacon and Mushrooms
Slightly Adapted from Cassie Craves

1-lb rigatoni
Garlic powder
Italian seasoning
Salt and pepper
1 pound boneless skinless chicken breast, cut into bite-size pieces
3 tablespoons olive oil
6 slices bacon, chopped
1 medium onion, chopped
6-ounces mushrooms, cut into quarters
1/2 cup chicken stock
1/2 cup apple juice
1 14.5-ounce can diced tomatoes
1/4 teaspoon crushed red pepper flakes
15 fresh basil leaves, julienned
Salt and pepper to taste
1/2 cup heavy cream
Parmesan cheese

Cook rigatoni in boiling salted water according to al dente. Drain and set aside.

Meanwhile, sprinkle chicken with garlic powder, Italian seasoning, salt and pepper. Heat olive oil in a large skillet over medium-high heat. Add chicken and cook until golden brown and cooked through. Remove to a plate.

Using the same pan, cook the bacon just shy of crispy. Add onions and mushrooms and cook until onions are translucent. Increase heat to high and add chicken stock and apple juice. Use a wooden spoon to scrape the browned bits from the bottom of the pan. Bring to a boil and let cook for 2 minutes. Add tomatoes, red pepper flakes, and half of the basil; season with salt and pepper. Reduce to medium low heat and cook until the sauce begins to thicken, about 15 minutes.

Stir cream and remaining basil into the sauce. Add chicken and any accumulated juices to the pan. Stir to combine. Add rigatoni to and toss to combine. Sprinkle with Parmesan cheese and serve with additional cheese.
Pin It!

Wednesday, January 04, 2012

Recipe Swap Roundup - Special Occasion

Every Christmas Eve and New Year's Eve I like to make a special meal, something we don't normally eat, to celebrate. I thought it would be nice to see what other people like for special occasions, hence the theme for this recipe swap.

Leanne had never heard of Mungo's but loved the at-home version of their famous Mungo's Salad:


Lishie is a big fan of over-easy eggs and she loved my recipe for Asparagus with Fried Egg and Pecorino:


Ashley brought her Hoisin Braised Short Ribs to her parent's house as a comfort food meal even her 3-year-old nephew enjoyed:


Mary Ellen loves making appetizers for Christmas Eve so her recipe for Sausage Balls was perfect (and delicious):


Jenna enjoyed her Horseradish Crusted Filets and would happily make it again for another special occasion:


Jaida's Spinach-Stuffed Mushrooms were a hit at one of her holiday parties:


The Cookaholic Wife loved the combination of caramelized onions, cream and bleu cheese in her Filet with Onion-Bleu Cheese Sauce:


Jey's Steak Marsala was a delicious way for her and her husband to have a date night:


My recipe for Endive Stuffed with Goat Cheese and Walnuts was a big hit as a Christmas Day appetizer:


Coleen has never tasted or made Potato Pancakes before, but really enjoyed them:


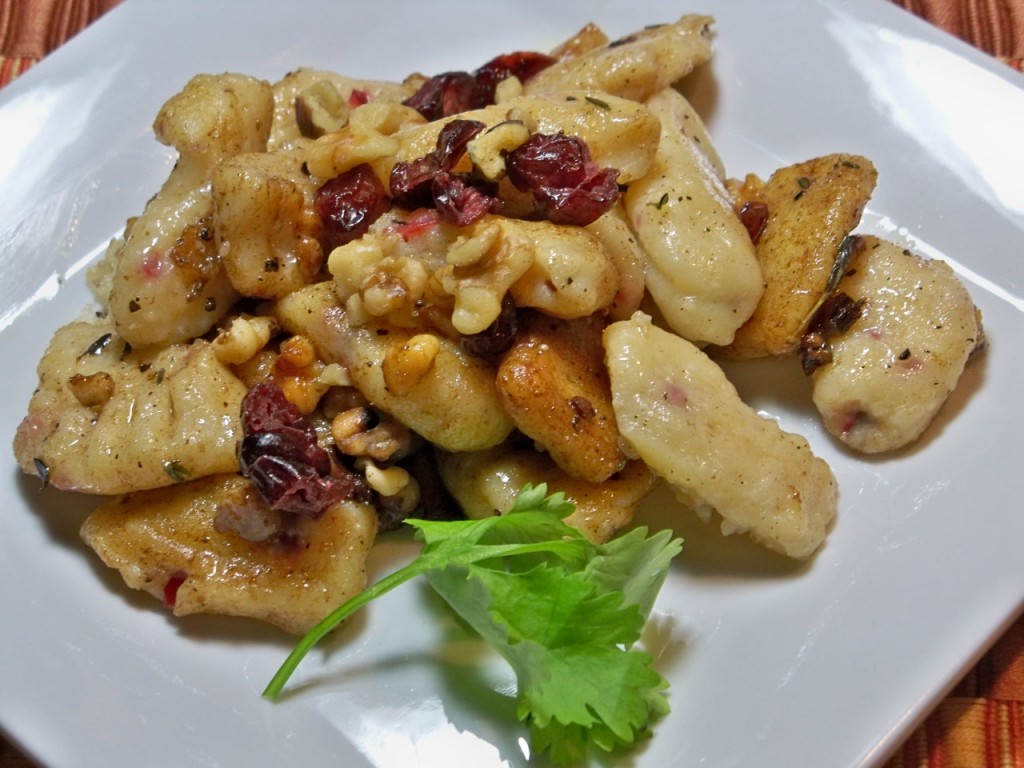
Jessy's attempt at Cranberry Ricotta Gnocchi was a comedy of errors, but even so she and her husband enjoyed this slightly different dish:

Pin It!

Saturday, December 31, 2011

Saying Goodbye

Today was one of the hardest days of my life. Today we had to say goodbye to our cat, Dusty.


We got Dusty the day the war in Iraq started back in March 2003. That day we drove around to all the local shelters to see who was up for adoption. Dusty was an older cat, already seven years old, and obviously very unhappy at the shelter. He was sitting in his litter box, subdued where the other cats and kittens were hyperactive. No one was paying him much attention since he wasn't as "fun" as the other cats. But I knew he was the one when he nuzzled my hand while I was petting him. We signed the papers that day and brought him home. Even though I'd grown up with cats and dogs, Dusty was SP's first pet. He was so excited, buying him toys and a bed to sleep in that he never even set one paw in the entire time we owned it. He came to us with the name Doobie, but after spending a month hiding under our bed he was christened Dusty (for obvious reasons). After that the nicknames came easily - Dusty Springfield; Dusty Wusty Was a Bear, Dusty Wusty Had No Hair; Dustman.


Dusty was with us for every major life event, from getting engaged, to getting married, buying our first home and having Baby Girl. He would sleep at the foot of our bed, always hopping off like clockwork 15 minutes after we turned the lights off. He loved to chase string and the light from a flash light. We nicknamed him Doctor Dusty for how concerned he was when one of us was sick. He was always so low-maintenance that we could leave a bowl of food out and he'd just graze all day. He was never a lap cat, but he would sit next to me on the couch every night while we watched TV.


In the almost 9 years we had him we only had to take him to the vet for illness once. A few years ago he stopped eating and we were using a syringe to force-feed him baby food. He bounced right back like nothing had happened. He's always been a chunker, so when he started losing weight about a year ago we got concerned. The vet said we might be looking at the big C. We monitored him and over the last few weeks it became clear that something was definitely wrong. It all came to a head today when we noticed that he was having trouble walking, that his back legs just didn't seem capable of supporting him anymore.


We knew it wasn't good when they put us in the Comfort Room at the vet's office. A quick talk with the vet confirmed our fears. We had known it was coming, but hearing the words made it unbearable. I will forever be in debt to the amazing vet who took the time to talk with us, make us comfortable and who seemed genuinely upset about what was happening. At the end SP was holding Dusty while I pet his head and we said soothing words to him. Right before the sedative kicked in, Dusty looked at me and nuzzled my hand. In that moment we came full circle. It was one of the best and one of the worst moments of my life. I hope I never forget it.

Dusty, you were the best cat in the world. You were more than a cat - you were a friend. You will be missed for the rest of our lives and there will always be a hole in our heart and someone missing from our family. We are better for knowing you and we love you.

Rest in peace, my friend.

PS. I'm planning to take a small break from blogging. Life has been incredibly difficult lately and I need to focus on other things right now. It won't be a long break since I've got another recipe swap coming up in a few weeks and a roundup from the last one to put together. Thank you, as always, for reading.
Pin It!

Friday, December 30, 2011

Recipe Swap - Endive Stuffed with Goat Cheese and Walnuts

Want to see what other Special Occasion recipes were made during the swap? Here is the link to the Special Occasion Recipe Swap Roundup

The holiday season means parties and special dinners for many people. We always have a special meal for dinner Christmas Eve and New Year's Eve, so I thought a special occasion recipe swap would be perfect. The guidelines were for an appetizer, entree or side dish since we just did two dessert swaps in a row. I received a recipe for Endive Stuffed with Goat Cheese and Walnuts. My step-aunt always brings an antipasto platter to Christmas dinner and I thought these would be the perfect accompaniment.


I assembled these in the morning and kept them refrigerated until our guests arrived. They were incredibly easy to make since the only real cooking is making the sauce and that takes care of itself. My walnuts took 10 minutes in the toaster oven to get golden brown but definitely keep an eye on them.


I loved the presentation of the endive stuffed with all the delicious bits drizzled with the balsamic syrup. I've always been a fan of savory and sweet flavors together and these were the perfect blend of both. Everyone loved them. We only had three left and that was with them competing with the gorgeous antipasto platter. I will definitely make these again. Thanks for a delicious, easy recipe Leanne!

Endive Stuffed with Goat Cheese and Walnuts
Slightly Modified from Cooking Light, recommended by Around the Table

1/3 cup coarsely chopped walnuts
2 tablespoons honey, divided
Cooking spray
1/4 cup balsamic vinegar
3 tablespoons orange juice
16 Belgian endive leaves (about 2 heads)
2 ounces crumbled goat cheese
1 large can mandarin oranges in juice (about 16 slices)
1 tablespoon minced fresh chives
1/4 teaspoon cracked black pepper

Preheat oven to 350. Combine walnuts and 1 tablespoon honey; spread on a baking sheet coated with cooking spray. Bake at 350° for 10 minutes, stirring after 5 minutes. Watch carefully so they don’t burn.

Combine 1 tablespoon honey, vinegar, and orange juice in a small saucepan. Bring mixture to a boil over high heat, and cook until reduced to 3 tablespoons (about 5 minutes).

Separate and wash endive leaves. Lay each leaf, cup side up, on a platter. Top each section with about 1 teaspoon goat cheese, one orange slice and 1 teaspoon walnuts. Drizzle the vinegar mixture evenly over leaves, and sprinkle evenly with chives and pepper.

Pin It!

Wednesday, December 28, 2011

Asian Turkey Burgers with Spicy Lime Mayo

I can't remember the last time I made a burger. It must have been sometime over the summer. And as much as I love a good beef burger, I've come to realize that I'm a big fan of chicken or turkey burgers. The mild flavor of poultry makes it so much easier to add whatever flavors you like. This is a new phenomenon for me but I'm embracing it in these days of attempted weight loss.

I recently discovered How Sweet It Is and boy am I glad I did. She's got some truly delicious-sounding recipes that I'm dying to make. When I saw her post about these Asian Turkey Burgers with Spicy Lime Mayo I had to take her advice and add them to my weekly menu.


Head over to Jessica's blog for some drool-inducing photos. Mine are ehh, as usual. But don't let that deter you from making these immediately. I prepped the burgers in the morning before work and the smell alone was intoxicating. As far as I'm concerned you really can't go wrong with garlic, ginger, scallions, soy sauce and sesame. Add the delicious Spicy Limo Mayo and you've got one hell of a burger. Try these soon. You won't be disappointed.

Asian Turkey Burgers
How Sweet It Is

1 pound ground turkey breast
2 garlic cloves, minced or pressed
1/2 teaspoon freshly grated ginger
3 green onions, thinly chopped
1/2 tablespoon soy sauce
1/2 tablespoon rice wine vinegar
1/2 tablespoon sesame oil
1/2 tablespoon toasted sesame seeds
4 burger buns
Lettuce and sliced tomato for serving

Combine all ingredients (except buns) in a large bowl and mix gently with your hands until just combined – do not overmix. Form turkey into 4 patties about 1/2 inch thick. Heat a skillet (in my case – a cast iron grill pan) over medium-high heat (or preheat your grill) and once hot, add burgers. Cook for 4-5 minutes per side.

Toast buns if desired, then top burgers with mayo and serve.

Spicy Lime Mayo

1/4 cup mayonnaise
1 teaspoon Sriracha sauce (or more if desired)
Zest of half of a lime
Juice of half a lime

Combine all ingredients in a bowl and mix until smooth and combined.

Pin It!

Monday, December 26, 2011

SRC: Cheesy Spinach Farfalle

It's hard for me to believe that this is already my third month participating in the Secret Recipe Club. Time sure does fly when you're busy.

This month I was given Enriching Your Kid, a blog written by a Clinical Psychologist turned homemaker after having kids. She says her goal is to prepare food that is nourishing as well as enticing for kids. She actually had my blog for the first month of the SRC and made my corn fritters.

A lot of the recipes on her blog are for Indian food, which I love but rarely make at home. I wanted to find something that didn't require specialty ingredients since we are on a budget, so I finally settled on Cheesy Spinach Farfalle, which is right up my family's alley.


I made a few modifications but overall kept the recipe the same. I subbed a can of diced tomatoes for fresh tomato because tomatoes aren't in season (plus I hate loose tomato skin on cooked tomatoes). Since she didn't specify a type of grated cheese I thought mozzarella would be nice. I also upped the amount of pasta to a full pound since this needed to feed us for dinner, lunches and a little leftover for Baby Girl and also upped the spinach, garlic and cheese. I only had one small onion but I found a leek in the fridge that needed to be used, so I combined the two. I also added in white wine for some extra flavor since I thought pasta water alone wouldn't be enough to make a flavorful sauce. To thicken the sauce I opted for cornstarch mixed with cold water, which resulted in a silky-smooth sauce without worrying about lumps.

Make sure to taste as you go and add salt and pepper as needed. I absolutely loved this, but then again I pretty much love any pasta dish with tomatoes and spinach. It's an easy meal to put together on a weeknight, which is another plus in my book, along with being vegetarian and healthy. Score!

Cheesy Spinach Farfalle
Modified from Enriching Your Kid

1 lb farfalle
1 large onion, diced
3 cloves garlic, grated
1 15-ounce can diced tomatoes, undrained
1/2 cup white wine
1 6-ounce bag baby spinach, coarsely chopped
Salt and pepper to taste
1 teaspoon Italian seasoning
1 tablespoon cornstarch
1/2 cup cold water
1 cup shredded mozzarella cheese

Cook the farfalle according to package directions. Drain, reserving 1 1/2 cups of the cooking water.

Meanwhile, heat oil in a large pan. Add the onions and minced garlic, cooking until the onions are translucent and soft. Add the wine and allow to reduce slightly. Add the tomatoes with the juice and the chopped spinach. Add salt and pepper to taste and the Italian seasoning. Allow the spinach to wilt.

Combine cornstarch and cold water in a small bowl. Slowly add to the pan, stirring to combine. Add the reserved pasta water. Sprinkle in grated cheese and allow to melt into the sauce. Add the pasta, mix well and season with salt and pepper. Top with more shredded cheese if you like and serve hot.


Pin It!

Friday, December 23, 2011

White Cheddar Chicken Pasta

In one of the "what's for dinner?" posts on Facebook recently my friend Carrie said she was making this White Cheddar Chicken Pasta. The name alone sold me but then I looked at the ingredients and knew I had to make it ASAP.


After Carrie made the recipe she recommended cooking the onions before making the sauce, so I took her advice. I also ended up adding some chicken broth because my sauce was too thick.

We both loved this meal. The sauce is wonderfully flavorful with the sharp cheddar and the spices. I left out the red pepper flakes in the original recipe because spicy food and I don't get along well anymore. The spices on the chicken were perfect and I bet this would be even better with grilled chicken. I can't wait to try that once the weather warms up. Or if I ever get a grill pan.

White Cheddar Chicken Pasta
Modified from Homemade by Holman

1 pound chicken breasts, trimmed and cut into 1 inch pieces
1 teaspoon dry mustard
1 teaspoon dried thyme
1/2 teaspoon salt
1/2 teaspoon pepper
1 tablespoon olive oil
1 pound rotini or other short cut pasta
2 tablespoons butter
1 tablespoon olive oil
2 cloves garlic, minced
1 small onion, finely diced
2 tablespoons flour
1/4 cup dry white wine
1 1/2 tablespoons Dijon mustard
2 cups milk
1 cup chicken stock
8 oz sharp white cheddar cheese, grated
1 teaspoon dried thyme
1 teaspoon dried oregano
Parmesan cheese to taste

Heat olive oil in a large skillet over medium heat. Mix together mustard, thyme, salt and pepper and sprinkle over chicken pieces. When pan is hot, add chicken and brown about 3 minutes per side until cooked through. Remove to a plate and cover with foil.

Cook pasta according to package directions, drain and set aside.

Meanwhile, melt butter and oil in the now-empty skillet you used to cook the chicken. Add garlic and onions and cook until the onions are soft, about 5 minutes. Add the flour and whisk to combine. Add wine and Dijon mustard. Cook about 5 minutes, then reduce heat to low and slowly add milk and chicken stock, stirring to combine. Cook about 5-7 minutes more until mixture begins to thicken. Add cheese, thyme and oregano and stir to melt cheese. Add chicken and pasta and toss to incorporate sauce. Top with Parmesan cheese and serve.
Pin It!

Thursday, December 22, 2011

Smothered Pork Medallions

As the weather gets colder I am all about comfort food meals. I also love an excuse to make mashed potatoes. They're one of my favorite things and Baby Girl is taking after me in that regard. She will happily eat a big bowl full of them whenever I make them. When Melissa posted this recipe for Smothered Pork Medallions what drew me in was a new way to use pork and a sauce that included buttermilk, which I bought for Buttermilk Mac and Cheese and still had in my fridge waiting to be used up.


When shopping this week I realized I've never purchased pork tenderloin. How is that possible? Thankfully my supermarket had it on sale so it wasn't too expensive, but imagine my surprise when I discovered that what I thought was two tenderloins turned out to be four (the club pack came with two packages of pork, but each package contained two tenderloins). That's four meals for about $10. Awesome.

I was hesitant to use the full 2 teaspoons of cayenne pepper to season the flour and I think that was a mistake. The dish was a little too sweet, probably from the onions. The extra cayenne would have helped mitigate that. Even so, this was delicious and we both cleaned our plates. You know SP is a sucker for anything with mushrooms in it. And it couldn't have been easier, which was nice for the Sunday when we decorated our Christmas tree.

Smothered Pork Medallions
Slightly Modified from I Was Born to Cook

3/4 cup flour
3 tablespoons garlic powder
2 teaspoons cayenne pepper
1 teaspoon salt
1/2 teaspoon black pepper
1 pork tenderloin, thinly sliced into medallions
1/4 cup extra virgin olive oil
1 package (10 ounces) mushrooms, sliced
2 medium onions, sliced
1 cup chicken broth
1/2 cup buttermilk
Chopped fresh parsley, for garnish

Put the flour in a gallon food storage bag. Add garlic powder, cayenne, salt and pepper. Mix well. Add the medallions and shake to coat.

Heat oil in a large skillet and add pork in an even layer. Fry pork on each side until golden brown, 2-3 minutes. Remove to a plate. Add a little more oil to the pan, then add the mushrooms and onions. Season with a little salt and pepper and cook until the liquid from the mushrooms has evaporated and the onions are soft, about 10-15 minutes. Add about 1 tablespoon of the seasoned flour to pan drippings. Mix together, then add chicken broth. Once liquid is reduced and slightly thickened, add buttermilk and stir.

Return pork to pan and cover in sauce. Simmer for about 5 minutes, until pork is cooked through. Season with salt and pepper and garnish with parsley to serve.

Pin It!

Wednesday, December 21, 2011

Skillet BBQ Chicken Pasta

I love a good one-pot or skillet meal. There's something infinitely satisfying about being able to cook an entire meal, including the pasta, in one pan. Nicole raved about this Skillet BBQ Chicken Pasta recipe so on to the menu it went.


Don't tell SP, but since the recipe calls for only 12 ounces of penne I took this opportunity to try the Dreamfields pasta one of their reps sent me awhile back. I was really impressed. We weren't fans of the whole wheat spaghetti we tried a few months ago but this penne was great for being low carb. I wouldn't be sad if they wanted to send me more samples. Wink, wink.

Anyway, this was an easy meal to get on the table but I was a little underwhelmed. I had hoped the flavors of the BBQ sauce would be more pronounced. And despite using a nice, sharp cheddar cheese that flavor seemed to be masked by the mozzarella. I've made some changes to the recipe below. I'll definitely try it again because you can't beat the convenience of a one-pot meal.

Skillet BBQ Chicken Pasta
Slightly Modified from Mel's Kitchen Cafe, As Seen on Prevention RD

1 tablespoon extra-virgin olive oil
2 boneless skinless chicken breasts, cut into bite-size chunks
1 red onion, diced
3 cups water
2 1/2 cups chicken broth
1/2 teaspoon salt
12 ounces penne pasta
1 cup barbecue sauce
1/3 cup sour cream
1/2 cup shredded pepperjack cheese
1/2 cup shredded sharp cheddar cheese

In a large 12-inch nonstick skillet heat the olive oil over medium heat. When hot, add the chicken and onions and saute, stirring occasionally, until the chicken is browned and cooked through. Remove the chicken and onions to a plate and set aside.

In the same skillet, add the water, chicken broth, penne and salt. Bring to a boil and simmer for 12 to 15 minutes, until the liquid is almost absorbed, the pasta is tender and the mixture is thick and syrupy. Stir in the barbecue sauce and sour cream. Once mixed, add in the reserved chicken, onions and shredded cheeses. Stir to combine and cook until everything is heated through.

Taste and season with salt and pepper, if needed. Garnish with additional red or green onions and more shredded cheese.
Pin It!

Tuesday, December 20, 2011

Recipe Swap Roundup - Holiday Cookies/Treats

Tis the season for baking. You all know by now that I'm not much of a baker, but I couldn't resist making Holiday Cookies/Treats one of the themes for the recipe swap. I know most of the time people make the same recipes every year, usually by request from hungry friends, family or coworkers, but every once in awhile it's nice to branch out.

Jaida loves mint and chocolate so she was thrilled to get Mint Oreo Fudge:


Melissa celebrated her blog's first birthday with these Mint Chocolate Chip Cookies:


Jenna was hoping her White Chocolate Dipped Spice Cookies would bring back memories of her grandpa's favorite cookie, but they were a little too busy in the flavor department for her tastes:


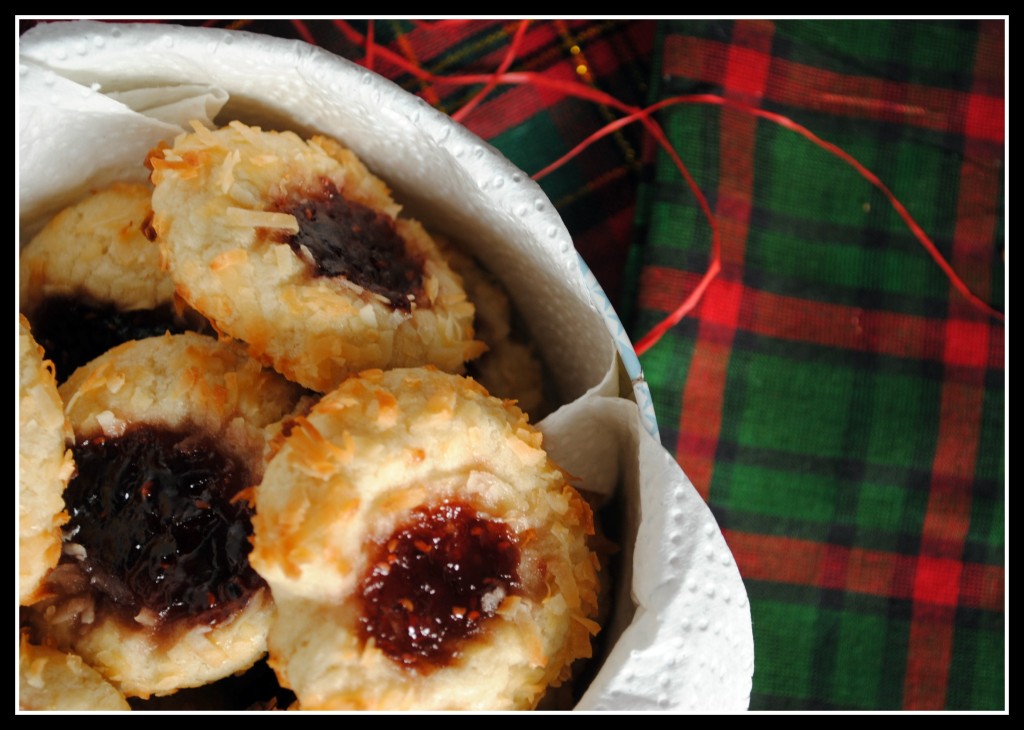
Nicole had my Jam Thumbprint Cookies, which are my all-time favorite holiday cookie. Thankfully, she agreed:


Lishie loves baking and her recipe for Chewy Ginger Molasses Cookies really hit the spot:


Jey's Caramel Chex Party Mix was the perfect mix of sweet, tasty and easy:


Ashley isn't a big fan of fudge but her sister loved the pretty colors in the Candy Cane Fudge:


Cathy's recipe was aptly named Christmas Crack (aka Saltine Toffee Bark):


The Cookaholic Wife is a big fan of chocolate and peanut butter so she loved her recipe for Peanut Butter Cups, even if she had to use a regular size muffin tin to make them:


Coleen had some minor issues with her Oatmeal Cookies, but they were still light, chewy and delicious:


Allison, a newcomer to the swaps, enjoyed her Chocolate Gingerbread Cookies, a spicy treat (especially for breakfast):


Katie made adorable Spoon Cookies filled with apricot preserves:


After making tons of cookies this holiday season Nicole was happy to do something different with Chocolate Dipped Pretzels:


I had a small issue with my Black Bottoms, so this is my pinch baker's photo:


Diana, a newcomer to the swap, doesn't have a blog but she did take pictures and write a review of her recipe for Pumpkin Seed Cranberry Biscotti:


I adapted this recipe from its original form – subbing out the cranberries and pumpkin seeds. Neither one of these items are liked in my household and with the base recipe the changes were easy to make. I have to say I was a little bit skeptical about making biscotti since I’d never made it before. This was a very easy recipe and I have to say with my minor substitutions this recipe came out delicious. My husband (who never really liked biscotti) likes these.

Pecan Chocolate Chip Biscotti Recipe
Adapted from Delish!

3/4 cup sugar
2 eggs
1/4 cup canola oil
1-1/2 teaspoons pure vanilla extract
1/2 teaspoon almond extract
1-3/4 cups all-purpose flour
1 teaspoon baking powder
1/2 teaspoon salt
1 cup chopped pecans
1/2 cup chocolate chips

In a small bowl, beat the sugar, eggs, oil and extracts. Combine the flour, baking powder and salt; gradually add to sugar mixture and mix well. Stir in pecans and chocolate chips (dough will be sticky).

With lightly floured hands, shape each portion into a 12-in. x 2-in. rectangle. Bake at 350° for 25-30 minutes or until golden brown.

Carefully remove to wire racks; cool for 10 minutes. Transfer to a cutting board; cut diagonally with a serrated knife into 3/4-in. slices. Place cut side down on baking sheets.

Bake for 5 minutes or until firm. Turn and bake 5-10 minutes longer or until lightly browned. Remove to wire racks to cool. Store in an airtight container. Yield: 2-1/2 dozen.
Pin It!