Wednesday, July 13, 2011

Chicken Burgers with Garlic-Rosemary Mayo

Delicious. That about sums up my feelings on this amazing burger.


If you were to judge a recipe by the number of ingredients, these Chicken Burgers with Garlic-Rosemary Mayo shouldn't be as nearly good as they are. But man, are they good. I seriously considered having two for dinner the night I made these, they were that good.

Once again, I ground my own chicken. If you have chicken breasts and a food processor there's no reason to buy ground chicken, in my opinion. I really enjoyed being able to pick the rosemary from my herb garden. That's one of the reasons it's taken me so long to make these. I've had the recipe printed for ages, ever since I saw Giada make them on her show, but I hate paying upwards of $3 for rosemary at the supermarket.

Make these soon. They'll be making another appearance on our table for sure.

Chicken Burgers with Garlic-Rosemary Mayo
Giada De Laurentiis

Mayonnaise:
1 cup mayonnaise
1/4 cup chopped fresh rosemary leaves
1 clove garlic, minced

Burgers:
1 pound ground chicken
1/2 teaspoon kosher salt
1/4 teaspoon freshly ground black pepper
4 sandwich rolls or burger buns
1 cup arugula, divided

For the mayonnaise: In a small bowl, mix together mayonnaise, garlic, and rosemary; set aside.

For the burgers: Preheat a gas or charcoal grill or place a grill pan over medium-high heat. In a large bowl, add the ground chicken, 1/2 teaspoon salt, 1/4 teaspoon pepper, and 1/2 of the mayonnaise mixture. Using clean hands, gently combine the ingredients and form the chicken mixture into 4 patties. Place the burgers on the grill and cook for about 7 minutes on each side. Transfer to paper towels and let rest for a few minutes.

Brush the cut side of each roll with 1 teaspoon of the mayonnaise mixture. Toast until golden brown.

To assemble the burgers: Spread a dollop of the remaining mayonnaise mixture on the tops and bottoms of the toasted buns. Place the chicken burgers on the bottom halves of the buns. Top each with 1/4 cup of arugula and finish with the top half of the bun.
Pin It!

Tuesday, July 12, 2011

Ranch Pasta with Bacon, Spinach and Tomatoes

I recently discovered that I love the flavors of Ranch dressing. The herbs in the dressing add a great kick to anything I've added it to. SP was skeptical about this one, but after one bite he was hooked.


This recipe is very, very loosely based on a recipe for Chicken Bacon Ranch Pasta that I printed out a long time ago. When I went to the blog the printout says it came from the recipe was very different, so I consider it more of an inspiration then anything else. I have to admit, I'm excited that I actually came up with a recipe on my own. I very rarely do that.


Ranch Pasta with Bacon, Spinach and Tomatoes
A Taste of Home Cooking Original

1 teaspoon dried parsley
3/4 teaspoon ground black pepper
1 teaspoon seasoned salt
1/2 teaspoon garlic powder
1/4 teaspoon onion powder
1/8 teaspoon dried thyme
Olive oil
4 garlic cloves minced
2 cups heavy cream
1 bag baby spinach
1 can diced tomatoes, undrained
1/2 lb bacon, cooked and crumbled
1 lb short cut pasta, cooked according to package directions
Grated Parmesan or Pecorino cheese

Combine first 6 ingredients (through dried thyme) in a bowl and mix together. This is your Ranch seasoning. You can also use a packet of pre-made dried seasoning.

Heat 2 tablespoons oil in skillet large enough to hold the pasta over medium-high heat. Add garlic and saute for 2 minutes. Add heavy cream and bring to a boil. Lower the heat to a simmer and add Ranch seasoning, spinach and tomatoes. Cook until the spinach wilts. Add pasta and cooked bacon and toss to combine. Add grated cheese and taste for seasoning.
Pin It!

Monday, July 11, 2011

Menu - Week of July 10, 2011


Does anyone else feel like the beginning of the week always creeps up on you? I've been feeling that way a lot lately. I thought I'd publish these menu posts on Sundays but every week Monday rolls around and I haven't done it yet. Ooops!

Sunday - Chocolate Chip Cupcakes with Dark Chocolate Frosting (for this week's recipe swap)

Monday - Date Night

Tuesday - Chicken Caprese and Cappellini with Tomatoes and Garlic

Wednesday - Summer Sweet Corn Fettuccine

Thursday - Baked Chicken Chimichangas

Friday - Burgers and Cheesy Stuffed Tomatoes
Pin It!

200 Facebook "Likes" Giveaway

Thanks to my wonderful readers, my blog's Facebook fan page reached 200 "likes" this week. In honor of this milestone I'm teaming up with my friend Christa from 5 Little Elephants on a very special giveaway. One lucky reader will receive this adorable toddler apron:


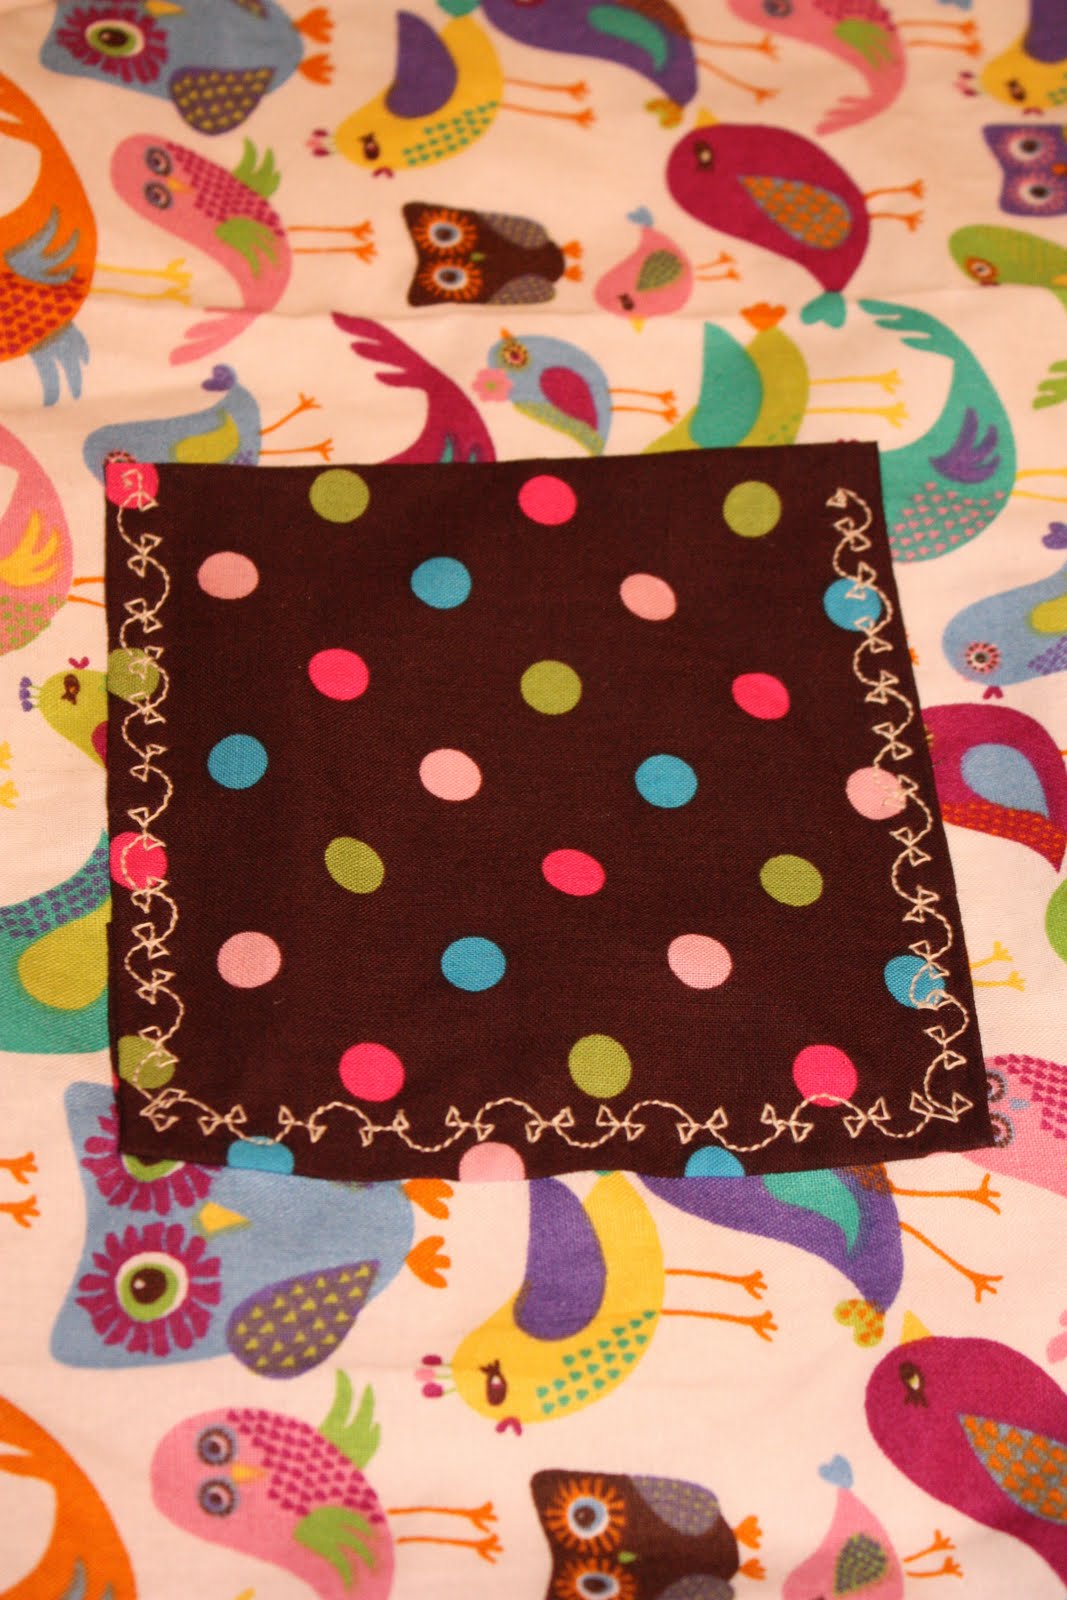
This apron is made of cotton material, measures 19" long and is perfect for any toddler. The apron, decorated with various birds, has decorative stitching around its two deep pockets.


The neck piece is made of pink satin ribbon.


It needs to be hand washed separately and dried flat. This apron retails for $16.95 plus $3.95 s/h. A matching adult apron is available for $22.95 plus $4.95 s/h. A special $5 discount is available for matching aprons.

UPDATE: Here is the boy version:


About 5 Little Elephants: Christa and Sarah are stay at home moms with a total of 5 children. Sarah has a 2 year old daughter, Riley, and a 5 month old son, Lucas. Christa has a 2 year old daughter, Ella, and 4 month old twins, Juliette and Tucker. They decided that they needed a creative outlet and chose to make products for moms that are tasteful, useful and reasonably priced. You can also check out their Etsy site. You can contact Christa directly at christa.nielsen@gmail.com or go to their Facebook page and leave a post on their wall.

And because this giveaway is extra special, there will be a second place winner as well. That person will receive a $5 off coupon for the 5 Little Elephants store.

To enter the giveaway: Leave a comment on this post telling me what you love most about cooking with kids. Even if you don't have children of your own, this is a perfect gift to give a friend or relative.

For a second entry: Like 5 Little Elephants on Facebook and leave another comment on this post letting me know you did.

The Rules: Maximum of two entries per person, U.S. residents only. Each question should be answered in a separate post for you to receive credit for each entry. Commenting will close on Friday, July 15, at 4:00 pm, EST. Entries that do not follow the entry requirements will not be considered. A first and second place winner will be chosen at random and announced next week. The winner must be willing to provide a mailing address. Good luck!
Pin It!

Sunday, July 10, 2011

Green Goddess Potato Salad

Yet another winner from the latest issue of Food Network Magazine, this one for Green Goddess Potato Salad. This came from the magazine insert 50 Potato Salads. There were quite a few that sounded good so check out the list if you don't subscribe to the magazine. I picked the Green Goddess recipe because I had all the herbs in my garden and wanted to try something new.


Green Goddess Potato Salad
Modified from Food Network Magazine

2 lbs potatoes
1 cup mayo
1/4 cup mix of parsley, thyme, tarragon, basil, finely minced
1 lemon, juiced
1 tablespoon white wine vinegar
Salt and pepper
1 teaspoon sugar

Peel potatoes and cut into large cubes. Put potatoes in a pot of cold, salted water and bring to a boil. Boil for 10 minutes, checking with a knife for doneness. Drain thoroughly.

While the potatoes are cooking, combine the mayo, herbs, lemon juice, vinegar, salt, pepper and sugar in a large bowl.

After the potatoes have been drained, spread them on a cookie sheet in a single layer. Take a large spoonful of the mayo and herb mixture and toss with the hot potatoes. Redistribute the potatoes into an even layer and put the cookie sheet in the fridge for 30 minutes to cool.

Once the potatoes are cool, toss them with the remaining mayo mixture. Taste and adjust the seasoning as needed. Serve cold.
Pin It!

Saturday, July 09, 2011

Hawaiian Chicken Sandwich

This post is featured over at Carrie's Sweet Life. Check out her blog for more delicious recipe ideas.

In my neverending quest to find new ways to cook with pineapple, I came across this recipe for Hawaiian Chicken Sandwiches. I'd never heard of Heinz 57 Sauce, but I love chicken and I love pineapple so I put it on the menu.


This was actually the second time in a week that I made this recipe. The first time I followed the directions to grill and then shred the chicken. Unfortunately the texture was so off-putting I ate a few bites and threw it away (saving the pineapple for Round 2). I've seen plenty of other bloggers make this recipe without any issues, so I don't know what happened. I will say that I don't usually think of shredding chicken after grilling it, only after poaching or slow cooking.

For Round 2 I grilled the chicken and left it whole while using the leftover sauce to dress the sandwich, along with some mayo. It was utterly delicious. The spice from the Tabasco and Heinz 57 Sauce was perfect and the smokiness from the charcoal grill added a nice complexity to the other flavors.

Hawaiian Chicken Sandwiches
Adapted from Confections of a Foodie Bride

1/2 cup Heinz 57 Sauce
Fresh pineapple, cored and sliced into 1/2″ inch rings*
2 tablespoons honey, plus more (if desired)
Tabasco sauce
4 boneless, skinless chicken breasts
Olive oil
Salt and pepper
4 buns or sandwich rolls

Heat grill to medium heat.

Place one 1/2″ ring of pineapple into a food processor or blender and process until pureed. Pour the processed pineapple into a medium bowl and stir in the steak sauce, honey, and a couple of dashes of Tabasco. Taste and add honey if additional sweetness is desired. Remove 1/4 cup of sauce to use for basting and reserve the rest for serving.

Brush pineapple rings with olive oil and place on the grill. Cook for 5-7 minutes on each side, until the sugars start to caramelize and nice grill marks have developed.

Pound chicken breasts to an even thickness. Brush the Hawaiian sauce on one side of the chicken breast and season liberally with salt and pepper. Place on the grill and cook about 6-8 minutes, turning once halfway through. Before turning the chicken, baste with the remaining Hawaiian sauce.

Remove chicken and pineapple rings from the grill when done. Let chicken stand for 5 minutes, then assemble your sandwiches. Divide the pineapple rings and chicken between the 4 buns, top with some of the extra Hawaiian sauce and some mayo, if desired, and serve warm.

*Note: You will have extra pineapple to save for another use.
Pin It!

Friday, July 08, 2011

Recipe Swap - Mexican Pizzas

Want to see what other Mexican recipes were made during the swap? Here is the link to the Mexican Recipe Swap Roundup

The theme for this week's recipe swap was Mexican food, which happens to be one of my favorite cuisines to make and eat. I was really excited when I got Brianna's recipe for Mexican Pizzas. I'm always looking for new ways to cook with ground beef and I knew these would not only be easy to make, they'd taste great.


What is it about Mexican food that makes it so difficult to photograph? I know I'm not a professional, but I wish there was a way to make the photo look as good as the dish itself tasted. And boy did it taste good. Even SP, who was wary after I told him what was for dinner, thought it was delicious and cleaned his plate.

I only made a few modifications to Brianna's recipe. I used my own recipe for enchilada sauce and built the pizzas more like quesadillas, with the cheese on the inside to hold everything together, although I did sprinkle some cheese on top of the tortillas as well. I made four pizzas so we'd have enough for leftovers but I didn't anticipate how rich and filling they'd be. I was only able to eat half of mine for dinner so next time I'll just make two.

Thanks for a great recipe, Brianna!

Mexican Pizzas
Slightly Adapted from OishiiFood

1 1/2 tablespoons olive oil
1/4 cup all-purpose flour
1 can (14.5 ounces) chicken broth
1 1/2 tablespoons chili powder
1 small canned chipotle chile in adobo, minced, plus 1 tablespoon adobo sauce from can
3/4 cup water
Vegetable oil
4 corn or flour tortillas
1 lb. ground beef (or turkey)
1 package taco seasoning (or your favorite seasoning blend)
1 14-oz. can refried beans
Toppings: Shredded cheese, diced tomatoes, diced onions, chopped lettuce, sour cream

If you have a broiler, preheat it. If not, preheat your oven to 425 degrees.

Make sauce: In a medium saucepan, heat 1 1/2 tablespoons olive oil over medium heat. Add flour and cook, whisking occasionally, 1 minute. Add broth, chili powder, chipotle and adobo sauce, and 3/4 cup water; bring to a boil, whisking constantly. Reduce heat, and simmer until lightly thickened, about 10 minutes.

In a nonstick skillet large enough to hold the tortillas, fry corn or flour tortillas in vegetable oil on both sides until crispy. Drain on paper towels and place two of them on a baking sheet in a single layer.

Brown ground beef in a pan and add water and taco seasoning (or your own blend) according to package directions. While it’s simmering, heat up the refried beans.

Spread a thin layer of beans on top of each tortilla on your baking sheet. Top with some taco meat (you won’t need all of it – save for another use). Sprinkle with lots of shredded cheese and chopped onions.C over with your remaining 2 tortillas and liberally spoon the enchilada sauce on top of the two Mexican pizzas. Sprinkle with more shredded cheese.

Broil for a few minutes until the cheese is melted or bake for 10 minutes. Slice your Mexican pizzas into quarters. Before serving, scatter some chopped tomato and lettuce on top, along with a dollop of sour cream.
Pin It!

Thursday, July 07, 2011

Smashed Sliders

These Smashed Sliders are another recipe from the most recent issue of Food Network Magazine. When I saw the photo of the burgers in the magazine I thought they looked just like a McDonald's hamburger with the ketchup, mustard, pickles and onion. I couldn't wait to see if these would be a healthier, tastier option.


They didn't disappoint. After my first bite I looked at SP and we both said, "These taste just like a McDonald's hamburger, only better." And they couldn't have been easier to make. Since I only made 12 burgers I was able to cook them all in one pan along with the onions. Prep time is minimal and cooking time is even less. I can't wait to make these again, only next time I'm adding cheese.


Smashed Sliders
Food Network Magazine

2 1/4 pounds 90% lean ground beef (such as sirloin)
1 large onion, roughly chopped
Kosher salt and freshly ground pepper
36 slider buns, split
Dill pickle slices, ketchup and mustard, for topping

Form the meat into 36 golf ball-size balls. Pulse the onion in a food processor until finely chopped.

Heat a cast-iron skillet over high heat. Working in batches, add the meatballs to the skillet and smash them very flat with a spatula. Season with salt and pepper, then sprinkle the onion over the patties. Cook 1 minute, then flip and smash the burgers with the spatula again. Cook 1 more minute; place both halves of the buns on top of the patties to steam for the last few seconds of cooking.

Serve the burgers on the buns topped with pickles, ketchup and mustard.
Pin It!

Wednesday, July 06, 2011

Creamed Corn

I was looking through the most recent issue of Food Network Magazine and came across this recipe for Creamed Corn. Corn, bacon, salt and pepper - what could be easier?


I changed the method slightly based on what I do for my corn fritters and I think the result was pretty amazing. Sweet corn and salty bacon is a great combination.

Creamed Corn
Modified from Food Network Magazine

6 slices bacon
8 large cobs fresh corn, preferably white, shucked and cleaned
Kosher salt and freshly cracked black pepper

In a large skillet, (seasoned cast iron does well here) cook the bacon over medium-high heat until crisp. Turn off the heat and transfer the bacon to a paper towel lined plate. Reserve the drippings in the pan.

Using a chef's knife, cut kernels from 4 ears of corn and place in a large bowl. Grate the kernels from the remaining 4 ears of corn on the large holes of a box grater. Add to the bowl with the whole kernels. Using the back of the knife, scrape any remaining pulp from all the cobs and put in the bowl. Return the skillet to medium-low heat, and add the corn kernels.

Season corn lightly with salt and pepper and cook until broken down and creamy, about 30 to 45 minutes, stirring often; add water if the pan gets too dry. Serve warm or at room temperature.

Note: Crisp bacon can be crumbled over the creamed corn when serving or reserved for another use. If you have bacon drippings on hand, use 1/4 cup for this recipe.
Pin It!

Tuesday, July 05, 2011

Broccoli Salad

I've had this recipe for Broccoli Salad printed out for years but have never gotten around to making it. Fourth of July weekend seemed like the perfect time since we were doing a lot of grilling.


I ended up cutting the recipe down substantially after SP took a look at the ingredients and said, "No way will I be eating any of that." I used one small broccoli crown and pretty much eyeballed the rest to make two portions just for me. It was delicious. I loved the crunchy broccoli, the sweetness of the grapes and dried cranberries mixed with the tanginess of the vinegar and the salty bacon.

Broccoli Salad
Very Culinary

1 large head of broccoli, cut into bite sized pieces
2 cups of red grapes, sliced in half length wise
1 cup slivered almonds
1 cup dried cherries, raisins, or dried cranberries
6 scallions, chopped
1/4 cup cooked bacon pieces
1 cup mayo
1 tablespoon white wine vinegar
1 tablespoon sugar

Mix dry ingredients together in a large bowl. Mix mayo, vinegar, and sugar together in a small bowl. Pour mayo mixture over broccoli mixture and combine well. Serve right away or chill for a few hours.
Pin It!

Monday, July 04, 2011

Menu - Week of July 3, 2011


I made quite a few new recipes over the holiday weekend. I can't wait to share them all with you. Stay tuned for blog posts throughout the week.

Sunday - Stuffed Mushrooms (brought to a cookout next door)

Monday - Smashed Sliders, Green Goddess Potato Salad, Creamed Corn

Tuesday - Ranch Pasta with Spinach, Bacon and Tomatoes

Wednesday - Mexican Pizzas (recipe swap)

Thursday - Chicken Burgers with Garlic-Rosemary Mayo, chips
Pin It!

Friday, July 01, 2011

Caprese Pasta

Two of the things I love most about summer are fresh tomatoes and basil. I love the simple flavors of mozzarella, tomato and basil, also known as caprese. I usually grow my own tomatoes but last year they all fell victim to blossom rot so I skipped them this year. But I am still growing basil (among other herbs) for the simple joy of being able to cook with them whenever I want. My friend Melissa recently posted this recipe for caprese pasta, which I've made countless times before but rediscovered thanks to her post.


I haven't tried her version with the shredded mozzarella since I'm a sucker for fresh, but if she says it's awesome then I believe it.

Caprese Pasta

There are no set amounts here. It's all up to you. This is what you will need:

Dry pasta
Cherry/grape tomatoes
Fresh basil leaves
Olive oil
Kosher or sea salt
Fresh ground black pepper
Fresh mozzarella, diced

Cook pasta in boiling salted water according to package directions; drain well. Pour into a medium bowl, squirt a bit of olive oil on it, toss and let cool to room temperature.

Cut up the tomatoes and chiffonade the basil. Mix together in a large bowl, soak with olive oil, and add salt and pepper, to taste. Let sit for at least 5 minutes.

Pour the cooled pasta into the bowl with the tomato basil mixture. Combine well, taste, and add more salt and/or pepper, if needed. Add diced mozzarella and toss.
Pin It!

Thursday, June 30, 2011

Recipe Swap Roundup - Main Course Salads

The theme for this week's recipe swap was Main Course Salads. With the heat of summer in full force, as well as an abundance of gorgeous fresh produce in supermarkets and farmers markets, we can all use some lighter, healthier recipes.

I always hope whoever gets my recipe likes it, so I was thrilled to see that Katie's whole family liked the BBQ Chicken Salad:


Moviegirl03 loved her recipe for Southwestern Chicken Salad:


Jaida's recipe for Quinoa and Roasted Sweet Potato Salad introduced her to not one but two new ingredients:


There was supposed to be steak in the Cookaholic Wife's recipe for Steak and Artichoke Salad, but unfortunately her fridge didn't cooperate and she had to leave it out:


Heather really enjoyed her recipe for Chicken Salad with Strawberries & Dried Cranberries:


Jey's recipe for Chinese Chicken Salad didn't disappoint:


Even though my husband wouldn't touch my recipe for Strawberry, Orange and Grilled Chicken Salad, I loved it:

Pin It!

Wednesday, June 29, 2011

Recipe Swap - Strawberry, Orange and Grilled Chicken Salad

Want to see what other Main Course Salad recipes were made during the swap? Here is the link to the Main Course Salad Recipe Swap Roundup

This week's recipe swap theme was Main Course Salads. I know a lot of people like to eat lighter, healthier meals in the summer but still want a meal that's substantial enough to last until morning. My recipe was Strawberry, Orange and Grilled Chicken Salad:


In the interest of full disclosure, SP didn't even attempt to eat this one. As soon as I told him what I'd made for dinner he said he "didn't do fruit in salads unless it was a fruit salad" and promptly heated up some leftovers. Oh well, more for me. I really enjoyed this salad. I happen to love fruit in salads and the combination of the strawberries and mandarin oranges was perfect. I added some blue cheese and sliced almonds and I think they were great additions that helped cut some of the sweetness from the other ingredients.

Strawberry, Orange and Grilled Chicken Salad
Adapted from The Cookaholic Wife

6 cups baby spinach leaves
2 cups cooked chicken, shredded
2 cups strawberries, diced
1 cup mandarin oranges, chopped
1/2 red onion, thinly sliced
1/3 cup sliced almonds
1/2 cup blue cheese, crumbled
Raspberry vinaigrette (recipe below)
Fresh cracked black pepper, to taste

Combine the first 7 ingredients in a large bowl. Add desired amount of dressing, toss well to coat. Season with pepper, to taste. Serve cold.

Raspberry Vinaigrette

1/4 cup olive oil
1/8 cup red wine vinegar
1/8 cup white wine vinegar
1 tablespoon raspberry preserves
1/2 teaspoon Dijon mustard
Fresh tarragon, minced
Black pepper
1 shallot, minced
1 teaspoon sesame seeds
Honey, to taste

Blend all the ingredients, except the sugar or honey, in a food processor, adding water as necessary to adjust the consistency. Add honey to taste at the very end.
Pin It!

Monday, June 27, 2011

Crispy Margarita Chicken Tacos with Strawberry Avocado Salsa

My friend Jaida recently posted this recipe for Crispy Margarita Chicken Tacos with Strawberry Avocado Salsa, which she saw on How Sweet It Is. I'm always on the lookout for new Mexican recipes and this sounded delicious.


Unfortunately, while I thought they were delicious (especially the salsa) SP wasn't a fan. I didn't even notice this when I was making the recipe, but there's no sauce except for the juices from the salsa. The chicken, while moist and crispy in and of itself, was a little dry when mixed with all the other ingredients. I'm not sure what kind of sauce would go well, maybe sour cream mixed with lime and coriander? If you have any suggestions please leave a comment.


Crispy Margarita Chicken Tacos with Strawberry Avocado Salsa
How Sweet It Is

4 chicken breasts
8 4-inch tortillas (corn, whole wheat, flour)
3 cups panko bread crumbs
1/4 cup whole wheat flour
Zest of 3 limes
1 teaspoon ground coriander

Marinade:
1/3 cup olive oil
1/3 cup tequila
1/4 cup lime juice
Zest of 2 limes
1 teaspoon ground coriander

Salsa:
1 avocado, chopped
1 medium tomato, chopped
1/4 red onion, chopped
4 large strawberries, chopped
Juice of half a lime
1/8 teaspoon salt
1/8 teaspoon pepper
Toppings: shredded lettuce, freshly grated Monterey Jack cheese, cilantro, lime wedges

At least 2 hours, but no more than 24 hours before making the tacos, combine the marinade ingredients in a plastic food storage bag. Season the chicken with salt and pepper, then slice it into strips lengthwise. Put the chicken in the bag, seal and let marinate in the fridge until ready to cook.

Preheat the oven to 450 degrees F. Combine panko, flour, lime zest and coriander in a bowl. Lay a wire rack on a baking sheet covered with tinfoil and spray with non-stick spray. Remove chicken from marinade and coat strips in panko mixture, pressing so crumbs adhere. Let them on the baking sheet then give them a quick spray of non-stick spray or olive oil. Bake for 10 minutes, flip, then bake 10 more.

While chicken is cooking, combine avocado, tomato, strawberries and onion. Mix with salt, pepper and lime juice.

Heat tortillas if desired, then serve with crisp chicken, salsa, and toppings. Spritz with lime wedges.
Pin It!

Sunday, June 26, 2011

Menu - Week of June 26, 2011


I just realized the theme for this week's menu is chicken. I try to make sure we have some variety in terms of protein but alas.

Sunday - Strawberry, Orange and Grilled Chicken Salad

Monday - Date Night

Tuesday - Chicken Tikka Masala, basmati rice, naan and raita

Wednesday - Pulled Hawaiian Chicken Sandwiches, caprese pasta salad

Thursday - Chicken Bacon Ranch Pasta

Friday - Burgers on the grill, quick potato salad
Pin It!

Friday, June 24, 2011

Eggplant Panini

I've had this recipe for Eggplant Panini printed out and ready to make since Lishie submitted it for a recipe swap on my life board, but I didn't want to make it until I could pick fresh basil from my backyard. I finally got my herb garden going a few weeks ago and immediately put this on the menu for the first week after my big work conference.


I made a few modifications, replacing the roasted red peppers with tomato sauce, ditching the balsamic simply because I forgot to include it, and using flour and egg to coat the eggplant instead of breadcrumbs (which is how we make our eggplant rollatini). I'd really like to try it with the roasted red pepper and balsamic next time. SP gave this sandwich his highest honor - he said it tasted like something he'd get at a restaurant. High praise indeed!

Eggplant Panini
Modified from DeLish!

1 eggplant
1 egg, whisked
1/2 cup flour
1/2 cup vegetable oil
1lb fresh mozzarella, sliced
6-8 leaves fresh basil, thinly sliced
1 cup marinara sauce
4 Italian sub rolls

Trim the stems and ends from the eggplants. Remove strips of peel about 1" wide from the eggplants, leaving about 1/2 the peel intact. Cut the eggplant lengthwise into 1/4" slices and place them in a colander. Sprinkle generously with coarse salt, tossing to expose all slices, and let drain 1 hour. Rinse eggplant under cool running water, drain thoroughly and pat dry with paper towels.

Whisk the egg in a shallow bowl and put the flour in another bowl. Heat the oil in a saute pan on medium-high heat. Dip the eggplant slice first in the egg then coat the slices with flour. Add to the oil, making sure not to crowd the pan, and cook until they are golden, about 2-3 minutes each side. Allow to cool on a paper towel-lined plate.

To assemble the sandwiches - cut each roll in half. Spread marinara sauce on each slice of bread. Layer the eggplant, mozzarella slices, and basil leaves. Close the assembled sandwiches and cook either on a panini press or on a grill pan with a weight on the sandwich (another pan or heavy plate) until the mozzarella is melted. Serve hot.
Pin It!

Thursday, June 23, 2011

Kicked-Up Carbonara

If you've read this blog for any length of time you know how much I love carbonara. I discovered it with a good friend when we were studying abroad and have been in love with it ever since. When I saw Kicked-Up Carbonara on Cassie's blog I knew it would be a winner in my book.


I made a few changes in order to incorporate some of the flavors I love from my traditional carbonara recipe (sliced onion and vermouth) and swapped fresh tomato for the red pepper since neither of us are big pepper fans. The result was utterly delicious - rich and creamy, with a bright burst from the tomatoes. I also loved the addition of the spinach. Carbonara is my guilty pleasure, so if I can add some veggies in it makes me feel better about eating it. Thanks again, Cassie!


Kicked-Up Carbonara
Adapted from Cassie Craves

1 pound linguine or spaghetti
8 pieces thick-sliced bacon, chopped
4 cloves garlic, minced
1 onion, sliced
1/4 cup vermouth
2 cups fresh baby spinach
4 eggs, lightly beaten
3/4 cup half-and-half
Dash of nutmeg
1/2 cup shredded Pecorino or Parmesan cheese
1/2 cup diced tomatoes
Salt and pepper

Cook pasta according to package directions. Drain and return pasta to pan.

Meanwhile, in large skillet, cook bacon until crisp. Add garlic and onion; cook, stirring occasionally, until onion is softened and caramelized, about 10-15 minutes. Add vermouth and bring to a boil. Reduce heat; boil gently, uncovered, 3 minutes or until most of the liquid has evaporated. Add spinach and cook 1 minute, or until wilted. Add pasta to skillet and toss to coat the pasta with the syrupy liquid.

In medium bowl whisk together eggs, half-and-half, nutmeg and Pecorino cheese. Season with salt and pepper. Off heat (this is very important or the eggs will scramble) add egg mixture to skillet and toss to coat. Add the tomatoes. Taste and season with more salt, pepper or cheese, if necessary and serve immediately.
Pin It!

Wednesday, June 22, 2011

Jalapeno Popper Chicken

Someone on my cooking board recently asked for ideas for jalapenos and one of the recommendations was this recipe for Jalapeno Popper Chicken. I love jalapeno poppers so I thought I'd give it a try.


Unfortunately this was just too spicy for me. I was hoping for a mild heat, but I guess I left too many ribs and seeds in the jalapenos because this was downright spicy. SP liked it, but wished I had sauteed the jalapenos before combining them with the cheese. I have to agree. This has definite potential but needs some tweaking. I've added my recommendations to the recipe below.


Jalapeno Popper Chicken
Adapted from The Tiny Tyrant's Kitchen

4 chicken breasts
4oz cream cheese, softened
1/2 cup shredded cheese (any flavor)
1 tablespoon oil
4 jalapenos, chopped (ribs and seeds removed)
salt and pepper, to taste
1 cup bread crumbs
1 cup Panko
2 teaspoons taco seasoning
2 eggs

Preheat oven to 350 degrees and lightly grease a baking dish with nonstick cooking spray.

Heat oil in a small skillet over medium-high heat. Add jalapenos and cook until softened, about 5 minutes. Mix together cream cheese, shredded cheese, and jalapeno peppers. Use a knife to make a pocket in each chicken breast. Stuff mixture into pocket. Use a toothpick to secure if necessary. Sprinkle with salt and pepper.

Mix together bread crumbs, Panko and taco seasoning on a plate. Whisk eggs in a separate bowl. Dip chicken into bread crumb mixture then egg and again into bread crumbs.

Place in baking dish and bake for 30 minutes. Remove toothpicks and serve.
Pin It!

Tuesday, June 21, 2011

Menu - Week of June 19, 2011


The results are in...by unanimous vote I will now post a weekly menu (hopefully on Sundays) of my meal plan for the week. I've been thinking about doing this for awhile and I'm not really sure what was holding me back. So, here goes!

Sunday: Burgers on the grill, pasta salad

Monday: Date night

Tuesday: Kicked-Up Carbonara

Wednesday: Eggplant Paninis, pasta salad with mozzarella and grape tomatoes

Thursday: Crispy Margarita Chicken Tacos with Strawberry Avocado Salsa

Friday: Burger Friday (TBD)
Pin It!