Thursday, October 15, 2015

Roasted Tomato Soup

I'm not a soup person. Actually, I'm not a hot liquids person. I don't drink coffee or tea, I don't really like hot chocolate and I can take or leave soup. On second thought, I take that back. I like soup in small amounts, as a side dish or appetizer, but soup as a main dish doesn't do it for me. There are very few soup recipes I'll make more than once.

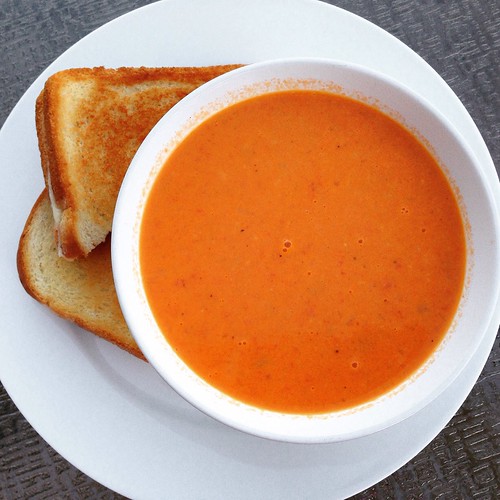
Roasted tomato soup

But this roasted tomato soup from my friend Cassie (who appears to have stopped blogging - what's up with that, Cassie?) is definitely going on the short list. Not only is it easy to make, it's delicious. The tomato flavor really shines and roasting the tomatoes gives them a wonderful depth of flavor. I served it with grilled cheese (duh) and salad and enjoyed every bite.

Roasted Tomato Soup
As seen on Cassie Craves, adapted from Tyler Florence

2 1/2 pounds Roma tomatoes
Salt and freshly ground black pepper
Olive oil
4 tablespoons butter
1 large onion, sliced
2 stalks celery, diced
2 bay leaves
3 cloves garlic, minced
1 quart chicken stock
1/2 cup half and half

Preheat the oven to 400 degrees.

Wash the tomatoes, remove the cores and cut them in half (or into quarters if they're particularly large). Spread the tomatoes onto a baking sheet and drizzle a few tablespoons of olive oil. Season with salt and pepper. Toss to coat all the tomatoes evenly, then roast for 30 minutes until caramelized. Remove from the oven and allow to cool. Remove the tomato skins and discard. Set aside until ready to make the soup.

Melt butter in a Dutch oven over medium-high heat. Add the onion, celery and bay leaves. Season with salt and pepper, and cook until onions are translucent and starting to brown, about 10 minutes. Stir in the garlic and cook until fragrant, about 30 seconds.

Add the tomatoes, along with the chicken stock. Bring to a boil, then reduce the heat and simmer for 15 to 20 minutes until liquid has reduced by a third. Remove the bay leaves and discard.

Use an immersion blender to puree the soup until smooth. You can also use a regular blender or food processor to do this - just be careful not to overfill either since the soup will be hot. Over low heat, add the half and half. Cook for 5 minutes, then taste the soup and add more salt and freshly ground black pepper, if necessary.
Pin It!

Thursday, October 08, 2015

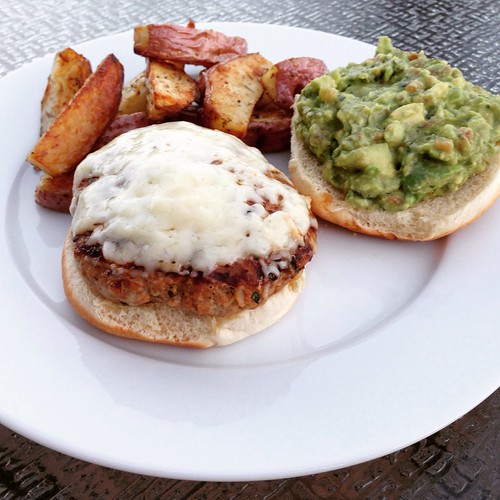
Turkey Burgers with Cheddar and Guacamole

These turkey burgers were a happy accident. See, the plan had been to make my friend Jaida's Turkey Tikka Burgers. I've been thinking about them since she posted the recipe and I couldn't wait to try them. Unfortunately, both the curry paste and mango chutney available in our supermarket weren't safe for Baby Girl since they might contain nuts. Phooey.

Turkey burger with guacamole

Not to be deterred, I looked for a replacement recipe and remembered that I'd been wanting to try this recipe for Jalapeño Cheddar Chicken Burgers with Guacamole that a lot of my favorite bloggers made a couple of years ago. I happened to have everything but the jalapeno, which was fine because Baby Girl doesn't like spicy food.

These were absolutely outstanding. SP said, "this couldn't possibly be a turkey burger. Turkey burgers are dry and flavorless. This is incredible." And Baby Girl gave them two thumbs way up as she inhaled her dinner. I only had one pound of turkey and I graciously allowed SP to take the leftover patty to work today (grumble, grumble) but that just means I need to make them again soon.

Turkey Burgers with Cheddar and Guacamole
Slightly modified from What's Gabby Cooking, seen on Annie's Eats

For the burgers:
1 1/2 lbs. ground turkey (or chicken)
1/2 cup onion, minced
1/3 cup fresh cilantro, minced
2 cloves garlic, minced
1 teaspoon ground cumin
1 teaspoon paprika
Juice of 1/2 small lemon
1/3 cup shredded cheddar cheese, plus more for topping
1/2 teaspoon kosher salt
1/2 teaspoon pepper

To serve:
Burger buns
Guacamole*
Salsa

To make the burgers, combine all the ingredients in a large bowl and mix lightly until evenly combined. Form the mixture into 4-5 patties.

Preheat an outdoor grill and oil the grates. Or, you can cook these on a grill pan or non-stick skillet indoors. Coat whichever pan you're using with cooking spray and heat over medium-high heat.

Cook the patties 3-4 minutes per side, flipping once. A few minutes before the burgers are finished cooking, top with shredded cheddar cheese. Remove the burgers to a plate and let rest a few minutes before serving.

Place one burger on each bottom bun. Put guacamole and/or salsa on the top bun, or on the burger directly, and serve.

*Here's how I made the guacamole for this recipe:

2 ripe avocados
Juice from the other half of the lemon used in the burgers
Minced cilantro
Salt and pepper
A few spoonfuls of prepared salsa

Cut each avocado in half and scoop the flesh into a bowl. Squeeze the lemon juice over the avocado and toss to coat. Add as much cilantro as you like then season with salt and pepper. Add some salsa and stir to combine. Taste and season as needed.
Pin It!

Wednesday, September 16, 2015

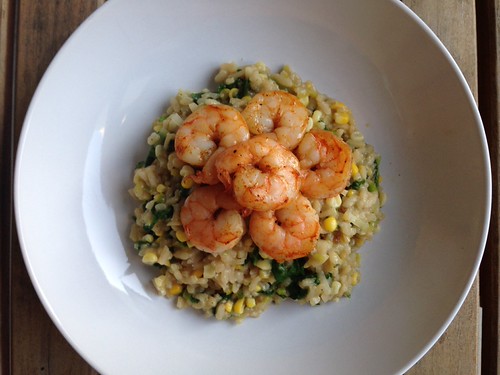
Sweet Corn Risotto with Roasted Shrimp

We all love risotto. I see it as a blank slate, the perfect starting point for whatever combination of flavors you happen to want that day. I recently saw a recipe for Sweet Corn Risotto on Iowa Girl Eats and figured I better make it ASAP before corn season is over.

Shrimp and corn risotto

I've been on a shrimp kick lately, made possible by a sale on frozen shrimp at Acme. I love Ina Garten's method for roasting shrimp - it's so easy and flavorful. I threw in half a bag of baby spinach once the risotto was done for a little color and extra veggies and dinner was served.

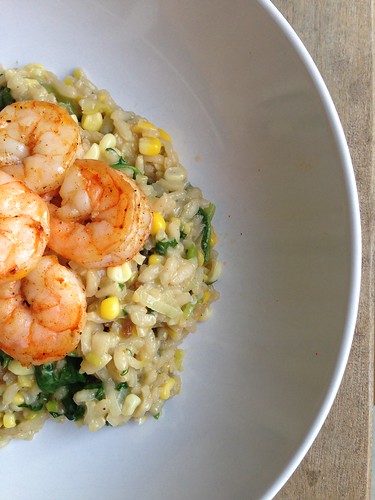
Shrimp and corn risotto

This was wonderful with fresh corn, but I imagine I'll make this again multiple times this winter with frozen corn and it will be just fine. Don't let the fact that corn season is over deter you from trying this recipe.

Sweet Corn Risotto with Roasted Shrimp
Risotto from Iowa Girl Eats, roasted shrimp from Ina Garten

2 large leeks, white and light green parts only, sliced in half then into thin half moons
6 cups chicken broth
3 tablespoons butter
2 cups corn kernels (from 3 ears, you can also use frozen corn)
2 cloves garlic, minced
salt and pepper
2 tablespoons extra virgin olive oil, divided
1 large shallot or 1/2 small onion, chopped
1-1/2 cups arborio rice
1/2 cup dry white wine
1-lb shrimp (at least 21-25 or 26-30 count, you can go larger if you want)
1/2 cup freshly grated Parmesan cheese
1/2 bag of baby spinach (3-4oz), roughly chopped

Important note: You need to soak the leeks before you start cooking. After the leeks have been cut as directed above, place them in a bowl of water for at least 30 minutes. Swish them around a few times, making sure to separate all the pieces. Leeks are VERY sandy and you don't want grit in your risotto. After they've been soaking for 30 minutes, drain in a colander and rinse with fresh water.

Bring chicken broth to a boil in a saucepan then turn heat down to low to keep warm.

Melt 2 tablespoons butter in a large skillet over medium heat then add corn, leeks, and garlic, season with salt and pepper. Saute until leeks are tender, about 10 minutes. Remove mixture to a bowl then set aside.

Melt remaining tablespoon butter in 1 tablespoon olive oil in the skillet then add the shallots and saute until starting to turn tender, 2 minutes. Add rice then stir for one minute. Add wine then stir until nearly absorbed by the rice. Add two ladlefuls of chicken broth then stir until nearly absorbed before adding another two ladlefuls. Repeat until the rice is creamy and al dente, 25-30 minutes. Be sure to taste the risotto when you're nearing the end of the chicken broth, in case you need more.

While the risotto is cooking, preheat the oven to 400 degrees F. Peel and devein the shrimp. Place them on a sheet pan with 1 tablespoon olive oil, salt, and pepper. Toss to coat, then spread them in an even layer. Roast for 8 to 10 minutes, just until pink and firm and cooked through.

Remove the risotto from the heat then stir in the Parmesan cheese, corn and leek mixture, and the spinach. Season with salt and pepper to taste then serve topped with the roasted shrimp.

Pin It!

Friday, September 11, 2015

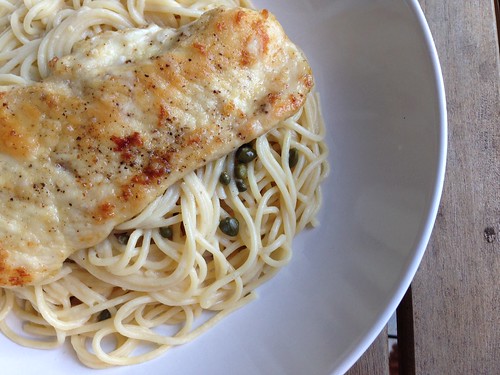
Chicken Piccata with Lemony Noodles

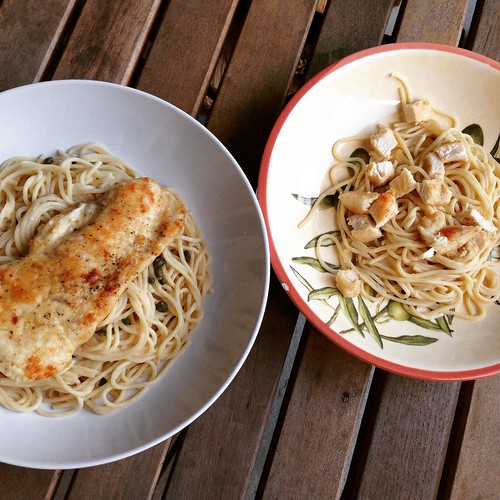
My family loves a good chicken and pasta dish so this recipe for Chicken Piccata with Lemony Noodles was right up our alley. Simple yet bold flavors from the lemon juice and the capers really make the dish.

Chicken piccata

I rarely make a full pound of pasta anymore and it didn't sound like there would be enough sauce, but I went ahead and made the whole box (actually, since I buy Dreamfields pasta, it was 13.25-oz) and there was too much pasta and not enough sauce. I increased the liquid below and decreased the pasta to 8 ounces. I think that will be a better ratio since hot pasta is like a sponge and soaks up all the liquid.

Chicken piccata

And one more photo because Baby Girl loves it when I photograph our plates together.

Chicken Piccata with Lemony Noodles
As seen on So Tasty, So Yummy

3 boneless, skinless chicken breasts
1/2 cup flour
1/2 teaspoon salt
1/2 teaspoon pepper
2 tablespoons butter
2 tablespoons olive oil
2 cloves garlic, minced
1 cup chicken broth
1/2 cup dry white wine
Juice of 1 lemon
1 cup half and half, plus more if needed
1 tablespoon drained capers
8 ounces spaghetti, angel hair or linguine

Slice each chicken breast in half lengthwise. In a food storage bag, combine the flour, salt and pepper. Add the chicken, seal the bag, and toss to coat.

Heat the butter and oil in large skillet over medium heat. Add the chicken and cook until golden brown, about 3 minutes per side. Remove the chicken to a plate.

Add the garlic and sauté for 30 seconds. Add the broth, wine and lemon juice, whisk and scrape the bottom of the skillet. Cook until the sauce is reduced by half. Add salt and pepper to taste. Reduce the heat to low, stir in the cream and capers.

While the chicken and sauce are cooking, cook and drain the pasta. Toss the drained noodles with the sauce. Serve with slices of the chicken on top.
Pin It!

Tuesday, September 08, 2015

Caprese Salad with Warm Bacon Dressing

Raise your hand if you're mourning the end of summer. I know I am. I love everything about summer - the warmth, the sun setting later, the pool, the beach, kids playing in the backyard before bed. I'm not one of those people who looks forward to fall with its cooler temps, sweaters and boots. Give me t-shirts and flip flops any day.

But, alas, summer is winding down. The good news is, this is the time when Jersey tomatoes are still at their best and there's no better way to showcase them than in caprese salad. I'm not usually one to mess with perfection. Caprese, with its creamy fresh mozzarella and red ripe tomatoes sprinkled with basil is my idea of a perfect summer meal. I love to eat it plain or tossed with pasta.

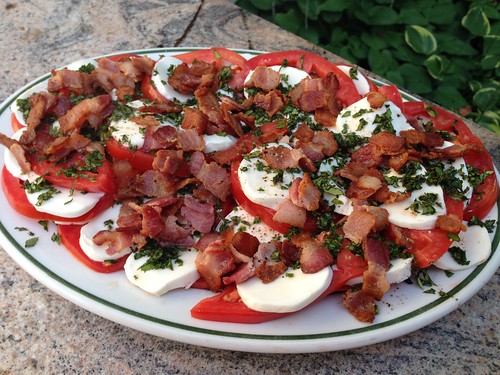
Caprese with warm bacon dressing

Then I saw this recipe for Caprese Salad with Warm Bacon Dressing. I was skeptical at first. Bacon on caprese? With red wine vinegar? Admittedly, I'm not a fan of balsamic on caprese, so I was hesitant to try this. But I'm so glad I did. We had this with my parents for Labor Day dinner and we were fighting over it. The crispy bacon is the perfect contrast to the mozzarella and tomatoes and the warm dressing, with just the right amount of tang from the red wine vinegar, is addictive.

Caprese Salad with Warm Bacon Dressing
As seen on Fake Ginger, adapted from Southern Living

2 1/2 pound beefsteak tomatoes, cut into 1/2-inch slices
8 ounces fresh mozzarella, cut into 1/2-inch slices
1/2 cup fresh basil leaves, finely minced
6 thick bacon slices, chopped into bite-size pieces
2 tablespoons red wine vinegar
1/2 teaspoon salt
1/2 teaspoon pepper

Arrange the tomatoes and mozzarella on a serving platter. Sprinkle with the minced basil.

Saute the bacon pieces in a large skillet over medium heat until crisp. Remove the bacon pieces to a paper towel-lined plate. Transfer 2 tablespoons of the bacon fat to a small bowl. Let stand for 1 minute, then whisk in the vinegar, salt, and pepper. Add the bacon pieces to the dressing and stir to combine. Drizzle the dressing over the salad right before serving.
Pin It!

Friday, September 04, 2015

Recipe Redo: Texas BBQ Chicken Quesadillas

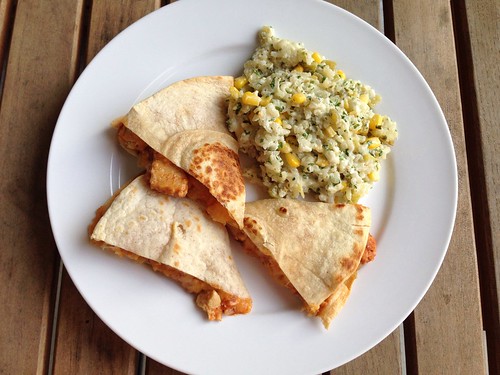
I've been making these Texas BBQ Chicken Quesadillas for years but I've never blogged them properly, with an actual recipe and a decent photo. I made them for dinner tonight and figured now was as good a time as any, seeing as some Facebook friends were asking for the recipe.

BBQ chicken quesadillas

Use your favorite BBQ sauce for the chicken. We like Dinosaur sauce.

Texas BBQ Chicken Quesadillas
As seen on Allrecipes

2 tablespoons oil
2 onions, sliced into thin rings
1 tablespoon honey
2-3 chicken breasts, diced
1/2 cup BBQ sauce
cooking spray
4 10-inch (burrito size) flour tortilla
shredded Mexican cheese

Preheat the oven to 350. Line a baking sheet with foil.

Heat 1 tablespoon of the oil in a pan over medium high heat. Add the onions and cook until they begin to caramelize, stirring often, about 20 minutes. Turn the heat down if the onions are browning too quickly. You want them to be soft and deeply brown. Mix in the honey and stir to combine. Remove the onions to a bowl and set aside.

Put the remaining 1 tablespoon oil in the pan and add the chicken. Cook over medium high heat until cooked through, about 5 minutes. Off heat, stir in the BBQ sauce to evenly coat the chicken.

Coat a griddle pan or large, flat skillet with cooking spray and add one of the tortillas. Heat over medium heat until hot, then add one of the tortillas. Cook until the tortilla is lightly browned on both sides. Remove the tortilla to a cutting board and repeat with the other 4 tortillas.

While the other tortillas are cooking, start assembling the quesadillas. Lay one tortilla flat and add some shredded cheese to one half. Top with a quarter of the onions and a quarter of the chicken. Add some more cheese, then fold the tortilla in half. Place on the prepared baking sheet. As the other tortillas brown, assemble in the same way.

Once all the quesadillas have been assembled, put the baking sheet in the oven for about 10-15 minutes to melt the cheese.
Pin It!

Thursday, August 20, 2015

Lemon Parsley Turkey Meatballs in Curry Sauce over Coconut Rice

I've become obsessed with meatballs.

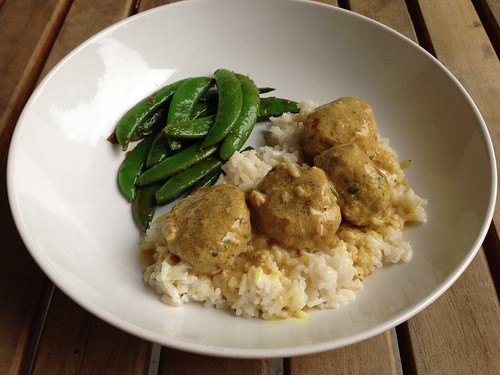
Turkey meatballs coconut rice

My friend, Jaida, posted this recipe for Lemon Parsley Turkey Meatballs with Lemon Coconut Curry Sauce and Lemon-Coconut Rice (sorry, Jaida, I had to shorten the name) last month and I couldn't wait to make them. She came up with this one all on her own, which is pretty amazing if you ask me.

We're also obsessed with coconut rice in this house and these delicious, light meatballs in a drinkably good curry sauce were the perfect thing to serve on top. I decided to make a few changes to Jaida's original recipe to suit our tastes and it did not disappoint. I'm already plotting when I can make it again.

Lemon Parsley Turkey Meatballs in Curry Sauce over Coconut Rice
Slightly modified from Sweet Beginnings

Lemon-Parsley Turkey Meatballs
1 lb ground turkey
Zest and juice of 2 medium-large lemons
1/4 cup parsley leaves, chopped
Salt and pepper, to taste
1/3 cup Panko bread crumbs
1 egg
1 tablespoon olive oil

Coconut Rice
1 tablespoon butter
1 cup long-grain rice
1 cup coconut milk
1 cup water

Curry Sauce
1 can, plus what's left in the can used for the rice, coconut milk
Juice of 1 large lemon
2 teaspoons yellow curry powder
Salt and pepper, to taste

In a large bowl, combine all of the meatball ingredients, except the olive oil. Gently mix with your hands until well combined. Take about 2 tablespoons of the meat at a time and form into balls. Place each meatball on a plate and repeat with all the meat. Heat 1 tablespoon of olive oil in a large skillet over medium-high heat and swirl around to coat the bottom of the pan. Once hot, add the meatballs so that they are not touching. Cook for 2-3 minutes per side, until all sides are browned. Reduce the heat to medium.

While the meatballs are cooking, heat 1 tablespoon of butter over medium heat in a large saucepan. Once the butter is melted, add the rice and stir to coat each grain evenly. Toast the rice for a few minutes, until you start to see brown spots. Add the coconut milk and water and bring to a boil. Reduce the heat, cover, and let simmer for 20 minutes. Remove from heat and let sit while you finish the meatballs and sauce.

Put all the sauce ingredients in a small saucepan over medium heat. Heat, stirring occasionally, while the meatballs cook. Once the meatballs have been browned, carefully pour the sauce over the meatballs. Simmer for 5-10 minutes, until the sauce thickens slightly and the meatballs are cooked all the way through.

Serve the meatballs and sauce over the rice.

Pin It!

Thursday, July 23, 2015

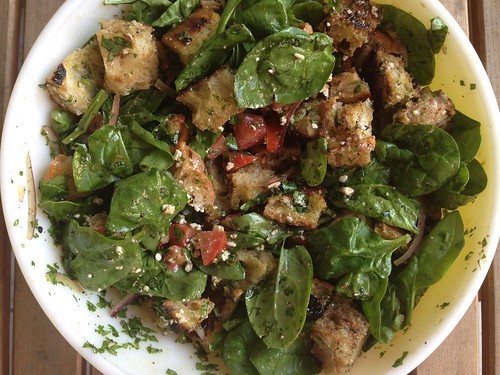
Grilled Ciabatta Bread Salad

My friend Mary Ellen made this Grilled Ciabatta Bread Salad for us twice before I finally got off my butt and made it myself. It's one of SP's favorite salads so he's been bugging me to make it.

Grilled bread salad

We have a charcoal grill, which makes it harder to control the heat of the fire. My bread got pretty blackened so I had to cut some sections off (I really dislike overly charred food), but that was no big deal. This made a TON of salad, way more than the three of us could eat, so next time I'll cut the recipe in half or just make it when we have company.

Grilled Ciabatta Bread Salad
As seen on Mary Ellen's Cooking Creations

1/2 small red onion, thinly sliced
1 small bunch cilantro, chopped
1 cup good olive oil, divided
1 loaf ciabatta bread
1 6-oz bag baby spinach
2 tomatoes, chopped
blue cheese or feta crumbles, to taste

1/2 cup balsamic vinegar
Salt, pepper and oregano, to taste

Place onions, cilantro and 1/2 cup olive oil in a large bowl and toss together. Let marinate in the fridge while you grill the bread.

Slice the bread into two long halves. Spray or brush with cooking spray/olive oil, season with salt and pepper and grill until charred on both sides.

Let the bread rest until it's cool enough to handle, then chop into 1 inch pieces. Add bread cubes to the onion and cilantro mixture, along with the remaining 1/2 cup olive oil. Chill at least 30 minutes.

Before serving, add the tomatoes, spinach and cheese. Toss with the balsamic (start slowly and add to taste), salt, pepper and oregano to taste. Serve immediately
Pin It!

Monday, July 06, 2015

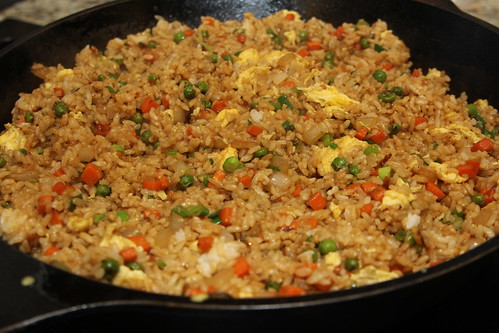
Fried Rice

One of T's contributions to our Asian dinner was Fried Rice. But in true form, she managed to be busy when it was time to cook the rice so the task fell to me. I pick on her about this all the time, her knack for finding something else to do when I'm in her kitchen so she's off the hook for cooking. I actually don't mind - I love cooking in her kitchen. There's so much room!

Asian night
(all photos by T. Casey)

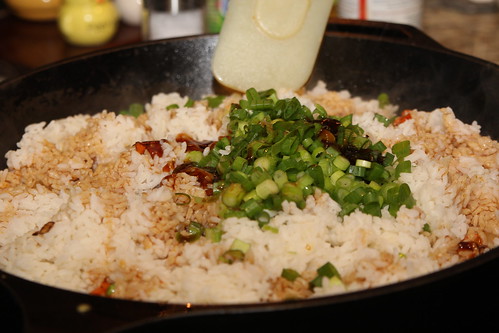
Anyway, let's talk about this fried rice. T did all the prep the day before (a must when making fried rice - the rice needs to be pre-cooked and cold) so all I had to do was throw it all together in her huge cast-iron skillet.

Asian night

This was outstanding. So fresh and flavorful. T doubled the recipe for our dinner and it was enough to feed 6 adults, 2 kids plus two of T's adult kids who scrounged the kitchen for leftovers after we'd eaten.

Fried Rice
As seen on Gimme Some Oven

3 tablespoons butter, divided
2 eggs, beaten
2 medium carrots, peeled and diced
1 small white onion, diced
1/2 cup frozen peas
3 cloves garlic, minced
salt and pepper
4 cups cooked and chilled short-grain white rice
3 green onions, thinly sliced
3-4 tablespoons soy sauce, or more to taste
2 teaspoons oyster sauce
1/2 teaspoon toasted sesame oil

Heat 1/2 tablespoon of butter in a large skillet over medium-high heat until melted. Add the beaten egg, and cook until scrambled, stirring occasionally. Remove egg to a separate plate.

Add an additional 1 tablespoon butter to the pan and heat until melted. Add carrots, onion, peas and garlic, and season with a generous pinch of salt and pepper. Saute for about 5 minutes or until the onion and carrots are soft.

Increase heat to high, add in the remaining 1 1/2 tablespoons of butter, and stir until melted. Immediately add the rice, green onions, soy sauce and oyster sauce and stir until combined. Continue stirring for an additional 3 minutes to fry the rice. Then add in the eggs and stir to combine. Add the sesame oil, stir to combine, and remove from heat.

Serve warm.

Pin It!

Monday, June 29, 2015

Pork and Shrimp Dumplings

The theme for our latest dinner with our friends C & T was Asian food. We usually pick one recipe to make at T's house and this time we chose Steamed Dumplings. I've never made dumplings before and incorrectly assumed they'd be a lot of work. Nope!

Asian night
(all photos by T. Casey)

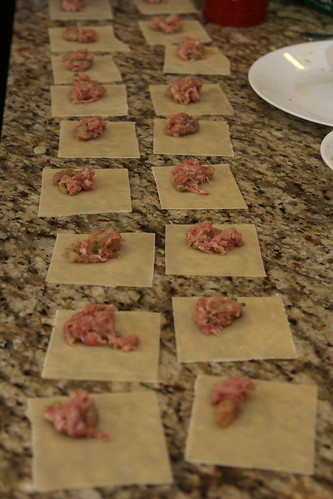
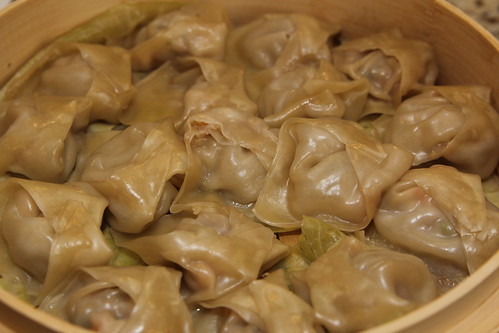
T always cons me into doing all the work (just kidding, I love cooking in her gorgeous kitchen). After I mixed up the filling we assembled the first batch, placing up a little bit of filling onto each dumpling wrapper, wiping the edges with water, and then folding the dough into a triangle. Then we pinched the two edges together to make little packages.

Asian night

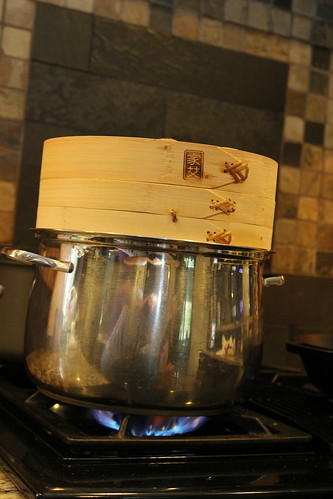
SP and I got a bamboo steamer as a wedding present and had never used it. Oops! We lined the bottom with cabbage leaves, placed the dumplings on top and set it over a pot of boiling water for 10 minutes.

Asian night

These dumplings were outstanding. They had great flavor from the filling and the dipping sauce (which mirrored those same flavors) was perfect. We all gobbled them up. We doubled the recipe below so we had 40+ dumplings for 6 adults and 2 kids and it wasn't enough. Thankfully we had extra filling and T had more wrappers in her fridge, so I quickly assembled another 20 dumplings. The kids would run into the room, grab a handful of dumplings off the platter and run off to play, then come back for more. So, so good.

Asian night

I can't wait to make these again. My mom has already put her in request.

Pork and Shrimp Dumplings
From Rasa Malaysia
Makes about 20-24 steamed dumplings

1/2 pound ground pork
8-10 medium-sized shrimp, peeled, deveined, and cut into small pieces
1 scallion, finely chopped
3 dashes white pepper
1 teaspoon Shaoxing wine or sherry
1/2 teaspoon salt
1/2 teaspoon soy sauce
1/4 teaspoon sesame oil
1 inch ginger, peeled and grated
1 pack potsticker/dumpling wrappers

Combine the ground pork, shrimp, chopped scallions, ginger, and all the seasonings together. Mix well and set aside.

To make dumplings, place a small spoonful of the filling in the center of a wrapper. Dab a little water with your finger and circle around the edge of the skin, and then fold and pleat the dumpling accordingly. Repeat the same for the rest.

Arrange the dumplings in a bamboo steamer (lined with parchment paper or cabbage leaves at the bottom) and steam for 8-10 minutes. Serve immediately with dipping sauce.

To pan fry the dumplings: heat a large skillet and swirl some oil around to coat the pan. Add a single layer of pot stickers. Cook for 2 to 3 minutes until they begin to turn golden on the underside. Don't move them. Add 1/4 cup of water to the pan and cover immediately. Cook for 5 minutes, or until the meat is cooked through and the dumplings release from the pan. Serve immediately with the dipping sauce.

Soy-Vinegar Dipping Sauce
From Martha Stewart

1/2 cup soy sauce
1 teaspoon rice vinegar
1/2 teaspoon toasted sesame oil
2 teaspoons sugar
1 scallion, trimmed and sliced
2 tablespoons water

Combine all ingredients for the dipping sauce in a small bowl.
Pin It!

Thursday, June 25, 2015

Quick Stir-Fried Snow Peas or Sugar Snap Peas

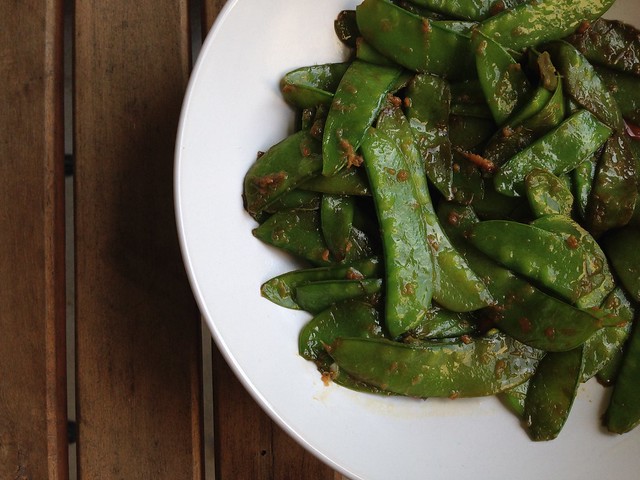
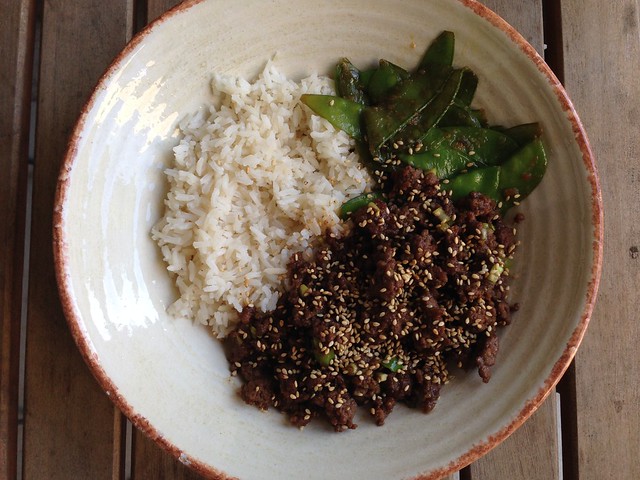
Baby Girl loves snow peas. Usually she eats them raw but I wanted to try cooking them as a side dish for dinner one night. After a quick Google search I found this recipe for Quick Stir-Fried Snow Peas or Sugar Snap Peas. The ingredients closely mirrored my main dish (a family favorite - Cheater Korean Beef) so I thought it would be perfect

Snow peas

Sadly, I overcooked the snow peas, but they were still tasty. Baby Girl told me she loved the flavor but wished they were still crispy like when she eats them raw. Next time (and there will definitely be a next time) I won't let them go too far.

Snow peas

Quick Stir-Fried Snow Peas or Sugar Snap Peas
As seen on Diner's Journal from the NY Times

2 tablespoons canola, vegetable or peanut oil
1 1/2 pounds snow or sugar snap peas, washed and trimmed
1 tablespoon minced ginger
1 tablespoon minced garlic
1 teaspoon dark sesame oil
1 to 2 tablespoons soy sauce

Place 2 tablespoons oil in a large, deep skillet or wok and turn heat to high. When it begins to smoke, toss in peas and cook, stirring almost constantly, until they are glossy, bright green and begin to show a few brown spots, about 5 minutes.

When peas are almost done, stir in ginger and garlic, and cook another minute or so. Turn off heat and remove peas to a platter. Drizzle with dark sesame oil and soy sauce. Taste and adjust seasoning, and serve.
Pin It!

Monday, June 08, 2015

Cut-Out Sour Cream Sugar Cookies

::waves hi:: I hope you guys are still with me. I didn't realize I'd taken such a long break. It was completely unintentional, actually. Here's the short explanation before I tell you about these cookies I made for Christmas.

Long story short, blogging isn't as much fun for me as it used to be. I've never been a big-name blogger but I started to get annoyed that my photos aren't that good, that I always had to try new recipes instead of remaking old favorites, that I wasn't interested in food trends like spiralizers and zoodles. Frankly, blogging became a chore so I just stopped doing it. I can't remember the last time I photographed a meal with the intention of blogging about it. I started remaking dishes I hadn't made in years and just enjoyed eating with my family every night.

Last night I realized it had been more than a month since I blogged and I figured I should see if I had any recipes in my draft folder that I could write about. And I found these Cut-Out Sour Cream Sugar Cookies that I made for Christmas.

Sour cream sugar cookies

I never even grabbed a shot of these frosted so you'll just have to take my word for it that the frosting was awesome. Baby Girl and I made these together and they were so easy and so delicious. Definitely my go-to cookie recipe for the holidays from now on.

I don't know how often I'll blog in the coming weeks/months, but I'm actually making a new recipe tonight. If it's good, I'll blog about it. If you want to follow me on Instagram you can see all the food photos I do take, although it's not always of things I've cooked.

Cut-Out Sour Cream Sugar Cookies
By Monica

FOR COOKIE DOUGH:
2 3/4 cups flour
1/2 teaspoon baking soda
1/4 teaspoon salt
1/2 cup sour cream, room temperature
1/2 cup butter, softened
1 cup sugar
1 egg
1/2 teaspoon vanilla

FOR FROSTING (makes 1/2 cup of frosting):
1 cup powdered sugar
1 tablespoon butter, softened
1/2 teaspoon vanilla
2 tablespoons half and half
food coloring

In large bowl, whisk together flour, baking soda, and salt; set aside. In second large bowl, with an electric mixer, cream the sour cream and butter at low speed; add sugar, eggs, and vanilla and mix until combined. (It's okay if it's a little lumpy as long as no butter chunks are visible.) Gradually add the flour mixture to the sour cream mixture, mixing until well combined. Dough will be sticky. (You can stir it by hand with a wooden spoon.) Divide dough onto two pieces of plastic wrap; flatten dough, wrap tightly, and refrigerate 1-2 hours. (Make ahead tip: Dough may be made to this point and refrigerated for up to 3 days or frozen for up to 1 month.)

Preheat oven to 350 degrees. Line 2 baking sheets with parchment paper; set aside.

Generously flour your counter and rolling pin. Sprinkle the top of the dough with more flour. Starting at the center, roll the dough out until dough is an even 1/4" thick all over. Dip cookie cutter in flour and cut out dough shapes. Transfer dough shapes to baking sheets.

Bake 2 sheets at a time for 8-10 minutes, rotating and switching pans half way through cooking time. Bake just until they are cooked all the way through but haven't started browning on the bottom. Transfer hot cookies to a baking rack to cool completely.

Combine powdered sugar, softened butter, vanilla, and half of the half and half in a large bowl. Use an electric mixer to combine ingredients on a low speed until you have a thick paste and all of the lumps are gone. Gradually add remaining half and half and continue mixing on medium speed until frosting is a smooth, silky, spreadable consistency. If it's still too thick, add more cream 1/2 teaspoon at a time. Mix in food coloring, if desired. Frost each cookie and decorate with sprinkles while frosting is still wet. Leave out to dry for several hours until dry to touch before storing in an airtight container. If stacking frosted cookies, put waxed or parchment paper between layers.
Pin It!

Friday, May 01, 2015

Homemade Tater Tots

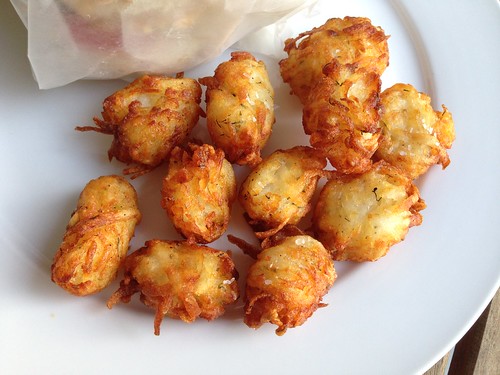
Sometimes I see a recipe and I have to make it right away. That was the case with these Homemade Tater Tots. I was reading my blog feed on a Friday afternoon and came across this recipe. Baby Girl doesn't like tater tots, (for some reason she isn't a fan of most potato dishes) but she was going to my parent's house for a sleepover that night. Score! I immediately went into my kitchen to see what kind of potatoes I had. Unfortunately I only had red potatoes, but I forged ahead anyway.

Tater tots

Red potatoes have less starch and more sugar, so they're drier and stickier than a russet. I had a heck of a time forming these into tots, but I persevered with a bowl of water to rinse my hands. I can't wait to make these again, but with a russet instead. They're starchy and light, which makes them perfect for frying. Even so, these were really good. SP loved them. Now if only we could get Baby Girl to like them...

Homemade Tater Tots
As seen on Damn Delicious

2 pounds russet potatoes, peeled
1 tablespoon all-purpose flour
1 teaspoon garlic powder
1/2 teaspoon onion powder
1/4 teaspoon dried oregano
1/4 teaspoon dried dill
Kosher salt and freshly ground black pepper, to taste
1 cup vegetable oil

Place potatoes in a large saucepan and cover with cold water by 1 inch. Bring to a boil and cook until parboiled, about 6-7 minutes; drain well and let cool.

Using a box grater, finely shred potatoes. Using a clean dish towel or cheese cloth, drain potatoes completely, removing as much water as possible.

Transfer potatoes to a large bowl. Stir in flour, garlic powder, onion powder, oregano and dill; season with salt and pepper, to taste. The mixture should be workable but dry. Form potatoes into tots.

Heat vegetable oil in a large stockpot or Dutch oven over medium heat. Add tots (don't crowd the pan) and cook until evenly golden and crispy, about 3-4 minutes. Transfer to a paper towel-lined plate. Sprinkle with some more salt and then serve immediately.*

*TO FREEZE: Transfer cooled tater tots to an airtight container. Freeze up to 1 month. To bake, preheat oven to 400 and bake until heated through, about 15-17 minutes.
Pin It!

Wednesday, April 22, 2015

Mustard-Roasted Fish

We all love fish but I'm not great at changing up how we eat it. We have two family favorites - homemade fish sticks and tilapia francese. I buy a club pack of frozen tilapia filets and those are the two dishes I make over and over again.

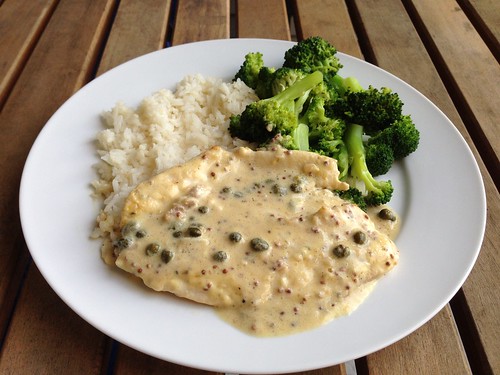
Then Ina's recipe for Mustard-Roasted Fish came into my life. I follow Ina's page on Facebook and it was re-posted there as an easy weeknight meal recommendation. I've had a jar of grainy mustard in my pantry for ages just waiting to be used and this sounded easy and delicious.

Mustard roasted fish

Ina recipes never steer me wrong but this was outstanding. I loved the flavors in the sauce (I was glad I made rice to sop up the extra) and it really was one of the easiest meals I've ever made. All you do is mix the sauce ingredients, put the fish in a baking dish, top with the sauce and bake. I'm happy to have a new fish dish in the rotation.

Mustard-Roasted Fish
From Barefoot Contessa Back to Basics

Cooking spray
4 fish fillets (tilapia, cod, red snapper, etc.)
Kosher salt and freshly ground black pepper
8 ounces creme fraiche
3 tablespoons Dijon mustard
1 tablespoon whole-grain mustard
2 tablespoons minced shallots
2 teaspoons drained capers

Preheat the oven to 425.

Spray an ovenproof baking dish with cooking spray. Place the fish fillets in the dish. Season with salt and pepper.

Combine the creme fraiche, 2 mustards, shallots, capers, 1 teaspoon salt, and 1/2 teaspoon pepper in a small bowl. Spoon the sauce evenly over the fish fillets, making sure the fish is completely covered.

Bake for 15-20 minutes, depending on the thickness of the fish. You want the fish to flake easily at the thickest part (test by pulling at the fish with a fork).

Serve hot or at room temperature with the sauce from the pan spooned over the top.

Pin It!

Wednesday, April 01, 2015

Chewy Café-Style Chocolate Chip Cookies

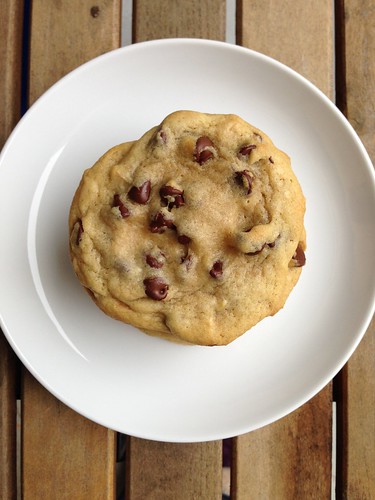
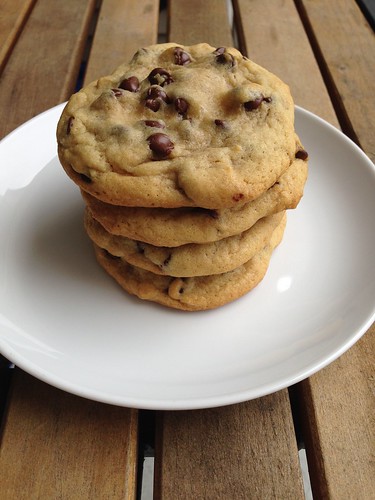
Chocolate chip cookie recipes are a dime a dozen and everyone seems to have a favorite. I wanted something sweet to bring to our friend's house and remembered Mary Ellen posting this recipe for Chewy Café-Style Chocolate Chip Cookies. She raved about the recipe so I was excited to give it a try.

Chocolate chip cookies

You have to chill the dough, which means planning ahead if you want to make these, but they're worth the wait. I'm still not sure rolling the dough into balls, then tearing them apart and smashing them back together is worth the time and/or energy, but in the interest of following the recipe I did it this time. Next time I may just scoop the dough loosely and see how that works out.

Chocolate chip cookies

These were delicious (and huge). Full of chocolate chips, crispy on the outside and chewy on the inside. Not too sweet, either. I, unlike most people, didn't have a go-to recipe before this one and I don't think I need to look any further. These were everything I like in a chocolate chip cookie.

Chocolate chip cookies

Chewy Café-Style Chocolate Chip Cookies
As seen on Mary Ellen's Cooking Creations, from Host the Toast

2 cups + 2 tablespoons all purpose flour
1 teaspoon baking soda
2 teaspoons cornstarch
1/2 teaspoon salt
1 1/2 sticks butter, melted and cooled
1 cup light brown sugar, lightly packed
1/2 cup granulated sugar
2 large eggs
2 teaspoons vanilla extract
1 1/2 cups chocolate chips

In a medium-sized bowl, whisk together the flour, baking soda, cornstarch, and salt. Set aside.

In a large bowl, beat together the cooled melted butter and the sugars with a hand mixer for about one minute. Add in the eggs and vanilla extract. Beat until just combined.

Slowly add in the dry ingredients and mix just until there are no flour clumps left. Fold in the chocolate chips. Cover the bowl with plastic wrap and refrigerate for one hour.

Remove the dough from the refrigerator and preheat the oven to 325 degrees, making sure you have one rack in the middle of the oven. Line a few baking sheets with parchment paper (I needed 5, but it you don't have that many you can always reuse them once they've cooled).

Scoop 3 tablespoons of cookie dough at a time and roll into balls. Pull the balls apart by pulling on both sides, then put the two halves together again with the lumpy, torn sides facing up. Place the dough on a baking sheet, making sure the cookies have plenty of space to spread. (I was able to fit 5 cookies per sheet).

Bake for about 12 minutes, rotating half-way through, or until the cookies have spread out and the edges are golden, but the center of the cookie still looks soft and just slightly under-cooked. Remember, every oven is different, so you can start with just one or two cookies on the tray to see what baking time works best for your oven. Mine took 13 minutes.

Let cool on the baking sheets until the cookies are firm enough to remove. Place the cookies on wire cooling racks to cool completely. Repeat with remaining batches, until all cookies are baked. Store in an air-tight container.
Pin It!

Thursday, March 19, 2015

Ham and Potato Soup

I figured I should share this recipe with you guys before the weather changes. Although, if you live in the Northeast like I do, you may be wondering if it will ever be warm again. They're calling for snow tomorrow, for crying out loud. No thanks. Bring on summer!

Ham and potato soup

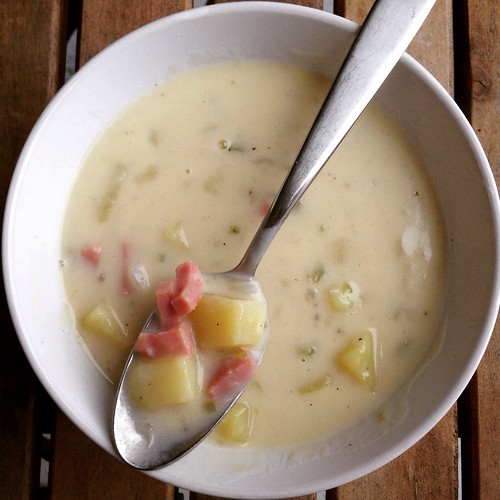
I printed off this recipe for Ham and Potato Soup awhile ago and finally decided to make it. When I actually read the recipe (anyone else tend to do that, just read the ingredients and not the directions?) I decided to make some changes. For starters, dirtying two pots to make soup seems wrong. I also like to saute veggies to add that extra layer of flavor.

The result was delicious - thick and rich and creamy. At first I thought the soup would need some other seasoning, like thyme or rosemary, to brighten it up, but this was perfect just with salt and pepper. The leftovers reheated well the next day, too. I'll definitely make this again.

Ham and Potato Soup
Modified from Allrecipes

3 1/4 cups water
2 cubes chicken bouillon
5 tablespoons butter
1 rib celery, diced
1/2 large onion, finely chopped
salt and pepper
5 tablespoons flour
2 cups milk
1 1/4 lbs Yukon gold potatoes, peeled and cut into bite-size pieces
7oz ham steak, cut into bite-size pieces

Bring the water to a boil in a pot or an electric kettle. After the water comes to a boil, transfer it to a bowl or glass measuring cup and add the chicken bouillon cubes. Stir to dissolve the bouillon. Set aside.

Melt the butter in a large Dutch oven over medium-high heat. Add the celery and onion and cook until the onion is translucent and starting to soften, about 5 minutes. Add some salt and pepper to season the veggies, then add the flour. Stir to coat all the veggies with the flour, then cook for 1 minute.

Add the water with the bouillon and the milk to the pot and whisk to get rid of any lumps from the flour. Add the potatoes. Bring to a boil, then simmer until the potatoes are tender, about 10 to 15 minutes.

Once the potatoes are cooked, add the ham to the soup. Stir to heat through, then taste and adjust the seasoning with more salt and pepper, if needed. Serve immediately.
Pin It!

Friday, March 13, 2015

Chicken and Green Chile Enchiladas

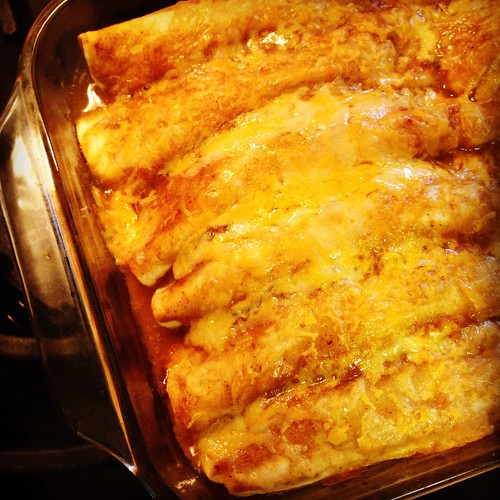
As you may have noticed, I've been on a chicken thigh kick recently. The meat is just so tender and flavorful. Take these Chicken and Green Chile Enchiladas from my friend, Melissa. In the past I would have subbed breasts for the thighs. I'm sure the results would have been good, but not great. Instead I used thighs and everyone, even the 5-year-old, was raving about how good they were.

Untitled

My stepdad kept oohing and ahhing over them. And, like many things, they got better the longer they sat. SP took the final two enchiladas for lunch two days later and said they were even better than the first day we ate them.

As luck would have it, my aunt lives in New Mexico, home of the Hatch chile. She knows how much I love to cook, and that I can't get Hatch chiles here in Pennsylvania, so she figured out a way to process them, freeze them and bring them with her when she visited for the holidays. I've had the chiles in my freezer, waiting for the perfect recipe. If you don't have Hatch chiles you can definitely use regular green chiles - you can't really taste the true Hatch chile flavor in the enchiladas anyway. I'm saving the rest of the chiles to use as a burger topping. I can't wait!

Chicken and Green Chile Enchiladas
As seen on Alosha's Kitchen

2 pounds boneless, skinless chicken thighs
Seasoning: ground cumin, dried oregano, garlic powder, salt and pepper
1 tablespoon oil
1 large yellow onion, diced
4 large cloves garlic, minced
1 7-ounce can diced green chiles (or 7 to 8 ounces Hatch chiles if you have them!)

Enchilada sauce:
1 1/2 tablespoons olive oil
1/4 cup all-purpose flour (spooned and leveled)
2 cups chicken broth
1 1/2 tablespoons chili powder
1 small canned chipotle chile in adobo, minced
3/4 cup water

8 ounces cheddar cheese, shredded and divided in half
18 flour tortillas, large taco size
Chopped fresh cilantro (optional)

Preheat oven to 350. Place the chicken on a large baking sheet lined with foil. Season the chicken generously with cumin, oregano, garlic powder, salt and pepper. Bake for 30 minutes.

Meanwhile, heat 1/2 tablespoon oil over medium low in a small skillet. Add the onions and garlic and saute until just soft, about 5 minutes. Add the onion and garlic to a medium mixing bowl along with the diced green chiles.

To make the enchilada sauce: in a medium saucepan, heat 1 1/2 tablespoons oil over medium. Add flour and cook, whisking occasionally, 1 minute. Add broth, chili powder, chipotle, and 3/4 cup water; bring to a boil, whisking constantly. Reduce heat, and simmer until lightly thickened, about 10 minutes.

Once the chicken has finished baking, remove to a cutting board, let cool slightly, then slice/chop the chicken into small bits and add to the mixing bowl. Make sure the mixture is cool enough to not melt the cheese, then add half the cheddar. Toss well to combine.

You'll need two baking dishes (one 9x13" and one smaller, I used an 8x8 square). Spray both dishes with cooking spray. Fill each tortilla with some of the filling, then roll it up and place seam side down in the baking dishes. Repeat with the other tortillas. Pour the sauce evenly over the enchiladas.

Cover the dishes with foil (do not forget this or the sauce will dry out!) and bake in the 350-degree oven for 30 minutes. Remove the pan and discard the foil. Sprinkle the remaining cheddar on top of the enchiladas and return to the oven uncovered for another 10 minutes.

Sprinkle cilantro on top, if desired, and serve immediately.
Pin It!

Monday, March 09, 2015

Double Chocolate Silk Cream Pie

We all know I don't bake, but when I saw this recipe for Double Chocolate Silk Cream Pie I had to have it. An Oreo cookie crust and rich, chocolate filling sounded heavenly. And since there's no baking involved I figured it would be a piece of cake (or pie...ha!) to whip up one weekend.

Double chocolate silk pie

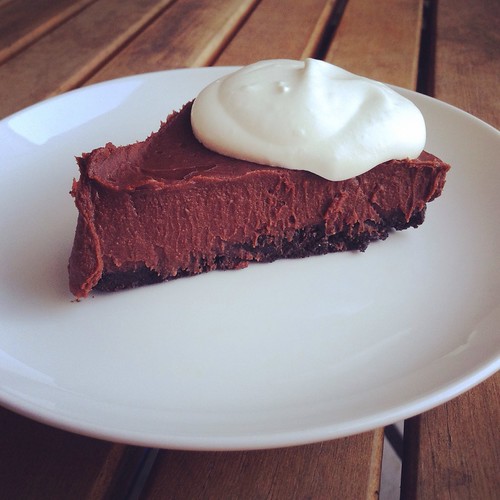
The only downside to this recipe is that the pie has to cool overnight. The original recipe says you can let it cool for 4-6 hours, but you really want this ice cold so overnight is probably best (at least in my opinion). The lingering smell of crushed Oreos and cooked chocolate drove us all crazy until we could finally enjoy a slice of this decadent pie.

A little goes a long way for this one, unless you have a serious sweet tooth. I served this with fresh whipped cream after Sunday dinner and we were all in love. Baby Girl especially loved this one, so I know I'll be making it again soon.

Double Chocolate Silk Cream Pie
As seen on Lauren's Latest

CRUST
20 Oreo cookies
6 tablespoons melted butter

FILLING
5 large egg yolks
1 1/2 cups heavy cream
3 tablespoons granulated sugar
1/8 teaspoon salt
1 1/2 teaspoons vanilla extract
10 oz. semi sweet chocolate chips

whipped cream, for serving

Place all the Oreo cookies (use the whole cookie) in a food processor. Pulse a few times until the cookies become crumbs. Mix the crumbs and melted butter together until moist. Press into the bottom and up the sides of a 9-inch pie plate or cake pan. Refrigerate while making the filling.

Separate the eggs, reserving the egg yolks in a bowl. Reserve or discard the egg whites. Lightly beat the yolks and set aside.

Place a medium-sized glass bowl over a pot with about an inch of simmering water (this is called a double boiler). Make sure the water does not touch the bottom of the bowl. Add the cream to the bowl and heat until you start to see bubbles forming. This will scald the cream. Stir in the sugar and salt, whisking until dissolved, about 2 minutes. Stream one tablespoon at a time of the hot cream into the egg yolks, whisking after each tablespoon is added. Do this 4 or 5 times. This is called tempering. Stir the tempered egg yolks back into the cream in the double boiler. Cook, whisking occasionally, until the eggs and cream start to thicken and coat the back of a spoon, about 8 minutes. The pie won't set if you don't thicken the cream and egg mixture long enough, so if you're unsure whether or not the mixture is thick enough, continue cooking for another 5 minutes.

Remove the cream and egg mixture from the heat and stir in the vanilla and chocolate chips. Whisk until the mixture is smooth and all the chocolate has melted. Pour the filling into the prepared pie shell and cool to room temperature.

Once the pie is cool, cover it with plastic wrap, pressing the plastic wrap directly onto the filling. Refrigerate the pie overnight. Cut into pieces and serve with whipped cream (recipe below).

Homemade whipped cream

1 cup heavy cream
2 tablespoons confectioners' (powdered) sugar

Place a metal, glass or ceramic bowl in the freezer for 15-30 minutes to chill. Once chilled, pour the cream into the bowl and add the sugar. Using an electric hand mixer or balloon whisk, beat the cream to the desired consistency. For soft peaks, the cream will be just thick enough to hold its shape. For stiffly beaten cream, the beaters or whisk wires will leave distinct traces on the cream and stand in firm peaks when the beaters are lifted.

MAKE AHEAD
The cream can be whipped up to 1 day ahead, covered tightly with plastic wrap, and refrigerated. If liquid separates from the cream, whip it again to incorporate the liquid.

Pin It!

Friday, March 06, 2015

Oklahoma Fried Onion Burgers

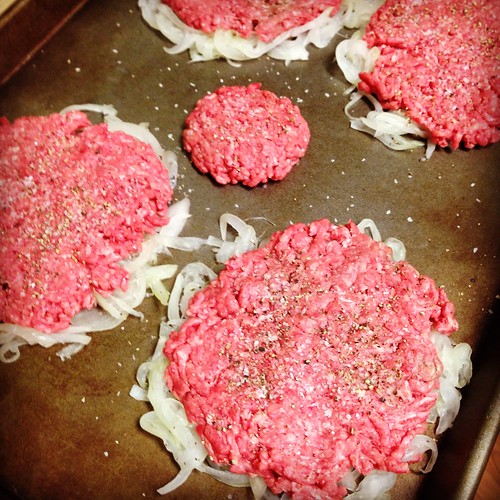
A few weekends ago we were all watching Cook's Country together (yes, my 5-year-old loves to watch cooking shows. It warms my heart). They were making something called Oklahoma Fried Onion Burgers and they looked mouthwateringly good.

Oklahoma fried onion burgers

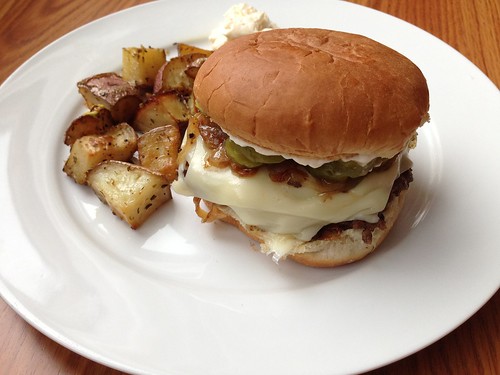
For some reason that episode was on at least 3 or 4 more times within a two-week span and I finally told SP I had to make them. So, he picked up some ground beef at the store and I planned to make them one Saturday for dinner. Then we had a ridiculously huge lunch and couldn't stand the thought of eating again. The ground beef went into the freezer, where it was promptly forgotten. I finally remembered that I wanted to make the recipe and put the burgers on the menu two nights ago. They were so good I had to blog them immediately.

Oklahoma fried onion burgers

I thought these would be more complicated but it's actually a very easy recipe. All you need to do is plan ahead enough to let the onions sit in the colander. SP said they tasted like a McDonald's hamburger only a million times better. Baby Girl had the mini burger in the center of the picture above, sans onions because she isn't a fan. They even reheated well the next day.

Oklahoma Fried Onion Burgers
As seen on Cook's Country

1 large onion, peeled, halved and thinly sliced
salt and pepper
1 lb ground beef
1 tablespoon butter
1 tablespoon vegetable oil
4-8 slices American cheese
Mayo, mustard and pickles, for serving
4 hamburger buns, toasted

Combine the onion slices and 1 teaspoon of salt in a bowl and toss to combine. Transfer the onions to a colander and let sit for 30 minutes, tossing occasionally. Transfer the onions to a clean dish towel, gather the edges together and squeeze out as much liquid as you can from the onions. Do this over the sink or a large bowl since the onions will have quite a bit of liquid in them.

Divide the onions into 4 separate mounds on a rimmed baking sheet. Form the beef into 4 lightly packed balls. Place the beef balls on top of the onion mounds and flatten the beef firmly (use your palm) so the onion adheres to the beef. The patties should measure 4 inches in diameter. Season the beef generously with salt and pepper.

Melt the butter with the oil in a 12-inch skillet over medium heat. Using a large spatula, transfer the patties to the skillet, onion side down. Cook for 6-8 minutes, until the onions turn a deep golden brown and begin to crisp around the edges. Flip the burgers, then increase the heat to high and cook until well browned on the second side, about 2 minutes.

Add 1 or 2 slices of cheese to each burger and allow to melt. Add mayo, mustard and pickles to the top buns, then place each burger on a bottom buns. Serve immediately.
Pin It!

Wednesday, February 25, 2015

Chicken Tikka Masala

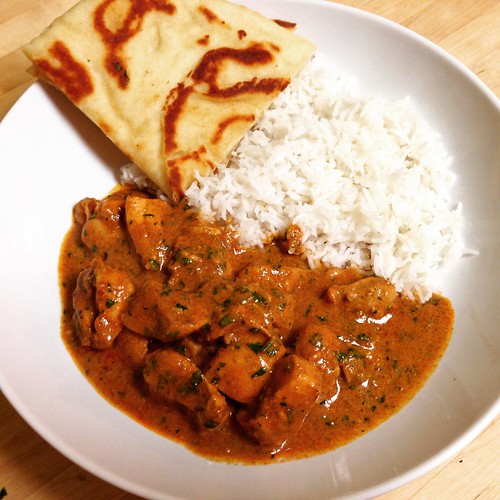
Can we talk about chicken thighs for a minute? I know I'm late to the party but holy moly are they good. Tender, juicy, flavorful, almost impossible to overcook. And cheap as all get-out. I had a serious craving for Chicken Tikka Masala recently and realized I'd never gotten around to trying my friend Melissa's version. This is now my go-to recipe.

Untitled

It's not that different from the previous version I used to make in terms of ingredients and flavor. The big differences are the use of chicken thighs and the cooking method. Melissa's recipe has you marinating the chicken and then baking it. My old version had you grilling the chicken. Baking is so much easier and clean up is a snap.

This was outstanding. Utterly fantastic. We all gobbled it up, using some delicious buttered naan to soak up the sauce.

Chicken Tikka Masala
As seen on Alosha's Kitchen

Marinade
1 cup plain yogurt
2 tablespoons lemon juice
1 tablespoon grated fresh ginger
2 teaspoons cumin
1 teaspoon ground cinnamon
1 teaspoon ground cayenne pepper
1 teaspoon salt
1 1/2 to 2 pounds boneless, skinless chicken thighs cut into large cubes

Sauce
1 tablespoon butter
2 cloves garlic, minced
1 jalapeno chile, minced
2 teaspoons ground coriander
1 teaspoon cumin
1 teaspoon sweet paprika
1 teaspoon garam masala
1 teaspoon salt
1 8 oz. can tomato sauce
1/2 cup half and half
1 cup water
1/2 cup fresh chopped cilantro

In a large food storage bag, combine yogurt, lemon juice, grated ginger, 2 teaspoons cumin, cinnamon, cayenne and 1 teaspoon salt. Add the chicken, toss to combine, seal the bag and refrigerate overnight.

Preheat the oven to 350. Spread the chicken out on a foil-lined baking sheet and cook for 25 minutes.

While the chicken is cooking, melt the butter in a 12-inch non-stick skillet over medium heat. Add the garlic and jalapeno and stir for 1 minute. Stir in the ground coriander, 1 teaspoon cumin, paprika, garam masala and 1 teaspoon salt. Add the tomato sauce, half and half and water and stir to combine. Reduce the heat to low and simmer gently until the sauce thickens, about 10 minutes.

Add the cooked chicken with all the accumulated juices (don't omit that!) to the sauce and let simmer for another 10 minutes. Garnish with chopped cilantro.

Serve over basmati or jasmine rice with naan for soaking up the sauce.
Pin It!