Wednesday, October 05, 2011

Tortellini Soup with Chunky Tomatoes and Spinach

I have a confession to make - I'm not a big fan of soup. In truth I just don't like hot liquids. I don't drink coffee, tea or hot chocolate and I don't like soup. I blame my dad, who's the same way. But SP really likes soup and in an effort to make him happy (and expand my horizons a bit) I put this Tortellini Soup with Chunky Tomatoes and Spinach on the menu recently. I have to admit, it smelled wonderful as it cooked, but I also love the smell of brewing coffee but I still don't drink it.


Thankfully, this soup tasted just as good as it smelled. I served it with Garlic Cheddar Biscuits and side salads.

Even though I used 6 cups of broth the soup was still mostly veggies and tortellini, so next time I'd use a full 8 cups. The next day Baby Girl ate the tortellini and some of the broth and veggies for dinner.

Tortellini Soup with Chunky Tomatoes and Spinach
Slightly Modified from Alida's Kitchen

1 tablespoon extra virgin olive oil
1 medium yellow onion, chopped
3 cloves garlic, minced
6-8 cups low sodium chicken broth
1 can (14.5 ounces) low sodium diced tomatoes, including juices
1-lb tortellini (fresh or frozen), any variety
1 1/2 teaspoons Italian herb seasoning
2 bags baby spinach
Salt and Pepper, to taste
1/4 cup freshly shredded Parmesan cheese

In a dutch oven, heat oil over medium-high heat. Saute onion for 5-7 minutes, or until translucent. Add garlic, and saute for 1 minute. Add broth and tomatoes. Turn heat to high, cover and bring to a boil. Add tortellini and cook according to package instructions.

Within the last minute of cooking the tortellini, stir in Italian herb seasoning and spinach. Taste, and add salt and pepper seasoning, as desired. Serve immediately, garnishing each bowl with Parmesan cheese.
Pin It!

Tuesday, October 04, 2011

Garlic Cheddar Biscuits

I'm really mourning the loss of natural light these days. My photos, which were never that great to begin with, are really suffering from the lack of daylight. I'm thinking it might be time to invest in a light box.

Anyway, on to the biscuits. I admit to loving the Garlic Cheddar Biscuits at Red Lobster. I have very fond memories of going there as a kid with my grandma. It was a special treat and I would eat a bunch of these biscuits with my Caesar salad. Yum!


I used a white cheddar because that's what we had on hand, but I wish I'd thought to buy yellow cheddar for the picture. I guess I'll just have to make these again and retake the photo. Oh darn.

Garlic Cheddar Biscuits
Sugared Whisk

2 cups unbleached all purpose flour
2 oz sharp cheddar cheese, shredded
2 teaspoons sugar
2 teaspoons baking powder
1/2 teaspoon table salt
2 cloves garlic, minced
1 cup whole milk
1/4 cup sharp cheddar cheese, shredded (for topping)
4 tablespoons butter
1 clove garlic, minced
1/2 teaspoon dried parsley
Seasoned or garlic salt, to taste

Adjust oven rack upper-middle position and heat oven to 425 degrees. Line baking sheet with parchment paper or grease for easy removal of biscuits.

Whisk together flour, cheddar cheese, sugar, baking powder, salt, and garlic in a medium bowl. Add milk and stir until ingredients are mixed, be careful not to over mix. At this point the dough should be fairly sticky but not runny or dry. Add more flour or milk as needed to achieve desired consistency.

Scoop dough onto prepared baking sheet with a large cookie scoop (about 2 tablespoons worth of dough). Top each biscuit with a sprinkle of cheddar cheese. Bake for 20 minutes or until the tops of the biscuits begin to brown.

In a small bowl, melt the butter along with the garlic and parsley in the microwave. Brush tops with garlic butter mixture and sprinkle with garlic salt to taste.

Makes 12 biscuits
Pin It!

Monday, October 03, 2011

And the winner is....

I'm sorry to have made everyone wait until Monday for the big announcement of who won the giveaway for the Furi Rachael Ray Froggy Double-Bladed Mezzaluna with Wooden Cutting Board and Non-Slip Mat. In the future I promise to have all giveaways end on Thursdays so I can announce the winner the next day.

Without further ado...


Drum roll please...


The winner is:


Jaida from Sweet Beginnings! Congratulations, Jaida! I hope it makes chopping herbs an easier task. Please contact me with your mailing address within 24 hours.

Thank you to everyone who entered. I really appreciate my readers and am so happy you enjoy reading my blog (and hopefully making my recipes) as much as I enjoy sharing my meals with you. Happy Cooking!
Pin It!

Spaghetti Carbonara with Blue Cheese, Asparagus and Artichokes

I love carbonara. This isn't a big secret if you've read this blog for any length of time. It's my absolute favorite pasta dish, so when I saw Jessy over at Gourmet Day to Day had a recipe for Linguine Carbonara with Blue Cheese and Artichokes I knew I had to try it. Just one problem - SP isn't a big fan of artichokes. Luckily my stepdad invited SP out for dinner recently, so I invited my mom over to share the pasta.


We both loved this. Loved it. We kept oohing and ahhing over the rich, creamy pasta, the crispy bacon, the freshness of the asparagus and the artichokes. Oh, the artichokes. So nice to see them on my plate again. I made a few slight modifications to the recipe, adding sliced onions and cutting down the blue cheese so it didn't overwhelm the other flavors, although you can add up to 1 cup if you want more blue cheese flavor. Thanks, Jessy, for a delicious spin-off to my beloved carbonara.

Kitchen Tip - Use kitchen scissors to easily cut bacon directly over the pan.

Spaghetti Carbonara with Blue Cheese, Asparagus and Artichokes
Slightly Modified from Gourmet Day to Day

1 pound spaghetti
1 bunch asparagus, trimmed and cut into thirds
8 slices bacon, cut into 1-inch pieces
1/2 large onion, sliced
3 garlic cloves, minced
2 8-oz cans artichokes hearts (in brine), rinsed and quartered or 2 8-oz packages frozen artichoke hearts, thawed and quartered
1/2 - 1 cup crumbled blue cheese
1 1/2 cups heavy cream
1 teaspoon freshly ground black pepper
1/2 teaspoon salt
3 large eggs
1/2 cup half and half
1 cup grated Parmesan cheese (about 3 ounces)
1 tablespoon chopped fresh basil

Bring a large pot of salted water to a boil.

In a large pan or dutch oven, cook cut bacon until starting to get crispy over medium-high heat. Add sliced onions and cook about 15 minutes, until tender and starting to caramelize. Add artichokes and garlic and saute for 5 minutes.

While artichokes are cooking, add pasta to boiling salted water. Add blue cheese, cream, black pepper and salt to the artichoke mixture and simmer until sauce thickens, about 5 minutes.

Add the asparagus to the pasta water 3 minutes before the pasta is done. Drain and add to the sauce and toss to coat. Remove from heat.

Beat the eggs and half and half together, along with the cheese and basil. Add to pasta and toss well with tongs. Serve immediately.

Pin It!

Sunday, October 02, 2011

Menu - Week of October 2, 2011


October is finally here and in the Northeast we are really noticing the change in seasons. Leaves are falling along with the temps and much to my chagrin, it's getting dark much earlier these days. My camera and I are mourning the loss of natural light. I am also in full-on comfort food mode, as you will see in the menu plan below.

I'm also excited because next week is Baby Girl's second birthday, which we're celebrating on Saturday. Hard to believe two years have passed already. Where does the time go? And the day after her birthday is our 8th wedding anniversary. These two milestones truly mark the beginning of the fun and festive fall and holiday season for me and I can't wait.

Sunday - Salisbury Steak, Blue Cheese and Scallion Mashed Potatoes, Creamed Spinach

Monday - Goat Cheese, Sweet Onion, Apple and Brandy Stuffed Chicken, (for the recipe swap and I'm planning to modify it), oven roasted potatoes, corn

Tuesday - Gnocchi Mac and Cheese, side salads

Wednesday - Pan Seared Pork with Citrus Rum Sauce, mashed potatoes, green beans

Thursday - Ranch Pasta with Bacon, Spinach and Tomatoes

Friday - BBQ Cheddar Bacon Ranch Chicken Salad Wraps, chips

Saturday - pizza, antipasto and cake for Baby Girl's 2nd birthday party
Pin It!

Friday, September 30, 2011

Recipe Swap Roundup - Tailgating/Party Appetizers

For many people this time of year means only one thing - football. Even if you aren't into the game itself, there's always delicious food to cook and eat. In honor of football season I thought tailgating/party appetizers would be a great theme for the recipe swap. I was pleasantly surprised by the popularity of this theme. I'm proud to say this was the swap with the highest number of participants at 28 people. Woohoo!

Whatever team you root for, whether you prefer college or NFL, I'm sure you'll enjoy the recipes below.

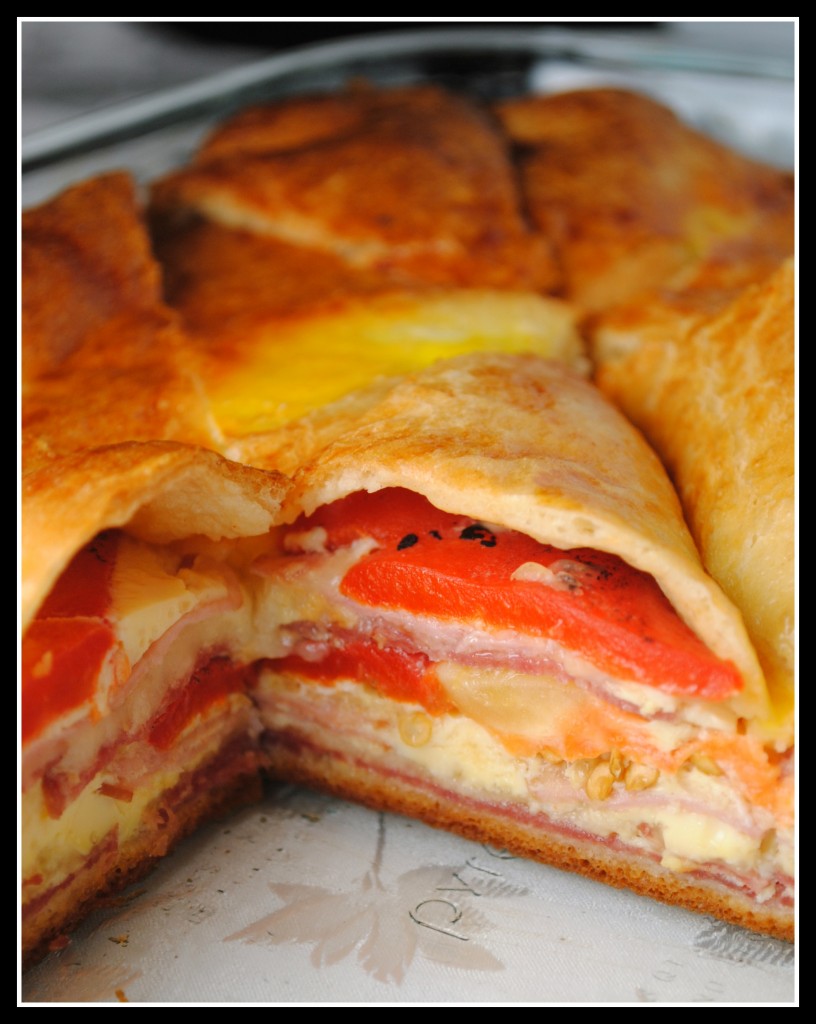
Nicole enjoyed her Italian Appetizer Bites during a recent football game:


Caitlin loves having an excuse to make football food and she loved this recipe for Crispy Baked Thai Chicken Wings:


Heather is a football fan and loved her recipe for Buffalo Chicken Tenders:


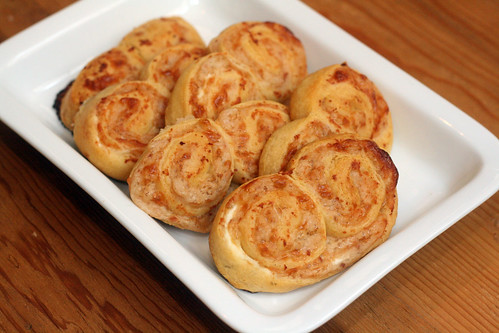
Katie and her toddler both enjoyed the Ham and Swiss Double Pinwheels:


The Cooking Nurse was a little wary of her recipe for Brat Bruschetta but ended up being pleasantly surprised by this fun twist:


Jaida loves dips and pizza so she thought her White Pizza Dip was a great football snack:


Ashley, a newcomer to the swaps, loved her recipe for Grilled Sriracha "Poppers" so much she's already got plans to make them again when she tailgates in a few weeks:


Brianna isn't a big football watcher (like me), but she enjoyed making and eating her recipe for Buffalo Chicken Rolls:


Coleen enjoyed her BBQ Chicken Dip:


Jessy had planned to take some of her Prosciutto and Fontina Pinwheels to a friend, but they were so delicious she and her husband couldn't part with a single one:


Lishie's husband is a wing fanatic so her recipe for Baked Buffalo Wings was a perfect addition to their game-day spread:


Melissa loved the idea of putting Hot Artichoke Dip in wonton cups:


The Cookaholic Wife just recently started experimenting with different burger toppings and found out she loved this recipe for Tailgate Sliders:


Jey's recipe for Oven Fried Pickles made the cut for game-day:


My recipe for Philly Cheesesteak Eggrolls with Spicy Ketchup was perfect for this Philly-area girl:


Krystal had my recipe for Potato Slabs:


Maryanna's recipe for Corn and Jalapeno Nachos is great because each chip is individually filled with all the yummy toppings:


Melissa put a buffalo chicken spin on her Cheesy Chili Chip Dip:


Ellie really enjoyed watching a game while eating her Chile-Lime Chicken Wings:


Jenna enjoyed her Chicken Cordon Bleu Rollups:


Peace, Love and French Fries loved her Soft Pretzel Bites and Beer Cheese Dip:


Melissa brought her Spinach Artichoke Dip to a recent family gathering, where it was a huge hit:


Jill took inspiration from her recipe to create Mediterranean Chicken Calzones:


Lindsay took a trip back to where she used to live with Hot Crab Dip:


Mary Ellen simplified her recipe for Creamy Sundried Tomato Pesto Dip:


Vicki, a swap newcomer, made Thai Shrimp and Scallion Dumplings (no photo).
Pin It!

Thursday, September 29, 2011

Biscuits over Creamed Chicken

Now that it's officially fall I'm in full-on comfort food mode. Of course now that my mind is off summer and stuck in fall the cool temps we had recently have been replaced by heat and humidity. Typical East Coast weather, unfortunately. That didn't stop me from making Biscuits over Creamed Chicken for Sunday dinner, though.


Once again Cassie delivered a great recipe. I tried making my own cream of chicken soup, and SP thought it needed a bit more chicken flavor, so I might look into those chicken bouillon cubes the next time I make it from scratch. I would also add some chicken stock to thin out the sauce since mine was a little thick, probably because of the homemade soup. Those things aside, this was a great comfort-food meal that I'll definitely be making again.

Biscuits over Creamed Chicken
Adapted from Cassie Craves

2 cups cooked, shredded chicken
1 1/2 cups cream of chicken soup (make your own recipe below)
1/2 cup sour cream
1/2 cup milk
1 cup chicken stock
Salt and pepper to taste
1 cup frozen peas
1 cup frozen carrots
1 cup frozen corn
6-8 oz shredded cheddar cheese
1 can refrigerated biscuits, cooked according to package directions

Combine chicken, cream of chicken soup, sour cream, milk, chicken broth, salt and pepper, peas, carrots and corn in a large, high-sided skillet over medium heat. Heat to boiling, stirring frequently. Stir in cheese.

Nestle the biscuits in the creamed chicken mixture, or pour the creamed chicken over the biscuits.

From Scratch Cream of Chicken Soup
Slightly Modified From Allrecipes.com

1 1/2 cups chicken broth
1/2 teaspoon poultry seasoning
1/4 teaspoon onion powder
1/4 teaspoon garlic powder
1/8 teaspoon black pepper
1/4 teaspoon salt
1/4 teaspoon dried parsley
Dash of paprika
2 cups milk
3/4 cup flour

In medium-sized saucepan, boil chicken broth, 1 1/2 cup of the milk, and the seasonings for a minute or two.

In a bowl, whisk together the remaining 1/2 cup of milk and flour. Add to boiling mixture and continue whisking briskly until mixture boils and thickens.

Pin It!

Wednesday, September 28, 2011

Red Wine Vinaigrette

As the weather gets colder and I find myself gravitating toward rich, creamy (read: fatty) meals, I'm rediscovering salad. A nice side salad with lots of veggies and a light vinaigrette dressing not only adds a healthy component to a fattening meal, it helps cut through the richness.


I love making homemade salad dressing because it takes next to no time to throw together and I can control the ingredients. This is my standby for simple green salads. Lately I've been using spring mix, romaine hearts, shaved carrot, chopped mushrooms and tomatoes in my salads and thyme from my garden in the vinaigrette.

Red Wine Vinaigrette

1 tablespoon Dijon mustard
1/4 cup red wine vinegar
1 shallot, finely minced
4-6 sprigs of thyme, leaves stripped off the stems
Salt and pepper
1/4 cup extra virgin olive oil

Combine mustard through pepper in a bowl, cup, salad dressing container, etc. Stir/whisk to combine. Slowly add oil in a steady stream, continuously whisking to emulsify. I like a tangy vinaigrette so I use less oil, an even amount to the vinegar. Adjust to your personal preference and season to taste with salt and pepper, if needed.
Pin It!

Tuesday, September 27, 2011

It's time for a GIVEAWAY!

Thanks to my wonderful readers, my Facebook fan page reached 300 "likes" this week. Thank you all so much! In honor of this milestone I've decided it's time for another giveaway.


In the interest of full disclosure, I received this Furi Rachael Ray Froggy Double-Bladed Mezzaluna with Wooden Cutting Board and Non-Slip Mat as a gift a few years ago. It was an incredibly thoughtful gift, but since I haven't taken it out of the box yet I figured it might be nice to give it a home where someone will actually use it.
(Image from Amazon.com)

Product Features (taken from Amazon.com):

1. Füri Rachael Ray Froggy Double Blade Mezzaluna, reversible wood chopping board and a non-slip mat
2. Froggy has a bright green patented 'grippy' polypropylene and rubber handle that is antimicrobial-treated
3. The knife's dual blades are designed to offer additional cutting efficiency while providing ample stability for even the youngest of cooks
4. Use to mince and chop - from herbs, to nuts, to chocolate
5. The reversible wood chopping board has a curved bowl for easy chopping and measures 13.5-inches in length, 7.75-inches wide and 1-inch in height. Hand wash - not dishwasher safe.

To enter the giveaway: Leave a comment on this post telling me what you plan to chop with the mezzaluna.

For a second entry: Let me know what recipe(s) you've made from my blog.

The Rules: Maximum of two entries per person, U.S. residents only. Each question should be answered in a separate post for you to receive credit for each entry. Commenting will close on Friday, September 30, at 4:00 pm, EST. Entries that do not follow the entry requirements will not be considered. The winner must be willing to provide a mailing address, so make sure to leave an email address if there isn't one in your profile. If the winner does not respond within 24 hours of being notified a second winner will be chosen. Good luck!
Pin It!

Monday, September 26, 2011

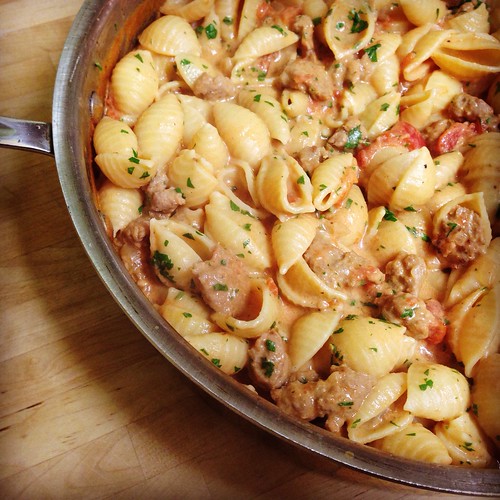
Bow Ties with Sausage, Tomatoes and Cream

One of my friends posted this recipe for Bow Ties with Sausage, Tomatoes and Cream on Facebook recently, touting it as a delicious, easy weeknight meal. I'm always struggling to put meals on the menu that don't include chicken, so I was excited to try this.


One word - delicious. I really can't say enough good things about this recipe. It couldn't have been easier to make but the flavors were perfect with the spicy sausage, tomatoes, and richness from the cream. SP practically inhaled his bowl and said he could keep going back for more. And Baby Girl was also a big fan, which is an automatic winner in my book. This is definitely going on my must-make-again-soon list. I served the pasta with side salads made with homemade red wine vinaigrette (recipe coming tomorrow!)

UPDATE January 2015 - a picture I posted on Instagram. We still love this meal.

Bow ties with sausage

Kitchen Quick Tip - Avoid a messy cutting board by using kitchen scissors to cut the tomatoes while they're still inside the can.

Bow Ties with Sausage, Tomatoes and Cream
Modified from Allrecipes.com

1-lb package bow tie pasta (or other short-cut pasta)
2 tablespoons olive oil
1 pound Italian sausage, casings removed and crumbled
1/2 teaspoon red pepper flakes (optional if you want some spice)
1 large onion, coarsely chopped
1 (28 ounce) can Italian-style plum tomatoes, coarsely chopped
1 1/2 cups half and half (could even do a combo of milk and half and half)
1/2 teaspoon salt
3 tablespoons minced fresh parsley

Bring a large pot of lightly salted water to a boil. Cook pasta in boiling water according to package directions; drain.

Heat oil in a large, deep skillet (large enough to hold the sauce and pasta) over medium heat. Cook sausage and pepper flakes (if using) until sausage is evenly browned. Add the onion and cook until tender. Stir in tomatoes, half and half, and salt. Simmer until mixture thickens, 8 to 10 minutes.

Stir cooked pasta into sauce, and heat through. Taste and adjust seasonings. Sprinkle with chopped parsley.

Pin It!

Sunday, September 25, 2011

Menu - Week of September 25, 2011


Can you believe it'll be October by this time next week? Crazy. October is a great month in the Home Cooking house. Baby Girl's birthday and our anniversary, plus Halloween and all kinds of fall fun. October really signals fall for me so I'm very excited. Bring on the apples, pumpkin, sweater weather, hay rides and Halloween!

Sunday - Biscuits over Creamed Chicken with side salads. (I'm going to try making my own cream of chicken soup)

Monday - Tortellini Soup with Chunky Tomatoes and Spinach, Garlic Cheddar Biscuits

Tuesday - French Onion Mac and Cheese, side salads

Wednesday - Spaghetti Carbonara with Blue Cheese and Artichokes (SP is going out with my stepdad for dinner so I'm taking the opportunity to cook one of his least favorite foods - artichokes)

Thursday - Pork Chops with Onions and Ranch, garlic mashed potatoes, green beans (I'm combining two recipes to make the chops - this one and this one)

Friday - homemade pizza with extra cheese

Saturday - Salisbury Steak, Blue Cheese and Scallion Mashed Potatoes, Creamed Spinach
Pin It!

Friday, September 23, 2011

Recipe Swap: Philly Cheesesteak Egg Rolls with Spicy Ketchup

Want to see what other Tailgating/Appetizer recipes were made during the swap? Here is the link to the Tailgating/Appetizer Recipe Swap Roundup

Fall is in the air and that means only one thing for many people - the start of football season. I decided to make tailgating/appetizers the theme for the recipe swap to give people some new ideas for fun snacks to make during the games.

My recipe for Philly Cheesesteak Spring Rolls with Spicy Ketchup was perfect, seeing as I live outside of Philly and love a good cheesesteak.


These were rich and delicious, although it made WAY more than the 4 rolls the original recipe called for. I overfilled the rolls and still ended up with 13 rolls, plus an extra sheet and a half (don't know where the half came from) that I used to make a breakfast roll with egg and cheese. I fried up two rolls for us to snack on and froze the rest, along with the breakfast roll, to fry at a later date.

I don't usually do this (and I apologize for the horrible photos/lighting) but I did a step-by-step for the rolling part of the recipe. Just reading the directions confused me until I watched a YouTube video for how to roll an egg roll, so I thought I'd save you the trouble and try to document it in photos.

Philly Cheesesteak Spring Rolls with Spicy Ketchup
Modified from Does Not Cook Well With Others

4 tablespoons olive oil
1 1/2 pounds thin-sliced beef, such as Landis, or Steak-Umms
1/2 a large onion, sliced
1/3 pound American cheese, cut into 1/2-inch pieces
1/4 pound provolone cheese, cut into 1/2-inch pieces
Salt and freshly ground black pepper
1 package spring roll wrappers, 9 1/2-inches in size
2 eggs, beaten with a splash of water
Canola oil

Heat the olive oil in a large skillet over medium heat. Add the sliced beef and cook, chopping with two spatulas to shred, until no longer pink, 5-7 minutes. Strain beef, discarding liquid, and set aside. Return skillet to medium heat, add more oil and the onion. Cook, stirring occasionally, until soft, about 20 minutes. Once onion is cooked, add beef back to the skillet.

Reduce heat to medium-low, place cheese slices on top of beef, and allow to melt, 2-3 minutes. Season with salt and pepper to taste, toss beef and cheese to mix together and set aside to let cool.

Place 1 wrapper on a clean work surface, keeping other wrappers covered with plastic wrap to prevent drying. Brush entire surface of wrapper with egg. Form about 1/3 cup of the beef mixture into a log along one edge of the wrapper.


Roll up wrapper, leaving ends open.


Place a second wrapper on the work surface with a corner facing you, brush the corners with egg yolk, and lay the first roll across the bottom corner of the second wrapper.


Roll up wrapper, tightly folding the ends over halfway through. Press down slightly to seal and set aside.


Repeat process with remaining wrappers and filling.

(If freezing, individually wrap each roll in plastic wrap and place in a freezer bag).

Pour canola oil into a heavy medium pot to a depth of 2-inches and heat over medium heat until temperature registers 350 F on a deep-fry thermometer. Fry spring rolls in batches, turning over halfway through, until golden brown, about 8 minutes. Serve whole, or cut in half on a bias, with spicy ketchup dipping sauce (recipe below).

Spicy Ketchup Dipping Sauce

1/2 cup ketchup
1 1/2 tablespoons Dijon mustard
1 1/2 tablespoons honey
1/3 teaspoon cayenne

Combine the ketchup, mustard, honey, and cayenne in a small bowl. Cover and set aside.

Pin It!

Thursday, September 22, 2011

Bacon Lover's Mac and Cheese

Hands up if you love bacon! If you raised your hand this recipe is for you.


I've had this recipe for Bacon Lover's Mac and Cheese printed out for awhile now but I wanted to wait for fall weather to make it. As soon as the temps dipped into the 60s I put it on my menu and now I'm kicking myself for waiting so long. It was delicious. The bacon flavor is pronounced but not overwhelming and it isn't nearly as heavy as I would have thought it would be due to the mushrooms and spinach. SP and I absolutely loved this. I served it with a simple green salad and homemade vinaigrette dressing, which also helped cut the richness of the pasta. I can't wait to make this one again.

I divided the recipe in half and froze one half, unbaked, to have on one of those nights when I don't feel like cooking. I love recipes like that.

Bacon Lover’s Mac and Cheese
Slightly Modified from Annie's Eats

1 lb. short-cut pasta
8 slices bacon, chopped
12 oz. mushrooms, sliced
1/4 cup flour
2 cloves garlic, minced
2 1/2 cups milk
1/4 teaspoon salt
Freshly ground black pepper, to taste
Pinch nutmeg
8 oz. Fontina cheese, grated
8 oz. white cheddar cheese, grated
1 bag baby spinach, roughly chopped or torn
3 tablespoons butter, melted
1 cup panko

Preheat the oven to 400.

Bring a large pot of water to boil. Once boiling, cook the pasta according to package directions until just shy of al dente. Drain well and set aside.

Meanwhile, cook the bacon in a large skillet or sauté pan over medium heat until crispy. Transfer to a paper-towel lined plate with a slotted spoon. Reserve 2 tablespoons of the bacon grease. Return the pan to the heat and add the mushrooms. Cook, stirring occasionally, until tender and most of the liquid has evaporated, about 5-7 minutes. Remove mushrooms from the pan.

Add the reserved bacon grease to the skillet. (If there was not enough bacon grease to make 2 tablespoons, replace the missing amount by adding an equal amount of butter.) Heat over medium-high heat until the butter is completely melted. Whisk in the flour and garlic and cook, stirring constantly, until the mixture is golden and fragrant but not burned, 1-2 minutes. Whisk in the milk. Cook the mixture, stirring frequently, until it begins to bubble and thicken. Whisk in the salt, pepper, and nutmeg. Remove the pan from the heat and whisk in the Fontina and white cheddar until completely melted and smooth.

Return the drained pasta to the pot. Mix in the cooked bacon and mushrooms, the cheese sauce and the chopped spinach. Stir everything together gently until well combined. Combine melted butter and panko in a bowl.

Spread the mixture into a lightly greased 2-quart casserole dish. (You can also separate the mixture into two greased casserole dishes and freeze one). Add the buttered panko to the top of the mixture. Bake for 15-20 minutes or until the top is light golden and the cheese is bubbling.
Pin It!

Wednesday, September 21, 2011

Roast Beef with Onion Gravy

I'm sure most people have a handful of meals that bring them back to their childhood. Roast Beef with Onion Gravy is one of mine. This is my dad's favorite meal and one my stepmom made for his birthday every year. I don't know why it's taken me this long to attempt to make it, but I finally emailed her to ask how she made the gravy and was surprised to hear it was as simple as water and onion soup mix in the bottom of the roasting pan.


We had purchased an obscenely large beef tenderloin for Christmas, so after the holiday we vacuum-sealed two, 4-lb roasts and froze them. Seeing as they're getting dangerously close to having a birthday, I figured I better use them quickly. This roast was the second of the two, the first one I made a few weeks ago with my all-time favorite potato gratin recipe. In keeping with my dad's favorites, I served this with mashed potatoes and what was supposed to be peas, until I checked the freezer and saw we were out. Baby Girl loves her peas, so I wasn't surprised to see we'd gone through another bag. I just subbed green beans for the peas. Hopefully my dad won't mind the substitution.


One bite and I was transported back to my childhood. The gravy was perfect, the beef tender, the mashed potatoes rich and buttery. Perfection on a plate. I'll definitely be making this again soon, maybe even for my dad the next time he and my stepmom are in town.

Roast Beef with Onion Gravy
Recipe from my stepmom

1 (3 1/2-4-lb) beef roast
Salt and pepper
1 packet onion soup mix
3 cups cold water, plus more as needed
1 tablespoon cornstarch

Heat the oven to 450 degrees. Sprinkle salt and pepper over all sides of the roast. Place roast on a rack set in a roasting pan and put in the oven.

Dissolve the onion soup mix with 3 cups of cold water (doesn’t completely dissolve) and add it to the bottom of the pan with the roast 15 minutes after putting it in the oven. Turn the oven down to 350 degrees. Baste the roast with the mixture as it cooks, about every half hour. For medium the roast will take about 2-2 1/2 hours. Add water to the bottom of the roasting pan, as needed so the drippings and soup mix don't dry out and burn.

When the roast is done, take the remaining drippings and pour into a small pot and bring to boil, adding water as needed to make the amount of gravy you want. Combine cornstarch and 2 tablespoons water until cornstarch is dissolved, then add to the gravy until it thickens.

Serve the gravy on the side, with the sliced beef, peas and mashed potatoes.
Pin It!

Tuesday, September 20, 2011

Panko Crusted Chicken

This may seem like an unnecessarily simple post, but I know I've struggled for awhile to find a good coating method for shallow-frying chicken and thought this post might help some of my more novice readers make excellent chicken cutlets or chicken fingers at home.


Just look at that gorgeous coating. That comes from panko, a Japanese-style breadcrumb. What a great invention. I rarely use regular breadcrumbs anymore. Panko provides such a wonderful crunch you can even bake with it and still get a nice, crispy coating.

This recipe can be used for chicken cutlets or chicken fingers. It's a great, simple method to have in your kitchen arsenal.

Panko Crusted Chicken

Vegetable oil for frying
Chicken, either pounded thin or cut into long strips
salt and pepper
2 eggs
2 cups panko, more as needed

Fill a large skillet with enough olive oil to reach a depth of 1/4 inch and place over medium-high heat. Test with a piece of bread - if the bread starts to brown but doesn't burn, the oil is ready.

Season the chicken with salt and pepper. Put panko in one shallow bowl and beat the eggs in another shallow bowl. Dip chicken into the egg, then into the panko. Working in batches, add the chicken to the pan and cook, turning once, until cooked through, about 5 minutes per side. Don't disturb the chicken while it's cooking. Drain on a paper-towel-lined baking sheet. Transfer to a preheated 200 degree oven to keep warm, if not serving immediately.
Pin It!