Thursday, December 31, 2020

Southern-Style Smothered Chicken

I don't know what it is about this recipe for Southern-Style Smothered Chicken. There's nothing earth-shattering about the ingredients or the cooking method but it is one of the coziest, tastiest meals I make. And I've made it a lot since I discovered it this spring. For some reason it reminds us of egg-foo yung, which makes zero sense but we all love it so we just go with it.

It's an easy recipe but since we prefer to eat saucy chicken dishes off the bone it does take some time management and prep work to get dinner on the table quickly. We like this with rice and steamed broccoli.

Southern-Style Smothered Chicken
As seen on Cook's Country

3 pounds bone-in chicken pieces (split breasts cut in half crosswise, drumsticks, and/or thighs)
Salt and pepper
1/2 cup plus 2 tablespoons all-purpose flour
1/4 cup vegetable oil
2 onions, chopped fine
2 celery ribs, chopped fine
3 garlic cloves, minced
1 teaspoon dried sage leaves (1/4 teaspoon ground sage)
2 cups chicken broth
1 tablespoon cider vinegar

Season chicken with salt and pepper. Put 1/2 cup flour in a plastic food storage bag and add all the chicken. Seal the bag and toss to coat. 

Heat oil in Dutch oven over medium-high heat. Add half of chicken to pot, skin side down, and cook until deep golden brown, 4 to 6 minutes per side; transfer to plate. Repeat with remaining chicken, adjusting heat if flour begins to burn. 

Pour off all but 2 tablespoons fat and return pot to medium heat. Add onions, celery, 1 teaspoon salt, and 1/2 teaspoon pepper and cook until softened, 6 to 8 minutes. Stir in garlic, sage, and remaining 2 tablespoons flour and cook until vegetables are well coated with flour and garlic is fragrant, about 1 minute. Whisk in broth, scraping up any browned bits. 

Nestle chicken into sauce, add any accumulated juices from plate, and bring to boil. Reduce heat to low, cover, and simmer until breasts register 160 degrees and drumsticks/thighs register 175 degrees, 30 to 40 minutes. 

If you want to remove the chicken from the bone like we do, transfer chicken to a plate and place in the fridge to cool before removing the skin and bones. While the chicken is cooling, stir vinegar into sauce and season with salt and pepper to taste. 

Either add chicken pieces back to the pot and toss to coat or pour sauce over chicken. Serve over white rice.

Pin It!

Wednesday, December 30, 2020

Biscuits and Gravy Make Ahead Breakfast Casserole

We love biscuits and gravy around here. If we see it on a restaurant menu, we order it. Since we live in the Northeast that doesn't happen often, so I usually just make it at home using this excellent recipe I've had for years. It's savory and sweet and very addictive. 

But then I saw this recipe for Biscuits and Gravy Egg Bake on Pinch of Yum and knew it would end up being a family favorite. I was particularly excited for the chiles in the gravy.

The recipe calls for canned dough, but making your own biscuit dough is ridiculously easy so I went that route. I did a quick Google search and found this one from Sally's Baking Addiction and I will never use another recipe. So, so good. I was just sad we didn't have any jam or jelly in the house for the leftover biscuits.

What I love about this recipe is that you can make it ahead and then bake it the next morning. It's perfect for the holidays - a few friends made it for Christmas after I raved about it on Facebook - or to keep in the fridge for busy weekday mornings.

Biscuits and Gravy Make Ahead Breakfast Casserole
As seen on Pinch of Yum

Green Chile Sausage Gravy
1 lb. breakfast sausage
4 tablespoons butter
4 tablespoons flour
2 1/2 cups milk
1/2 teaspoon salt
1 can (4oz) chopped green chiles

Casserole
8 eggs
1/2 cup milk
1/2 teaspoon salt
6-8 jumbo buttermilk biscuits (from a can or make your own, recipe below), cut into cubes
1 cup shredded cheddar cheese

If making your own biscuits, do that first using the recipe below. Save 6-8 biscuits for this recipe and bake off the rest.

Preheat the oven to 350 degrees. If you're making the casserole in advance, do this the next morning. Spray a 9 x 13 pan with cooking spray.

Brown the sausage in a large skillet then remove to a plate. Melt the butter in the now-empty skillet over medium-low heat. Whisk in flour until thickened, 2-3 minutes. Whisk in the 2 1/2 cups milk, salt, and diced green chiles, then add the sausage. Stir to combine.

Whisk the eggs, 1/2 cup milk and salt in a 4-cup measuring cup or large bowl. Place half the biscuits in the greased 9 x13 pan. Pour the eggs over the top. Sprinkle with the cheese, then dollop some of the gravy (be sure to save some gravy for later) on top. Add the rest of the biscuit cubes.

At this point you can cover and refrigerate overnight. In the morning, preheat the oven, and warm up the extra gravy while you bake the casserole for 35-45 minutes, until the eggs are set. It will take longer to cook if the casserole is cold.

Serve slices warm from the oven, with a scoop of sausage gravy over the top (thin it out with a little more milk

Homemade Buttermilk Biscuits
As seen on Sally's Baking Addiction

2 1/2 cups flour, plus extra for dusting
2 tablespoons baking powder
1 teaspoon salt
1 stick very cold unsalted butter, cubed
1 cup cold buttermilk
2 teaspoons honey

Preheat oven to 425.

Add the flour, baking powder, and salt to a large food processor and pulse to combine. Add the cubed butter and pulse until you have coarse crumbs form. Pour into a large bowl. Make a well in the center of the mixture and add the buttermilk and honey. Fold together with a rubber spatula until it begins to come together. Do not overwork the dough.

Turn the dough out onto a floured work surface and gently bring together with generously floured hands. The dough will be sticky so have extra flour nearby. Flatten the dough into a 3/4 inch thick rectangle, fold one side into the center, then the other side. Turn the dough horizontally, flatten into a 3/4 inch thick rectangle again. Repeat three more times.

Cut the dough into circles with a biscuit cutter or glass. (Tip: Do not twist the biscuit cutter when pressing down into the dough– this seals off the edges of the biscuit which prevents them from fully rising.) Re-roll scraps and cut more biscuits until all the dough is used.

Bake for 15-20 minutes or until tops are golden brown. Cover leftovers tightly and store at room temperature or in the refrigerator for up to 5 days.

Pin It!

Tuesday, October 20, 2020

Chicken Milanese

My friend, Dana, recently posted a photo of Chicken Milanese from her anniversary dinner and I had to make it ASAP. Crispy chicken. Bright arugula salad. I could almost taste it.

I followed the same breading and shallow frying method I use for Chicken with Prosciutto, Brie and Arugula and served simple fried potatoes on the side. Absolutely delicious meal. 

Chicken Milanese with Arugula Salad  

1/2 cup flour
2 large eggs, lightly beaten
1 cup Panko breadcrumbs
1 cup Italian breadcrumbs

Salt and freshly ground black pepper, to taste
4 (6 oz) boneless, skinless, chicken breasts
6 tablespoons unsalted butter, divided
2 tablespoons olive oil, divided

1/2 lb baby arugula, rinsed and spun dry
2
tablespoons fresh squeeze lemon juice
Salt and freshly ground black pepper, to taste
1/4 cup extra virgin olive oil
grated pecorino/parmesan cheese
chopped fresh tomatoes
thinly sliced red onion


Place flour, eggs and breadcrumbs in three separate shallow bowls or shallow dishes. Preheat the oven to 300 degrees. Place a wire baking rack over a baking sheet; set aside.

Place each chicken breast between two pieces of waxed paper (or a freezer-style plastic bag) and pound to 1/4-inch thickness. Season chicken on both sides with salt and pepper. Dredge each breast in the flour; tap off excess. Dip into the egg wash and let excess drip off, and then dredge on both side in the breadcrumbs.

Add 3 tablespoons of butter and 1 tablespoon of oil to a large nonstick pan and heat until the butter is melted and sizzling. Place 2 chicken breasts in the pan and cook until golden brown on the first side. Flip over and continue cooking until golden brown on the second side and the chicken is cooked through, about 5 to 6 minutes total. 

Put the cooked chicken on the wire rack and keep warm in the oven while you cook the other pieces. Add more butter and oil as needed.

In a medium bowl, toss the arugula with lemon juice, salt, pepper, oil and grated cheese. Add chopped tomatoes (I used grape tomatoes since it's October and tomatoes are out of season) and very thinly sliced red onion, to taste.

To serve: place one chicken breast on a plate and top with some of the arugula salad mixture.


Pin It!

Wednesday, October 14, 2020

Greek Meatballs

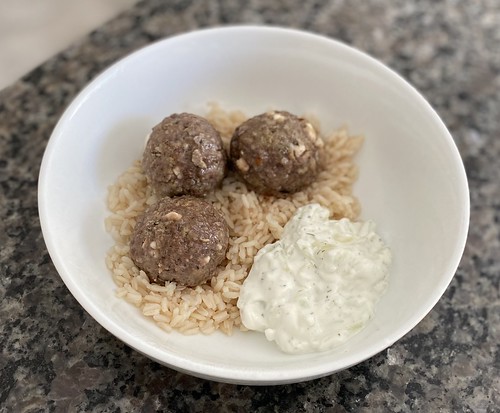
I am such a sucker for Greek flavors. I've been thinking about Greek meatballs forever and finally decided to make them when my friend, Patty, brought me some amazing feta from New York City. She has family up there and whenever she visits she brings home all sorts of Greek delicacies. This feta has spoiled me for all supermarket feta. It's tangy and salty and just plain perfect.


After I posted these to my personal Facebook page, my friend Jaida mentioned that she makes her Greek turkey meatballs with spinach. I wish I'd thought of that because you may notice that we didn't have a veggie side dish. We all thought the texture of the meatballs was perfect so I don't want to add spinach to them directly, but next time I make these I'll definitely wilt some spinach with sliced garlic to serve alongside.


There are a lot of recipes for Greek meatballs out there so I looked at a few and pulled ingredients that sounded good to me. This is my take. Adjust as you like. 

UPDATE: December 2020


I turned leftover meatballs into Greek meatballs sandwiches. Homemade naan, meatballs broken into pieces, lettuce, tomato and tzatziki. Utterly and completely delicious (and very messy). I highly recommend doing this with leftover meatballs.

Greek Meatballs
 
2 lbs. ground beef
1/4 cup finely minced red onion
1/2 to 1 cup feta, crumbled

1 tablespoons dried oregano

1 teaspoon cumin
2 teaspoons dried dill
1 teaspoon garlic powder
1/4 to 1/2 teaspoon red pepper flakes

2/3 cup panko
1/3 cup milk
2 large eggs, slightly beaten

1 teaspoon kosher salt

1/2 teaspoon pepper
Preheat the oven to 415 degrees. Combine all the ingredients in a large bowl and mix well. Refrigerate for 30 minutes.
Line a baking sheet with foil and top with a sheet of parchment paper. Spray the parchment with cooking spray. Form the meat mixture into meatballs. I used an ice cream scoop for larger meatballs.  Place the meatballs on the baking sheet. 
Bake for 30 minutes if you made larger meatballs. Bake for 15 minutes if you used a 1 to 1 1/2 tablespoon scoop. Meatballs are done when the internal temp is at least 165 degrees. 
Serve with rice, garlicky sauteed spinach and tzatziki. 
Tzatziki

1 medium cucumber, peeled and seeded
Salt and pepper, to taste
1 small garlic clove, minced
Dried dill, to taste
2 cups plain Greek nonfat yogurt
Squeeze of fresh lemon juice

Grate the cucumber over the large holes of a box grater. Place the cucumber in a bowl and add the salt, pepper, garlic, and dried dill. Stir to combine. Add the yogurt and some lemon juice and mix well. Taste and adjust the seasonings, as needed. Chill before serving.


Pin It!

Friday, July 24, 2020

Pizza Friday: Pierogi Pizza

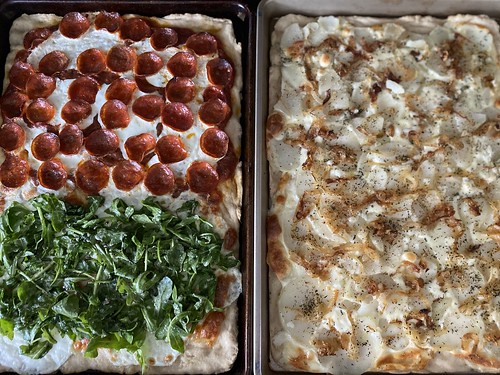
This is one of the easiest pizzas I make and easily one of the tastiest. That's saying a lot because you all know how much we love homemade pizza around here.

Pierogi pizza

I first saw this pizza over at Dinner: A Love Story. One bite and we all said it tasted just like a pierogi. The soft potatoes, the sharp cheddar, the caramelized onions. Such a great combo.

The first time I made it with only cheddar cheese and it was too greasy for us, so I swapped out half the cheddar for mozzarella. Sometimes I bake the potato slices like I do for my Roasted Potato and Rosemary Pizza but most of the time I just parboil them.

Pierogi Pizza
Inspired by Dinner: A Love Story

3 tablespoons olive oil
1 large onion, thinly sliced
salt, to taste
4 medium red potatoes, peeled and thinly sliced
1 16-ounce ball pizza dough (or make your own), room temperature
6 oz shredded or deli sliced mozzarella cheese
6 oz shredded or deli sliced sharp cheddar cheese
fresh thyme or rosemary, minced (optional)

Preheat oven to 500°F.

Heat oil in a large non-stick skillet over medium heat. Add the sliced onions, season with a little salt, and cook for at least 25-30 minutes, allowing them to caramelize.

Add potato slices to a pot of salted water and bring to a boil. Cook for 5 minutes, then drain well.

Lightly grease a standard baking sheet. Place the dough in the middle. Press and stretch it out with your fingers so it reaches the edges. Drizzle with a bit of olive oil and rub to coat the dough. Cover with both cheeses, leaving a border around the edges. Put the potatoes on top of the cheese in a single layer, then top with the caramelized onions. Sprinkle with the thyme or rosemary, if using.

Bake for 15 minutes until cheese is bubbly and crust is  golden brown. Remove from the oven and transfer pizza to a cutting board. Slice and serve.


Pin It!

Thursday, June 25, 2020

Zucchini Muffins

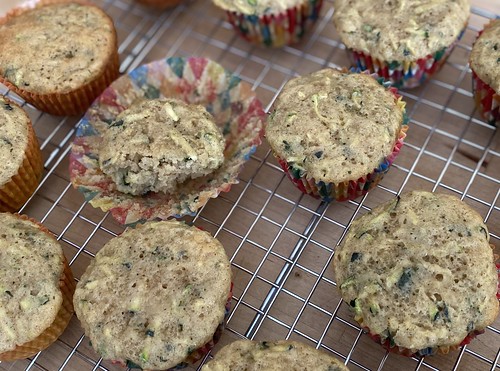
I can't believe I've never baked with zucchini. We love zucchini and I use it a lot in savory recipes like Crispy Baked Zucchini Fries, Zucchini Corn Pizza, Cheesy Zucchini Rice, zucchini fritters, on skewers, in summer pastas, etc. But this was my first time baking with it.

Zucchini muffins

The result? So good!! None of us could taste the zucchini. Now, I'll admit this is not exactly the healthiest recipe. If you're looking for a healthy way to get your kids to eat veggies, this isn't it. But they were delicious and a great way to use up zucchini that was past its prime.

The original recipe said it would yield 12 muffins. I got 15. I'm also not one to measure certain ingredients so I probably had more than 2 cups of shredded zucchini.

Zucchini Muffins
As seen on Land O Lakes

1 1/2 cups all-purpose flour
1 cup sugar
1/2 teaspoon baking powder
1/2 teaspoon baking soda
1/2 teaspoon ground cinnamon
1/2 teaspoon salt
1/2 cup unsalted butter, melted
2 large eggs
1 medium (2 cups) zucchini, shredded

Heat oven to 350. Put paper baking cups into 12 (or more) muffin pan cups; set aside.

Combine flour, sugar, baking powder, baking soda, cinnamon and salt in bowl; mix well. Combine butter and eggs in bowl; stir into flour mixture just until moistened. Stir in zucchini.

Use an ice cream scoop to fill prepared muffin pan cups three-fourths full with batter. Bake 22-25 minutes or until toothpick inserted into center comes out clean. Cool 5 minutes in pan; remove to cooling rack.
Pin It!

Thursday, June 11, 2020

Tired of warm beer at parties? Enter the NewAir Beer Froster

This post is sponsored by NewAir. I received a Beer Froster in exchange for a review. All opinions are my own.

Hi folks. Steve here with a guest blog post. Sadly, alcohol doesn’t agree with Sarah (more often than not she’s left battling a nasty migraine) so I’m our household’s official subject matter expert on all things alcohol. When the good folks at NewAir offered us an opportunity to try out their Beer Froster beer fridge, I offered to write the product review.

Bottom line: I’d recommend this whole-heartedly to anyone who’s ever had to suffer through warm beer at a party. Friends don’t let friends drink warm beer, right? But party planning can sometimes be a mad rush to get ready and mistakes get made.

(Remember parties? Those were fun. Hopefully we’ll be entertaining safely again soon but we’ll definitely be out of practice).

I’ve been there; I’m sure you have, too. You get to the party, or worse, you are the host of the party and you see the beer sitting in a tub of ice. Maybe not even submerged in the ice - sitting on top like it’s being merchandised in a store. Then your friend reaches in and hands you a Trojan brew. You have your doubts, but the bottle or can is cold to the touch. So you pop the top and take a swig only to be greeted by beer the temperature of warm chicken broth that had been sitting in the August sun since about a half hour before you arrived.

Newair

Well, enter the Beer Froster! This product holds 125 cans. I’m a bottle guy and I got more than 50 bottles in there. Perfect amount for a party. You hit the Turbo button and the compressor on this baby runs a cool 24 degrees for an hour, getting your beer nice and cold. It takes away the shame and stigma of serving less than ideal beer to family and friends.

If you’re like Sarah and the ultimate planner, just remember to hit the Party button when you wake up and the compressor runs a good 6 hours at 24 degrees for a slower chill down. This also helps ward off those friends who stand there with the door open taking 10 minutes to choose a beer. There’s even a handy light that you can activate from the outside so you can easily see the selections through the glass front door.

The Beer Froster is true to its name, though I will offer some pro tips if you should decide to add this little wonder to your man cave or kitchen. First, arrange the shelves for optimum storage. It’s designed for cans, but bottles require a little care to load in properly. Also, allow for about 24 hours for the fridge to get to a cool 24 degrees the first time you turn it on. The last point, and this is my only criticism of the appliance, is that the compressor does emit an audible hum that some may find distracting. After experiencing the low hum we made the choice to locate the fridge in our basement instead of the kitchen just because we are overly sensitive to noise. Your mileage may vary.

All in all, the Beer Froster certainly lives up to its name in helping to insure the beer you are serving, or enjoying alone, is crisp and cold. In my heyday I used to go to this bar that touted the “Coldest beer in Trenton (N.J.)” and it was. Often you got served a beer that had frozen solid and they had to swap it out for a new one. I haven’t had a colder beer since then, until this beauty came into my life.

NewAir is offering readers 20% off the Beer Froster! Use code SARAH_BATES at checkout.
Pin It!

Thursday, May 28, 2020

Sheet Pan Kielbasa, Potatoes and Veggies

I'm very late to the sheet pan dinner craze but this is one that will be on rotation forever. I've already made it twice and it's just so, so good.

Sheet pan

I love that you can make this however you want with whatever veggies and meat you want. It's a one-pan meal that hits all the right notes with minimal cleanup.

Sheet Pan Kielbasa, Potatoes and Veggies

1 package (14-16oz) precooked sausage or kielbasa cut in half lengthwise and sliced into 1/2" half-moons
1 medium onion (red, white, whatever you have), cut into bite sized pieces
2 broccoli crowns, separated into florets
1 small head cauliflower, separated into florets
1/2 lb red potatoes, peeled and cut into small, bite-size pieces
3 tablespoons olive oil
1 tablespoon paprika
1 tablespoon onion powder
1/2 tablespoon garlic powder
1/2 tablespoon dried thyme
1 teaspoon kosher salt, or to taste
1/2 teaspoon freshly grated black pepper, or to taste
1 cup shredded cheddar cheese (or mozzarella, Monterey Jack, colby, whatever you want)

Preheat the oven to 450 and line a baking sheet with a couple sheets of aluminum foil.

Combine the sausage, onion, broccoli, cauliflower and potatoes in a large bowl. Season with the oil, paprika, onion and garlic powders, dried thyme, salt and pepper. Mix well. Dump onto the baking sheet and spread out in an even layer. Put sheet pan in the oven.

Roast for 25 minutes. Remove pan from the oven and test to make sure the potatoes are fully cooked (use the tip of a knife). If they aren't, put back in the oven for another 5-10 minutes. Once the potatoes are cooked through, top with the shredded cheddar cheese and put back in for another 5 minutes to melt the cheese.
Pin It!

Thursday, March 05, 2020

Indian Butter Chicken

Added another Indian dish to my repertoire last night. Woohoo!

Indian butter chicken

This Indian Butter Chicken was so darn good. I combined the cooking method from my standby Chicken Tikka with the ingredients in For the Love of Cooking's Butter Chicken. I ended up doubling the sauce because (1) we love extra sauce and (2) I didn't see the point in saving less than half a can of coconut milk. Dump it all in!

My family absolutely loved this, which is saying a lot because they're big fans of my chicken tikka and kind of hate when I insist on trying new recipes. What can I say, I like variety.

Indian Butter Chicken
Combo of Hunt, Cook, Eat and For the Love of Cooking

Marinade:
3/4 cup full fat plain Greek yogurt
Juice from 1/2 a lemon
1 tablespoon fresh ginger, grated
4 cloves garlic, minced
2 teaspoons garam masala
1 teaspoon turmeric
1/2 teaspoon ground cumin
1/2 teaspoon ground coriander
1/4 teaspoon ground cayenne
1 teaspoon kosher salt
6 boneless skinless chicken thighs, cut into bite-size pieces

Sauce
4 tablespoons butter
2 15oz cans diced tomatoes, pureed with a blender (DON'T use tomato sauce)
1 teaspoon sugar
1 can full fat coconut milk
salt, to taste
Fresh cilantro

Basmati rice
Naan bread

Whisk the yogurt, lemon juice, fresh ginger, minced garlic, garam masala, turmeric, cumin, coriander, and cayenne pepper together in a large bowl. Add the chicken and stir to coat. Cover with plastic wrap and refrigerate overnight.

Preheat the oven to 350. Spread the chicken and marinade in a single layer on a baking sheet and cook for 30 minutes.

While the chicken is cooking, melt the butter in a 12-inch skillet over medium heat. Add the pureed tomatoes and sugar. Reduce the heat to low and simmer for 10 minutes. Add the coconut milk and cooked chicken with all the accumulated juices (don't omit that!) to the sauce and let simmer for another 10 minutes. Garnish with chopped cilantro. Taste and season with salt, if needed.

Serve over basmati rice with naan for soaking up the sauce.
Pin It!

Thursday, February 20, 2020

Apricot and Mustard Baked Chicken

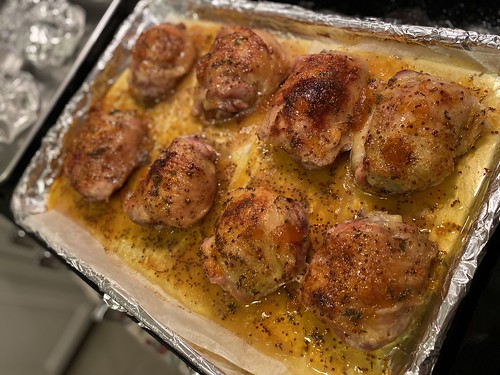
This Apricot and Mustard Baked Chicken has quickly become one of our favorite weeknight meals. The baking time is a bit long (longer than the original recipe states) but it's almost completely hands-off. The flavor is truly fantastic - the perfect combo of sweet and savory.

To blog

I like to serve this with mashed potatoes and a veggie (lately it's French cut green beans), but it would be equally good with rice.

Apricot and Mustard Baked Chicken
Slightly modified from Jenny Rosenstrach

6 to 8 skin-on chicken pieces (thighs or drumsticks)
Salt and pepper
3/4 cup apricot jam
2 tablespoons grainy mustard
1/4 cup water
Leaves from 6 sprigs fresh thyme, minced

Preheat the oven to 400°F.

Line a baking sheet with plenty of foil. This is key because the glaze is sticky and you don't want to spend the evening scrubbing the baking sheet. Place a piece of parchment paper over the last layer of foil. This is also key because the chicken won't stick to the parchment the way it will stick to the foil.

Place the chicken on the lined baking sheet and sprinkle with salt and pepper. Bake for 30 minutes.

While the chicken is baking, whisk together the jam, mustard, water, thyme, and a little salt and pepper in a small saucepan. Bring to a boil over medium heat and allow to get slightly syrupy. Transfer to a 2-cup glass measuring cup to make it easier to pour.

After 30 minutes, take the chicken out of the oven and pour the sauce evenly over the chicken. Put back in the oven and continue baking for another 30 minutes. If you have a broiler, place the chicken under the broiler on the top rack so it gets golden and crispy.
Pin It!

Thursday, January 23, 2020

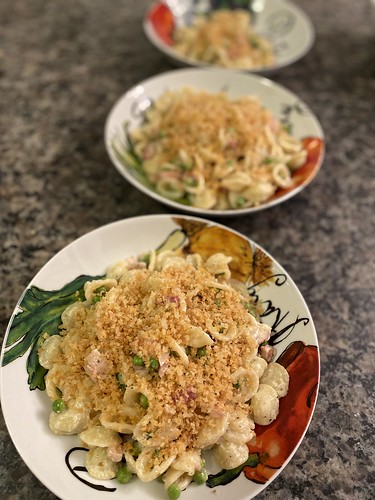
Pioneer Woman's Lemon Pasta Pronto

The Pioneer Woman recently posted a video of herself making this recipe for Lemon Pasta Pronto on her Instagram stories. It sounded right up our alley so I printed out the recipe (fair warning, the recipe on the Food Network site doesn't include all the ingredients/directions).

To blog

Past experience has taught me that I can always add more lemon juice but I can't take it away so I was skeptical about using the juice of two lemons in this recipe. Sure enough, one was plenty.

We all LOVED this but I'm not sure I'll spend the extra money for the pancetta next time. Bacon would be just as good and a heck of a lot cheaper. I served this with an incredible beet, citrus and ricotta salad that I'll be blogging soon and it was just the thing to cut the richness of the pasta.

Lemon Pasta Pronto
Modified from the Pioneer Woman

Kosher salt
1 pound orecchiette
6 tablespoons butter, divided
1/2 lb pancetta or bacon, cut into bite-size pieces
1 teaspoon fresh thyme, minced
2 cloves garlic, minced
1/2 yellow onion, diced
2 lemons, 1 juiced and both zested, divided
2 cups frozen peas, thawed
1 cup half and half
3/4 cup panko
1 cup grated pecorino

Bring a large pot of salted water to a boil. Cook the pasta according to the package instructions.

While the water is coming to a boil, melt 3 tablespoons of butter in a large skillet over medium heat. Add the pancetta (or bacon) and cook until the fat starts to render and the pancetta gets crispy. Add the thyme, garlic and onions and cook until the onions soften, 2 to 3 minutes. Stir in the zest and juice of one lemon, the peas and half and half. Bring to a simmer and cook until slightly thickened, about 2 minutes.

In a small skillet, melt the remaining 3 tablespoons butter over medium-low heat. Add the panko and season with salt and pepper. Cook, tossing occasionally, until the panko is golden brown, 3 to 4 minutes. Remove the pan from the heat and add the zest of one lemon. Stir and then set aside.

Drain the pasta and add it to the skillet along with the pecorino. Toss together, taste and adjust the seasoning as needed. The original recipe calls for the juice of two lemons but a lot of people said it was too lemony. If you want more lemon flavor, add more juice. Remember, you can always add but you can't take away!

To serve, spoon some of the pasta into a bowl or on a pasta plate. Sprinkle some of the crispy panko on top.
Pin It!

Thursday, January 09, 2020

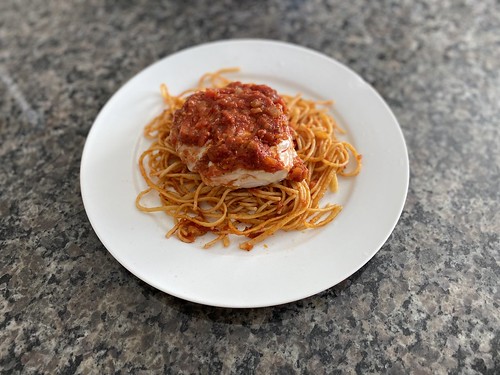
Chicken Pizzaiola

This chicken pizzaiola is another one of those recipes that I've looked at countless times over the years and bypassed time and time again. Who knows why; it's not like it's a complicated recipe. My only note is to make sure you use plenty of pepperoni so you can really taste the flavor.

Chicken pizzaiola

Such an easy, delicious weeknight meal. I made my own quick pasta sauce but jarred would be fine, too.

Chicken Pizzaiola
From America’s Test Kitchen, modified from Pinch of Yum

3 cups of your favorite pasta sauce (or make your own, see note)
1 cup shredded Parmesan/pecorino cheese
4 large/6 small boneless skinless chicken breasts
2 ounces sliced pepperoni (see note)
1 cup sliced mozzarella
8 ounces spaghetti or other pasta

Heat the oven to 450. Spread pasta sauce into a 9×13 baking dish (I had 6 chicken breasts so I needed another small baking dish). Spread Parmesan/pecorino in a shallow dish.

Put one chicken breast at a time in a plastic food storage bag and pound to an even thickness. You don't want it too thin but it should be the same thickness throughout. Season all the chicken with salt and pepper, then coat with Parmesan/pecorino. Lay each piece of chicken on top of the sauce in a single layer. Bake for 25 minutes.

While the chicken bakes, cook pasta. Drain and toss with some olive oil to prevent sticking. Set aside until the chicken is done.

Remove the chicken from the oven and top each breast with a few slices pepperoni and mozzarella. Increase oven to 475 and bake until cheese melts, about 5 minutes.

Spoon some sauce from the baking dish into the pasta pot and toss to combine. To serve, put some pasta on a plate and top with a piece of chicken and some sauce.

NOTES:
1. It's really easy to throw together a quick pasta sauce. I usually just heat up a 28oz can of crushed tomatoes (rinse the can with some water and add to the pan so you get all the sauce from the can) and season with plenty of oregano. I had half an onion in the fridge so this time I minced that up and sauteed it in oil with some salt and pepper before adding the crushed tomatoes.

2. I hate excess grease on my pepperoni so I put three layers of paper towels on a plate and top with a single layer of pepperoni slices. Top with two more layers of paper towels and microwave 15 seconds, then another 15 seconds (don't do 30 seconds before the pepperoni can burn). Blot the grease off with the top paper towel layers.
Pin It!

Wednesday, January 01, 2020

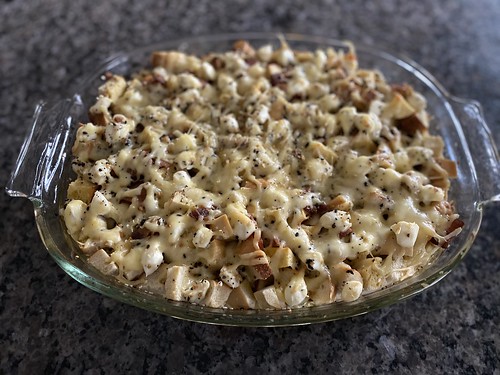
Everything Bagel Breakfast Casserole

I'm always on the lookout for new make-ahead breakfast casseroles. I love them for holidays because you do all the work the day before and then you get to enjoy a delicious breakfast with minimal effort the next morning. Just make sure you plan ahead because most of them need to bake for about an hour. My family is always hounding me to make the hour go by faster because they're starving.

Everything bagel casserole

I have a lot of Everything But the Bagel seasoning in my spice cabinet but if you don't, just use everything bagels instead of plain bagels.

Everything Bagel Breakfast Casserole
Adapted from Home Made Interest

5 plain bagels, cut into 1-inch cubes
8 oz. bacon, cooked and diced
8 oz. Jarlsberg cheese, shredded
8 oz. cream cheese, cut into 1-inch cubes
Everything But the Bagel seasoning, to taste
8 large eggs
2 cups half and half
1/2 teaspoon salt
1/4 teaspoon fresh cracked black pepper

Spray a 9x13 inch casserole dish with cooking spray. Add half the bagel cubes to the casserole dish. Top with half the bacon, half the Jarlsberg and half the cream cheese. Sprinkle Everything But the Bagel seasoning evenly over the top. Repeat with another layer of bagel cubes, bacon, Jarlsberg, cream cheese and Everything But the Bagel seasoning.

Combine eggs, half and half, salt and pepper in a 4-cup measuring cup. Whisk until thoroughly combined, then pour evenly over the bagel pieces, making sure to cover all of them.

Cover the casserole with cling wrap and refrigerate overnight.

In the morning, preheat the oven to 350 degrees. Remove the cling wrap and cover with aluminum foil. Bake for 40 minutes. Remove foil and continue to bake for 15 minutes.
Pin It!

Friday, October 25, 2019

Pizza Friday: Hawaiian Pizza

We recently went to Southern California to visit my dad and stepmom. On the way home we were lucky enough to fly out of John Wayne Airport in Orange County, which despite being a very small airport has a surprising number of decent eateries. At least compared to Newark Airport. Ugh. I will never forget the truly awful, inedible bagel sandwich I had on the flight out. Blech.

Pizza to blog

Anyway. Steve and Katie decided to split a Hawaiian pizza from California Pizza Kitchen and immediately asked me to recreate it at home. I've been making Hawaiian pizza for years. It's Katie's all-time favorite and I usually make it with cubed ham and caramelized pineapple, which is freakin' delicious. But they asked for this version, with thinly sliced ham and larger slices of pineapple, so I acquiesced.

Hawaiian Pizza

1/2 ball pizza dough
1/2 cup pizza sauce (we love Don Pepino)
8oz shredded mozzarella cheese
8 pieces of very thinly sliced ham, cut in half
small can pineapple rings, each ring cut in half
dried oregano
garlic salt

Place a pizza stone in your oven and preheat the oven to 500 degrees.

Lay a piece of parchment paper the size of the pizza stone on a work surface. Dust lightly with flour and roll out the pizza dough into a 14-inch circle. Spread the pizza sauce in a thin layer over the dough, leaving a half-inch margin around the outer edges. Sprinkle the shredded mozzarella over the top, then add the pieces of ham and pineapple. Dust with some oregano and garlic salt, to taste.

Transfer the pizza on the parchment paper to the pizza stone. Bake for 15 minutes, checking often to make sure there are no bubbles forming. I keep a poking stick handy to pop them during the first 5 minutes.

Remove the pizza from the oven and allow it to rest for 5 minutes before slicing.
Pin It!

Friday, October 18, 2019

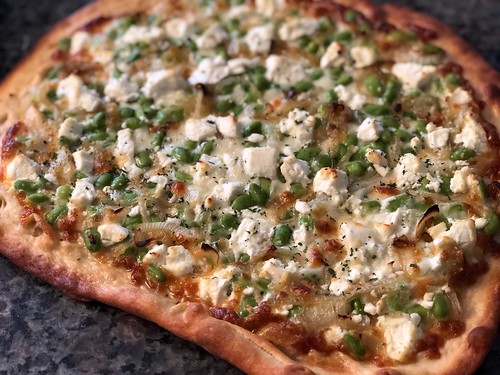
Pizza Friday: Edamame with Caramelized Onions and Goat Cheese

I've mentioned this before but one of my favorite things to do is scour the Jules Thin Crust menus for Pizza Friday inspiration. One of our favorites pies is their Veggie #12: Organic edamame, ricotta cheese, organic goat cheese, caramelized onions, fresh mint, mozzarella, lemon vinaigrette. I've been recreating it at home for awhile and this was one of the best iterations so far.

Pizzas to blog

Over the years I've decided to leave off the ricotta so the goat cheese can shine. I'm also realizing that I forgot the little spritz of lemon and/or shaving of lemon zest. I'll have to remember for next time.

Edamame with Caramelized Onions and Goat Cheese Pizza
Inspired by Jules Thin Crust

1 teaspoon olive oil
1 small onion, thinly sliced
salt and pepper
1/2 ball of pizza dough
1 cup shelled edamame
8 oz mozzarella, shredded
4oz goat cheese
fresh mint, minced, to taste
zest of one lemon

Preheat a pizza stone in a 500-degree oven for at least an hour while you assemble your ingredients.

Heat the oil in a non-stick skillet over medium heat. Add the onion and season with salt and pepper. Allow the onion to cook slowly - you want it to get brown without burning. Lower the heat if the onions are browning too quickly. If the pan seems dry, add a splash of water. The onions should take about 20-30 minutes to turn a nice, caramel color and become soft.

Lay a piece of parchment paper the size of the pizza stone on a work surface. Dust lightly with flour and roll out the pizza dough into a 14-inch circle. Drizzle some olive oil on the dough and rub around so all the dough is lightly coated.

Top with the mozzarella cheese. Dollop the goat cheese by the tablespoon over the cheese then add the caramelized onions and edamame.

Transfer the pizza on the parchment paper to the pizza stone. Bake for 15 minutes, checking often to make sure there are no bubbles forming. I keep a poking stick handy to pop them during the first 5 minutes.

Remove the pizza from the oven. sprinkle the fresh mint and lemon zest on top and slice.
Pin It!

Thursday, October 17, 2019

Strawberry Summer Sheet Cake

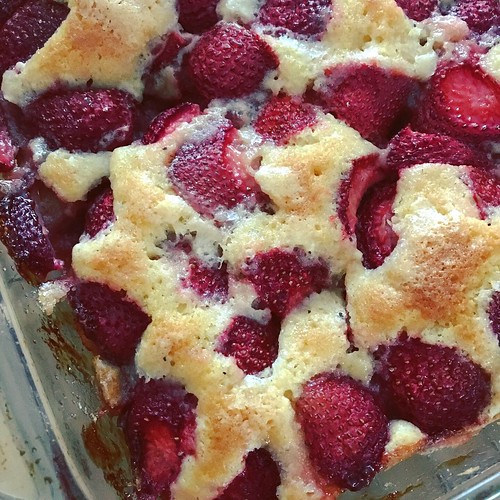
I know strawberry season is long gone but if I don't blog this Strawberry Summer Sheet Cake now it'll sit in my draft folder for years and never see the light of day. So just agree to save this for next spring/summer, OK? Great.

To blog

I went through a baking phase this summer, fueled mostly by all the amazing produce (fruit) available. We'd buy way more than we could eat in a week, so by Thursday I'd be Googling recipes for overripe fruit. We shared all the spoils with friends and they seemed very happy about it, so it was a win-win.

This cake was so good. Oof. Just looking at the photo again is making me wistful. It wasn't overly sweet, which we loved. The berries really shone through and the cake itself was moist and delicate. We didn't do this, but a scoop of vanilla ice cream would be perfect on top of a slice. Or a dusting of powdered sugar. Or whipped cream.

Strawberry Summer Sheet Cake
From Smitten Kitchen

9 tablespoons unsalted butter, at room temperature
3/4 teaspoon fine sea or table salt
1 1/2 cups plus 3 tablespoons granulated sugar
1 large egg
1 large egg yolk
1 1/2 teaspoons vanilla extract
3/4 cup milk
2 1/4 teaspoons baking powder
2 1/4 cups flour
1 1/2 pounds of the freshest, even a touch overripe, strawberries, hulled and halved
Vanilla ice cream, powdered sugar or whipped cream, for serving

Heat your oven to 350°F.

Lightly coat the sides and corners of a 9×13-inch pan with butter or nonstick spray, and fit the bottom with a rectangle of parchment paper.

In a large bowl, beat butter, salt, and 1 1/2 cups of the granulated sugar until light and fluffy. Add egg, yolk, and vanilla and beat until combined. Add milk and mix until (updated) combined; it may look a little curdled but don’t fret, it will smooth out in a minute. Sprinkle baking powder evenly over batter and beat into batter for 20 seconds longer than will seem necessary — this ensures it’s perfectly distributed. Scrape down the bowl. Add flour and beat or stir until just combined.

Spread batter in prepared pan. Arrange strawberries cut side down, as snugly as you can get them to fit. If you have extra, nudge them in anyway. Leave no strawberries behind. Sprinkle with remaining 3 tablespoons of sugar — it will seem like a lot but helps the strawberries get jammy and gives the cake a great texture.

Bake until golden brown and a toothpick inserted into the cake comes out free of wet batter (gooey strawberries are a given and doesn’t mean it’s under baked) — about 45 to 48 minutes. Let cool in pan on a rack. Cut into squares and serve.

Do ahead: Cake is even better a half- to a full day later, when the strawberries marry with better with the cake.
Pin It!

Wednesday, October 16, 2019

Green Tea Ice Cream

This is one of the recipes I found in my draft folder that had never been published. It was from one of the themed dinners we used to do with our friends, Chris and Tracie. I posted the other recipes from this meal back in 2015 (!!!) but not this one. I wish I knew why. It was an Asian-inspired meal and we made: Pork and Shrimp Dumplings, Fried Rice, someone brought sushi and someone else brought some sort of meat dish. Forgive me, it's been 4+ years.

This is what I wrote at the time:

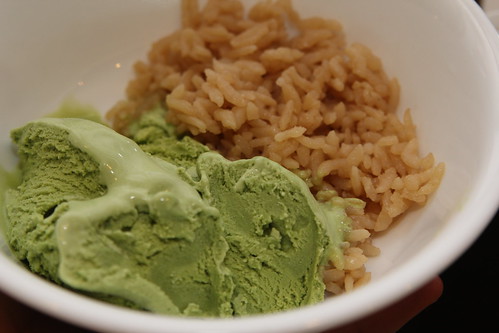
One of T's contributions to our Asian meal was Green Tea Ice Cream. I've never had it before and couldn't wait to try it.

Asian night
(all photos by T. Casey)

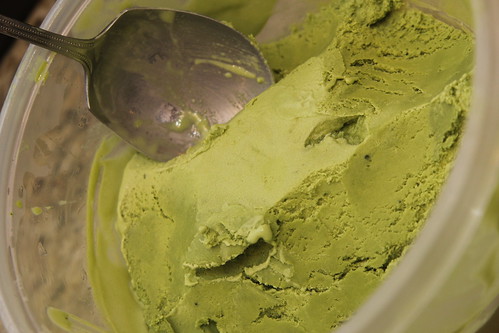
Just look at that color - I love it!

Asian night

Green Tea Ice Cream
As seen on Annie's Eats
Yield: about 1 quart

1 cup whole milk
3/4 cup sugar
Pinch of salt
2 cups heavy cream
4 teaspoons matcha (green tea powder)
6 large egg yolks

Combine the milk, sugar and salt in a medium saucepan. Heat over medium heat until warmed through. Meanwhile pour the heavy cream into a large bowl and whisk in the matcha. Set a fine mesh sieve over the bowl.

In a separate medium bowl, whisk the egg yolks until smooth. Whisking constantly, slowly pour the warmed milk mixture into the bowl with the egg yolks. Return the entire mixture to the saucepan and continue to cook, stirring constantly and scraping the bottom of the pan, until the mixture thickens slightly (it will register 170-175˚ F on an instant read thermometer). Immediately remove from the heat and pour the mixture through the mesh strainer into the bowl with the cream mixture. Whisk the mixture vigorously to dissolve the green tea powder. Cover and chill in the refrigerator.

Once the mixture is thoroughly chilled, transfer it to an ice cream maker and freeze according to the manufacturer’s instructions.
Pin It!

Tuesday, October 15, 2019

Sour Cream Noodle Bake

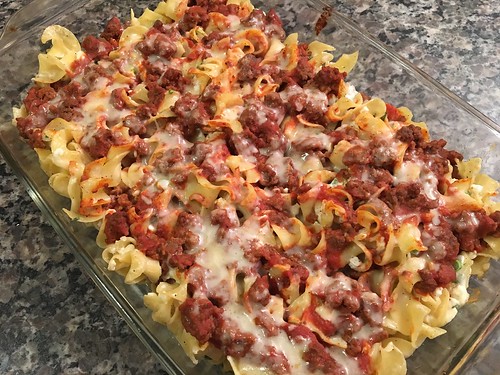
This is another recipe that I made a lot last year and apparently never found the time to blog. Sorry about that, folks. It's from the ever-popular Ree Drummond, a.k.a., the Pioneer Woman, so you might have already seen it over on her blog. It's an easy, comforting weeknight dinner that we all love.

Sour cream noodle bake

If you aren't sure how you feel about cottage cheese, never fear. It combines beautifully with the other ingredients and makes the whole thing taste insanely good. Trust me.

Sour Cream Noodle Bake
From The Pioneer Woman

1 1/4 pounds ground beef
1 15oz can tomato sauce
1/2 teaspoon salt
Freshly ground black pepper
1 bag egg noodles
1/2 cup sour cream
1 1/4 cups small curd cottage cheese
1/2 cup sliced scallions
1 cup grated sharp cheddar cheese

Preheat oven to 350 degrees. Spray a 9 x 13" baking dish with cooking spray.

Brown ground beef in a large skillet. Drain fat, then stir in the tomato sauce, 1/2 teaspoon salt and plenty of freshly ground black pepper. Simmer while you prepare the other ingredients.

Cook egg noodles until al dente. Drain and set aside.

In a medium bowl, combine sour cream and cottage cheese. Add plenty of freshly ground black pepper. Add to noodles and stir. Add scallions and stir.

To assemble, add half of the noodles to the baking dish. Top with half the meat mixture, then sprinkle on half the grated cheddar. Repeat with noodles, meat, then a final layer of cheese.

Bake for 20 minutes, or until all cheese is melted. Serve with salad and crusty French bread.
Pin It!

Monday, October 14, 2019

Kofta in Pita Pockets with Cucumber-Tomato Salad

Katie is a voracious reader and while we love the beauty of inter-library loans requested from the comfort of our home, sometimes we need to actually go to the library so she can discover a new series to read. On one such visit Steve found a Weber grilling cookbook that he decided to check out. We ended up liking the recipes so much we bought our own copy. Since then we've made quite a few delicious recipes, including this one for Kofta in Pita Pockets with Cucumber-Tomato Salad.

To blog

The time I took this picture we opted to serve the patties as a platter with the salad, couscous, hummus, yogurt sauce and pita on the side. I think I prefer it this way but the pita pockets are delicious, too, if messy.

Kofta in Pita Pockets with Cucumber-Tomato Salad
From Weber's Greatest Hits

1 cup chopped cucumber (skin and seeds removed)
1 cup chopped cherry or grape tomatoes
1/4 cup finely minced red onion
kosher salt

1 1/2 lbs ground beef
1/2 cup minced fresh parsley leaves
1 tablespoon minced garlic
2 teaspoons ground coriander
1 1/2 teaspoons ground cumin
1 1/2 teaspoons kosher salt
1/2 teaspoon black pepper
1/2 teaspoon ground allspice
1/4 teaspoon ground cardamom
1/4 teaspoon turmeric

3 pita breads, with pockets
olive oil
yogurt sauce (see below)

In a medium bowl, combine the cucumber, tomatoes and onion. Season with salt and stir to combine. Set aside.

In another bowl, mix together the ground beef through the turmeric. Use your hands to make sure everything is well incorporated. Gently shape the mixture into six patties of equal size, about 3/4-inch thick. With your thumb, make a shallow indentation about 1-inch wide in the center of each patty. This will prevent it from doming as it cooks. Refrigerate the patties until you're ready to grill.

Prepare the grill for direct and indirect cooking over medium-high heat.

Lightly sprinkle the pita with water and wrap them in foil, sealing the packet closed.

Brush the cooking grates clean. Brush the patties on both sides with canola oil. Grill over direct medium-high heat, with the lid closed, until cooked to medium, 7 to 9 minutes, turning once. At the same time, warm the pita packet over indirect heat for 4 to 5 minutes, turning once. Remove from the grill.

Cut each pita in half. Scoop about 3 tablespoons of the salad into each pita half. Spoon some of the yogurt sauce on top and then place a patty into each pita half. Top with more salad and dressing, if desired.

Yogurt Sauce

1 cup plain greek nonfat yogurt
1 cup shredded cucumber (skin and seeds removed)
Salt and pepper, to taste
1 small garlic clove, grated
Squeeze of fresh lemon juice

Mix all the ingredients together and let sit so the flavors can meld.
Pin It!

Friday, October 11, 2019

Pizza Friday: Philly Roast Pork with Garlicky Broccoli Rabe

I try not to label something as "the best" or "the ultimate" because everyone's tastes are different. Plus, it feels like a major cop-out as a writer to use so many superlatives. That being said, this roast pork and broccoli rabe pizza is probably one of the best pizzas I've ever made.

Pizza to blog

I also try not to go into long, rambling stories when all people want to see is the recipe but hear me out. I'll be quick. We used to go to a local restaurant every Saturday for their roast pork with broccoli rabe sandwiches. They were amazing. The pork had just the right amount of seasoning and a nice kick from hot peppers. It was the highlight of my week. Long story short, the place went downhill and we haven't gone there in years. But I still dream about that sandwich. This recipe - both the sandwiches and the pizza - remind me of the heyday of that restaurant. And that makes me very, very happy.

The original sandwiches, which I made back in May and never blogged (ooops), were delicious but the pizza was even better. In fact, Steve said we should make another pork roast just for this pizza. As I often do, I squirreled away a bit of the meat for just this occasion. I happened to find it in the freezer last week and this pizza was born. Katie thought there was a wee bit too much broccoli rabe, but Steve and I disagreed. As always, use however much you like.

I'm including the instructions for the sandwiches and the pizza below since you'll have quite a bit of meat.

Philly Roast Pork with Garlicky Broccoli Rabe
From Cook's Country

Pork and Jus
1 tablespoon kosher salt
2 teaspoons minced fresh rosemary
2 teaspoons dried thyme
2 teaspoons dried oregano
2 teaspoons fennel seeds
1 teaspoon red pepper flakes
1 (4-pound) boneless pork butt roast, trimmed
2 cups chicken broth, plus extra as needed
8 garlic cloves, peeled and smashed

Broccoli Rabe
2 tablespoons extra-virgin olive oil
3 garlic cloves, sliced thin
1 pound broccoli rabe, trimmed and cut into 1/2-inch pieces
2 teaspoons kosher salt
Pinch red pepper flakes

Sandwiches
8 (8-inch) Italian sub rolls, split lengthwise
12 ounces sliced sharp provolone cheese

Pizza
1/2 ball of pizza dough
olive oil
1/2-lb grated mozzarella cheese
4 slices of sharp provolone
dried oregano and red pepper flakes, to taste

Adjust oven rack to lower-middle position and heat oven to 300 degrees. Combine salt, rosemary, thyme, oregano, fennel seeds, and pepper flakes in bowl. Tie pork with kitchen twine at 1-inch intervals. Sprinkle pork with salt mixture and transfer to large Dutch oven. Pour broth around pork and add garlic to pot. Cover, transfer to oven, and cook until meat registers 190 degrees, 2 1/2 to 3 hours.

Transfer pork to large plate. Transfer braising liquid to 4-cup liquid measuring cup; add extra broth, if necessary, to equal 3 cups. Let pork and liquid cool completely, about 1 hour. Cover and refrigerate both for at least 1 hour or up to 2 days.

Heat oil and garlic in Dutch oven over medium heat until garlic is golden brown, 3 to 5 minutes. Add broccoli rabe, salt, and pepper flakes and cook, stirring occasionally, until tender, 4 to 6 minutes. Transfer to bowl.

About 20 minutes before serving, adjust oven rack to middle position and heat oven to 450 degrees. Remove twine and cut cooled pork in half lengthwise to make 2 even-size roasts. Position roasts cut side down and slice each crosswise as thin as possible.

Spoon solidified fat off cooled jus and discard. Transfer jus to Dutch oven and bring to boil over high heat. Reduce heat to low, add pork, cover, and cook until pork is heated through, about 3 minutes, tossing occasionally. Cover and keep warm.

IF MAKING INTO SANDWICHES:
Arrange rolls on 2 rimmed baking sheets (4 rolls per sheet). Divide provolone evenly among rolls. Bake, 1 sheet at a time, until cheese is melted and rolls are warmed, about 3 minutes. Using tongs, divide pork and broccoli rabe evenly among rolls (about 1 cup pork and ⅓ cup broccoli rabe per roll). Serve, passing any remaining jus separately.

TURNING LEFTOVER PORK INTO PIZZA:
Defrost the pork you squirreled away and make another order of the garlicky broccoli rabe. Preheat your pizza stone in a 500-degree oven for at least an hour.

Sprinkle a square of parchment paper the size of your pizza stone with flour and roll the dough into a 14-inch round. Drizzle some olive oil on top and rub to coat all the dough. Top with the mozzarella. Arrange the four slices of provolone so they cover as much of the mozzarella as possible.

Reheat the pork so it's lukewarm. Distribute evenly on top of the cheese. Do the same for the broccoli rabe. Add a shake or two of dried oregano, if desired.

Transfer the parchment paper to the preheated baking stone and bake for 15 minutes, checking often to make sure there are no bubbles forming. I keep a poking stick handy to pop them during the first 5 minutes.

Remove from the oven and add more red pepper flakes, to taste.
Pin It!