Tuesday, April 30, 2019

Salmon Sushi Bowls

We recently discovered that the salmon we buy from the local fish market is sushi grade. Ahhhh! Such a game changer. We've gone a bit overboard since then, buying huge slabs of salmon so we can grill some on a cedar plank and cut up the rest for sashimi. One time Steve bought a whole side of salmon. That was $$$ but so damn good.

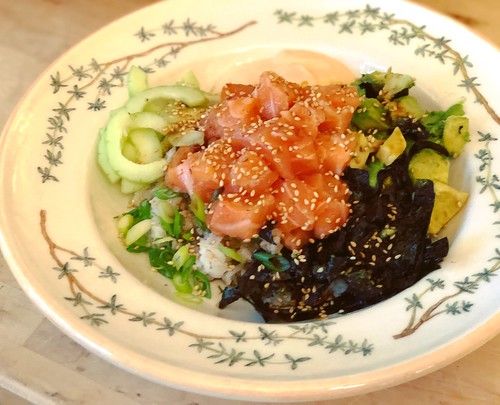
Sushi bowl

These sushi bowls were everything I wanted them to be and more. I can't wait to make them again but next time I'll also buy some tuna so we can enjoy both types of fish.

Salmon Sushi Bowls
Inspired by Fox and Briar

1 pound sushi-grade salmon
1 avocado, cut into cubes
1 cucumber, peeled, seeded and cut into cubes
3 scallions, sliced on an angle
4 sheets nori, cut into strips
sesame seeds, for garnish
cooked edamame, optional
pickled ginger, optional
wasabi, optional

For the Sushi Rice
1 cup short grain white sushi rice
1 1/2 cups water
1 tablespoon rice vinegar
1/2 tablespoon sugar
3/4 teaspoon salt

For Soy Ginger Dressing
1/4 cup low sodium soy sauce
2 tablespoons rice vinegar
1 teaspoon sugar
1/2 teaspoon sesame oil
1 tablespoon fresh grated ginger root
2 garlic cloves, minced

For the Spicy Mayo
1/4 cup mayonnaise
1 tablespoon sriracha (or more, to desired spiciness)
1/2 teaspoon fresh lime juice
1/2 teaspoon sesame oil

Remove the skin from the salmon and cut into bite-size chunks.

Rinse the rice until the water runs clear, then add to a pot with the 1 1/2 cups of water and let sit for 30 minutes. Turn on the heat and bring to a boil. Cover and reduce heat to low. Cook for 20 minutes. While the rice is cooking, mix the rice vinegar, sugar and salt in a small bowl. Heat in the microwave for about 30 seconds, then stir until sugar and salt are dissolved. Once the rice is cooked, cool for a few minutes and then pour the vinegar mixture over the rice and stir until combined.

Mix the soy ginger dressing ingredients together in a small bowl, then do the same for the spicy mayo.

To assemble the bowls, add sushi rice to a bowl and top with a portion of salmon, avocado, cucumber, scallion and a few pieces of nori. Drizzle with the soy ginger dressing and some of the spicy mayo. Garnish with sesame seeds. You can also add cooked edamame, pickled ginger and/or wasabi.
Pin It!

Thursday, April 11, 2019

Nut-Free Vegetable Korma

Indian restaurants are off-limits since Katie is allergic to nuts, but because I don't want her to miss out on all the amazing food I've spent the last few years slowly building a repertoire of dishes I can make at home. Vegetable korma is my favorite Indian dish to order whenever we try a new Indian restaurant so I was really excited to make a good at-home version.

Korma

The house smelled AMAZING while this was simmering away and I'm happy to report it was just as good as the traditional version with cashews. I forgot the cauliflower in our dish, but that just means I need to make it again.

Nut-Free Vegetable Korma
Adapted from The Wanderlust Kitchen

For the Sauce
1 medium yellow onion, peeled and halved
3 cloves garlic, peeled
1 (1-inch) piece ginger root, roughly chopped
1 jalapeno pepper, stemmed and seeded

For the Korma
1 tablespoon vegetable oil
1 tablespoon butter
2 teaspoons curry powder
1 teaspoon ground turmeric
1 teaspoon garam masala
1/2 teaspoon cumin
1/2 teaspoon cinnamon
1/2 teaspoon coriander
1/2 teaspoon kosher salt
1/2 teaspoon ground black pepper
1/8 teaspoon ground cardamom
2 small Roma tomatoes, diced
1 can unsweetened, full-fat coconut milk
3/4 cup plain yogurt
1 1/2 teaspoons brown sugar
1 medium red potato, peeled and diced
1/2 cup frozen peas
1/2 cup peeled, diced carrot
1 cup chopped fresh green beans
1 cup cauliflower florets

To Serve
Cooked basmati rice
Buttered and grilled naan
Raita

Place the onion, garlic, ginger and jalapeno in a blender with 1/2 cup of water. Process until pureed.

Heat the vegetable oil and butter in a large skillet over medium heat. Measure all of the spices (the curry powder through cardamom) in a small bowl. Once the butter has melted, add the spices and stir to coat the butter. You want to toast the spices to bring out their flavors.

Pour in the pureed sauce and cook for 2 to 3 minutes. Add the tomato, coconut milk, yogurt, brown sugar, potato, peas, carrots, cauliflower and green beans. Stir well. Reduce the heat to a simmer then cover the pan and cook for 10 minutes.

Uncover and cook another 10-15 minutes, or until the potatoes are tender. Serve with cooked basmati rice, raita and naan.

Cucumber Scallion Raita
From Smitten Kitchen

1 cucumber, peeled, seeds removed, finely chopped
1 thinly sliced scallion
10-12 oz plain Greek yogurt
salt, to taste

Mix everything together and let sit in the fridge for a few hours so the flavors meld.
Pin It!

Wednesday, February 13, 2019

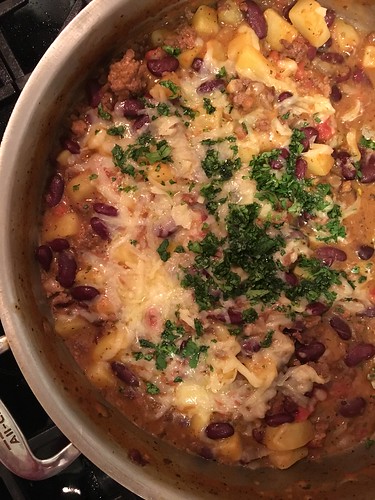
One Pot Cowboy Casserole

I recently saw this recipe for Crockpot Cowboy Casserole on my friend Kylee's blog. I don't use my crockpot so I knew immediately that I wanted to make this into a one pot stove top meal.

Cowboy casserole

I had no idea this was going to be worth blogging so I didn't take a good photo. D'oh. So you'll just have to trust me that this was delicious. Steve thought it was basically chili, which I usually refuse to make because I just don't love it. But this...so homey and comforting. And easy. So, so easy.

Stovetop Cowboy Casserole
Modified from Kylee Cooks

1 lb ground beef
1 large onion sliced
3 large potatoes, diced
2 cans kidney beans, drained and rinsed
15 oz. can diced tomatoes, UNdrained
10.5oz can cream of chicken soup
1 teaspoon Italian seasoning
1/2 teaspoon dried oregano
1 teaspoon salt
1/4 teaspoon pepper
1 1/2 cups cheddar cheese grated
handful cilantro, minced

Heat a large skillet over medium-high heat. Add the ground beef and leave it alone so it can start to brown. Add the onion and cook until the beef is fully cooked and the onions are translucent.

Add the potatoes, kidney beans, diced tomatoes, cream of chicken soup, Italian seasoning, oregano, salt and pepper. Stir well and bring to a boil. Reduce heat to a simmer, cover and cook for 30 minutes or until the potatoes are tender.

After 30 minutes, uncover and allow to simmer for 15 minutes to thicken the sauce. Turn off the heat, sprinkle the cheese on top and cover. Let the cheese melt before serving. Top with cilantro and serve.
Pin It!

Tuesday, February 12, 2019

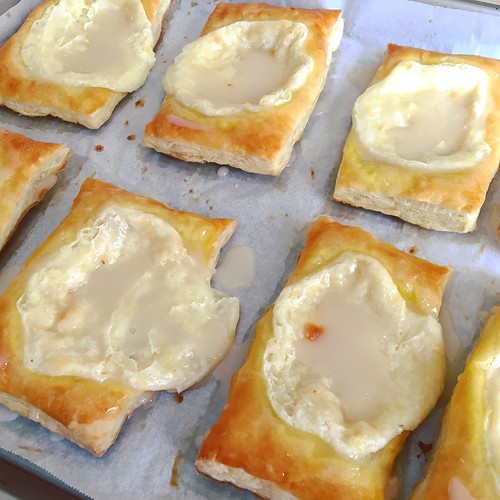
Cheese Danish

I'm so glad Kate over at Kate's Recipe Box decided to try her hand at homemade cheese danish. I love them...when they're good. And they rarely are. Most have barely a hint of cheese filling and the filling is tasteless, more texture than flavor. But these are incredible. And so easy thanks to frozen puff pastry dough.

Cheese danish

I cut my dough into 8 pieces, which was a good size for us. We all agreed that we didn't need the glaze in the original recipe. I also added a pinch of salt to the cheese filling.

Cheese Danish
As seen on Kate’s Recipe Box
Makes 8-12

1 sheet frozen puff pastry
6 oz. cream cheese, softened
4 tablespoons sugar
pinch of salt
1 teaspoon lemon zest
1 teaspoon vanilla extract
1 egg
1 tablespoon water

Thaw the puff pastry at room temperature for an hour, until it unfolds without breaking. Preheat the oven to 350 degrees. Line a baking sheet with parchment paper.

Roll out the puff pastry into roughly a 9 x 13" rectangle. Cut into 8 or 12 even pieces. Lay the pieces on the lined baking sheet.

Using a hand mixer, beat together the cream cheese, sugar, salt, lemon zest, and vanilla. Place about 2 tablespoons of the cream cheese mixture on top of each puff pastry, spreading out slightly so you have only a thin band of dough at the edges.

Beat the egg with the water and brush evenly over the puff pastry.

Bake for 15-20 minutes, until the puff pastry is lightly browned. Let cool to room temperature and serve.
Pin It!

Tuesday, January 08, 2019

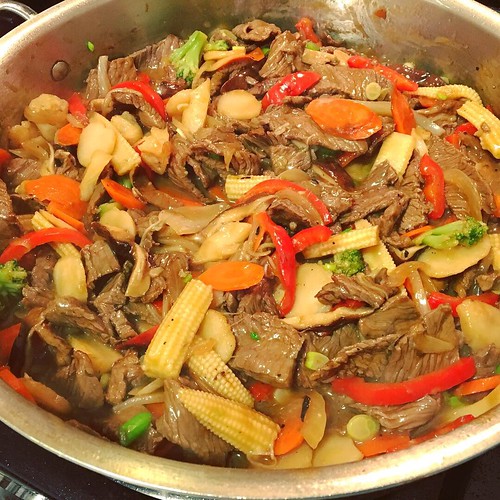
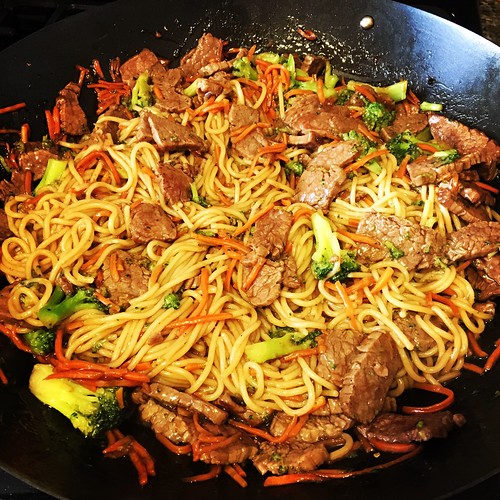
Beef and Vegetable Stir Fry

I think it's safe to say this blog has become just a space for me to easily share recipes with friends and family. Case in point - I posted a photo of this stir fry on IG last night and am only blogging it because a friend asked me for the recipe.

Beef stir fry

I had planned to make Amy's Stir Fry Beef with Snow Peas but Steve and Katie bought snap peas, which I don't love for stir fry, and at the last minute I decided I wanted a lot more veggies. I turned to my Pork and Vegetable Stir Fry recipe for inspiration and this recipe was born.

Beef and Vegetable Stir Fry
Adapted from Belly Full and So Tasty, So Yummy

1/2 cup low sodium soy sauce
3 tablespoons dry sherry
2 tablespoons brown sugar
2 tablespoons corn starch
2 pounds beef sirloin, fat trimmed and sliced very thin
2 tablespoons vegetable oil
1 small onion, thinly sliced
1 small red bell pepper, sliced thin
2 carrots, peeled and cut on the bias
1/2 pound shiitake mushrooms, sliced
1/2 bag frozen broccoli and cauliflower mix
8 ounces fresh snow peas (or snap peas)
1 tablespoon minced fresh ginger
2 cloves garlic, minced
1 can baby corn
1 can sliced water chestnuts
4 scallions, chopped
1 cup chicken broth
white rice or noodles, for serving

Placing the sirloin steak in the freezer for a few hours before you want to slice it helps you get super thin slices of meat.

In a large bowl, mix together soy sauce, sherry, brown sugar and cornstarch. Add sliced meat to bowl and toss to coat. Set aside.

Heat oil in a heavy skillet or wok over medium-high heat. Add onion, red bell pepper and carrots and stir fry until starting to brown. Remove to a separate plate. Set aside.

Allow pan to get very hot again, adding more oil if needed. With tongs, add half the meat by spreading it out in the skillet, leaving the marinade in the bowl. Let the meat sear, without stirring, for one minute. Turn meat over and cook for another 30 seconds. Remove to a clean plate. Repeat with other half of meat, allowing pan to get very hot again first.

Once all the beef is cooked, add a bit more oil to the skillet and heat. Add the mushrooms, broccoli and cauliflower and snow peas. Stir over high heat for 30 seconds, then add the ginger, garlic, baby corn and water chestnuts. Stir fry until fragrant, then add in the beef, cooked veggies and chicken broth. Cook for one more minute, then add the scallions.

Serve immediately over cooked hot rice or noodles.
Pin It!

Monday, July 23, 2018

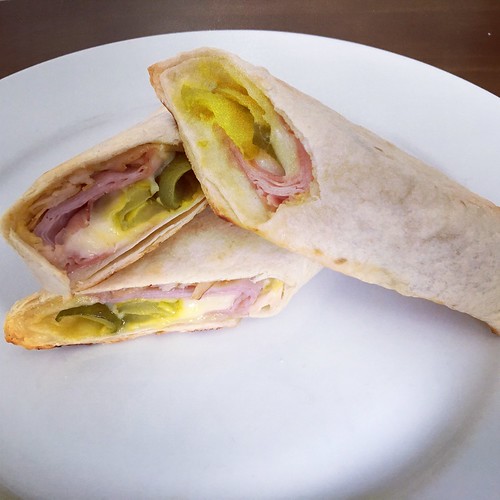
Cuban Taquitos

My friend Amy over at Bellyfull recently posted a photo of these Cuban Taquitos on her Instagram page. I knew immediately that they'd be a huge hit. We all love the flavors in a Cuban sandwich but my usual recipe is much more time-consuming. These were so easy!

Cuban rollups

I guesstimated the amounts based on how we like our Cuban sandwiches and the results were perfect. I was only able to make one small (taco size) roll-up and four larger (fajita size) roll-ups so I adjusted the amounts below. I had the leftovers for lunch today and they reheat beautifully in the toaster oven.

Cuban Taquitos
As seen on Bellyfull's Instagram

10 fajita size flour tortillas
mayo
yellow mustard
1/2-lb thinly sliced deli ham
1/2-lb thinly sliced deli turkey
1/2-lb thinly sliced lacy Swiss cheese
1 jar sandwich stacker dill pickles

Preheat the oven to 400 degrees.

Lay out your tortillas on a clean work surface. I find it easier to portion out amounts when you can do all of them at once. Spread some mayo on the bottom half of each tortilla. Squirt a little mustard on top of the mayo. Divide the ham and turkey evenly between the tortillas. You should be have at least two slices of each meat per tortilla. Layer on some of the Swiss and then top with one or two pickles.

Roll the tortillas as tightly as you can and place on a baking sheet lined with parchment paper that's been sprayed with nonstick cooking spray. Spray the tops of the tortillas or baste with melted butter. Sprinkle some salt on top.

Bake for 10-12 minutes until the cheese is melted and the meat is hot.
Pin It!

Thursday, July 12, 2018

Easy Weeknight Beef and Broccoli Lo Mein

Busy, busy, busy. That's all I can say about life these days.

It's summer, so at least I've got that going for me. It's my favorite time of year and I soak it all in to get me through the cold, dark days of winter.

We recently had a privacy fence installed on the part of our backyard that faces the street and quite a bit of landscaping done, so we're using our patio again. It's so lovely back there now and the weather has been cooperating so we can eat dinner outside.

This Easy Weeknight Beef and Broccoli Lo Mein was last night's meal, eaten al fresco until the damn flies found us and made things so miserable Katie decided to finish her dinner inside while Steve and I cleaned up.

And THAT is why I want a screened in porch.

Beef and broccoli lo mein

So...this lo mein was awesome. I thought it was a bit too sweet so I'll cut down on the sugar next time, but my family loved it. You'll see quite a large range for the flank steak. The original recipe called for half a pound but my supermarket doesn't sell such a small amount of steak, and we wanted more steak than that anyway, so I upped it to 1.5-lbs. Use however much you like.

I also used oyster sauce instead of hoisin because I already had it in the house. They're completely different flavors but I think both will work fine.

Easy Weeknight Beef and Broccoli Lo Mein
Modified from The Recipe Critic

12 ounces lo mein noodles, or spaghetti (I use Dreamfields and the boxes are some weird amount like 13.25 oz)
3 cups broccoli florets
1 tablespoon vegetable or canola oil
8 oz - 1.5 lbs flank steak, sliced against the grain
4 garlic cloves, minced
1 cup shredded carrot
1 cup chicken broth
1/4 cup packed brown sugar
1/2 cup reduced-sodium soy sauce
3 tablespoons hoisin or oyster sauce
1 tablespoon cornstarch
2 teaspoons sesame oil
1/3 teaspoon ground ginger
1/4 teaspoon crushed red pepper flakes
1/4 teaspoon pepper

Cook the noodles according to package directions. Add the broccoli during the last 4 minutes of cooking. Drain the noodles and broccoli. Set aside.

While the pasta is cooking, heat oil in a wok or other deep skillet over high heat. Add the steak and cook until just starting to brown. Add the garlic and carrots and cook for a minute more.

In a 2-cup measuring cup whisk together the chicken broth, brown sugar, soy sauce, hoisin or oyster sauce, cornstarch, sesame oil, ginger, red pepper flakes and pepper. Add to the skillet and bring to a boil. Simmer until the sauce thickens.

Add the spaghetti and broccoli to the wok and toss until incorporated. Serve.
Pin It!

Monday, June 04, 2018

Soft Cheese Tacos

I've been on a serious Tex-Mex kick lately. I can't get enough tortillas, salsa, cilantro, cheese, avocados...I want it ALL. I saw these Soft Cheese Tacos from Homesick Texan and I was hooked. Cheese, cheese and more cheese - sign me up!

Soft cheese tacos

There is absolutely nothing healthy about this dish but sometimes you just need to indulge. The ingredient list seems long, but it's actually a really easy meal to put together. And, surprisingly, these reheat beautifully. My only caution is to test your jalapenos before you add them to the queso. Sometimes jalapenos are more like green peppers and other times they're fiery little devils. The last time I made these one jalapeno was mild and the other was super spicy. I ended up using only a quarter of the spicy one and the queso was perfect.

One more note - these are a wonderful vegetarian meal but Steve likes meat so I usually add some of the rotisserie chicken I keep in the freezer. The chicken is entirely unnecessary but know it's an option if you also live with a carnivore.

Soft Cheese Tacos
Homesick Texan

For the queso:
2 tablespoons unsalted butter
1/4 cup diced yellow onion
2-4 jalapeños, seeded and diced (check spice level!)
2 cloves garlic, minced
3/4 cup diced grape tomatoes
2 tablespoons cornstarch
1 cup whole milk
1 cup water
1 pound American cheese, chopped or shredded
1/2 teaspoon kosher salt
1/2 teaspoon ground cumin

For the soft cheese tacos:
2 tablespoons vegetable oil
12 corn tortillas
12 ounces (3 cups) Colby Jack, shredded
1/4 cup diced yellow onion
2 cups cooked chicken (optional)
Garnish: sliced pickled jalapeño, minced cilantro

Preheat the oven to 350°F.

In a 2-quart saucepan, heat the butter over medium-low heat. Add the onion and jalapeños. Cook until softened, about 5 minutes. Add the garlic and tomatoes and cook for 30 more seconds.

Whisk together the cornstarch, milk and water until well combined then pour into the pot. Bring to a simmer and cook for a couple of minutes until it thickens. Turn the heat down to low and add the American cheese. Stir until the cheese has melted, then add the salt and cumin. Turn off the heat.

Pour the oil into a 9x13 baking dish. Place the tortillas in the baking dish (it’s okay if they overlap) and move them around to make sure they all get coated with some of the oil. Place uncovered in the oven for 5 minutes until they're soft and warm. Remove the baking dish from the oven and stack the tortillas on a plate. Reserve the baking dish.

To assemble the tacos, place a warm tortilla on a clean surface. Add 1/4 cup of the shredded Colby Jack down the center of the tortilla then add 1 teaspoon of the onions and some chicken, if using. Roll the tortilla then place seam side down in the reserved baking dish. Repeat with the remaining tortillas.

Cover the baking dish with foil and bake for 15 minutes. Reheat the queso over low heat, stirring occasionally. Once the tacos are done, remove them from the oven and pour the queso evenly over the tacos. They'll be swimming in queso, which is what you want. Serve warm with sliced pickled jalapeños and cilantro.
Pin It!

Friday, February 23, 2018

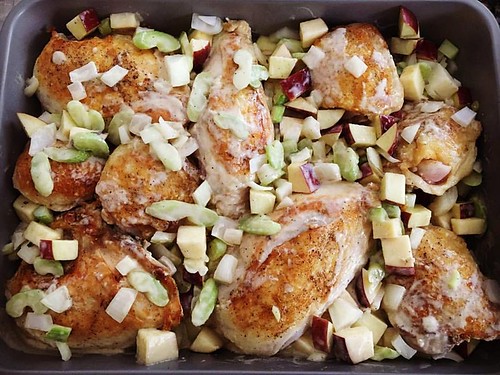
Recipe Redo - Chicken with Apples

I first posted this recipe waaaaay back in 2007 so I thought it was time for an update. For starters, the original photo is cringe worthy but I've also tweaked the prep a bit since then.

chicken apples

Quick reminder of this recipe's origin - my mom first made this recipe in the summer of 1973. This was the first summer (while she was in college) that she didn't go home. She was looking for a recipe to make, probably for a boyfriend, and came across this one. She doesn't remember where she saw it, but her copy calls for wine instead of apple juice. One time she was making it for a group of people and didn't have wine so she decided to substitute apple juice. We all prefer it that way, but you can decide. This is an authentic tried and true recipe for going on 44 years!

She also claims it makes a knock-out chicken salad the next day but I've never had enough leftover to try it.

Chicken with Apples

1 tablespoon vegetable oil
4 bone-in, skin-on chicken breasts (or 2 large/4 small thighs and 2 breasts)
1 medium onion, cut into large dice
2 celery stalks, cut into large dice
1 large Red Delicious apple, cut into large dice
1 tablespoon flour
1 cup apple juice (or white wine)
1 cup sour cream
salt and pepper

Preheat the oven to 350 degrees.

Heat the oil in a large skillet or Dutch oven over medium-high heat. Add the chicken and brown on both sides.

Place the chicken in a large baking dish and cover with the onion, celery and apple. Pour off all but 1 tablespoon of oil from the skillet and add the flour, stirring until it's incorporated. Add the apple juice and whisk until thickened. Remove the skillet from the heat and add the sour cream. Season with salt and pepper to taste and pour over the chicken.

Cover the baking dish with foil and bake for an hour. Uncover and bake another 30 minutes.

When the chicken is done, remove to a plate and cover the baking dish to keep the sauce warm. Once the chicken has cooled enough to handle it (I usually put the plate in the fridge for 30 minutes), remove the meat and pull into bite-size pieces with your fingers, discarding the skin and bones. Toss the chicken pieces with the sauce.

Serve over egg noodles.
Pin It!

Monday, January 22, 2018

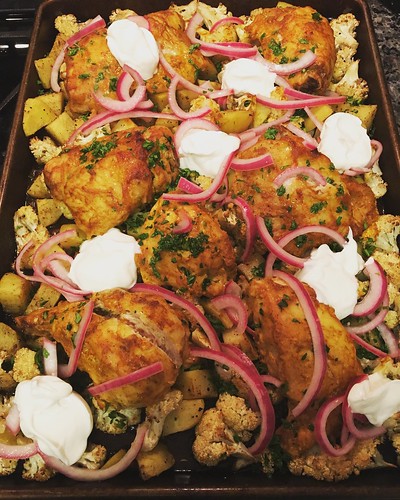
Sheet Pan Chicken Tikka with Pickled Onions

I already have a chicken tikka recipe that my whole family absolutely loves, but when I saw this Sheet Pan Chicken Tikka on Smitten Kitchen I knew I had to make it. Just reading the ingredient list was making my mouth water and I loved the idea of everything cooking on one sheet pan. Of course Steve and Katie were skeptical when they saw me putting it together, but once they tasted the amazing flavors they were hooked.

Sheet pan chicken tikka

I made only slight modifications - using Greek yogurt for the marinade and sour cream for topping, adding some lemon juice to the marinade and a different recipe for pickled onions. If you love Indian flavors you really need to try this one. It's delicious!

Sheet Pan Chicken Tikka with Pickled Onions
As seen on Smitten Kitchen, picked onions from Bon Appetit

For the chicken
1 3/4-inch piece of ginger, peeled and grated
4 cloves garlic, grated
1 5-oz container plain Greek yogurt
2 tablespoons fresh lemon juice
1 teaspoon kosher salt
1/2 teaspoon chili powder
1/2 teaspoon ground turmeric
1/2 teaspoon ground cumin
3/4 teaspoon granulated sugar
1 teaspoon paprika
1 teaspoon garam masala
3 pounds chicken thighs or halved chicken breasts (mixture of both, skin-on, bone-in)

For the vegetables
3 tablespoons olive oil
1 1/4 pounds (about 4 medium) Yukon Gold potatoes, peeled and cut into small chunks
1 3/4 pounds (1 small head) cauliflower, cut into florets
1/2 teaspoon kosher salt
1/2 teaspoon ground cumin

Garnish
Pickled red onion
Dollops of yogurt/sour cream
Chopped cilantro

Combine ginger, garlic, yogurt, lemon juice, salt, spices and sugar in a freezer bag. Add chicken pieces and toss to coat evenly. Let marinate overnight in the fridge.

Heat oven to 425°F. Coat a large baking sheet with 1 tablespoon of the olive oil. In a large bowl toss the potatoes, cauliflower, salt, cumin and remaining 2 tablespoons olive oil together until evenly coated. Spread evenly on the baking sheet.

Remove chicken from marinade and nestle in the vegetables. Roast in oven for 40-50 minutes until chicken and vegetables are cooked through. Test the potatoes with a knife to make sure they're cooked through.

To serve, top with pickled red onion, dollops of yogurt/sour cream and chopped cilantro. Serve right in the pan.

Pickled Onions
1/4 cup apple cider vinegar
1/2 cup water
1/2 tablespoon sugar
3/4 teaspoons kosher salt
1/2 red onion, thinly sliced

Separate the onion rings and place in a small bowl. Whisk the vinegar, water, sugar and salt together until the sugar and salt dissolve, then pour over the onion rings. Let sit at room temperature for at least 1 hour. Can be made 2 weeks ahead. Cover and chill. Drain onions before using.
Pin It!

Wednesday, November 29, 2017

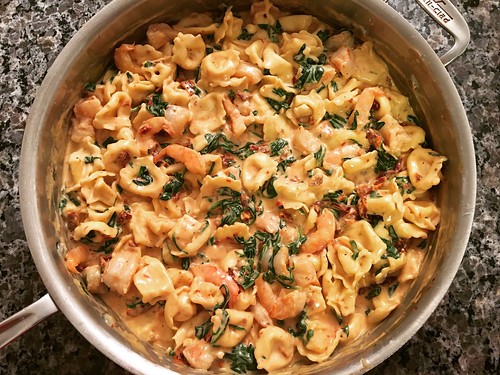
Tortellini with Spinach and Sun-Dried Tomatoes (with Shrimp)

A while back I bought a club pack of cheese tortellini. That's two, 20-ounce packages of tortellini. The first dish I made was a total flop, so I really wanted something great for the other package. I did a few searches and nothing was jumping out at me. Apparently most people use tortellini in soup, which I didn't feel like making, or they just toss it with a simple sauce. I wanted a flavorful, complex sauce to balance the blandness of the tortellini (let's be honest, cheese tortellini aren't exciting on their own).

Tortellini

I finally stumbled on this AMAZING recipe for Tortellini with Spinach and Sun-Dried Tomatoes. Seriously, this was SO GOOD. Even Steve, who hates sun-dried tomatoes, loved this meal. I bulked it up with some cooked shrimp, but you could also use chicken or sausage, or leave out meat all together.

I can't wait to buy another club pack of tortellini so I can make this again!

Tortellini with Spinach and Sun-Dried Tomatoes
Modified from The Brown Eyed Baker

1 lb shrimp, chicken or Italian sausage (optional, see note)
20 oz cheese tortellini
2 tablespoons unsalted butter
2 cloves garlic, minced
2 tablespoons flour
1 cup heavy cream
1 cup half-and-half
1/2 cup chicken broth
salt and pepper, to taste
Grated Parmesan cheese
7 ounces baby spinach, roughly chopped
1 (7-ounce) jar julienned sun-dried tomatoes packed in oil

Boil the tortellini according to the package directions.

While the tortellini is cooking, melt the butter in a large skillet over medium heat. Add the garlic and cook, stirring, until fragrant, about 30 seconds. Sprinkle in the flour and stir until a paste is formed. Whisk in the heavy cream, half-and-half and chicken broth. Season with a little salt and pepper, then add the Parmesan cheese. Simmer until the sauce thickens, about 5 minutes.

Stir in the spinach, sun-dried tomatoes (fish them out with a fork. You want some of the oil in the sauce but not the whole jar's worth), and shrimp/chicken/sausage, if using. Once the spinach is wilted, add the cooked and drained tortellini and stir to coat the tortellini with the sauce. Serve immediately.

NOTE: If you want to bulk this up a bit, you can add cooked shrimp, chicken or Italian sausage. I used shrimp that I seasoned with salt and pepper then seared in a hot skillet with a little oil. Once the shrimp were cooked I cut them in half (or thirds if they were big) so they were bite-size. If you want to do chicken or sausage instead, cut them into bite-size pieces and cook in a skillet with a little oil (be sure to season the chicken with salt and pepper).
Pin It!

Wednesday, November 01, 2017

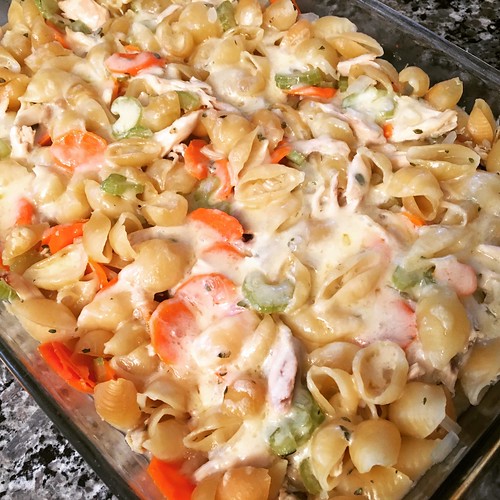
Chicken Noodle Soup Casserole

Do you ever make a recipe and just know that it's going to be something you make again and again and again? This Chicken Noodle Soup Casserole is one of those recipes. Not only was it delicious, it was one of the easiest meals I've ever made.

Chicken noodle soup casserole

The beauty of this recipe is two-fold:

1. Everything bakes together in a casserole dish so you don't even have to worry about food splatter on your stovetop.
2. It's hearty and comforting for those chilly nights.

To make this even easier, I used rotisserie chicken (I've been buying rotisserie chickens and freezing the meat in small portions for pizzas or recipes like this one) and prepped the celery, carrots, onion, thyme and garlic the night before. I made this for Halloween night since Steve and Katie like to have a quick meal before heading out for candy. I dumped everything in a huge bowl, mixed it all up, popped it in the oven to bake, steamed some green beans and called it dinner. So, so good.

The only issue was some of the pasta wasn't fully submerged in the broth so it didn't cook properly. I'm hoping that's easily solved by giving this a quick stir halfway through the cooking time. I can't wait to make it again!

Chicken Noodle Soup Casserole
As seen on The Seasoned Mom

2 cups diced, cooked chicken (rotisserie chicken works great)
2 celery stalks, diced
2 large/4 small carrots, peeled and diced
1/2 large onion, finely diced
1 tablespoon fresh thyme leaves, minced (or 1 teaspoon dried thyme)
2 large garlic cloves, minced or grated
12 ounces uncooked rotini pasta (I used shells)
4 cups low-sodium chicken broth
1 teaspoon salt
1 cup shredded cheddar cheese

Preheat oven to 425. Spray a 9 x 13-inch baking dish with cooking spray.

In a large bowl), stir together cooked chicken, celery, carrots, onion, thyme, garlic, uncooked pasta, chicken broth, and salt until well mixed. Pour into the baking dish and spread evenly.

Cover tightly with foil and bake for 40 minutes, uncovering to stir halfway through to make sure all the pasta has a chance to cook.

Uncover and sprinkle the cheese over the top. Bake uncovered for 5-10 more minutes until the cheese is melted. Let cool for a few minutes before serving.
Pin It!

Sunday, October 01, 2017

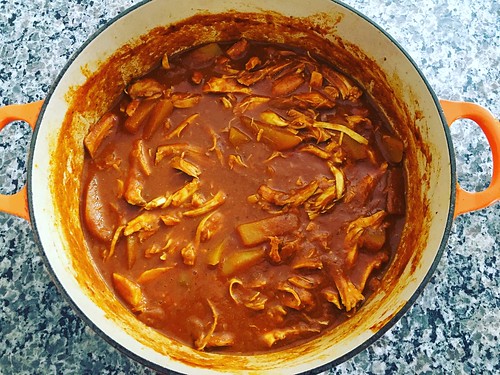
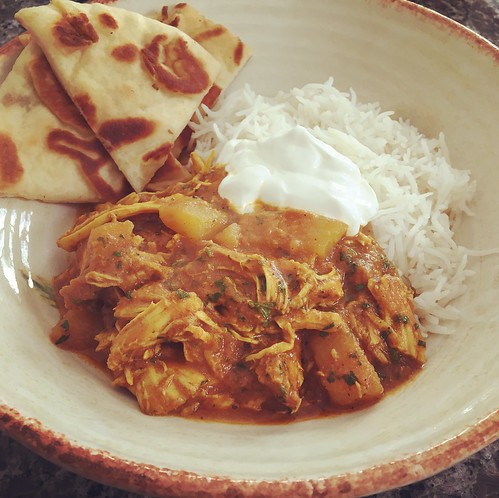
Indian Spiced Chicken Stew with Potatoes

My friend Lidia recently recommended this recipe for Indian Spiced Chicken Stew with Potatoes. I couldn't wait to make it, but not while it was still 85+ degrees. I'm one of those people who can only eat cold-weather food when it's cold. Soups/stews, chili, hearty baked pastas...all too heavy for me in the warmer months. As soon as the weather cooled off, though, this went right on the menu.

Indian chicken stew

Since this takes upwards of 3 hours to cook, I decided to make it on Saturday for Sunday lunch with my parents. I figured the stew would only get better sitting overnight and I was right. This was INCREDIBLE. The subtle Indian spices, the creamy, cool sour cream, the aromatic rice and the buttery naan were just fantastic together. I doubled the recipe and we barely had enough for lunches the next day. So, so good.

Indian chicken stew

This is one dish I'll be making often now that winter is coming (sob!)

Indian Spiced Stew with Chicken and Potatoes
As seen on Seasons & Suppers

2 tablespoons vegetable oil
3 large skin-on/bone-in chicken breasts
Kosher salt and freshly ground pepper
1 small onion, finely chopped
4 cloves garlic, chopped
1 tablespoon finely grated ginger
2 tablespoons tomato paste
2 teaspoons garam masala
2 teaspoons ground cumin
2 teaspoons ground turmeric
1 1/2 teaspoon ground coriander
1 teaspoon salt
1/2 - 3/4 teaspoon cayennne pepper (I left this out)
3 cups low-sodium chicken broth (plus a bit more thinning, if necessary)
3/4 cup tomato purée
1/2 cup heavy cream (I used half-and-half)
1/2 pound small Yukon Gold potatoes, cut into wedges
Chopped fresh cilantro/parsley/mint, for serving
Sour cream or plain yogurt, for serving
Basmati rice
Buttered naan

Heat vegetable oil in a large Dutch oven over medium heat. Season both sides of the chicken with salt and pepper and place skin side down in to the pot. Cook until golden brown on both sides, flipping halfway through, about 10 minutes. Transfer chicken to a plate.

To the same pot, add the onion, garlic, and ginger. Cook, stirring occasionally, until onion is very soft and golden brown, about 8–10 minutes. Add tomato paste, garam masala, cumin, turmeric, coriander, salt, cayenne (if using) and cook, stirring often, until tomato paste begins to darken, about 4 minutes.

Add the chicken, broth, tomato purée, and cream to the pot. Bring to a boil then reduce heat and simmer, partially covered, until chicken is almost falling off the bone and liquid is slightly thickened, about 1 1/2 hours. Remove chicken to a plate and let cool before removing the skin and bones. Cut or pull chicken into bite-sized pieces. Set aside.

Add the potatoes to the pot and cook, partially covered, until fork-tender, about 30-45 minutes. Stir the stew every so often to make sure the sauce hasn't thickened too much and potatoes aren't sticking to the bottom of the pot. If sauce is too thick, thin with a bit more chicken stock. When the potatoes are tender, add the chicken back to the pot and stir to combine.

Before serving, sprinkle with chopped cilantro, parsley or mint. To serve, spoon stew into a shallow bowl with basmati rice and/or naan on the side. Serve with a large dollop of sour cream or yogurt.

NOTE: This can (and should) be made ahead. Keep it refrigerated, for up to 3 days, in the Dutch oven you used to make it. Just re-heat over low heat when ready to serve, thinning with a bit of chicken broth, if necessary.
Pin It!

Thursday, August 17, 2017

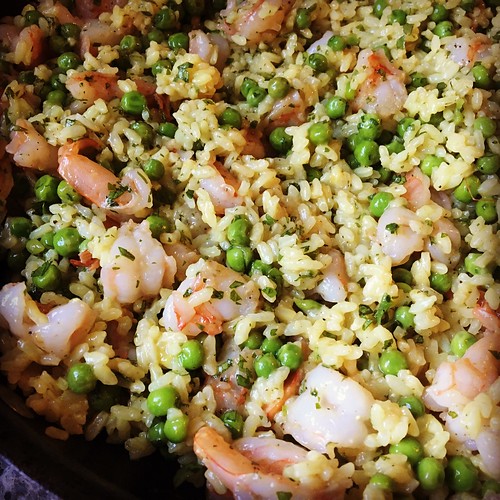
Curry Rice with Shrimp and Peas

I'm a big believer in meal planning. I started back in 2005 when we were saving for our first house. We had a weekly food budget of $50 (!!) and actually brought a calculator to the supermarket, wrote down prices as we shopped, added up the total before we went to the register and put items back if we went over our budget. We also stopped eating out altogether.

I quickly realized that the only way to make this method work was to decide ahead of time what we'd be eating for the week and use those recipes to make our shopping list. I can honestly say I have no clue what we did for dinner from 2002 (when we started living together) to 2005 (when I started meal planning). How did we decide what to eat? How did we grocery shop? It's a total mystery.

Even though some weeks I have zero inspiration and every recipe in my massive collection sounds meh, I will never give up meal planning. Not only does it save money, we waste less. At the end of the week our fridge is mostly empty. That's such a source of pride for me, being able to use everything we buy. And I also love knowing ahead of time what we'll be eating on any given day. It takes all the guesswork and stress out of dinnertime. Sure, there are times when a recipe flops and we order pizza, or life gets in the way and we have to switch days around, but I'd say 95% of the time it works.

So what does that have to do with this recipe. Since my friend Nicole posted this recipe for Spiced Chicken and Rice I've looked at it countless times as I'm sifting through my recipes for inspiration for the coming week. I actually had it as a tentative plan a number of times but it always got pushed back for some reason. This week we had a bunch of meals involving chicken in our plans, so Steve suggested I swap the chicken for shrimp. What can I say, the man is brilliant.

Curry shrimp and rice

I had to modify the recipe a smidge to keep the shrimp from overcooking, but the flavor profile is the same. Steve and I had chopped cashews on top but I obviously left those off Katie's serving. We absolutely loved the subtle spiciness from the curry powder, the crunch of the cashews, the vibrant notes of lemon and cilantro and the perfectly-cooked shrimp. Next time I'll up the amount of rice since this didn't yield much in the way of leftovers.

Curry Rice with Shrimp and Peas
Modified from PreventionRD

2 tablespoons olive oil
1 lbs shrimp, peeled, deveined, cut into bite-sized pieces
salt and pepper
2 tablespoons grated fresh ginger
1 1/2 teaspoons curry powder
1 quart low-sodium chicken broth
1 1/2 cups uncooked long-grain rice
1 lemon, zested and juiced
1 1/2 cups frozen peas
1/2 cup cilantro, minced
1/2 cup cashews, coarsely chopped

In a large, deep skillet with a lid, heat the olive oil over medium-high heat. Once hot, add the diced shrimp and season with salt and pepper. Cook until just pink. Transfer to a plate using a slotted spoon.

Add the ginger and curry powder to the skillet and cook, stirring constantly, until fragrant, about 30 seconds. Stir in the broth and scrape all the ginger and curry from the bottom, incorporating well. Bring to a boil.

Add the rice, lemon juice and zest to the skillet. Return to a boil, then cover and reduce heat to low. Cook until the rice is tender, about 20 minutes.

Remove from the heat and mix in the peas and reserved shrimp. Cover and allow to sit for 10 minutes. Taste and adjust the seasoning, if needed. Sprinkle with the cilantro and cashews and serve hot.
Pin It!

Wednesday, August 16, 2017

Zucchini Corn Pizza

I'm mourning summer as we enter the second half of August and begin the slow slide into fall and winter. This was a pretty lackluster summer weather-wise. More cool, rainy days than warm, sunny ones. Less pool time than I'd like. This seems to happen every few years, unfortunately.

One good thing to come out of the cooler weather was this Zucchini Corn Pizza. Holy guacamole. A local pizza joint serves a similar pie - roasted zucchini, roasted sweet corn, poblano sour cream, hot pepper flakes, salt, pepper, olive oil, mozzarella - that we love so I wanted to try making it at home.

Zucchini corn pizza

Even Katie, who's not the biggest zucchini fan, loved this. If you've got a bumper crop of zucchini in your garden this is a great way to use up at least one.

Zucchini Corn Pizza
As seen on Damn Delicious

1 tablespoon olive oil
1 tablespoon unsalted butter
2 cloves garlic, minced
1 medium zucchini, cut into 1/4-inch thick rounds
1/2 cup corn kernels (fresh, frozen, or canned)
1/2 teaspoon Italian seasoning
Kosher salt and freshly ground black pepper, to taste
1/2 ball pizza dough
8-oz shredded mozzarella cheese
1 cup ricotta cheese
fresh chives, snipped
crushed red pepper flakes, to taste

Place a pizza stone in the oven and preheat to 500 degrees.

Melt oil and butter in a large skillet over medium heat. Add the garlic and cook, stirring frequently, until fragrant, about 1 minute. Stir in the zucchini, corn and Italian seasoning. Cook, stirring occasionally, until zucchini are tender, about 3-4 minutes. Season with salt and pepper.

Lay a piece of parchment paper the size of the pizza stone on a work surface. Dust lightly with flour and roll out the pizza dough into a 12- to 14-inch circle. Top with the mozzarella and zucchini mixture. Add dollops of ricotta and spread them out a bit.

Transfer the pizza on the parchment paper to the pizza stone. Bake for 10-15 minutes, checking often to make sure the cheese is melting and browning. Remove the pizza from the oven and allow it to rest for 5 minutes before slicing. Serve garnished with chives and red pepper flakes, if desired.
Pin It!

Monday, August 07, 2017

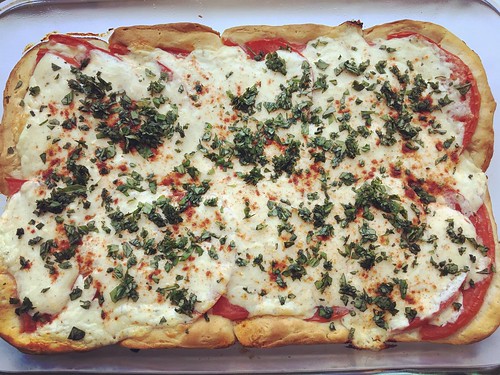
Cheesy Tomato Biscuit Casserole

I don't know about you but I get in such a rut with side dishes. Most of the time it's because I'm feeling uninspired or lazy and the same old same old is easy to throw together. I'm happy to report that I branched out this weekend and now I have a new, amazing side dish to add to my repertoire. And, bonus, it reheats well (if you have any leftovers that is).

Cheesy tomato biscuit casserole

My friend Amy posted this Cheesy Tomato Biscuit Casserole months ago, but I've been waiting until the height of tomato season to make it. While you can get tomatoes year-round, the ones we're enjoying right now are insane. I don't know if it's just a good year for tomatoes or what, but damn. I feel like I need to eat. all. the. tomatoes. every. day. So, so good.

As I was typing up this post I realized I forgot the onion in the original recipe. Oops! Since we thought it was amazing without it - and, bonus, if you skip that step you have one less pan to clean - I'm leaving it out. I also opted to add fresh chopped basil once this came out of the oven, mainly because my basil plant is out of control right now and because tomatoes and basil are so good together. Totally your call. Also, use way more tomato than you think you need. Tomatoes have a lot of water in them so they'll shrink as they cook.

Hurry up and make this simple and delicious side dish now. You won't be sorry!

Cheesy Tomato Biscuit Casserole
Slightly modified from BellyFull

1/2 cup sour cream
1/4 cup mayonnaise
1 cup shredded cheddar cheese
1/4 teaspoon kosher salt
1/4 teaspoon pepper
1/4 teaspoon dried oregano
1/4 teaspoon garlic powder
1 container (16 ounce) Pillsbury Grands Buttermilk Biscuits
4 tomatoes, cut into 1/4-inch slices
paprika
fresh basil, chopped (optional)

Preheat the oven to 400 degrees. Coat a 9x13 casserole dish with nonstick cooking spray.

Combine the sour cream, mayonnaise, cheese, salt, pepper, oregano and garlic powder in a small bowl. Set aside.

Press the biscuits into the casserole dish, pinching the seams together so they cover the bottom of the pan and pushing the dough slightly up the sides. The dough will be thin.

Arrange the tomato slices on top of the biscuits, overlapping to fit as many slices as you can. Spread the cheese mixture over the top then sprinkle with a little paprika.

Bake for 25-27 minutes until the dough is cooked through and the cheese mixture is browning and bubbly. Let stand for 10 minutes, then top with chopped basil and cut into slices.

To reheat leftovers: Preheat a toaster oven to 350 degrees. Spray some foil with non-stick cooking spray and place a slice of the casserole on top. Heat in the toaster oven, being careful not to burn the edges of the crust, for about 5-10 minutes depending on your toaster.
Pin It!

Thursday, July 20, 2017

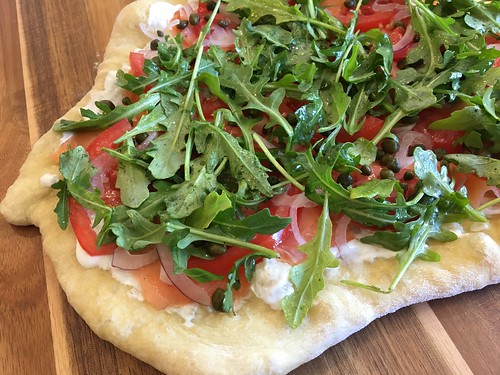
Smoked Salmon Pizza

I'm not sure how or when I came across this recipe for Smoked Salmon Pizza, but every time I looked through my huge stack of printed recipes I'd see it. While we're on the subject, yes I print recipes I want to make because I like having a hard copy in front of me while I'm cooking so I can make notes. And yes, I desperately need a better filing system than stuffing the pile of papers into a reusable grocery bag.

Ahem.

Smoked salmon pizza

I've been eyeing up this recipe for a while but I could never find a good time to make it. Then our friends invited us over for brunch and I finally got a chance to try it. As an aside, I love that my friend didn't blink when I asked if I could use her kitchen, or when I busted out my pizza stone, parchment paper and all the various toppings I'd put in individual containers.

This was a cinch to make and I loved the crispy pizza crust with the luscious smoked salmon, salty capers and the tang of the red onion. Next time I think I'll swap the sour cream (which I subbed for crème fraiche) for cream cheese to make it more like a bagel, while also adding some of the same seasonings found on my favorite bagel of all time, the everything bagel. I hear Trader Joes makes an everything bagel seasoning blend. I really need to get my hands on some of that!

Our Best Ever Smoked Salmon Pizza
Modified from Spoon, Fork, Bacon

1/2 a ball of pizza dough (homemade or store bought)
Olive oil
1/2 cup cream cheese, sour cream or crème fraiche
4oz sliced smoked salmon or lox
Thinly sliced tomato
Thinly sliced red onion
1/4 cup capers, drained
1/2 cup baby arugula
Lemon juice
Salt and pepper, to taste
Dried dill

Preheat the oven to 425°F with a pizza stone on the center rack.

Roll out the dough on a piece of parchment paper dusted with flour. Pierce the surface all over with a fork and brush with small amount olive oil. Remove the pizza stone from the oven and transfer the parchment paper to the stone. If you have a pizza peel (I really need to get one of these) just put the pizza dough directly on the heated stone.

Bake for 10-12 minutes or until the crust is golden brown and crisp. Remove from oven and allow crust to cool a bit before adding the toppings.

Spread the cream cheese/sour cream/crème fraiche on the crust and top with pieces of the salmon and tomato. Sprinkle on the red onions and capers. Toss the arugula with some lemon juice, salt and pepper and add that to the pizza. Add a sprinkling of dill, cut into wedges and serve.
Pin It!

Tuesday, July 18, 2017

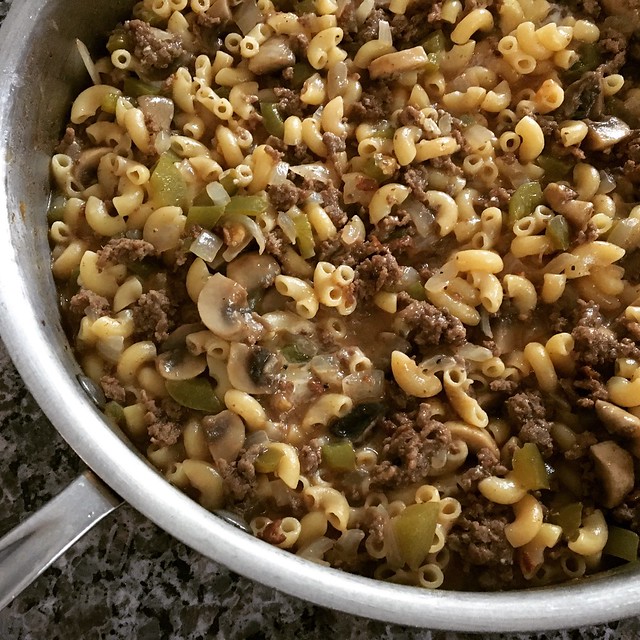
Philly Cheesesteak One Pot Pasta

I grew up, and still live, about 45 minutes outside of Philly so I know a thing or two about cheesesteaks. And I'm sure purists would balk at one of the most popular posts on my blog, these Philly Cheesesteak Sloppy Joes that I adapted from Rachael Ray, as well as this amazing one pot recipe for Philly Cheesesteak One Pot Pasta. That's their loss. All the busy parents I know love having one post pasta recipes in their back pocket for those busy weeknights and this one is a real winner.

Philly cheesesteak pasta

I made a few slight modifications from my friend Melissa's take on the recipe - I added flour to tighten up the sauce and swapped the cheese because I'm just not a huge fan of provolone when it's the only cheese. I also left off the parsley.

There's not much more to say except we'll be enjoying this one often.

Philly Cheesesteak One Pot Pasta
Slightly Modified from Hunt, Cook, Eat

1 pound ground beef
1 large sweet onion, diced
1 large green bell pepper, diced
12 ounces button mushrooms, chopped
1/4 cup flour
2 tablespoons ketchup
1 tablespoon Worcestershire sauce
1 teaspoon kosher salt
1 teaspoon fresh ground black pepper
1 quart beef or chicken broth
8oz elbow macaroni
4oz provolone cheese, shredded (or 3oz cheddar plus 1oz American cheeses, shredded)

Heat a large, deep skillet with a tight-fitting lid over medium high heat. Add the ground beef and cook until a brown crust starts to form before breaking the beef apart with the back of a wooden spoon.

Add the onions, green pepper and mushrooms. Cook for 4-5 minutes, stirring often, until the vegetables are soft and the mushrooms have released their liquid. Add the flour and stir to incorporate it.

Add the broth, ketchup, Worcestershire sauce, salt and black pepper and stir to combine. Bring to a boil, then add the macaroni. Cover and cook for 5-7 minutes or until noodles are just barely al dente, stirring once halfway through to make sure the pasta isn't sticking.

Remove the lid, reduce the heat to medium and simmer for another 5 minutes to thicken. Turn off the heat, then add the cheese. Stir until all the cheese melts. Let sit for another few minutes, then serve.
Pin It!

Monday, July 03, 2017

Creamy Shrimp Boil Pasta

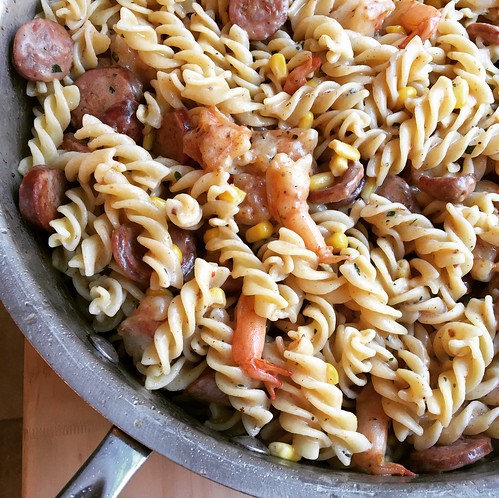
I love the idea of a shrimp boil when we're down the shore, but on a weeknight I need something quicker, easier and less messy. That's where this Creamy Shrimp Boil Pasta comes in. All the flavors of a classic shrimp boil served with pasta instead of potatoes.

Shrimp boil pasta

I lightened it up a bit by subbing half-and-half for the heavy cream. As I was making the sauce I realized the cream/half-and-half isn't even necessary. It was a nice treat, but I think the pasta could stand alone with the other ingredients. Totally your call. We also thought it needed more corn, so I upped the amount in the recipe below. This was so delicious and easy to make on a busy summer weeknight.

Creamy Shrimp Boil Pasta
As seen on Damn Delicious

1 pound cavatappi or rotini pasta
1 tablespoon olive oil
1 (12.8-ounce) package smoked andouille sausage, thinly sliced
1 pound shrimp, peeled and deveined (my shrimp were larger so I cut them in half)
3 teaspoons Old Bay seasoning, divided
4 tablespoons unsalted butter
4 cloves garlic, minced
2 tablespoons flour
1 cup chicken broth, plus more as needed
1/2 cup half-and-half
1/4 cup freshly grated Parmesan
1 teaspoon minced fresh thyme
Kosher salt and freshly ground black pepper, to taste
1 1/2-2 cups frozen corn kernels
2 tablespoons chopped fresh chives (optional)

Cook pasta according to package directions. Save 1 cup of the cooking water, then drain well.

Heat the olive oil in a large skillet over medium high heat. Add the sausage and cook, stirring frequently, until sausage is lightly browned, about 3-4 minutes. Place the sausage in a large bowl and set aside.

Season the shrimp with 1 1/2 teaspoons of Old Bay seasoning. Add the shrimp to the skillet and cook until pink, about 2-3 minutes. Remove from the pan to the same bowl as the sausage.

Melt the butter in the skillet. Add the garlic and cook, stirring frequently, until fragrant, about 1-2 minutes. Whisk in the flour and cook for 1 minute. Gradually whisk in the chicken broth, half-and-half, Parmesan, thyme and remaining 1 1/2 teaspoons Old Bay. Cook until slightly thickened, about 2-3 minutes. If the mixture is too thick, add more broth as needed. Season with salt and pepper, to taste.

Stir in the pasta, sausage, shrimp and corn. Toss to combine. Thin with some of the pasta cooking water, if needed. Serve immediately, garnished with chives, if desired.
Pin It!

Monday, June 26, 2017

Tomato and Goat Cheese Tart

Do you ever see a recipe and just know, instinctively, that it's going to be amazingly delicious? That's how I felt when I read my friend Kylee's post about this Tomato and Goat Cheese Tart . I could practically taste the buttery, flaky crust, the ripe, juicy tomatoes and the tang of the goat cheese. I couldn't wait to make it.

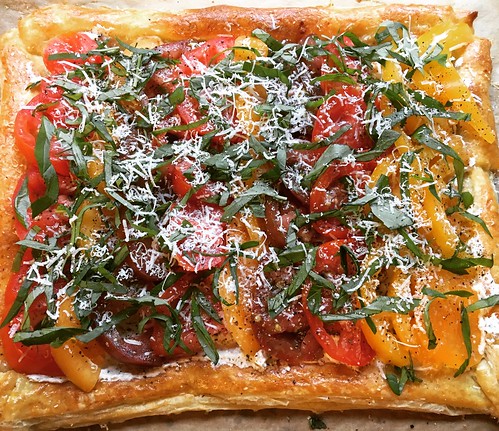
Goat cheese and tomato tart

I tried to find the Nature Sweet tomatoes Kylee mentions in her post (Eclipse tomatoes), but the stores near me don't seem to carry them (despite the Nature Sweet site claiming they did). I ended up splurging on heirloom tomatoes and I'm so glad I did. All I can say is wow. I'm lucky to live in an area known for amazing tomatoes, but it's not quite peak season yet. The heirlooms I picked up were stunning and really brought the whole tart together.

Katie helped me mix up the goat cheese spread the day before and then I assembled and baked the tart at my parent's house. We ate it as an app and holy guacamole was it delicious. Everything comes together beautifully and we were all sad when it was gone. My aunt is coming for a visit this weekend and since a pack of puff pastry comes with two sheets I'll be using her visit as an excuse to make this again. It's the perfect summer treat since you really want to make this when tomatoes are at their best. The only downside is that this wouldn't reheat well, so plan to devour the whole thing in one sitting. Maybe that's not such a bad thing...

Tomato & Goat Cheese Tart
Slightly modified from Kylee Cooks

1 puff pastry sheet, thawed in the fridge
1 egg, beaten
Grated Parmesan or Pecorino cheese
4 oz goat cheese, softened (a small log, the ones in my supermarket are 4oz)
1 clove garlic, grated
1 teaspoon dried Italian seasoning
4 heirloom tomatoes, sliced then cut into half-moons
1/2 cup fresh basil, chopped roughly
Salt & pepper

Preheat the oven to 425.

Place the sheet of puff pastry on a piece of parchment laid on a pizza stone or baking sheet. Use a rolling pin to gently flatten and spread out the pastry so it's smooth as well as longer and wider than when you started.

Using a sharp knife, cut a 1/2-inch strip off the pastry on all four sides. Keep the strips - you'll be adding them back onto the pastry in a minute. Brush all the pastry with the beaten egg, then put each strip you just cut back onto the dough, essentially making a border around the edges (Katie said it looked like a picture frame). Use the tines of a fork to press the strips down so they stick to the pastry underneath. Prick the entire surface (where the picture would go) with a fork. Sprinkle with some Parmesan or Pecorino cheese.

Bake for 15 minutes until puffed and golden.

Mix together the goat cheese, garlic and Italian seasoning. This can be done a day or two ahead of time. Once the puff pastry is golden brown, remove it from the oven. Spread the goat cheese mixture over the center area of the pastry (now you'll really see what Katie meant by it looking like a picture frame).

Top the goat cheese with slices of tomato. I bought different colored heirlooms so I alternated the colors to make it look pretty. Keep the tomato slices close together - you really want to pack them on for maximum flavor. Sprinkle the chopped basil and extra Parmesan or Pecorino cheese on top, then season with a little salt and pepper. Cut the tart into slices and serve.
Pin It!