Thursday, September 15, 2016

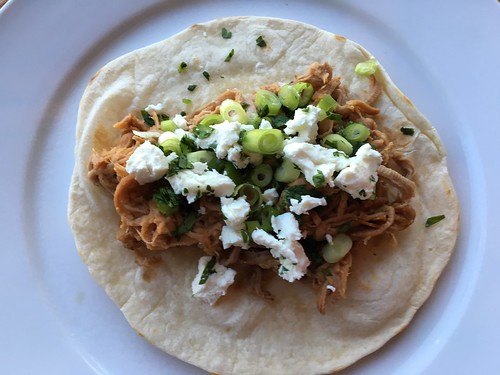
Pineapple Pulled Pork Tacos

I've mentioned this many times but my slow cooker and I do not get along. Thankfully, I work from home so I can still make delicious, slow-cooked meals like these Pineapple Pulled Pork Tacos. You prepare the recipe like you would in a slow cooker, but the meal cooks low and slow in the oven. The results are just as delicious, although perhaps not as convenient.

Pork pineapple tacos

The one downside to cooking dinner all day was the smell. Holy moly, did my house smell AMAZING. I was positively ravenous imagining how good these would taste. What drew me to the recipe in the first place was how totally different it was from regular tacos. We all love these flavors and the end result did not disappoint.
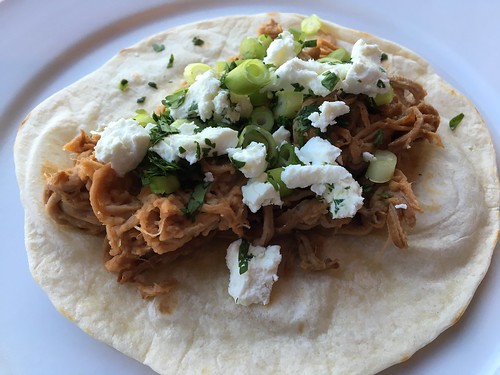
Pork pineapple tacos

The only change I'm suggesting below is to use a piece of pork with more fat. Steve was questioning why I'd cook a lean piece of meat like a tenderloin all day. I thought the pork was still tender, but it was a little dry. Otherwise we all loved these tacos. The subtle pineapple and soy flavor in the pork, the delicious BBQ sauce, the tangy, creamy goat cheese and the bright flavor of the cilantro and scallions. It all works.

The good news is, this makes a ton of food so leftovers are a given. I squirreled away the leftover pork and I'm planning to turn it into a pizza sometime soon - dough, pork and mozzarella cheese baked until golden, topped with scallions, cilantro and goat cheese. I. Can't. Wait!

{Slow Cooker} Pineapple Pulled Pork Tacos
As seen on PreventionRD

Pork:
3 lbs pork loin/shoulder/butt
1 28-oz can pineapple chunks with juice
1/4 cup low-sodium soy sauce
2 tablespoons apricot preserves
1/2 teaspoon garlic powder
1/2 teaspoon black pepper

Pineapple BBQ Sauce:
1/2 cup ketchup
3/4 cup reserved pineapple chunks
2 tablespoons apricot preserves
3 tablespoons brown sugar
1 tablespoon white wine vinegar
juice of 1 lime

To serve:
6-inch taco size tortillas
cilantro, chopped
goat cheese, crumbled
scallions, chopped

If using a slow cooker, place the pork in the slow cooker. If using the oven, preheat to 225 degrees and place the pork in a Dutch oven with a tight-fitting lid.

In a medium-sized bowl, combine the juice from the canned pineapple, the soy sauce, apricot preserves, garlic powder, and black pepper. Whisk to combine and pour over the pork. Reserve 3/4 cup of the pineapple chunks to use in the BBQ sauce. You can place the rest in the slow cooker/Dutch oven with the pork or save in the fridge to serve with the tacos. Cook on low for 6-8 hours.

Remove pork from the oven and shred the meat. Discard all the liquid and return pork to the crock pot/Dutch oven. Cover until ready to serve.

Meanwhile, combine all of the ingredients for the BBQ sauce in a blender or food processor and pulse until smooth. Pour over the pork and gently mix to coat.

Serve the pork with the tortillas. Top with cilantro, goat cheese, and scallions.
Pin It!

Wednesday, September 14, 2016

Warm Mexican Corn Salad {Esquites}

This is probably the fourth or fifth time I've made this Warm Mexican Corn Salad {Esquites} this summer, but I'm only just sharing it now because I never remembered to take a photo. Oops.

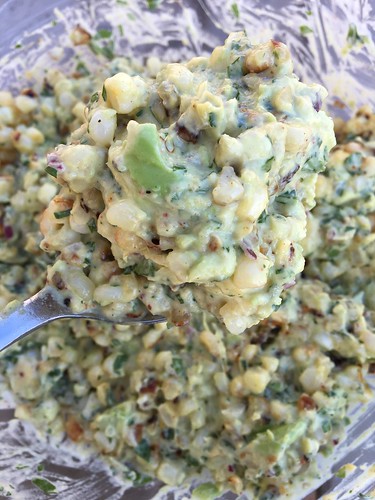
Esquites

This is my new go-to side dish whenever I make tacos and for good reason - it's a very simple recipe to make. The hardest part is getting all that darn silk off the corn cobs (I HATE that stuff - so annoying). I've been using fresh corn, but I imagine frozen would work, too. We're getting to the tail end of corn season here in PA, so I'm sure I'll find out soon enough.

I made quite a few changes and omissions to the original recipe to fit our preferences and to use what I had on hand the first time made this. This is one of those side dishes we can't stop eating and always end up fighting over the leftovers. This is enough for the three of us, which means if I ever decide to share I'll need to double or even triple the recipe.

Warm Mexican Corn Salad {Esquites}
Adapted from The Barbee Housewife

2 tablespoons butter
3 cups corn, cut from the cob {about 4 ears}
3 tablespoons mayonnaise
3 tablespoons minced red onion
handful of cilantro, chopped
Juice of 1 lemon
Chili powder, to taste
1 avocado, removed from the peel and diced
salt and pepper, to taste

Melt the butter in a non-stick skillet over medium-high heat. Add the corn. Let it sit, without stirring, so the corn starts to brown. Stir every so often until the corn is brown in spots, about 6-10 minutes.

Let the corn cool slightly, then add it to a bowl along with the mayonnaise, red onion, cilantro, lemon juice, and chili powder. Gently stir in the avocado, then season to taste with salt and pepper.

Serve warm or keep refrigerated until ready to eat.
Pin It!

Tuesday, September 13, 2016

Crazy (but delicious) Pasta Salad

I'll warn you now - the ingredients in this pasta salad are WEIRD.

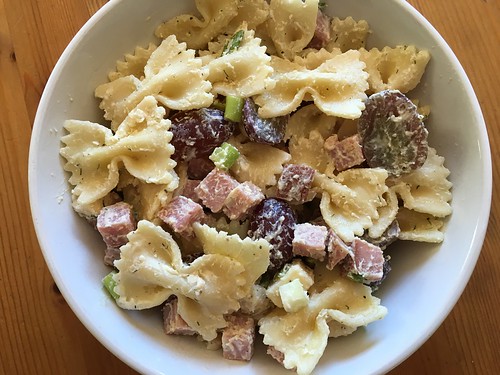
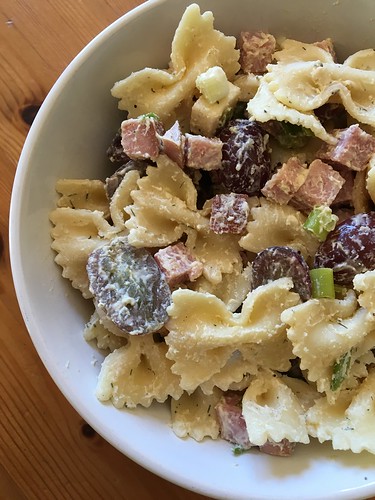
Pasta salad

I'm always up for trying new things, but when I ran this one by Steve he looked at me like I had three heads. I suggested we try it out for Sunday dinner with my parents (they're such troopers, always being my tasters for new recipes). And then I remembered I had an appointment early Sunday morning so he'd be the one actually making it. I figured it was easy - the only cooking you have to do is boiling the pasta - and it would be a chance for Katie to help out in the kitchen. They were just getting started mixing up the sauce when I left and by the time I got home the salad was done and chilling in the fridge. And Steve admitted it was delicious.

Pasta salad

Later, when we served it to my parents, we all kept going back for another spoonful. I won't pretend to know why but trust me, it works. And it couldn't be simpler. This is definitely one of those side dishes I'm going to make again and again.

Allison's Best Pasta Salad
As seen on Taste and Tell

2 cups dry farfalle (bowtie) pasta
1/2 cup mayonnaise
1/2 cup sour cream or plain Greek yogurt
2 tablespoons cider vinegar
1 1/2 tablespoons Dijon mustard
1 teaspoon granulated sugar
1/2 teaspoon ground black pepper
1/4 teaspoon dried dill
1/4 teaspoon salt
2 cups diced, cooked ham
1 1/2 cups red grapes, halved
6 oz sharp cheddar cheese, cubed
1/2 cup sliced green onions

Cook the pasta according to package directions. Drain and reserve.

While the pasta is cooking, stir together the mayonnaise, sour cream/Greek yogurt, cider vinegar, mustard, sugar, pepper, dill and salt in a small bowl.

Once the pasta is finished cooking, combine the drained pasta, ham, grapes, cheese and green onions. Pour the dressing over the top and stir to coat. Cover and chill for at least 6 hours, preferably overnight.
Pin It!

Tuesday, August 16, 2016

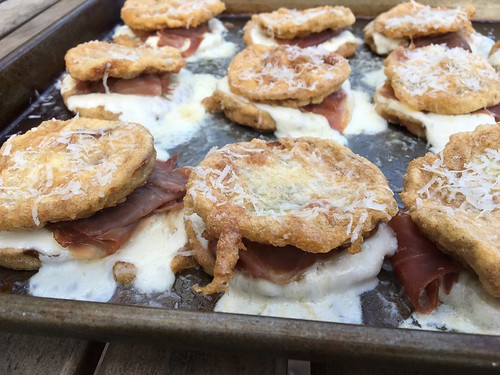
Eggplant, Prosciutto and Mozzarella Stacks

A few months ago I came to the realization that I only like fried eggplant. Well, that's partially true because I also like Chinese eggplant with garlic sauce. Anyway, I've tried cooking eggplant in pasta sauces or grilling it, but I'm just not a fan.

Recently I was thinking about a recipe I'd seen years ago for fried eggplant stacked together with prosciutto and mozzarella cheese. I got it in my head to try recreating it, preparing the eggplant the same way I do my eggplant rollatini.

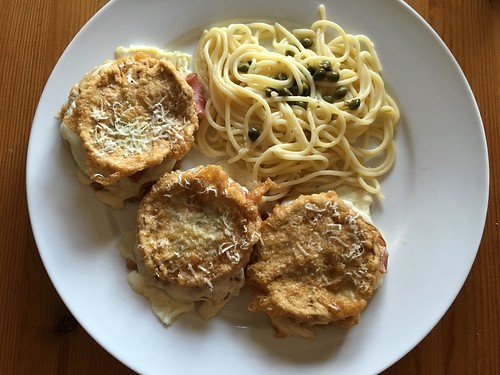
Eggplant garlic caper pasta

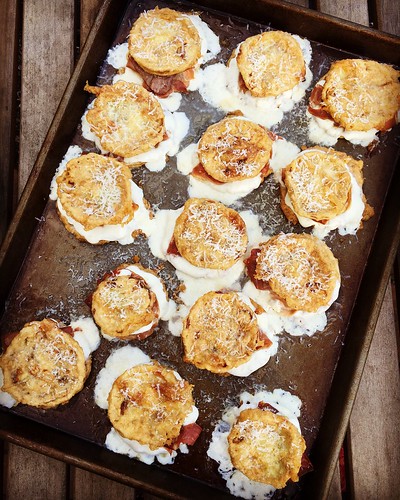
The results were outstanding. Despite being fried, the eggplant is light without being greasy. The prosciutto crisps up nicely in the oven and the melty mozzarella is perfection. Steve (and Katie, for that matter, but she was away when I made this meal) like everything I cook. But it's rare for Steve to actually rave about a meal. But this one he could not stop talking about. I texted him the next day to ask whether the eggplant stacks reheated well and he said they did and that he was in love with them.

Eggplant garlic caper pasta

As you saw in yesterday's post, I served this alongside spaghetti in a light, flavorful sauce made simply with butter, chicken broth, lemon juice and capers. It was the perfect side dish for this meal. I had two small-ish eggplants and they yielded 14 stacks, which was the perfect amount for me and Steve. If Katie had been home we'd have been in trouble, so keep that in mind if you're cooking for a larger crowd.

And speaking of crowds, these were great warm or room temperature, making them perfect for a party. I ate mine with my hands when cutting into the prosciutto proved challenging. So, so good.

Eggplant, Prosciutto and Mozzarella Stacks

1 large or 2 small eggplants
salt
3 eggs
1 cup flour
vegetable oil, for frying
extra virgin olive oil
1 slice prosciutto per stack (approximately 14 slices)
1-lb fresh mozzarella cheese, sliced
Pecorino cheese, grated

Cut both ends off the eggplant, the peel the skin. Slice each eggplant into thin rounds (make sure you have an even number of slices). Place a clean kitchen towel on a baking sheet. Lay the eggplant slices on top, then sprinkle with salt. Flip over and salt the other side. Top with another clean kitchen towel and let sit for at least an hour. When ready to cook, pat the eggplant slices dry with the top towel.

Preheat the oven to 350 degrees. Pour 1/2" of vegetable oil into a medium skillet and heat over medium-high heat.

While the oil is heating, whisk the eggs in a wide, shallow bowl or pie plate. Spread the flour in an even layer in a separate wide, shallow bowl or pie plate. Dredge the eggplant slices in the flour, shaking the excess off. Dip the floured eggplant into the egg mixture, turning well to coat both sides evenly.

Add as many of the coated eggplant slices to the pan as will fit without touching. Cook, turning once, until golden on both sides. Drain on a rack set over the same baking sheet you used to salt the eggplant. Repeat the process until all the eggplant is cooked.

Remove the rack from the baking sheet. Lightly oil the baking sheet with the extra virgin olive oil. Place half the eggplant slices on the sheet. Top each slice with one piece of prosciutto and one slice of mozzarella. Top with another eggplant slice.

Bake for about 15 minutes, until cheese is melted. Top with some grated cheese. These can be served warm or at room temperature.


Pin It!

Monday, August 15, 2016

Pasta with Garlic Butter Caper Sauce

Sometimes I feel like this guy:


I really haven't been doing a good job as a blogger lately and I'm sorry for that. But like the meme promises, if you DO see a post from me it means I've made something so delicious I simply have to dust off my computer and type up a post.

Take this meal for instance. Today I'm sharing the side dish - Pasta with Garlic Butter Caper Sauce. Tomorrow you get the real star - Eggplant, Prosciutto and Mozzarella Stacks. But don't think for one second that the pasta isn't delicious in its own right.

Eggplant garlic caper pasta

I was a little sad that I only made 6oz of pasta because I could have eaten a whole pound myself. It's light yet flavorful and so, so simple. I simplified it even further by cooking everything in one pot. And I left out the wine because all I had was Riesling. We didn't miss it so I probably won't bother with it next time. And there will most certainly be a next time since this is now Steve's favorite meal of all time.

And hey, don't forget to come back tomorrow for those delicious eggplant stacks.

Pasta with Garlic Butter Caper Sauce
As seen on Iowa Girls Eats

6oz spaghetti
2 tablespoons butter, divided
4 garlic cloves, minced
1 1/4 cup chicken broth
2 tablespoons capers, rinsed
juice of 1 small lemon

Cook the spaghetti according to package directions. Drain well and set aside.

In the now-empty pot, melt 1 tablespoon of the butter over medium-high heat. Add the garlic and saute until just starting to brown. Add the chicken broth, lemon juice, and capers then turn heat up to high. Simmer until the sauce is reduced by half. Add the remaining 1 tablespoon butter. Taste and add salt, only if necessary.

Turn off the heat and add the cooked pasta to the pot. Toss to combine, then let sit for 3-4 minutes so the pasta can absorb some of the sauce.
Pin It!

Wednesday, August 10, 2016

Pasta with Shrimp, Brie and Tomatoes

I love when my friends post on Facebook about the meals they make, especially when they include a recipe. As much as I love reading food blogs, many of the ones I follow simply don't cook the way I do. They post all sorts of fancy, trendy meals that I just know in my heart I'm never going to make for my family. So when I see posts from friends about food they're actually cooking, I pay attention.

Take this recipe for Pasta with Shrimp, Brie and Tomatoes. I was hooked as soon as I saw my friend's photo. This recipe has it all - pasta, one of my favorite cheeses, fresh tomatoes and shrimp. And, bonus, it's a one-pot meal. What's not to love?

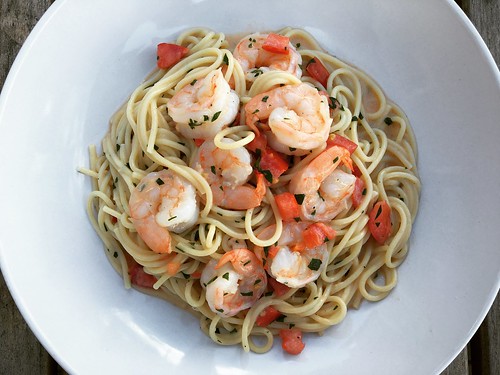
Pasta with shrimp, Brie and tomatoes

The original recipe calls for sundried tomatoes and Kalamata olives, both of which I left out, opting instead for all fresh tomatoes, and no olives simply to save Steve from going to the olive bar at Wegmans. This really couldn't be simpler - mix the Brie with the tomatoes and seasoning, cook the pasta and, in the last few minutes of cooking, add in the shrimp. When the pasta is done, toss everything together and serve. I can't wait to make this one again.

Pasta with Shrimp, Brie and Tomatoes
Recipe adapted from Coastal Living

8 ounces Brie
4 tomatoes, seeded and chopped
2 garlic cloves, minced
1 cup fresh basil leaves, minced
salt and pepper, to taste
1/4 cup extra virgin olive oil
8 ounces uncooked spaghetti
1 pound peeled and deveined shrimp
Freshly grated Parmesan cheese

Remove the rind from the Brie, if desired. Cut the Brie into pieces and add it to a bowl along with the tomatoes, garlic, basil, salt and pepper and olive oil. Toss to combine, then cover and let stand at least one hour.

Cook pasta in boiling salted water according to package directions. Add the shrimp two minutes before the pasta is done. Finish cooking, then drain well. Immediately toss the pasta and shrimp with the Brie mixture. Serve immediately with freshly grated Parmesan.
Pin It!

Monday, August 01, 2016

One Pot Taco Spaghetti

You know you've been a terrible blogger when people start calling you out for your lack of posts. Ooops! A friend asked me to post some a new recipes and since today is her birthday, I figured I'd oblige (hi, Tara!) Unfortunately, the only recipe I photographed recently was this One Pot Taco Spaghetti, so I didn't have much of a choice. The good news is, this was delicious. And a one-pot meal, which is always a good thing to have in your repertoire.

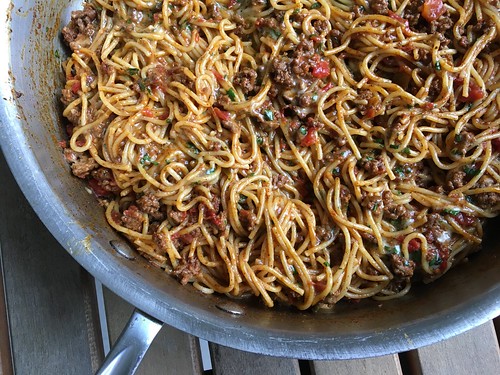
One pot taco spaghetti

The recipe might look long, but it's mostly spices. See, the original recipe calls for a packet of store-bought taco seasoning, but I prefer to make my own. I always have all these spices on my spice rack and, this way, I control the sodium content. Otherwise this is basically meat and pasta, with a little cheese and tomato on top. Delish!

One Pot Taco Spaghetti
As seen on Damn Delicious

1 pound ground beef*
1 medium/large onion, chopped
1 tablespoon chili powder
1/4 teaspoon garlic powder
1/4 teaspoon onion powder
1/4 teaspoon dried oregano
1/2 teaspoon paprika
1 1/2 teaspoons ground cumin
1 teaspoon salt
1 teaspoon ground pepper
1 (10-ounce can) Ro*Tel® Mild Diced Tomatoes & Green Chilies
1 tablespoon tomato paste
8 ounces spaghetti
3 cups water
1/2 cup shredded cheddar cheese
1/2 cup shredded mozzarella cheese
1 Roma tomato, diced
2 tablespoons chopped fresh cilantro leaves

Heat a large Dutch oven over medium high heat. Add the ground beef and cook until the beef just starts to brown. Add the onion and cook for another 3-5 minutes, making sure to crumble the beef as it cooks, until the beef is completely cooked.

If there's excess fat in the pot, turn off the heat and move the beef/onion mixture over to one side. Tilt the pot so all the fat is at the other end. Use crumpled up paper towels to soak up the excess fat. I like to keep the trash can right by the stove when I do this so I can easily throw the paper towels away. Make sure to leave a little bit of fat in the pan. Turn the heat back on and add the dried spices (chili powder through ground pepper). Stir to combine.

Stir in the Ro*Tel®, tomato paste, spaghetti and water. Bring to a boil, then cover. Reduce heat and simmer until pasta is cooked through, about 13-16 minutes, stirring occasionally.

Remove the pot from the heat. Add both the cheeses. Put the cover back on so the cheeses can melt. To serve, place some of the pasta and meat on a plate and top with chopped tomato and cilantro.

*You can also use ground chicken, turkey or pork. If you do, add 1 tablespoon of olive oil to the pan before browning the meat.
Pin It!

Friday, July 15, 2016

Szechuan Pork with Bok Choy

I love a good stir fry. Not only are they quick and easy to prepare, they're the perfect way to get protein and veggies in one dish. Serve over rice or toss with cooked pasta and dinner is done.

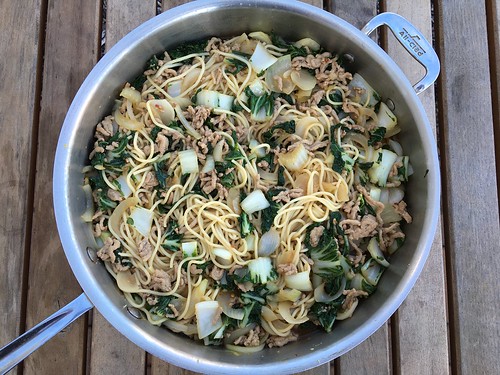
Szechuan pork with bok choy

My friend Mary Ellen recently posted this recipe for Szechuan Pork with Bok Choy. I immediately put it on the menu. Unfortunately, my grocery store didn't have the large heads of bok choy so I guessimated the number of baby bok choy I'd need as a substitute. I was way, way off. The bok choy all but dissolved in the sauce and Steve said he would never have known it was in there if I hadn't told him. Cooking fail.

I vowed to try again and this time, I looked up bok choy on Wegmans' website. I really love that their site lists their products as well as where you can find them in the store. I saw that a large head of bok choy weighs in at 1 1/2-lbs, so I told Steve to buy 1 1/2-lbs of baby bok choy. Problem solved! I remade the dish and this time, there was plenty of that crunchy goodness.

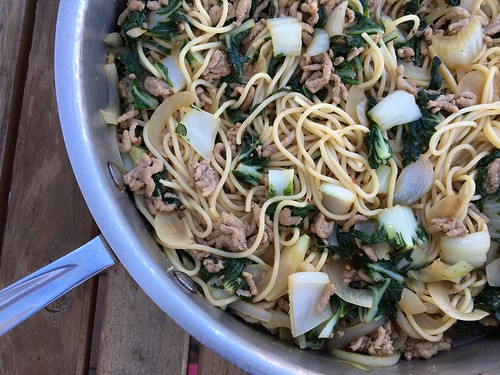
Szechuan pork with bok choy

This is such a simple meal that's packed with flavor. I love how the pork and vegetables stretch 8-oz of pasta into 5 meals and how quickly I was able to get this meal on the table. Thanks for another delicious dinner, Mary Ellen!

Szechuan Pork with Bok Choy
Slightly modified from Mary Ellen's Cooking Creations, originally from Rachael Ray

1 1/2-lbs baby bok choy
2 tablespoons sesame oil, divided
1 small onion, thinly sliced
4 cloves garlic, minced
1 tablespoon fresh ginger, grated
1 lb ground pork
1/3 cup soy sauce
1 teaspoon chile garlic sauce (more or less to taste)
1 cup chicken broth
8 spaghetti, cooked and drained
4 scallions, chopped

Cut off the bottom stem of each baby bok choy and discard any yellowing outer leaves. Chop the remaining bok choy into large chunks.

Heat 1 tablespoon of the sesame oil in a large skillet over medium high heat. Add the bok choy, onion, garlic and ginger. Cook, stirring occasionally, until the onions and bok choy start to soften, about 5 minutes. Remove the vegetable mixture to a bowl and return the skillet to the stove.

Add the remaining 1 tablespoon of sesame oil to the pan, then add the pork. Cook, breaking the pork up with your spoon, until browned.

Add the soy sauce, chile garlic sauce and chicken broth to the pan. Bring to a simmer, then add the vegetables. Simmer together for a few minutes, then add in the cooked noodles and scallions. Toss together and serve.
Pin It!

Friday, July 08, 2016

The Best Shrimp and Grits

I'm a sucker for shrimp and grits. If I see it on a menu, I have to order it. I just love the creamy, soft grits topped with the bursty, delicious shrimp. I've tried making it at home a few times, but wasn't successful. Now my search is over - I've found THE BEST recipe for shrimp and grits. This was Katie's first time eating grits and she literally licked her plate clean. Steve couldn't stop raving about it either. We were all silent as we ate, each of us savoring the delicious plate of food in front of us.

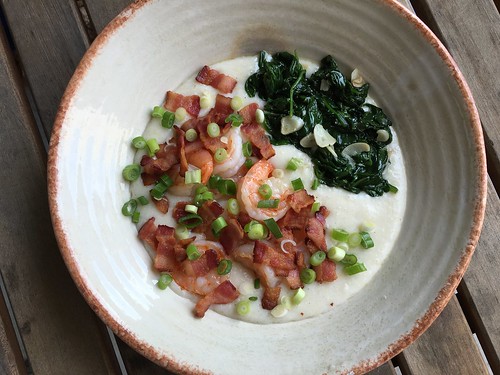
Shrimp and grits

The recipe could not be simpler - grits are cooked in a mixture of chicken broth, milk and butter. Aside from stirring them every once in a while, they cook themselves. Shrimp are cooked in delicious bacon fat with a little garlic. The whole thing takes less than 30 minutes to prepare, making it the perfect weeknight meal.

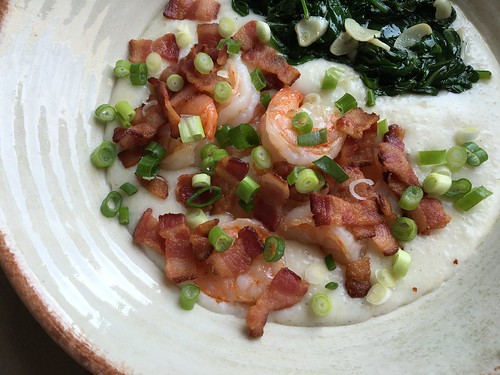
Shrimp and grits

I served the shrimp and grits with spinach sauteed in oil with some sliced garlic. It was the perfect accompaniment, especially since I could just plate it alongside the shrimp. The only thing I might do is add a little fresh chopped tomato - not because the dish needs anything but for that hint of freshness and acidity.

The Best Shrimp and Grits
As seen on The Redhead Baker, originally from Taste of Home

For the grits:
2 cups chicken broth
2 cups milk
4 tablespoons unsalted butter, cubed
3/4 teaspoon salt
1/2 teaspoon freshly ground black pepper
3/4 cup uncooked stone-ground/old-fashioned grits
1 cup (4 ounces) shredded extra sharp cheddar cheese

For the shrimp:
6 thick-sliced bacon strips, chopped
1 pound uncooked shrimp, peeled and deveined
3 garlic cloves, minced
4 scallions, thinly sliced

Combine the broth, milk, butter, salt and pepper in a large saucepan over medium-high heat and bring to a boil. Slowly whisk in the grits. Reduce the heat to low and cover. Cook for 20 minutes, stirring occasionally. Add the shredded cheese and stir until melted. Set aside covered, and keep warm.

In a large skillet, cook the bacon over medium heat until crisp. Remove to a paper towel-lined plate with a slotted spoon; reserve drippings in the skillet.

Saute the shrimp and garlic in the bacon drippings. Flip the shrimp as soon as they turn pink. Remove once both sides are pink.

To serve, divide the grits into four bowls. Top each with one quarter of the shrimp. Garnish with the reserved bacon and scallions.
Pin It!

Friday, June 10, 2016

Skillet Salsa Chicken with Cilantro Lime Rice

Like most people, I'm a big fan of easy weeknight meals. Obviously I love to cook or I wouldn't have a food blog, but even I have nights where I just don't feel like cooking. That's when a meal like this Skillet Salsa Chicken with Cilantro Lime Rice comes in handy.

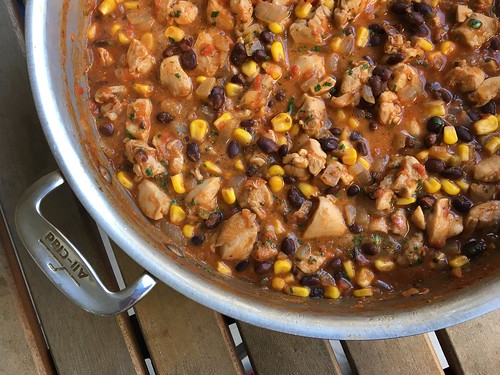
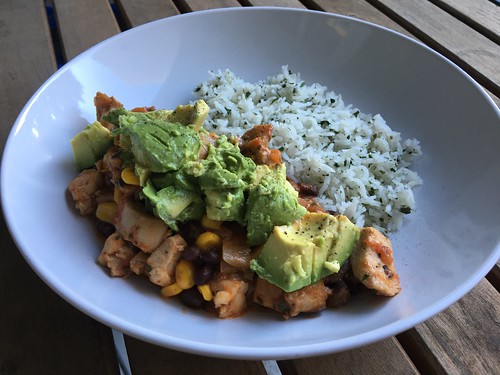
Salsa chicken with cilantro lime rice

I've seen recipes for salsa chicken floating around the Internet for years, but they all seem to involve the slow cooker, which I don't use. That's why I was so excited when my friend, Melissa, posted this recipe. A skillet salsa chicken was right up my alley and I knew it would pair beautifully with cilantro lime rice.

Salsa chicken with cilantro lime rice

What a show-stopper. Katie isn't a picky eater and loves pretty much everything I make, but she couldn't stop raving about this one. After every bite she said some variation of, "Mommy, you are an amazing cooker. I'm so lucky to have you cook for me. Can you make this again soon?" I was right there with her, practically swooning over the delicious flavors, especially when I mixed the rice and chicken together with the creamy avocado. Yum, yum, yum.

And the best part - dinner took almost no time to make so we could play after dinner. That's a win-win in my book.

Skillet Salsa Chicken with Cilantro Lime Rice
Slightly adapted from Hunt, Cook, Eat

1-1/4 pounds boneless skinless chicken thighs, cut into bite sized pieces
1 medium sweet onion, finely chopped
2 cloves garlic, minced (or 1 teaspoon garlic powder)
1 teaspoon cumin
1 teaspoon oregano
1 teaspoon chile powder
1 teaspoon salt
2 cups salsa
1 cup chicken stock or water
1 cup corn kernels
1 can black beans, drained and rinsed
2 tablespoons sour cream
1 tablespoon lime juice
Chopped fresh cilantro, for garnish

1 cup dry basmati rice
1 1/2 tablespoons lime juice
1 teaspoon vegetable oil
2 tablespoons fresh chopped cilantro
1/4 teaspoon salt

Diced avocado, for serving

Heat a large skillet over medium high heat with just a touch of olive oil. Add the chicken and cook for 4-5 minutes until no longer pink. Add the onion and saute for another 2-3 minutes until onion is soft and chicken is cooked through. Add minced garlic (if using) and stir for 30 seconds until fragrant. Add the seasonings, salsa, water, corn and black beans to the pan and stir to combine.

Turn the heat down to medium low and simmer for 10 minutes. Remove the pan from the heat and stir in the sour cream and lime juice. Sprinkle with fresh cilantro.

To make the rice, follow the directions on the package. My basmati calls for soaking the rice beforehand (which I highly recommend). Once you've cooked the rice, drizzle the lime juice and oil over the top while it's still warm. Sprinkle with 2 tablespoons chopped cilantro and salt, then fluff with a fork.

To serve, pile some rice in a shallow bowl and top with some of the chicken. Add diced avocado and serve.
Pin It!

Thursday, June 09, 2016

Bacon, Parmesan & Arugula Potato Salad

Sometimes the best things come into your life when you least expect them. Take this Bacon, Parmesan & Arugula Potato Salad. I wasn't looking for a new potato salad recipe, but as soon as I saw Kylee's post I just had to make it. And I'm really glad I did because we all absolutely loved it.

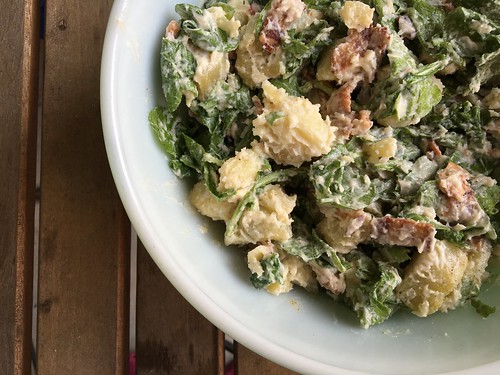
Potato salad with bacon arugula parm

I halved the recipe (the full amounts are listed below) and it was more than enough for the three of us. I brought the leftovers on a picnic the following day to share with friends and they raved, too. The best part is, it's super easy and incredibly flavorful.

Bacon, Parmesan & Arugula Potato Salad
Slightly modified from Kylee Cooks

3 lbs Yukon gold potatoes, peeled and cubed
1 teaspoon salt
1 lb bacon
1 5-oz bag arugula
mayonnaise
Shaved or grated Parmesan or Pecorino cheese
Freshly ground black pepper

Place potatoes in a large pot of cold water covering them by 1-inch. Bring to a boil over high heat and add salt. Reduce heat to medium-low and simmer for 10 minutes, until the potatoes are tender. Don't overcook them or they'll get mushy!

Meanwhile, cut the bacon into pieces using kitchen scissors. Cook it in a pan until crispy, then drain on a paper towel. Reserve the bacon grease in the pan.

Once the potatoes have cooked, drain them and immediately toss with the reserved bacon fat. Drain again and spread out on rimmed baking sheet. Refrigerate until cooled, about 30 minutes.

Mix the cooled potatoes, bacon, arugula, mayonnaise, Parmesan, and pepper together. Taste and adjust seasonings and mayo as needed.


Pin It!

Tuesday, June 07, 2016

Pulled Pork Flatbread Pizzas

The last time Steve made pulled pork, we had some left over. I'd had this idea of making flatbread pizzas in the back of my mind for a while, so I squirreled it away in the freezer for another time. That time finally came last week. I even had some leftover BBQ from our favorite spot, Sweet Lucy's in Philly.

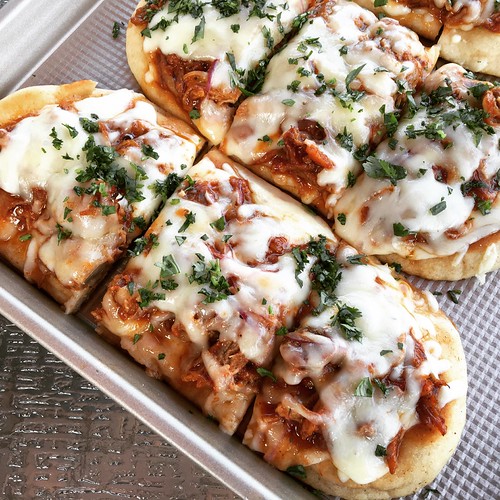
Pulled pork pizzas

I wasn't planning to blog these, but I posted photos on my personal Facebook page and on Instagram. I had a few people ask me for the recipe, so I promised I'd throw this blog post together. This is more of a method than a recipe. I don't have measurements and I've never blogged the pulled pork recipe Steve uses, so I hope what little I've got for you guys below will work for those who asked!

Pulled Pork Flatbread Pizzas

Butter
6 flatbreads or naan
Leftover pulled pork
Your favorite BBQ sauce
Grated Monterey Jack cheese
Grated mozzarella cheese
Thinly sliced red onion
Fresh cilantro, minced

Preheat the oven to 350 degrees.

Butter both sides of the flatbreads. Heat a grill or grill pan over medium heat. Add the flatbreads and cook, turning occasionally, until each side is browned and slightly crispy. Remove to a baking sheet and repeat with the remaining flatbreads.

Mix the pulled pork with some BBQ sauce, to taste.

Sprinkle some Monterey Jack and mozzarella on each flatbread. Divide the pulled pork evenly among the flatbread. Top each with some of the sliced red onion, followed by more of the cheeses.

Put the baking sheet in the oven and cook until the cheese melts, about 10 minutes. Remove from the oven, sprinkle each pizza with fresh cilantro and cut into pieces. Serve immediately.
Pin It!

Tuesday, May 10, 2016

Baked Camembert

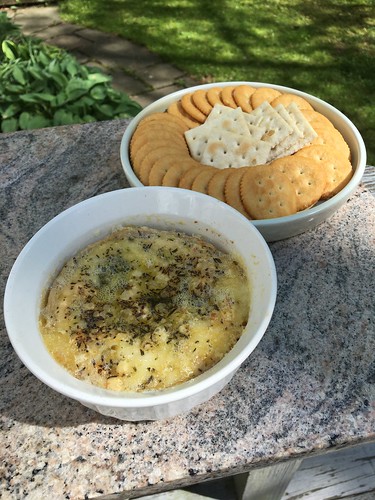
Do you remember when food blogs weren't nearly as plentiful as they are today? Back when I started blogging (August 2006!) the Internet was a much quieter place. One of the first food blogs I stumbled on was The Food Pornographer. She rarely posts recipes - her focus is on restaurants and photos of food - but she did post this one for Baked Camembert, which her extended family likes to make for special occasions.

Untitled

I made the same tweaks that they did - more garlic, no nuts or cranberries - and served it with crackers as our first course on Mother's Day.

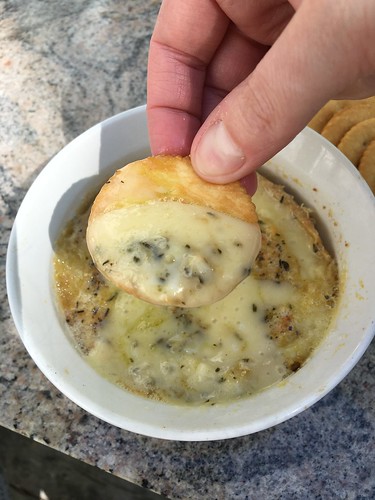
Untitled

The smell of the garlic and rosemary baking in the oven was downright intoxicating. As soon as it came out of the oven we all descended like vultures and it was quickly devoured. Poor Steve is lactose intolerant so he took a Lactaid pill to enjoy the cheesy deliciousness. And then Katie proceeded to all but elbow him out of the way to get to the cheese. I had to restrain her so Daddy could have a few bites. That girl loves cheese, just like her parents.

Baked Camembert
Modified from Jamie Oliver

8oz Camembert cheese
2 cloves garlic, thinly sliced
1 teaspoon fresh rosemary leaves, minced
olive oil
crackers or bread for dipping

Preheat the oven to 350.

Cut off the rind from one side of the cheese. Put the cheese into an oven-safe ramekin. Press the sliced garlic into the top of the cheese, then sprinkle with the minced rosemary. Drizzle with a little olive oil. Bake in the preheated oven for 15 to 20 minutes, until the cheese is soft and gooey.

Allow to cool slightly, then serve with crackers or bread cubes for dipping.
Pin It!

Monday, May 09, 2016

Buttermilk Pie

Whenever I buy a quart of buttermilk to make my homemade chicken nuggets, I end up with quite a lot leftover. I've heard about powdered buttermilk, but I've never seen it in our supermarket. I've also tried a homemade version using milk and lemon juice, but I didn't think it tasted the same. I have an amazing recipe for IHOP pancakes that uses buttermilk, so we usually have pancakes a few weekends in a row. But this time I wanted to try something different, especially after my friend, Kylee, posted this recipe for Buttermilk Pie.

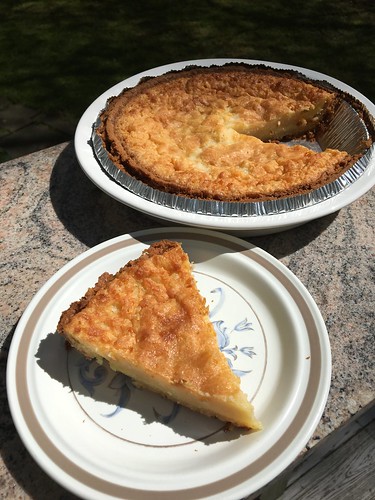
Untitled

From what I understand, this is a Southern staple, which means I'd never heard of it before Kylee posted the recipe. I went into this with zero expectations, just excited to try something new.

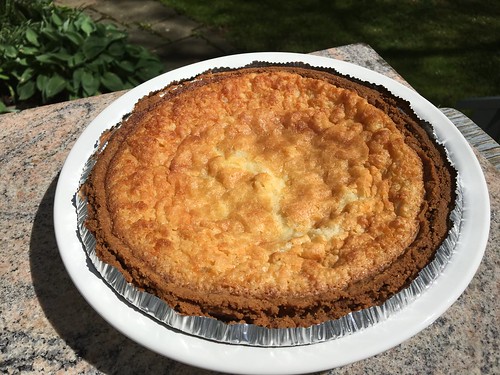
Untitled

The recipe couldn't be easier - you just mix all the ingredients together and pour into a pie crust. This actually makes two pies, so it's perfect for a family get together or to bring into the office. We gave the second one away to a friend and he said the pie was gone the next morning.

The consistency is almost like a custard, but denser. It's impossible to describe - there's a hint of vanilla, a slight tang from the buttermilk and a mellow sweetness. I chose a ready-made shortbread pie crust because I didn't want to futz with making my own crust, but next time I might try to find a traditional pie crust instead. I did over bake my pies (the tops are very brown) so make sure you start with 50 minutes and check it often.

Buttermilk Pie
As seen on Kylee Cooks

6 eggs, beaten
1 cup low fat buttermilk
1 teaspoon vanilla
2 cups sugar
2 tablespoons cornstarch
1 teaspoon table salt
1 cup butter, melted and cooled
2 unbaked 9-inch pie crusts

Preheat the oven to 350.

In a large bowl, beat the eggs, buttermilk and vanilla together with a hand mixer for about 5 minutes. In a medium bowl, combine the sugar, cornstarch, salt and melted butter. Mix until well combined. Add the sugar mixture to the eggs and stir together, using a wooden spoon, until just combined.

Put the pie crusts (in pie plates) onto a large baking sheet. Divide the filling between the two crusts.

Bake for 50-55 minutes. You want the filling to be loose/wobbly (kind of like a thick custard) when you tap it, but not runny and the top to be lightly browned.

Let the pies cool completely. Serve at room temperature.
Pin It!

Friday, May 06, 2016

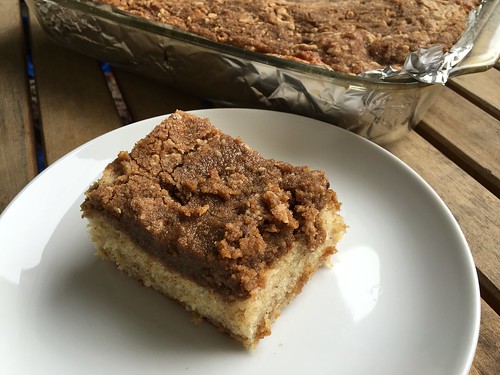
Banana Crumb Coffee Cake

What do you do when you have overripe bananas sitting on your counter? You bake with them, of course. As luck would have it, I saw this recipe for Banana Crumb Coffee Cake just as my bananas were starting to go from edible to mush. A quick check of the pantry and fridge showed I had all the ingredients on hand, so I set to baking.

Banana crumb coffee cake

What a cake. I loved the subtle banana flavor mixed with the traditional coffee cake. This was moist and delicious, just perfect to have with your morning coffee or tea (I don't drink either, by the way) or as a sweet treat.

A few notes:

1. I don't like using my stand mixer so I used my hand mixer. It worked fine.
2. I don't own a pastry cutter, so I attempted to break up the butter for the streusel topping by hand. It didn't work. I ended up just mixing it together as best I could and sprinkling it on top of the cake. The butter melts as the cake cooks, so it didn't matter.
3. I tried to divide the batter in half, sprinkling some of the streusel in the middle before topping with the remaining batter. It didn't work. It also didn't matter.
4. Steve is lactose intolerant, so he asked me not to glaze the cake (since the glaze contains milk). And, let's be honest, this is sugary enough without adding more sugar on top. You won't miss it. We certainly didn't.
5. This makes a TON of food, which makes it great if you're having a party or know people who will take a few slices off your hands. We kept four pieces for ourselves and gave away the other 12 (3 sets of 4 pieces each). We had some very thankful friends and family, let me tell you.

Banana Crumb Coffee Cake
As seen on Tide and Thyme

2 cups flour
3 teaspoons baking powder
1 teaspoon salt
3 ripe bananas
1/2 cup butter, room temperature
2 cups granulated sugar
2 eggs
1 teaspoon vanilla extract
1 cup milk

For the streusel:
12 tablespoons (1 ½ sticks) cold butter, cubed
1 1/2 cups light brown sugar
1 1/2 cups flour
1 teaspoon cinnamon

For the glaze:
1 cup powdered sugar
1 teaspoon vanilla extract
1-2 tablespoons milk

Preheat oven to 350 degrees. Line a 9×13 baking dish with aluminum foil and spray with cooking spray. Set aside.

In a medium bowl whisk together flour, baking powder and salt.

In a stand mixer fitted with a paddle attachment (or a large bowl with a hand mixer), mash bananas until they become liquified. Mix in butter until combined and then mix in sugar, eggs, milk, and vanilla.

With mixer running on low, carefully add flour and mix until just combined.

Prepare streusel by combining all the ingredients in a medium bowl, cut the butter in with a pastry cutter until a coarse crumb forms.

Pour 1/2 of the batter into the prepared pan. Top with 1/3 of the crumb mixture. Cover the filling with the remaining batter and top with remaining crumb mixture. Don't worry if this doesn't work - it didn't for me and it still tasted great.

Bake for 50-55 minutes until the center is set and a toothpick comes out clean. Cool for at least 1 hour.

Mix together the glaze ingredients and drizzle over the cake before serving.
Pin It!

Monday, April 25, 2016

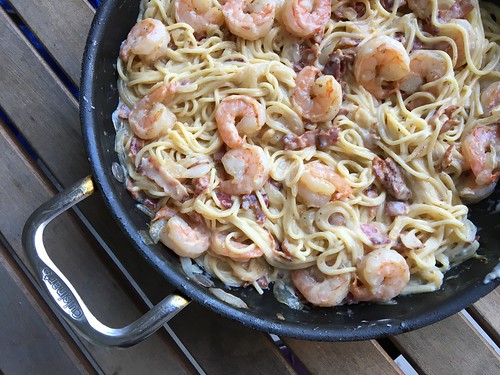
Shrimp Carbonara

We love a good carbonara around here. It's been a while since I made a new variation, so when I was reading a book that mentioned pasta carbonara I knew it was a sign. And thus, Shrimp Carbonara was born.

Shrimp carbonara

I'm not sure why it never occurred to me to make this before but now that I have, it will definitely become a regular thing. All I did was add shrimp to my standard carbonara recipe. I mean, what's not to love about shrimp cooked in bacon fat? Positively delicious.

Shrimp Carbonara
Based on Nigella Lawson's carbonara recipe

1 pound spaghetti
6 slices bacon, chopped into bite-size pieces
1 pound shrimp, any size you like, peeled and deveined
1 large onion, thinly sliced
1/4 cup dry vermouth (or white wine)
4 eggs
1 1/2 cups freshly grated Parmesan
1/4 cup half and half cream
Freshly ground black pepper
Freshly ground nutmeg

Cook pasta according to package directions. Drain and set aside.

In a large skillet that will fit the pasta later, cook the bacon until crispy but not crunchy. Remove with a slotted spoon, leaving the bacon grease in the pan.

While the bacon is cooking, pat the shrimp dry with paper towels and season with salt and pepper. After you've removed the bacon from the pan, add the shrimp in an even layer. Cook the shrimp until they're pink on both sides, about 2 minutes per side. Remove to the plate with the bacon.

Add the sliced onions to the pan and cook until softened and starting to caramelize, about 15 minutes. Add the vermouth and let it bubble so that, after a few minutes, you have a small amount of thick syrup left.

While the vermouth is reducing, beat together the eggs, Parmesan, cream, pepper and nutmeg in a bowl.

Once you have a nice syrup, add the pasta to the pan, tossing well to coat with the sauce. Take the pan off the heat (remove from the stove completely, don't just turn off the burner) and add the egg and cheese mixture, swiftly tossing everything with tongs to mix well. Add the bacon and shrimp and toss again. Taste and season with some more pepper and grated cheese, if desired.
Pin It!

Tuesday, April 19, 2016

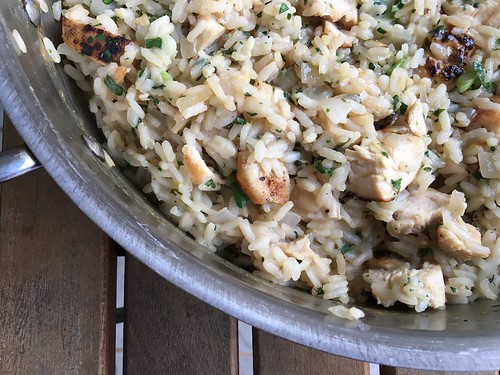
Lemon Chicken Risotto

Last night was one of those nights where I felt frazzled by the thought of making dinner. I was making this recipe for Lemon Chicken Risotto, so I should have been walkin' on easy street. I love risotto and don't know why it has a reputation for being complicated. Maybe it's because a lot of recipes claim you have to stand at the stove, constantly stirring the rice, for upwards of 20 minutes. Let me tell you this - I've been making risotto for years and I never babysit it like that. True, I don't leave the kitchen so I can keep an eye on it, but I just make sure the pan never gets too dry and give everything a quick stir every few minutes.

Lemon chicken risotto

Anyway. I was frazzled, which meant by the time dinner was done I forgot all about photographing the gorgeous skillet full of deliciousness. As Steve and Katie made oohing and ahhing noises over the bright, lemony flavors and the perfectly cooked chicken, I realized my mistake. I quickly gathered the leftover risotto to one side of the pan and tried to strategically photograph it so it didn't look like 3/4 of the pan was missing. Ha!

Guys. This is some seriously good risotto. We all love risotto, but this was a real showstopper. The fresh herbs and the punch from the lemon were utter perfection. I don't have lemon pepper seasoning, but I did have some free samples of Mrs. Dash, so I used that last night. I should probably put lemon pepper seasoning on the shopping list, though, since I plan to make this one often.

Lemon Chicken Risotto
Slightly modified from How Sweet It Is

1 pound boneless, skinless chicken thighs or breasts
1/2 teaspoon salt
1/2 teaspoon garlic powder
1/2 teaspoon lemon pepper seasoning
2 tablespoons olive oil
5 to 6 cups low-sodium chicken stock
1/2 onion, finely diced
1 1/2 cups arborio rice
1/2 cup dry white wine
4 scallions, minced
1 tablespoon freshly grated lemon zest
1/4 cup freshly grated parmesan cheese
1 tablespoon fresh chopped basil
1 tablespoon fresh chopped parsley
salt and pepper for seasoning
1 tablespoon unsalted butter
lemon wedges for serving

Season the chicken with the salt, garlic powder and lemon pepper seasoning on both sides. Heat the oil in a large skillet over medium heat. Once hot, add the chicken. Cook on both sides until golden brown and cooked through, about 5 minutes per side. Remove the chicken to a plate. Once cool, cut into bite-size pieces.

Heat the stock over medium heat.

If the pan looks dry, add a little more oil, then add the onion. Cook until the onion is soft, about 5 minutes, then add the rice. Stir to toast the rice until it's somewhat translucent, about 2-3 minutes. Stir in the white wine and wait until the rice absorbs it before starting to add the stock, stirring until the rice absorbs the liquid like it did with the wine. Repeat this until all stock has been added and the rice is al dente. This process should take about 20 minutes.

Stir in the scallions, lemon zest, parmesan, basil and parsley. Taste and season with more salt or pepper, if needed. Add the tablespoon of butter along with the chicken, and toss to melt the butter. Serve immediately with a squeeze of fresh lemon juice on top of each serving.
Pin It!

Tuesday, April 05, 2016

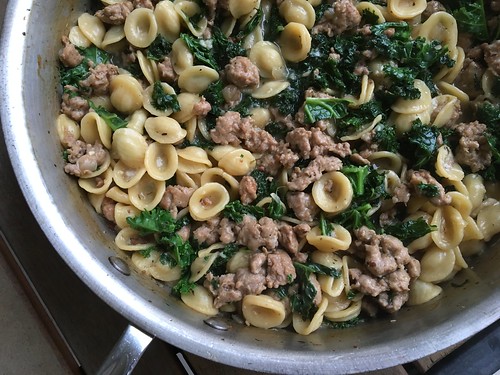
One Pan Orecchiette with Sausage and Kale

I've been on a serious kale kick lately. If I see it on a restaurant menu, there's a good chance I'll order it. But I very rarely (read: never) cook with it at home. I think I've purchased kale only once for this Italian Sausage, Potato and Kale Soup. I'm also really into one-pot meals, specifically when they involve cooking pasta in a flavorful broth. This One Pan Orecchiette with Sausage and Kale combines my two latest obsessions into one delicious meal.

Orrecchiette with sausage and kale

Looking at the pictures of this meal made my mouth water and the end result did not disappoint. I made a few minor adjustments to the cooking method but otherwise I followed the recipe. Katie and I both cleaned our plates in record time. I had the leftovers for lunch today and they were sensational, dare I say better than the first day. I needed to add a smidge of water just to loosen the sauce a bit, but this reheated beautifully.

Not that I have any nutrition background whatsoever, but as far as our personal eating habits, this is a pretty awesome meal. You've got grains, protein and veggies covered. The pasta is minimal (less than half a pound, thankyouverymuch) and plenty of healthy kale. And a bonus - the Italian sausage we buy is actually made from turkey instead of pork. The best part is, you can't taste the difference. We've served this sausage to countless people who had no clue they were eating turkey instead of pork.

One Pan Orecchiette with Sausage and Kale
As seen on For the Love of Cooking

1 tablespoon olive oil
1 medium yellow or white onion, diced
1 lb mild ground Italian sausage (if you buy links, remove casings)
1/2 teaspoon dried Italian seasoning
1/2 teaspoon dried oregano
1/2 teaspoon fennel seeds, crushed well
Pinch crushed red pepper flakes, or more to taste
3 cloves garlic, minced
1 quart chicken broth
6oz (weight) orecchiette pasta
Sea salt and freshly cracked black pepper, to taste
4oz (weight) kale, chopped
Parmesan, shaved or grated

Heat the olive oil in a large, deep skillet over medium heat. Add the onion and cook, stirring occasionally until soft and golden, about 5-6 minutes. Stir sausage into the onions along with the Italian seasoning, oregano, crushed fennel seed, red pepper flakes and garlic. Cook and stir until sausage is broken up and just browned, about 3-4 minutes.

Pour the chicken broth into the sausage mixture and bring to a boil. Be sure to scrape up the browned bits off of the bottom of the pan. Once the broth is boiling, add the orecchiette pasta. Cook, stirring every so often to prevent the pasta from sticking together or to the bottom of the pan, about 15 minutes. Taste and season with sea salt and freshly cracked pepper, if needed. Be sure to taste before adding any salt since the chicken broth will be salty.

Stir the kale into sausage mixture until it wilts, about 1-2 minutes. Ladle pasta into bowls and top with Parmesan.
Pin It!

Thursday, March 31, 2016

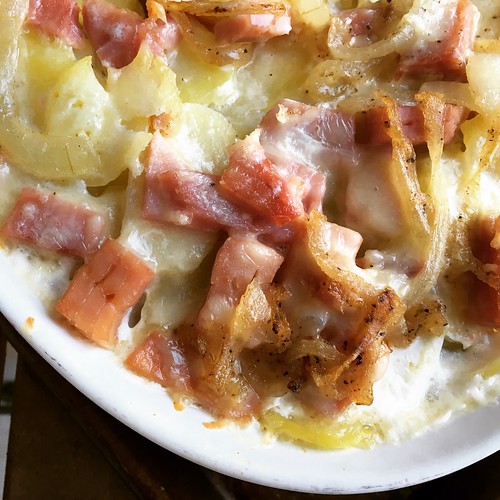
Scalloped Potatoes and Ham

Every Easter my mom makes a ham and sends us home with leftovers. This year I had my eye on a new recipe for Scalloped Potatoes and Ham. I liked that Ree added onions and cheese so I was excited to give it a try.

Scalloped ham and potatoes

When I made this I followed her recipe exactly save for one thing - precooking the potatoes. I made the mistake years ago of attempting to make scalloped potatoes using raw potatoes. It simply does. not. work. Do NOT make that mistake. You must always parboil the potatoes, otherwise you'll be waiting forever for the potatoes to cook through (or eating crunchy potatoes). I also splurged and used heavy cream, something I haven't purchased in years. And you know what, this was way too rich. Our tastes have certainly changed so feel free to use equal parts half-and-half and heavy cream, if that's what floats your boat. Next time I'm switching to all half-and-half or maybe even equal parts half-and-half and milk.

Another tip - use more cheese. I upped the amount below. And do yourself a favor and use extra sharp Cheddar. Steve didn't even realize there was cheese in the dish until he was setting aside his lunch portion.

It may sound like we didn't enjoy this but that's definitely not the case. And I wanted to share it with you now because I'm confident these small tweaks will make all the difference.

Scalloped Potatoes and Ham
Slightly adapted from The Pioneer Woman

3 pounds Russet or Yukon Gold potatoes
1 yellow or sweet onion
2 tablespoons butter
3 cups diced ham
3 cups half-and-half (or 1 1/2 cups each half-and-half and milk OR heavy cream)
1/4 cup flour
1 teaspoon salt
1/2 teaspoon pepper
8oz grated extra-sharp cheddar cheese
4oz grated Monterey Jack cheese

Preheat the oven to 350 degrees. Butter a large, deep casserole dish (at least 2 1/2-quarts, preferably larger).

Peel the potatoes, rinse under cold water, then pat dry. Using a mandoline or a sharp knife, slice potatoes into very thin slices (1/8-inch). Put the slices into a large pot of cold water. Repeat with the remaining potatoes. Once all the potatoes are sliced, bring to a boil then continuing boiling for 3 minutes. Drain well and set aside to cool slightly.

Cut the onion in half then cut each half into thin slices. Heat the butter in a large skillet over medium heat and add the onions. Cook until they start to caramelize, about 5-10 minutes. Remove from heat and set aside.

Combine the half-and-half and milk OR heavy cream (if using) then whisk in the flour, salt and black pepper until totally combined. Set aside. Combine the two grated cheeses. Set aside.

Layer 1/3 of the potato slices in the buttered casserole dish. Sprinkle on 1/3 of the ham and onions, then 1/3 of the cheese, then pour on 1/3 of the cream mixture. Repeat this twice more, ending with a sprinkling of cheese before pouring on the rest of the cream mixture.

Cover the dish with foil and bake for 40 minutes. Remove the foil and bake for an additional 20 minutes at least, or until bubbly and hot.
Pin It!

Wednesday, February 24, 2016

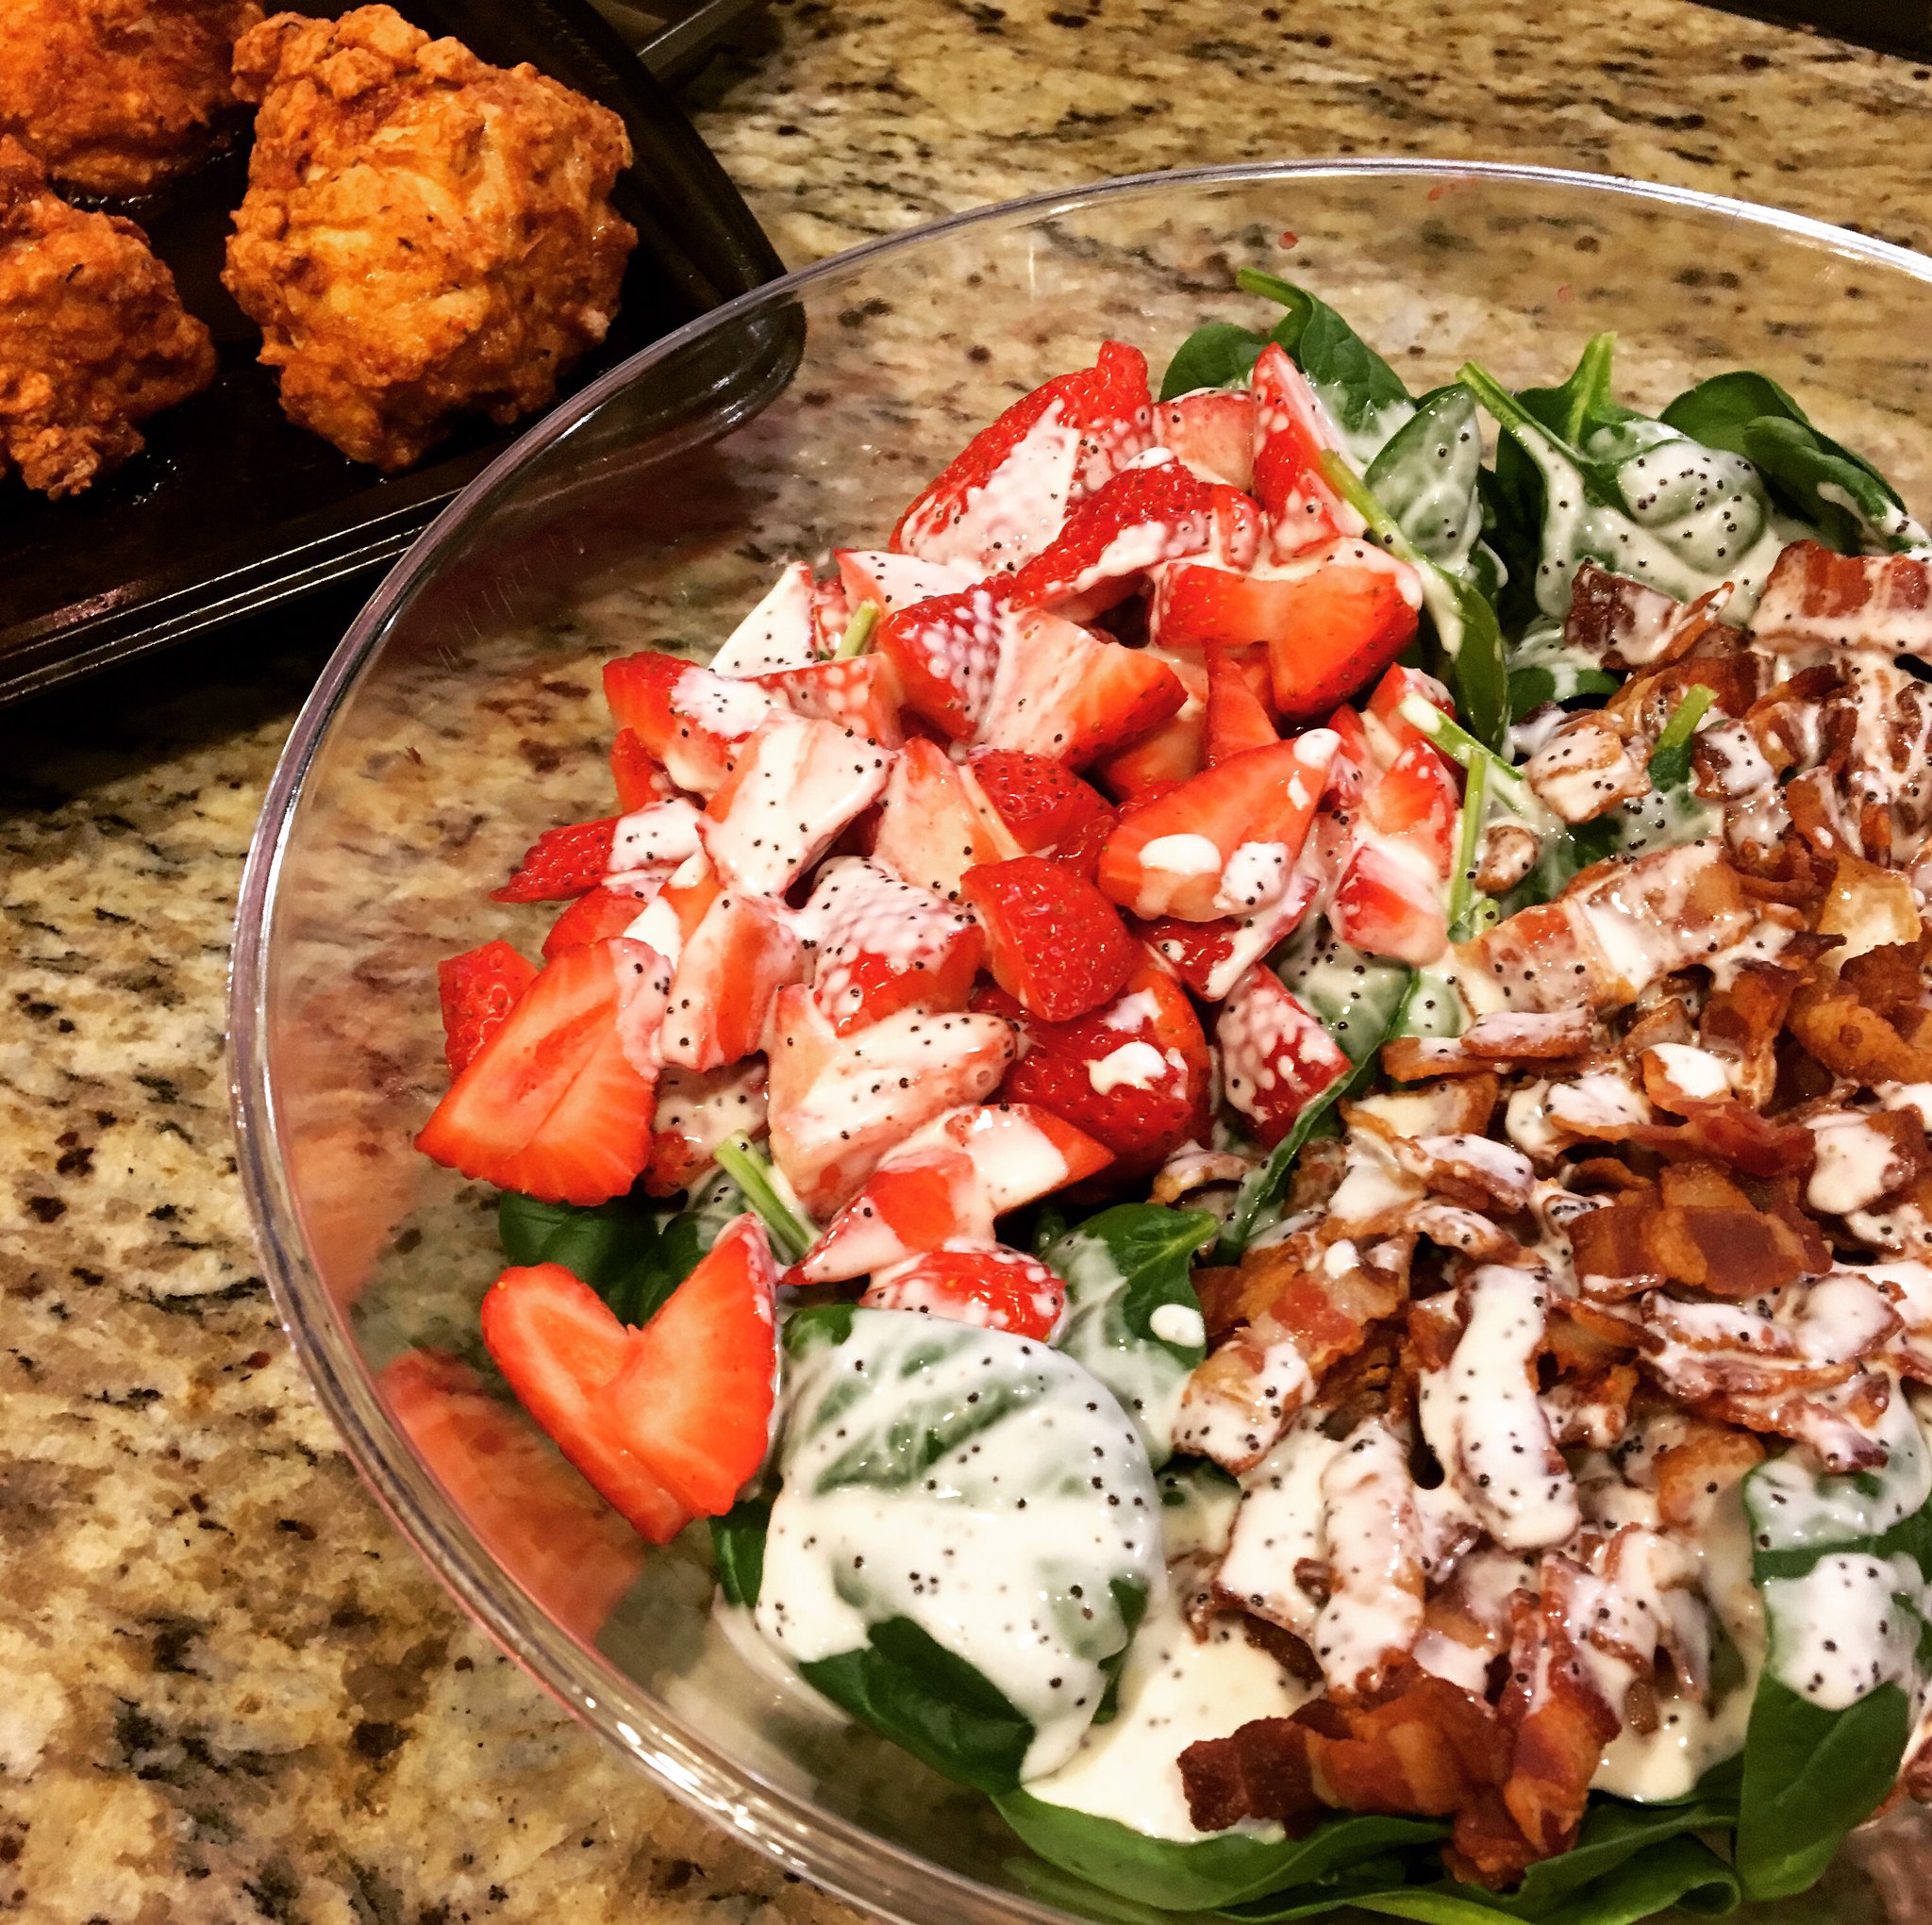
Spinach Salad with Strawberries and Bacon

A few weeks ago I was looking for a light, fresh salad to bring to a friend's house for one of our semi-regular cooking extravaganzas. I knew my friend, Jaida, would have something delicious on her blog and I was right. As soon as I saw this Spinach Salad with Strawberries and Bacon I knew I had a winner.

Spinach salad

I left out the toasted almonds due to Katie's nut allergy and decreased the amount of sugar in the dressing because we prefer things tangy, but otherwise I didn't change a thing. I've made this twice now and both times it was a sleeper hit. People don't seem to expect much from such a simple salad, but the flavors are so light and delicious. I know I'll be making this one often this spring and summer.

Pro tip: I like to cut bacon with kitchen shears. Simply remove however many slices you need from the package, keeping them stuck together, and cut them in half. Hold the chunk o' bacon over the skillet and snip pieces off directly into the pan. Repeat with the other half. No muss, no fuss.

Spinach Salad with Strawberries and Bacon
As seen on Sweet Beginnings, originally from Lauren's Latest

8 slices bacon, chopped
1 6oz bag baby spinach
2 cups sliced fresh strawberries
1/4 cup toasted almonds, chopped (I left these out due to Katie's allergy)
1/2 cup Greek yogurt
1/2 cup mayonnaise
1/4 cup white vinegar
2 tablespoons sugar
salt & pepper, to taste
1 teaspoon poppy seeds

In a large skillet, cook the bacon pieces over medium heat, until just crisp. Remove to a paper towel-lined plate to drain.

Place the spinach in a large bowl and top with the strawberry slices, almonds and bacon.

Combine the yogurt, mayonnaise, vinegar, sugar, salt and pepper, and poppy seeds in a small bowl and whisk until smooth. Drizzle the dressing over the salad just before serving.

All the components can be prepped a few days ahead of time and stored separately in the fridge.
Pin It!