Wednesday, February 24, 2016

Spinach Salad with Strawberries and Bacon

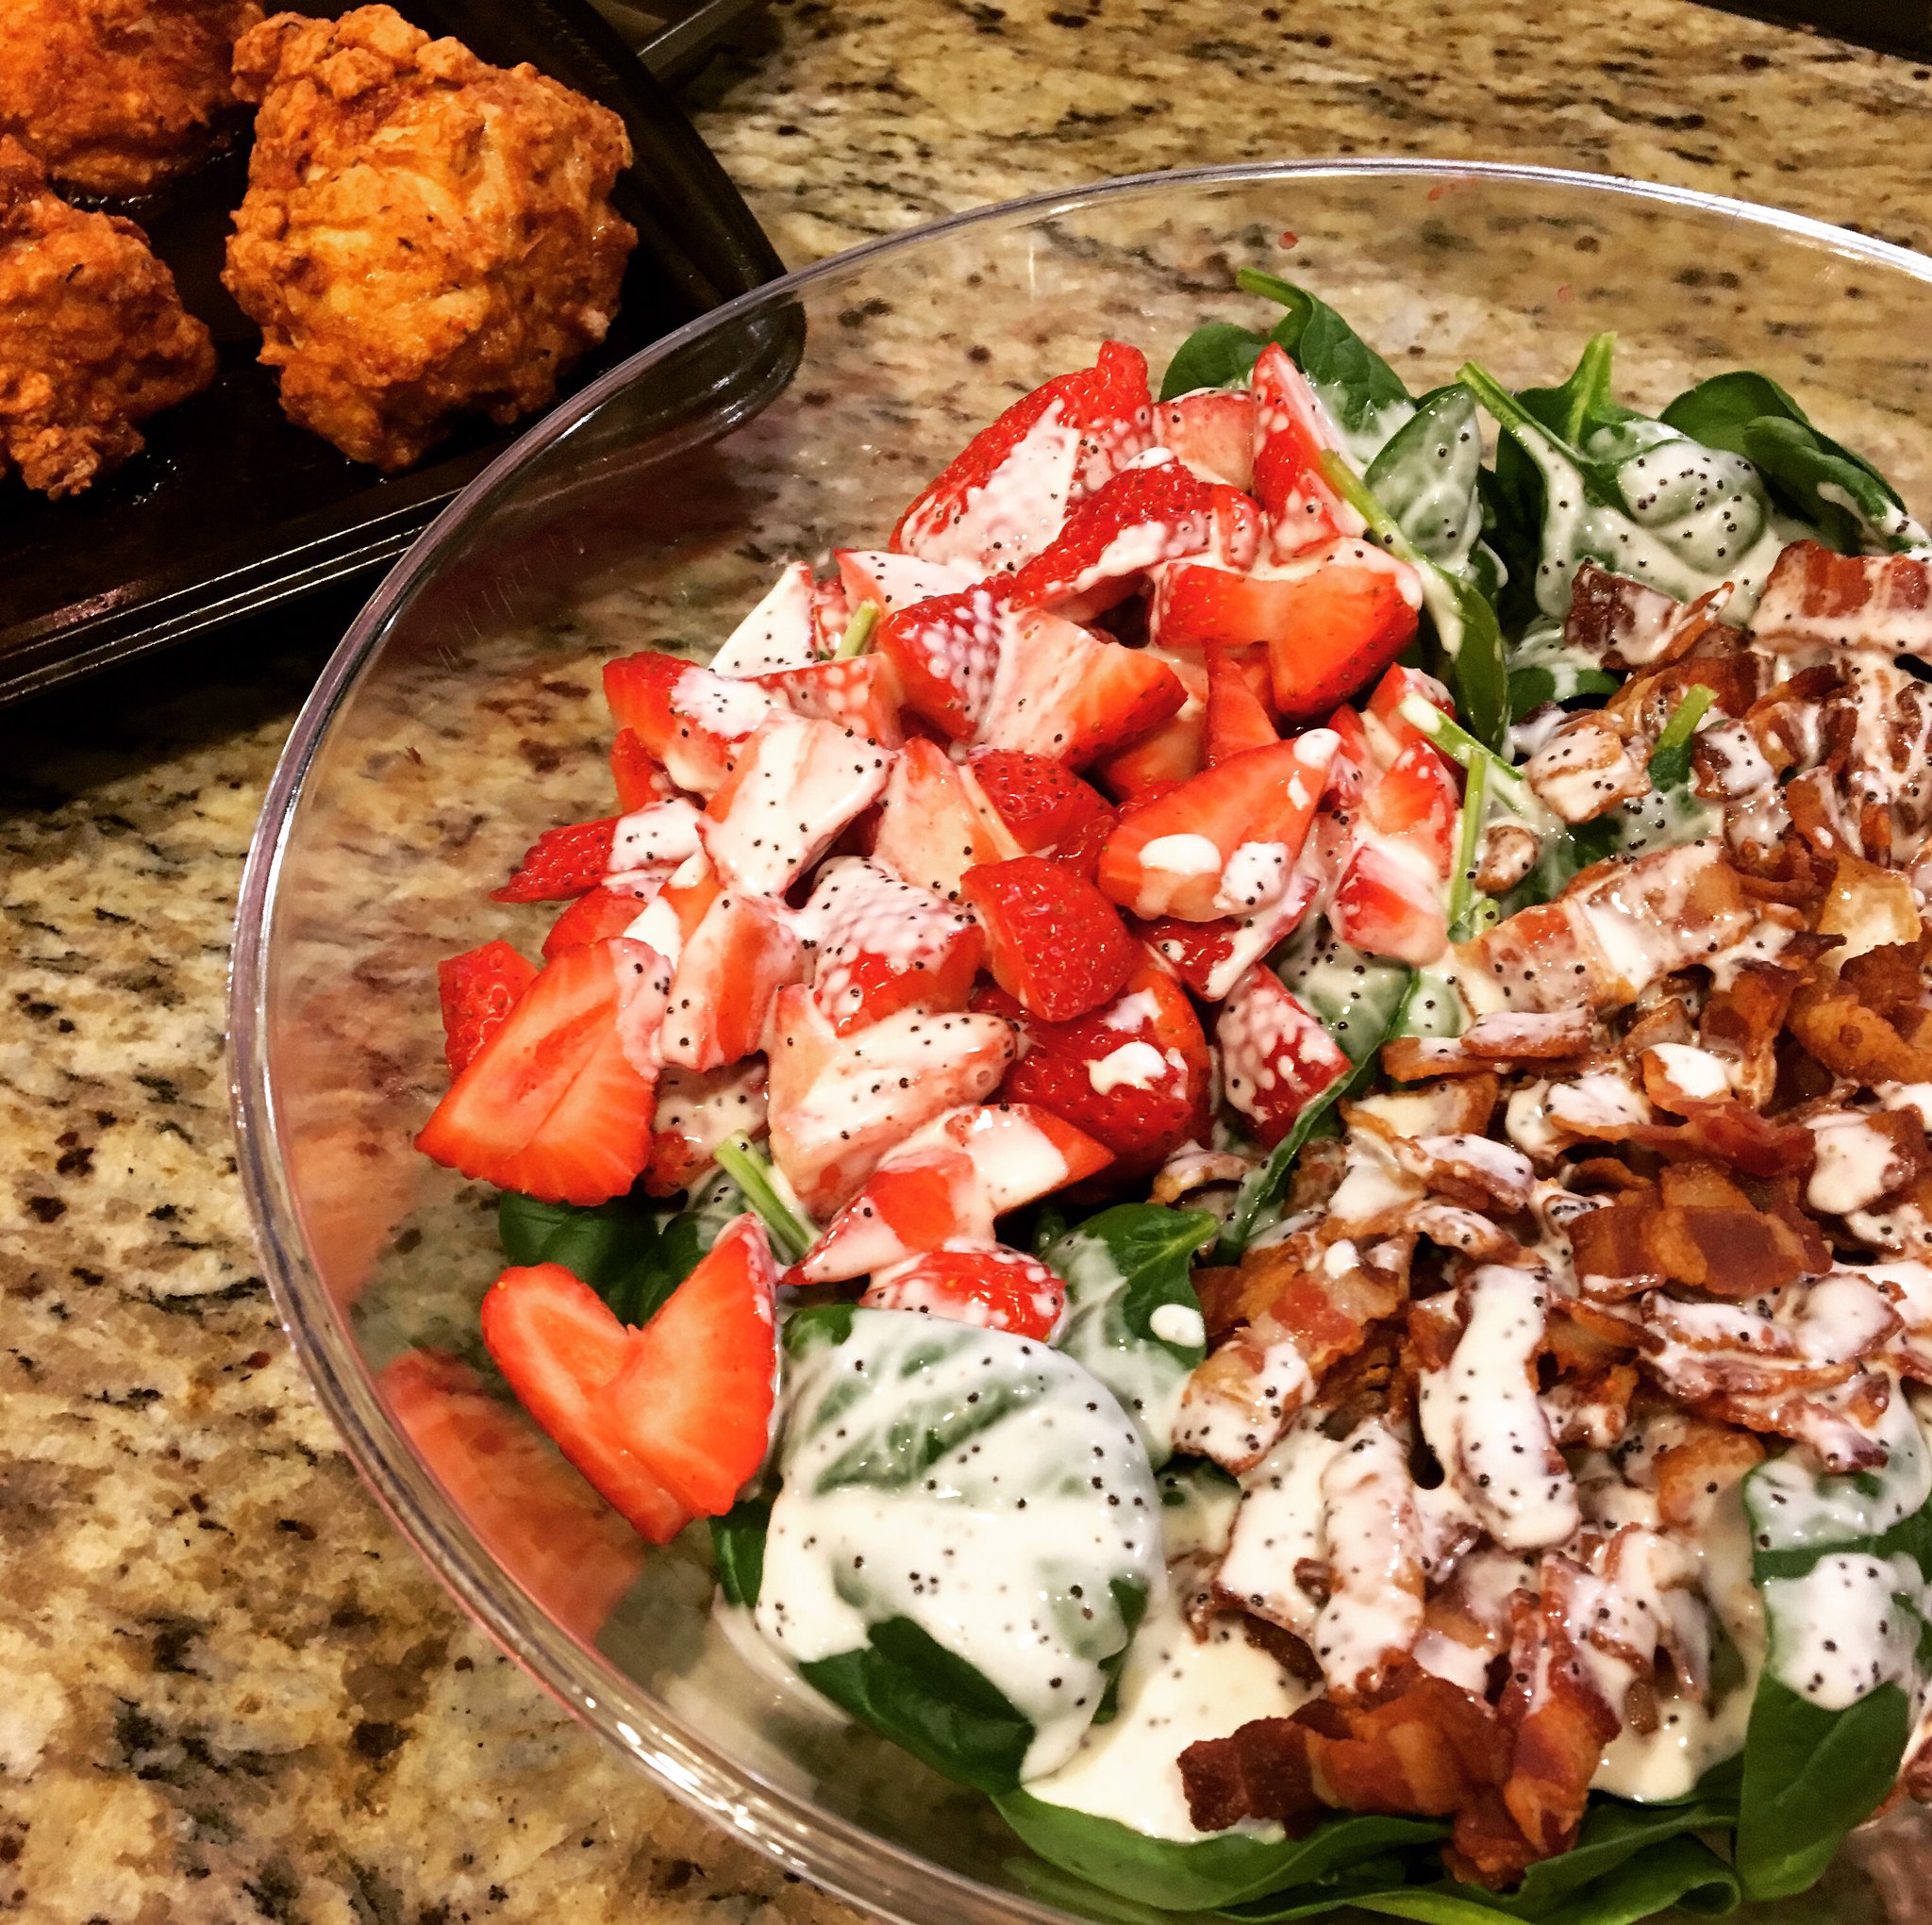
A few weeks ago I was looking for a light, fresh salad to bring to a friend's house for one of our semi-regular cooking extravaganzas. I knew my friend, Jaida, would have something delicious on her blog and I was right. As soon as I saw this Spinach Salad with Strawberries and Bacon I knew I had a winner.

Spinach salad

I left out the toasted almonds due to Katie's nut allergy and decreased the amount of sugar in the dressing because we prefer things tangy, but otherwise I didn't change a thing. I've made this twice now and both times it was a sleeper hit. People don't seem to expect much from such a simple salad, but the flavors are so light and delicious. I know I'll be making this one often this spring and summer.

Pro tip: I like to cut bacon with kitchen shears. Simply remove however many slices you need from the package, keeping them stuck together, and cut them in half. Hold the chunk o' bacon over the skillet and snip pieces off directly into the pan. Repeat with the other half. No muss, no fuss.

Spinach Salad with Strawberries and Bacon
As seen on Sweet Beginnings, originally from Lauren's Latest

8 slices bacon, chopped
1 6oz bag baby spinach
2 cups sliced fresh strawberries
1/4 cup toasted almonds, chopped (I left these out due to Katie's allergy)
1/2 cup Greek yogurt
1/2 cup mayonnaise
1/4 cup white vinegar
2 tablespoons sugar
salt & pepper, to taste
1 teaspoon poppy seeds

In a large skillet, cook the bacon pieces over medium heat, until just crisp. Remove to a paper towel-lined plate to drain.

Place the spinach in a large bowl and top with the strawberry slices, almonds and bacon.

Combine the yogurt, mayonnaise, vinegar, sugar, salt and pepper, and poppy seeds in a small bowl and whisk until smooth. Drizzle the dressing over the salad just before serving.

All the components can be prepped a few days ahead of time and stored separately in the fridge.
Pin It!

Monday, February 22, 2016

Dill Pickle Dip

People. People! Have I got an amazing party treat for you.

I had this recipe for Dill Pickle Dip saved for almost a year before I got around to making it. Why? Because we so rarely go to parties these days. Sad, but true. So when a friend invited a group of moms over for a post-Valentine's Day party, I knew this was my chance.

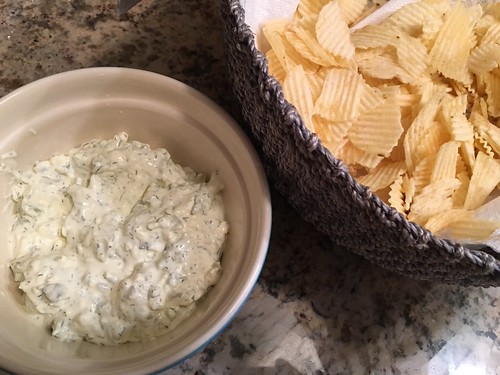
Dill pickle dip

As soon as I unpacked the chips and dip, all the moms were oohing and ahhing. Apparently I'm not the only one who loves pickles. I hadn't bothered to photograph the dip beforehand, not knowing just how good it would be, so as soon as everyone started raving I grabbed the chips and the plastic container I'd brought the dip in, asked the hostess for a proper bowl, and went into the kitchen to take a quick photo.

Rebecca said this dip is also amazing as a burger topping and I can't wait to test that out.

Dill Pickle Dip
As seen on Foodie with Family

1 (8 ounce) package cream cheese, softened to room temperature
1 cup chopped dill pickles
1/4 cup finely chopped sweet onion
4 tablespoons pickle juice (use less for thicker dip or more for thinner dip)
1 teaspoon dried dill weed
salt and pepper, to taste
Pretzels, vegetable sticks, crackers, or potato chips for serving

Place the cream cheese in a bowl and use a wooden spoon to press and loosen the cream cheese. Stir in all of the remaining ingredients and mix until evenly distributed. Cover with plastic wrap and refrigerate for at least an hour before serving.

If you have any leftovers, this dip will keep for up to a week tightly covered in the refrigerator. It may become thinner as it sits.
Pin It!

Friday, February 19, 2016

Restaurant Knockoff: Chick-Fil-A Sandwich

I don't always crave Chick-Fil-A, but when I do, it's Sunday.

I know there's plenty of you out there who feel me on that one. Anyway, even though there's a Chick-Fil-A all of 5 minutes from our house, we never seem to go there. But that's not to say we don't all love a good fried chicken sandwich. I printed out this recipe for a Copycat Chick-Fil-A Sandwich ages ago, but for some reason I hadn't gotten around to actually making it.
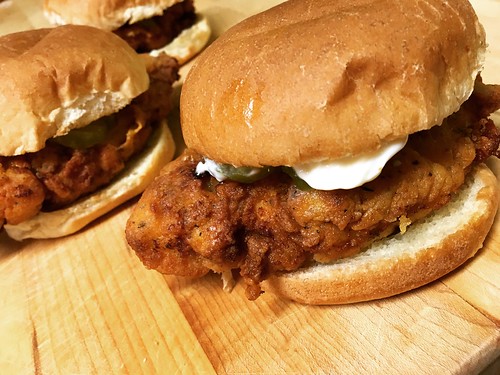
CFA sandwiches

Disclaimer for any current or former CFA employees: yes, this recipe contains pickle juice and yes, I'm fully aware that there's no pickle juice in an authentic CFA sandwich. Don't worry, my friend Chelsea (a former manager at CFA) gave me the run-down:

"Here's how we made the sandwiches: filet the raw chicken breasts, making sure they're a uniform thickness. Submerge completely in a milk wash (buttermilk/egg/water) and then coat thoroughly in seasoned flour, shaking off the excess. The flour mix comes in prepackaged bags and has paprika, onion powder, salt, pepper (I don't know exact quantities). I assume there was MSG or other ingredients as well, and most likely sugar. Deep fry in peanut oil in a pressure cooker for a couple minutes until golden brown. Place on a bun that's run through a toaster with "butter oil" on it, add two dill pickle chips, and serve."

Chelsea's theory for why these at-home recipes include pickle juice is due to the pickles sitting on the bread and the bread and chicken absorbing the flavor. I'm not sure two pickle chips is going to impart that much flavor, so my theory is that pickle juice adds that awesome tang but it also keeps the chicken moist, almost like brining. I don't know about most home cooks, but I'm not deep-frying in a pressure cooker. I shallow-fried the chicken for these sandwiches in less than an inch of oil. Frying in a pressure cooker is going to help the chicken retain moisture. The pickle juice helps replicate that for the home cook.

After doing some research online, it looks like the folks over at Serious Eats have come the closest to the real recipe. Hats off to them! As for me, I absolutely love marinating chicken in pickle juice. It's the secret to my homemade chicken nuggets and I highly recommend it, even if it isn't truly authentic.

Speaking of pickle juice, for years I threw all that delicious brine away once we'd eaten the pickles. Not anymore! At any given moment you'll find at least two jars of pickle juice in my fridge. I use it for nuggets, and now I'll use it for these sandwiches. I also put it in my potato salad in the summer.

One last thing - while the restaurant only serves two pickle slices with their sandwich, since you're making it at home you can do whatever you want. We all love pickles so I put at least 6 or 8 on our sandwiches. Rebel!

Restaurant Knockoff: Chick-Fil-A Sandwich
Slightly adapted from Hilah Cooking

4 small boneless chicken breasts*
1 cup pickle juice
1 egg
1/2 cup milk
1 1/2 cups flour
3 tablespoons confectioners’ sugar
2 teaspoons paprika
2 teaspoons salt
1 teaspoon black pepper
1 teaspoon garlic powder
1 teaspoon dried basil
vegetable, canola or peanut oil for frying
4 hamburger buns, buttered and toasted
Pickle slices, for serving

Place the chicken breasts, one at a time, in a plastic food storage bag. Pound to an even 1/2 inch thickness. Place all the chicken in a plastic food storage bag and marinate in the pickle juice for 4 hours.

Beat the egg and milk together in a bowl. Combine the flour, sugar and spices in a plastic food storage bag. Remove the chicken from the pickle juice and place in the bag with the flour. Seal the bag and toss to coat the chicken. Dip each piece of chicken in the egg mixture to coat on both sides, then put it back in the bag with the flour. Once all the chicken went through the egg wash, seal the flour bag again and toss to coat.

Heat about 1/2 an inch of oil in a deep skillet until smoking. Add the chicken and cook for 5-6 minutes per side, or until golden brown and cooked through. Remove to a paper towel-lined plate to drain. Serve on the toasted buns mayo and pickle slices.

*If your chicken breasts are huge (like so many seem to be these days) only use two large breasts instead of four. Cut them in half width-wise and then pound them thin.
Pin It!

Wednesday, February 17, 2016

Skillet Beans and Rice with Kielbasa

Before I tell you about this truly amazing, super simple one-pot meal I have exciting news! We're one month away (one month!!) from Daylight Savings Time. Gah! I can hardly stand it. I am so, so, so, so ready to be able to photograph meals in natural light again. So ready.

Ahem.

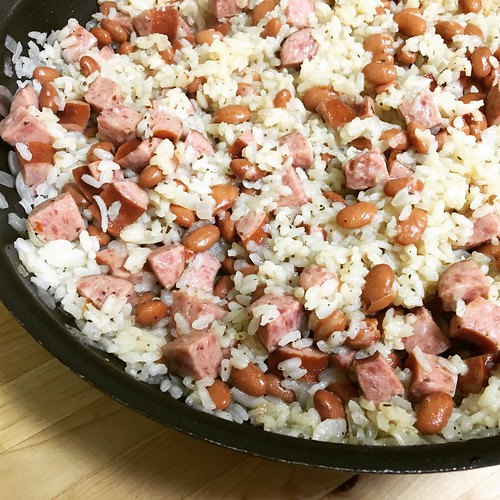
Now that we've got that out of the way, let's talk about this Skillet Beans and Rice with Kielbasa. Lordy, was this GOOD. Honestly, I wasn't expecting much. It's a pot of rice, beans and kielbasa; how exciting could it be? Boy was I wrong.

Skillet rice and beans with kielbasa

My mom's side of the family is Polish so I'm no stranger to kielbasa. We have it every year at Easter, but it's not a meat I usually cook on a weeknight. That will definitely change after this little beauty.

Unfortunately, my parsley went bad in the fridge but I didn't even miss it. I also subbed the 3 minced garlic cloves with 1/2 teaspoon of garlic powder. It pains me to say it, but I just can't handle fresh garlic anymore. It started when I was pregnant - garlic gave me wicked heartburn. It's been 7 years and I still can't handle it. I've been leaving it out of recipes or subbing garlic powder when I can. Sigh.

Skillet Beans and Rice with Kielbasa
Ever so slightly modified from BellyFull

1 tablespoon extra virgin olive oil
1 tablespoon unsalted butter
1 package (14 ounce) polska kielbasa, diced
1 medium sweet onion, diced
1 cup white rice
2 cups low sodium chicken broth
1 can (14 ounce) pinto beans, rinsed and drained
1/2 teaspoon dried Italian seasoning
1/2 teaspoon garlic powder
1/4 teaspoon red pepper flakes
salt and pepper, to taste
1/4 cup finely chopped fresh parsley

Heat the oil and butter in a large non-stick skillet (make sure it has a lid) over medium-high heat. Add the kielbasa and onion. Sauté until the onions become soft and translucent, stirring occasionally, about 5 minutes. Add the rice and stir to coat the grains with the fat, about 1 minute.

Add the chicken broth, beans, Italian seasoning, garlic powder, red pepper flakes, salt and pepper. Bring to a boil. Cover and reduce the heat to low so it stays at a simmer. Cook for 22 minutes, stirring occasionally so the rice doesn't stick.

Remove from the heat and stir in the parsley.
Pin It!

Monday, February 15, 2016

Oreo Peppermint Cookies

You're going to laugh at me. Do you want to know the reason I made these Oreo Peppermint Cookies? It's because I had half a brick of cream cheese leftover from the weekend of Winter Storm Jonas when we treated ourselves to bagels for breakfast.

That seems silly, right, trading cookies for a bagel. But see, here's the thing - if there's cream cheese in the house, I'll want to buy bagels to use it up. And then it becomes a vicious cycle of buying more cream cheese to finish the bagels and more bagels to finish the cream cheese. The truth is, I have a serious weakness for bagels. I used to eat half an everything bagel with cream cheese for breakfast every morning. In the summer I'd add nice, thick slices of fresh Jersey tomatoes and wash it all down with a tall glass of orange juice. That breakfast was the first thing to go when I decided to get serious about weight loss, exercise and healthier living a few years ago.

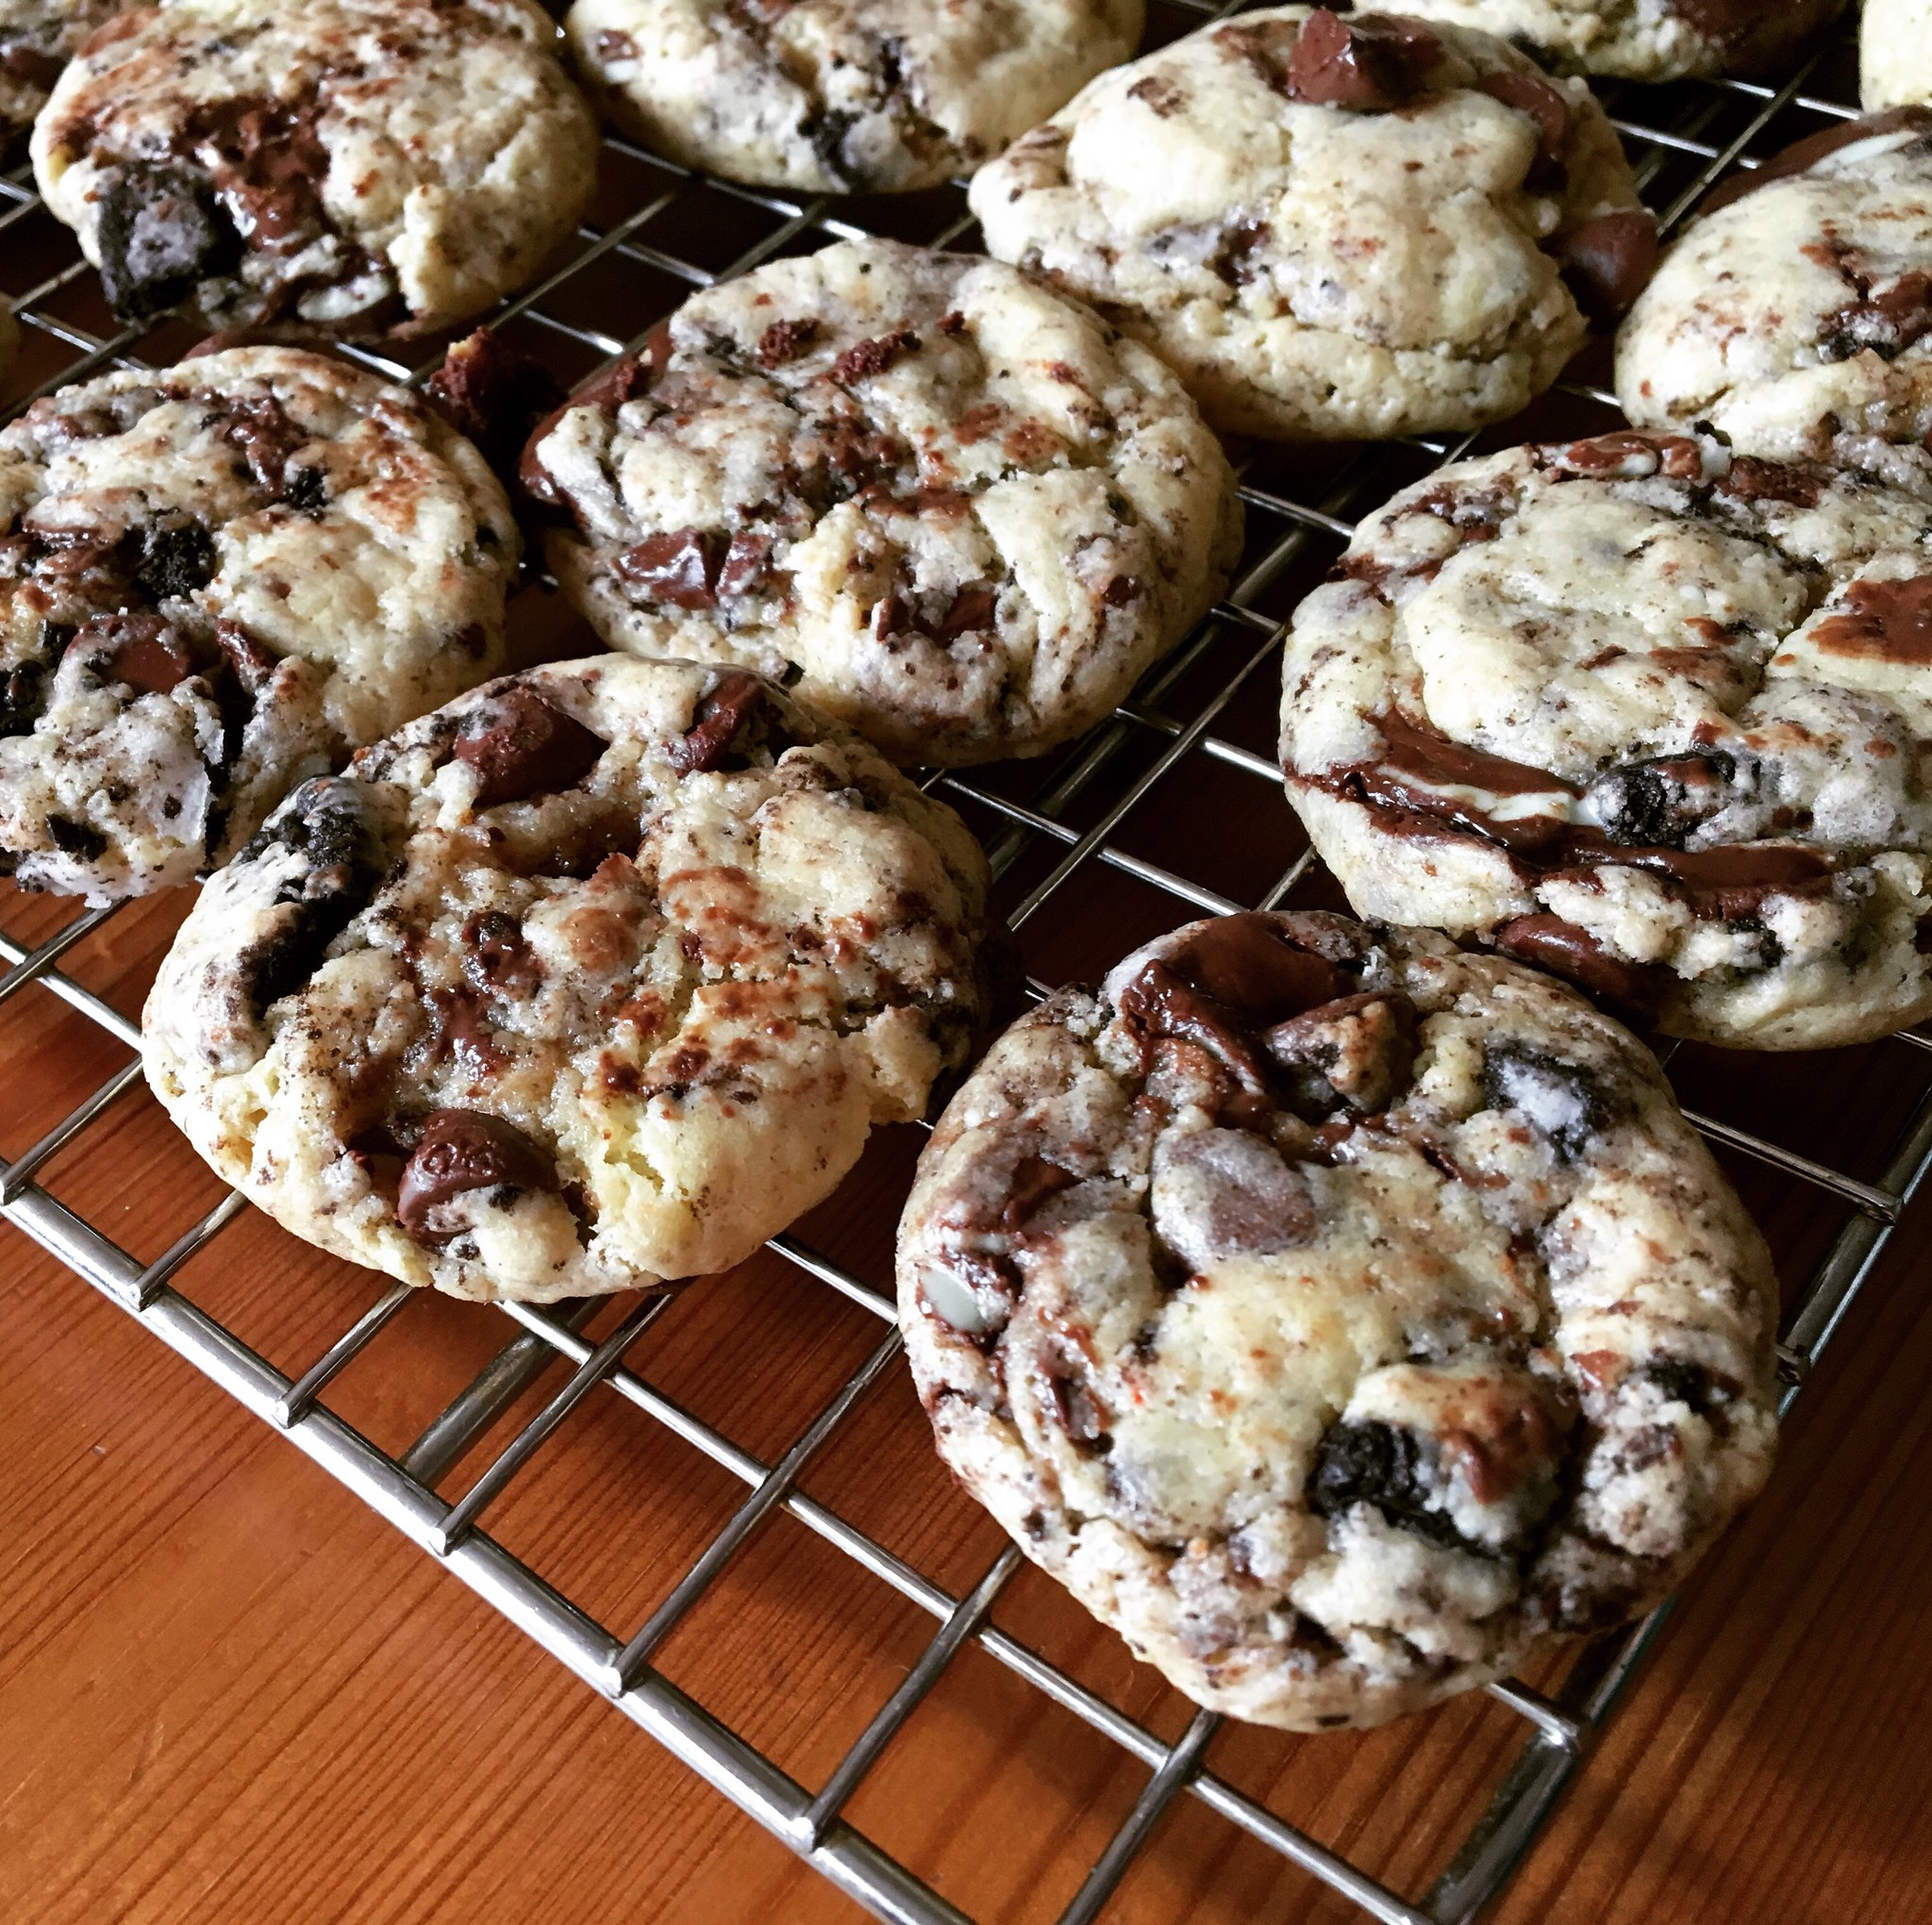
Oreo peppermint cookies

But cookies...meh. I can take or leave a cookie. The only dessert I have no willpower over is cake. I figured I'd make these cookies, we'd eat a few and then the rest would go into the office with Steve. Katie and I made the dough one Sunday morning and baked them off that afternoon before we went to my parent's house for Sunday dinner. And, as planned, the rest went to the office Monday morning.

Steve couldn't find the Andes Peppermint Crunch chips listed in the original recipe, so he just got a regular box of Andes mints. I crushed them up like I did for the Oreos and that worked fine and tasted great.

Because of the cake mix, these don't taste like your typical homemade cookie, but everyone who tried them liked them.

Oreo Peppermint Cookies
Slightly modified from Inside BruCrew Life

1 box yellow cake mix
1 stick butter, melted
1 egg
1/2 teaspoon peppermint extract
1/2 teaspoon vanilla extract
4 ounces cream cheese, softened
8 Oreo cookies, crushed into pieces
1 package Andes mints, crushed (or 1 cup Andes Peppermint Crunch pieces)
1/2 cup chocolate chips

Preheat the oven to 350 degrees.

Combine the cake mix, melted butter, egg, and extracts in a large bowl. Using a hand mixer, beat until a soft dough forms. Add the softened cream cheese and beat in gently until combined. Stir in the Oreos, peppermint pieces and chocolate chips. Cover the bowl and refrigerate the dough for at least 30 minutes.

Using a 1 1/2 tablespoon cookie scoop, divide the dough into 36 balls.

Bake on an ungreased cookie sheet for 9 minutes. These didn't spread at all, so I was able to fit 8 dough balls on each sheet. The cookies will be very soft and look under done. Let them sit on the hot cookie sheet for 2 minutes, then gently remove them with a spatula to a cooling rack. Very gently tap the tops of the cookies with the bottom of the spatula to even out the tops. Let them sit until completely cool. Store in an airtight container.
Pin It!

Wednesday, February 10, 2016

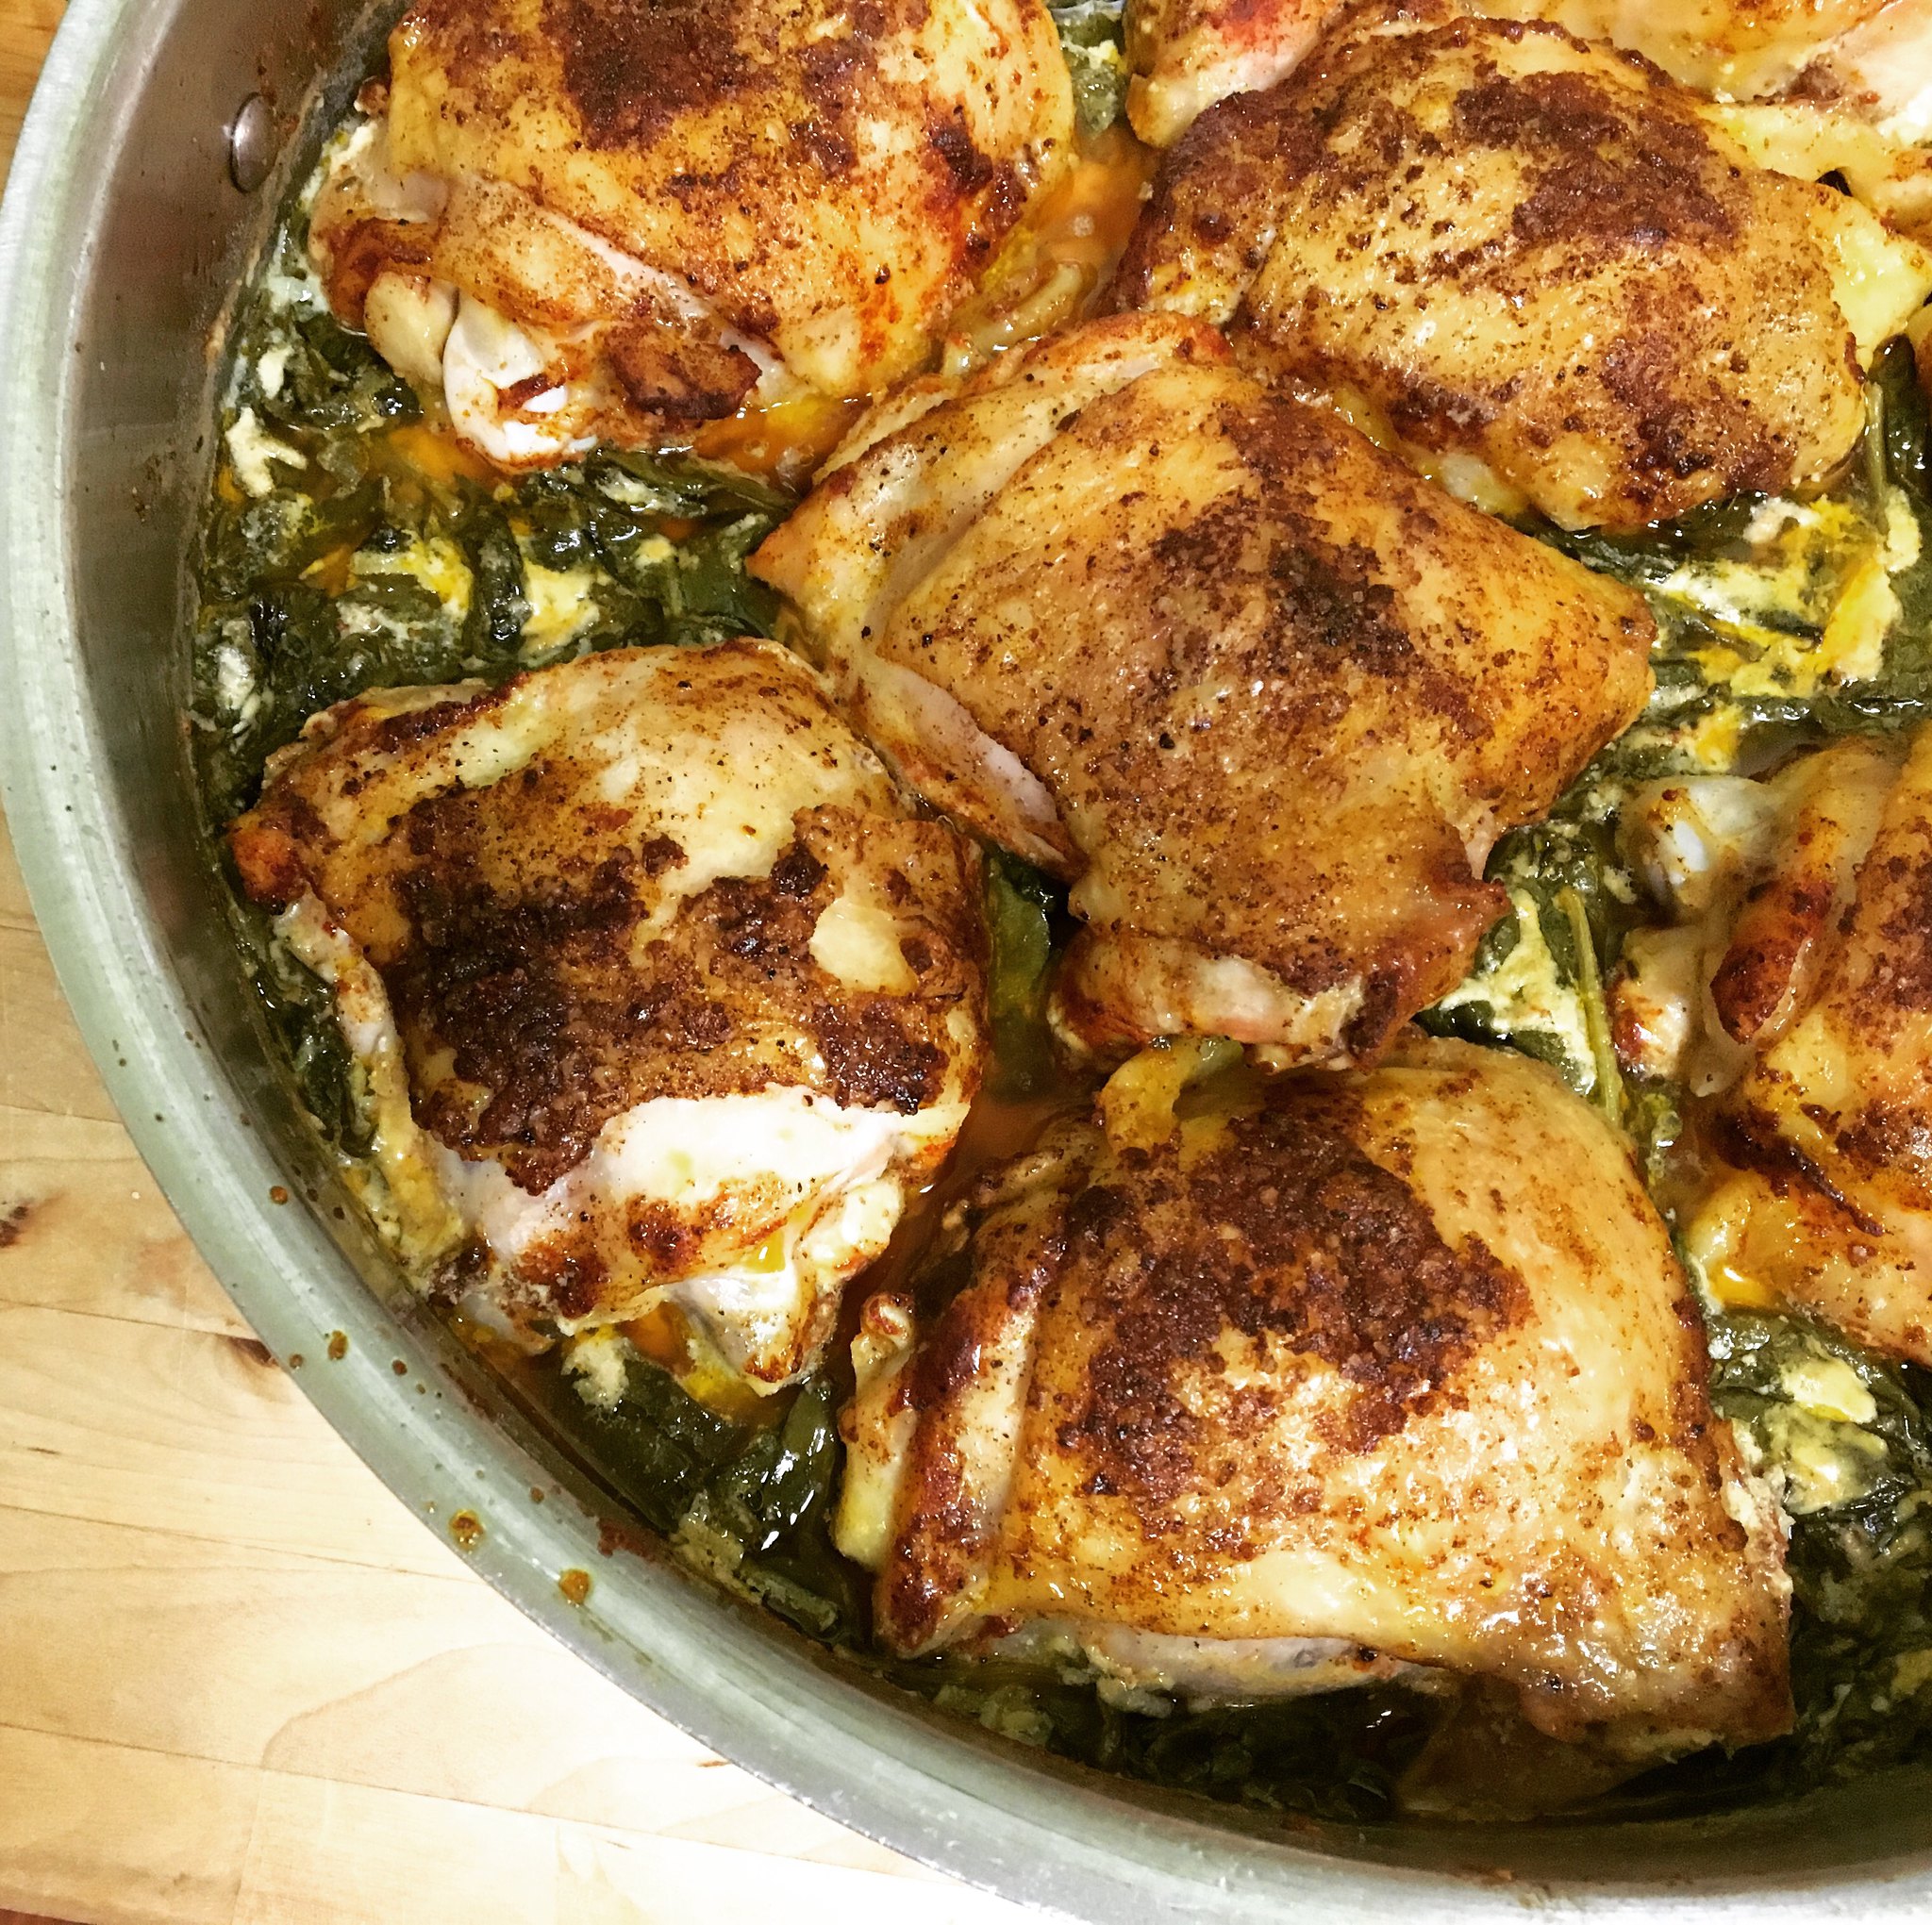
Lemon Butter Chicken

If you know me at all, or have read this blog for any length of time, you know I love to cook. That seems like a ridiculous statement because, duh, why else would I have a food blog. But I say that because, as you may assume, my love of cooking means I've done quite a lot of it over the course of my life. So for me to say this Lemon Butter Chicken is one of the Top Ten Best Things I've Ever Cooked...Ever carries a lot of weight.

Lemon butter chicken

I'm not even exaggerating. We all swooned over this meal. Katie and I each ate one thigh and then she asked to split another with me. She might be a good eater but that's still a lot of food for her. I cooked all 8 thighs, thinking we'd have a ton of leftovers, but between the three of us we easily ate it all between dinner and lunch the next day.

The sauce is what makes this so amazing. It's garlicky and creamy and positively drinkable. You'll want a nice mound of fluffy mashed potatoes (or even some crusty bread) to sop it all up. The only changes I made were to lighten it up a bit by using half-and-half rather than heavy cream (a substitution I've been making for years), and to use fresh thyme.

And, as if you need another reason to run right out and make this, it's SO EASY. Like, ridiculously easy. A novice chef could make this without any issues. All you have to do is season and brown the chicken, then pour over the sauce, wilt in some spinach and pop it in the oven. Chicken thighs are incredibly forgiving, so you can't mess this one up. Do yourself a favor and make this meal ASAP.

Lemon Butter Chicken
Ever so slightly modified from Damn Delicious

8 bone-in, skin-on chicken thighs
Smoked paprika, to taste
Kosher salt and freshly ground black pepper, to taste
1 cup chicken broth
1/2 cup half-and-half
1/4 cup freshly grated Parmesan
Juice of 1 large lemon
2 teaspoons fresh thyme
3 tablespoons unsalted butter, divided
3 cloves garlic, minced or grated
1 6oz bag baby spinach

Preheat the oven to 400 degrees. Season the chicken thighs with paprika, salt and pepper, to taste. Combine the chicken broth, half-and-half, Parmesan, lemon juice and thyme in a measuring cup or bowl.

Melt 2 tablespoons of the butter in a large oven-proof skillet over medium high heat. Add the chicken, skin-side down. Sear both sides until they're golden brown, about 3-4 minutes per side. Remove the thighs to a plate and discard the excess fat in the skillet.

Melt the remaining tablespoon of butter in the skillet. Add the garlic, and cook, stirring frequently, until fragrant, about 1 minute. Stir in the sauce ingredients (chicken broth, etc.) you combined earlier. Bring to a boil, then reduce the heat and stir in the spinach. Stir the sauce to wilt the spinach. Place the thighs back in the skillet.

Put the skillet into the oven and cook for 30 minutes. Remove, remembering to place a pot holder on the handle so you don't burn yourself. Serve immediately over mashed potatoes.

Pin It!

Wednesday, February 03, 2016

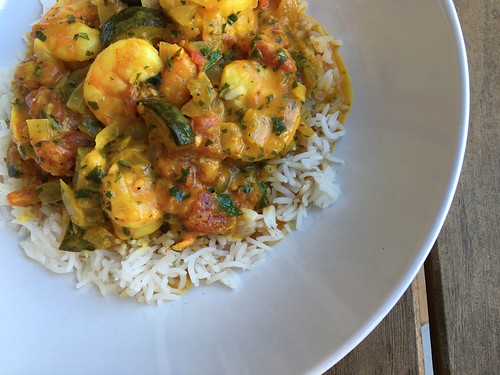
Coconut Shrimp Curry

My friend, Katie, posts photos of her family's dinner on Facebook sometimes. The other night she made this Coconut Shrimp Curry recipe and I couldn't get it out of my head. I quickly printed off the recipe to make this week.

Shrimp curry

This was so, so good. Light and fresh, with perfectly cooked shrimp. The only change I made was to add zucchini so I could call it a complete meal. You could add whatever veggies you like. I think carrots would be nice. Katie added sweet potatoes and said that was good.

Coconut Shrimp Curry
Slightly modified from Jo Cooks

For shrimp
1/4 teaspoon salt
1/4 teaspoon pepper
2 tablespoons lemon juice
1 lb extra-large shrimp, peeled and deveined

For sauce
1 tablespoon vegetable oil
1 medium onion, chopped
1 small zucchini, quartered lengthwise, then cut into bite-size pieces
3 garlic cloves, minced
1 tablespoon minced fresh ginger
1/2 teaspoon pepper
1 teaspoon salt
2 teaspoons ground coriander
1/2 teaspoon turmeric
1 teaspoon yellow curry powder
1 (14.5 oz) can diced tomatoes, undrained
1 can (5.5 oz) unsweetened coconut milk

Fresh cilantro, minced
Cooked basmati rice

In a bowl or plastic food storage bag, toss the shrimp with the marinade ingredients. Allow to marinate for 15 minutes.

While the shrimp is marinating, heat the oil in a medium size pot. Add the onion and zucchini, and cook for 2 or 3 minutes. Stir in the ginger, garlic, pepper, salt, coriander, turmeric and curry powder.

Continue to cook over medium heat until the onion is translucent, another 2 minutes. Add the tomatoes with juices and stir well. Cook for about a minute, then add the coconut milk. Stir and bring to a boil. Cook for 5 minutes. Add the shrimp with the accumulated juices from the marinade and cook for another 5 minutes or until the shrimp is pink and cooked through.

Serve over hot rice garnished with cilantro.
Pin It!

Thursday, January 21, 2016

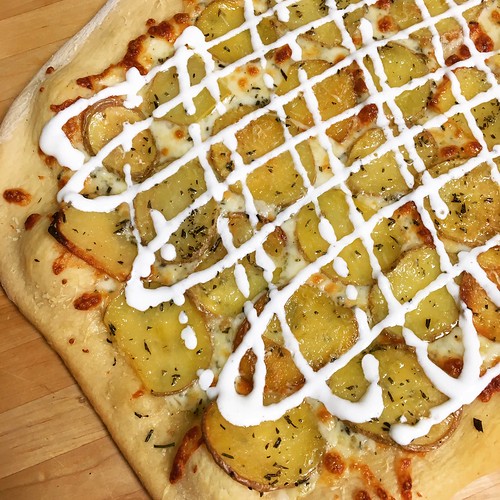
Restaurant Knockoff: Roasted Potato and Rosemary Pizza

There's a place near my house called Jules Thin Crust. It's a cross between pizza and a flatbread, loaded with all sorts of delicious toppings made with fresh, organic ingredients. We love going there in the warm months when we can grab a few slices and sit on their outdoor patio.

Roasted potato and rosemary pizza

I finally got around to harvesting my rosemary recently and decided to try to recreate one of our favorites from Jules - the Veggie #3: sliced roasted organic potatoes, sour cream, parmesan, rosemary, scallions, mozzarella. I have to say, my homemade version was spot on. So, so good. We inhaled it and it even reheated well the next day for lunch.

Roasted Potato and Rosemary Pizza
Inspired by Jules Thin Crust

3-4 medium Yukon gold potatoes, scrubbed clean
olive oil
4-6 sprigs fresh rosemary, leaves finely minced
garlic salt
1 lb. pizza dough
flour, for dusting as you roll out the dough
grated pecorino cheese
2 cups grated mozzarella cheese
sour cream
half-and-half or milk
scallions, finely chopped (optional)

Preheat the oven to 350 degrees.

Slice the potatoes about 1/4-inch thick. Drizzle a large baking sheet with about 1 tablespoon olive oil. Arrange the potato slices on the baking sheet. Drizzle with more oil, about half the rosemary and a good sprinkling of garlic salt. Place the baking sheet in the oven and cook for 20 minutes.

Once the potatoes are done, remove from the oven and set aside until you're ready to top the pizza. Place a pizza stone on the middle rack of your oven and increase the oven temperature to 500 degrees.

Sprinkle a square of parchment paper the size of your pizza stone with flour and roll the dough into a 14-inch round. Top with some grated Pecorino cheese and then the mozzarella. Arrange the potato slices on top of the cheese, then sprinkle with the remaining rosemary and some more garlic salt.

Transfer the parchment paper to the preheated baking stone and bake for 10-12 minutes or until bubbling and golden brown.

While the pizza is cooking, put some sour cream into a squeeze bottle and thin it with half-and-half or milk. When the pizza is done cooking, remove it from the oven and drizzle with the sour cream sauce. Top with freshly chopped scallions, if desired.

Pin It!

Friday, January 08, 2016

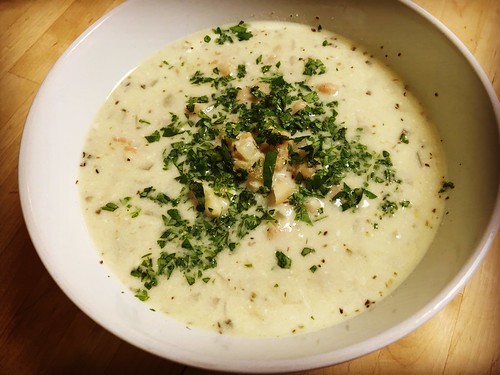
Creamy White Chicken Chili

You know how I've always claimed not to be a soup person? Well...times have changed. I don't know what happened, but sometime recently I realized that soup is pretty good. Delicious even. These days I ::gasp:: find myself searching for soup or stew recipes when I'm making my meal plan. What's come over me?

I printed out this recipe for Creamy White Chicken Chili years ago and never made it because, soup. We ended up buying a lot of chicken at the store recently so I figured what the heck, I'll give it a try.

Creamy white chicken chili

Please forgive the "it's winter and I don't have natural light to take good photos" photo above and just trust me - this is one delicious soup, errr, chili. SP wasn't convinced it was chili (he said chili is supposed to be tomato-based, and I don't necessarily disagree) but this was still delicious.

We used tortilla chips to scoop up the chicken and beans, or just dunked them in, and for some reason that really hit the spot. And the best part - it was incredibly simple to make. Definitely an easy weeknight meal.

I was looking at Mel's blog and some of the comments said they served it with her cornbread with fluffy honey butter, so I might do that next time, if I'm feeling adventurous.

Creamy White Chicken Chili
Mel's Kitchen Cafe
Serves 6

1 tablespoon oil
1 pound boneless, skinless chicken breasts, cut into 1/2-inch cubes
1 medium onion, chopped
2 cloves garlic, finely minced or grated
2 cans (15 1/2 ounces each) Great Northern Beans, rinsed and drained
1 can (14 1/2 ounces) chicken broth
2 cans (4 ounces each) chopped green chilies (if you like less kick, add just one can)
1 teaspoon salt
1 teaspoon ground cumin
1 teaspoon dried oregano
1/2 teaspoon pepper
1/4 teaspoon cayenne pepper (optional)
1 cup sour cream
1/2 cup heavy whipping cream
Fresh cilantro, for garnish
Grated Monterey Jack cheese, for garnish

Heat the oil in a large Dutch oven over medium-high heat. Add the chicken in a single layer and leave it alone for 1-2 minutes to allow it to brown. Stir, then add the onion and garlic. Cook until the chicken is no longer pink, about 3-5 more minutes.

Add the beans, chicken broth, chilies and seasonings. Bring to a boil. Reduce heat, then simmer (uncovered) for 30 minutes.

Remove from the heat and stir in the sour cream and heavy cream. Serve, topping each bowl with fresh cilantro and grated cheese, if desired. This is especially good served with tortilla chips.
Pin It!

Tuesday, November 17, 2015

Chicken Curry with Potatoes, Carrots and Chickpeas

I love a good one-pot meal and lately I've been really into curries. I think it's because we discovered coconut milk was safe for Baby Girl. Or maybe it's because we can't get enough of the buttered naan I serve alongside. Whatever the reason, I've been wanting to make my friend Chelsea's chicken curry recipe for a while now and I finally put it on the menu this week.

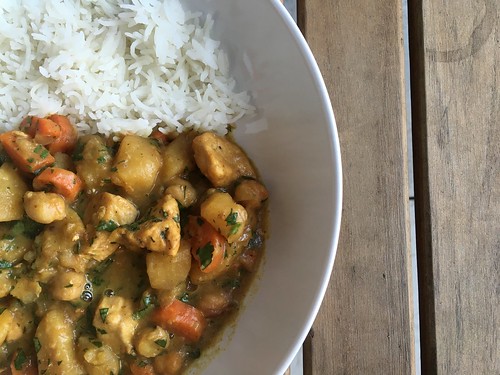
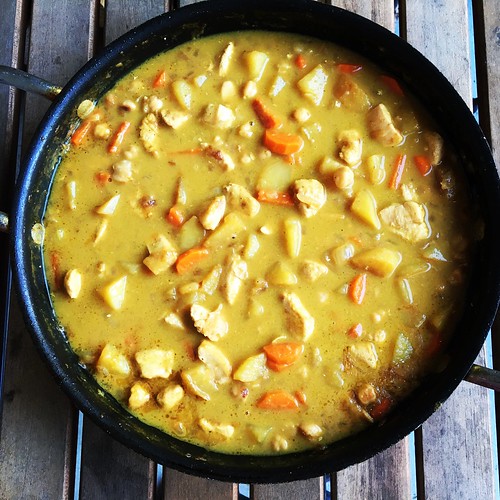
Chicken curry with potatoes, carrots and chickpeas

This is one of those meals that is so versatile you could add whatever veggies you like, or whatever is lurking in your crisper drawer. Don't like carrots? Leave them out. Have some cauliflower approaching it's birthday? Add it in. Vegetarian? Leave out the chicken or sub in some tofu and switch to vegetable broth. The sauce is what makes this so good, so use your imagination.

Chicken curry with potatoes, carrots and chickpeas

The sauce is the best part of any curry, in my humble opinion, so I opted not to thicken this. If you prefer a thicker curry, add some cornstarch during the final simmer.

Chicken Curry with Potatoes, Carrots and Chickpeas
Recipe from my friend Chelsea

2 tablespoons olive oil, divided
2 chicken breasts or 4 chicken thighs, cut into bite-size pieces
salt and pepper
1 medium onion, minced
3 garlic cloves, minced or grated
2 tablespoons grated fresh ginger
3 teaspoons yellow curry powder
2 cups chicken broth, divided
4-5 small gold potatoes, cut into bite-size pieces
3 carrots, cut into bite-size pieces
1 can chick peas, drained and rinsed
Juice of one lime
1 teaspoon fish sauce
1 can coconut milk
Optional: sriracha or hot sauce, to taste
Minced cilantro, for serving

Heat 1 tablespoon of olive oil in a large skillet over medium-high heat. Season the chicken with salt and pepper, then add to the hot skillet. Cook until browned but not cooked through, about 5 minutes. Remove the chicken to a plate and set aside. Add the onion, garlic and ginger to the skillet. Season with a little salt and pepper, then cook until the onions are softened.

Add the other tablespoon of olive oil and the curry powder. Let the curry powder toast for about one minute, then add the potatoes, carrots, and chick peas. Add 1/2 cup of chicken broth, then stir to scrape up any browned bits from the bottom of the pan.

Cover and cook until the potatoes and carrots are soft, about 10 minutes. Add the rest of the chicken broth and scrape the bottom of the pan again. Bring to a boil and simmer for another 5 minutes.

Add the chicken and any accumulated juices, coconut milk, fish sauce, lime juice, and sriracha (if using) to the pan. Simmer until the sauce has thickened slightly (it will continue to thicken as it sits).

Serve over basmati or jasmine rice topped with chopped fresh cilantro.
Pin It!

Friday, November 13, 2015

Braised Pork Ribs with Rigatoni

Another meal prepared by SP for Sunday dinner with my parents. He loves cooking this time of year because he's really into long-simmering, hearty, comfort food. We're big fans of Lidia Bastianich, so he turned to one of her cookbooks when deciding what to make. He chose Braised Pork Ribs with Rigatoni because we had a rack of ribs in the freezer that needed to be used up, but when he read through the recipe he realized we'd need more ribs. D'oh. Oh well, we'll just have to make these again.

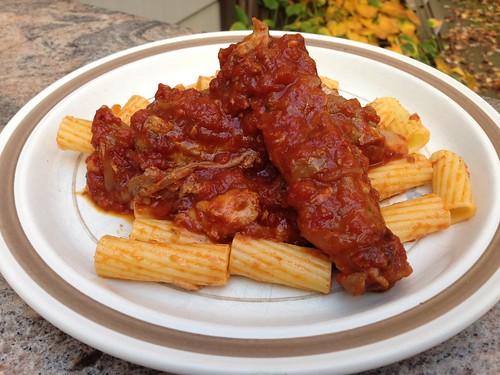
Pork rib ragu

He made this while Baby Girl and I were away for the weekend, so we didn't get to smell the delicious aroma throughout the house as it cooked. But the end result...man, oh man. The meat was so tender you could just lightly pull on the bone and it would slide right out. Delicious. Comforting. Hearty. Everything you want in a Fall/Winter meal.

SP had to make two adjustments to the recipe - we can't easily find San Marzano tomatoes so he just used two cans of crushed tomatoes. He also couldn't find pickled cherry peppers, so he used banana pepper rings. Both worked just fine.

Braised Pork Ribs with Rigatoni
As seen in Lidia’s Italian-American Kitchen

One whole rack (about 4 pounds) pork spare ribs
salt and freshly ground pepper
1/4 cup extra virgin olive oil
2 large yellow onions, sliced (about 3 cups)
8 garlic cloves, peeled
6 pickled cherry peppers, stemmed, seeded and quartered (can also use mild banana pepper rings)
Two 35-ounce cans plum tomatoes (San Marzano) with their liquid, seeded and crushed (or 2 28-ounce cans crushed tomatoes)
2 bay leaves
6 sprigs fresh thyme
2 to 3 cups hot water, or as needed
1 pound rigatoni
1/4 cup chopped fresh Italian parsley
2/3 cup freshly grated Parmigiano-Reggiano cheese, plus more for serving

Cut the rack of spare ribs between the bones into single ribs (or ask your butcher to do this for you.) Season the rib pieces with salt and pepper. Heat the olive oil in a large, heavy braising pan over medium heat. Add as many of the ribs as will fit without touching. Cook, turning occasionally, until browned on all sides, about 10 minutes. Remove the ribs, drain on a baking sheet lined with paper towel. Repeat with the remaining ribs. Adjust the temperature throughout the browning, so the fat in the pan is sizzling, but the pieces of pork that stick to the pan don’t burn.

Pour off all but about 4 tablespoons of fat from the casserole. Add the onions, garlic and cherry peppers and cook, stirring, until the onions are wilted and caramelized, about 4 minutes. Stir in the tomatoes, bay leaves and thyme. Bring to a boil, scraping the pan to loosen the brown bits stuck to the bottom. Tuck the spare ribs into the tomato sauce, season lightly with salt and pepper and bring to a boil. Adjust the heat to simmering and cook, turning the spare ribs in the sauce occasionally, until the ribs are fork-tender, about 2 hours. Ladle some of the hot water into the casserole from time to time as necessary to keep the ribs covered with liquid.

To serve: When the ribs are almost tender, cook pasta according to package directions.

Drain the pasta, return it to the pot and spoon in enough of the spare rib sauce to generously coat the pasta. Toss in the parsley and bring the sauce and pasta to a boil, tossing to coat the pasta with sauce. Check the seasoning, adding salt and pepper if necessary. Remove the pot from the heat and stir in 2/3 cup grated cheese. Transfer the pasta to a warm platter or individual plates and top with the spare ribs. Spoon a little of the remaining sauce over the pasta and serve immediately, passing additional sauce and grated cheese separately.
Pin It!

Monday, November 02, 2015

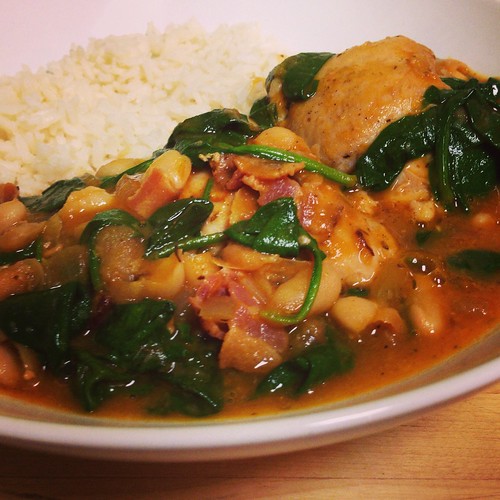
Chicken Stew with White Beans and Spinach

I started this post more than a year ago. I feel terrible for not sharing the recipe sooner, especially for such a superficial reason. See, I didn't like the picture I took. Silly, right? I hope you can forgive me.

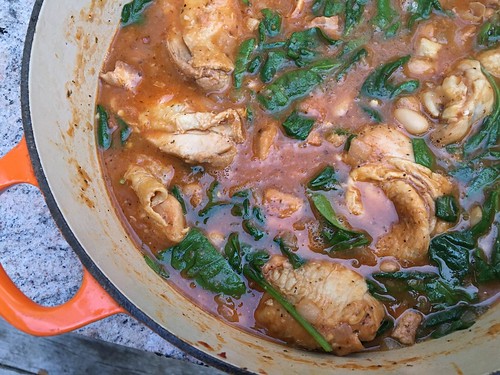
Chicken stew with white beans

Winter is coming. And no, I don't mean that as a Game of Thrones reference. It may not be too bad now, but the cold and the dark are coming soon, along with snow and ice. This is my least favorite time of year. But this Chicken Stew with White Beans and Spinach is comfort in a bowl. I will probably make this once a month until April because it's just that good.

Untitled

^^^ That's the picture I took a year ago and didn't like.

SP made this last night for Sunday dinner and doubled the recipe. We served it over rice with crusty buttered bread for dipping. The rice was the perfect accompaniment - I highly recommend serving it that way. The rice soaks up the sauce beautifully and, come on, rice and beans are a match made in heaven. Doubling the recipe worked well for 4 adults and 1 child. We all seriously loved it and, bonus, there were plenty of leftovers for lunch. I imagine this would freeze well if you wanted to portion out meals for later.

This is truly outstanding and I can't thank Elly enough.

Chicken Stew with White Beans and Spinach
As seen on Elly Says Opa!

3 slices bacon, chopped
4 chicken thighs (bone-in, if you can find it, but boneless/skinless are fine)
1 small onion, finely chopped
2 cloves garlic, minced
2 tablespoons tomato paste
1/2 cup dry white wine
1 cup chicken broth
a couple dashes of crushed red pepper
1 bay leaf
1 teaspoon oregano
1 can cannellini or other white beans, drained and rinsed
4 cups fresh spinach
salt and pepper
Cooked rice and crusty bread, for serving

Cook the bacon in a Dutch oven until crispy. Remove with a slotted spoon and set aside. Leave the fat in the pot.

Sprinkle the chicken with salt and pepper. Over medium-high heat, sear the chicken on both sides. Remove from the pot.

Add the onions to the pot and cook until tender, about 10 minutes. Stir in the garlic and once the garlic becomes fragrant, stir in the tomato paste. Cook for 1 minute.

Add the wine to deglaze, scraping up any brown bits from the bottom and sides of the pot. Cook for about 2 minutes, then add the chicken broth, bay leaf, oregano, salt and pepper to taste. Bring to a boil. Add the chicken back to the pot. Cover, reduce heat and simmer for 15 minutes.

Meanwhile, mash about 1/3 of the can of beans with a fork or the back of a wooden spoon. You don't want a paste, but breaking up some of the beans will improve the texture of the final dish. After the chicken has simmered for 15 minutes, add the whole beans and the mashed beans into the pot. Cover and simmer for an additional 15 minutes or until chicken is cooked through.

Add the bacon and the spinach to the pot. Cook just until spinach is wilted, about 2 minutes. Serve over rice with some crusty bread to sop up the sauce.
Pin It!

Thursday, October 15, 2015

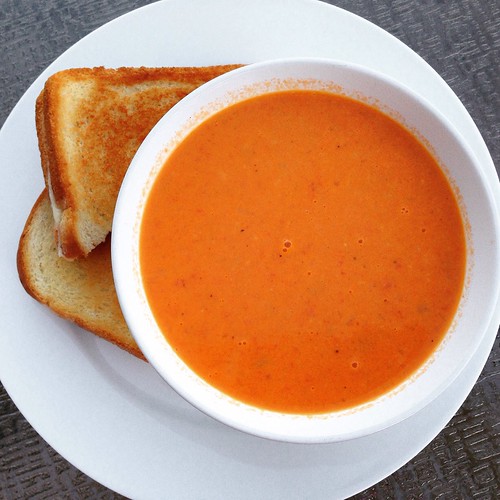
Roasted Tomato Soup

I'm not a soup person. Actually, I'm not a hot liquids person. I don't drink coffee or tea, I don't really like hot chocolate and I can take or leave soup. On second thought, I take that back. I like soup in small amounts, as a side dish or appetizer, but soup as a main dish doesn't do it for me. There are very few soup recipes I'll make more than once.

Roasted tomato soup

But this roasted tomato soup from my friend Cassie (who appears to have stopped blogging - what's up with that, Cassie?) is definitely going on the short list. Not only is it easy to make, it's delicious. The tomato flavor really shines and roasting the tomatoes gives them a wonderful depth of flavor. I served it with grilled cheese (duh) and salad and enjoyed every bite.

Roasted Tomato Soup
As seen on Cassie Craves, adapted from Tyler Florence

2 1/2 pounds Roma tomatoes
Salt and freshly ground black pepper
Olive oil
4 tablespoons butter
1 large onion, sliced
2 stalks celery, diced
2 bay leaves
3 cloves garlic, minced
1 quart chicken stock
1/2 cup half and half

Preheat the oven to 400 degrees.

Wash the tomatoes, remove the cores and cut them in half (or into quarters if they're particularly large). Spread the tomatoes onto a baking sheet and drizzle a few tablespoons of olive oil. Season with salt and pepper. Toss to coat all the tomatoes evenly, then roast for 30 minutes until caramelized. Remove from the oven and allow to cool. Remove the tomato skins and discard. Set aside until ready to make the soup.

Melt butter in a Dutch oven over medium-high heat. Add the onion, celery and bay leaves. Season with salt and pepper, and cook until onions are translucent and starting to brown, about 10 minutes. Stir in the garlic and cook until fragrant, about 30 seconds.

Add the tomatoes, along with the chicken stock. Bring to a boil, then reduce the heat and simmer for 15 to 20 minutes until liquid has reduced by a third. Remove the bay leaves and discard.

Use an immersion blender to puree the soup until smooth. You can also use a regular blender or food processor to do this - just be careful not to overfill either since the soup will be hot. Over low heat, add the half and half. Cook for 5 minutes, then taste the soup and add more salt and freshly ground black pepper, if necessary.
Pin It!

Thursday, October 08, 2015

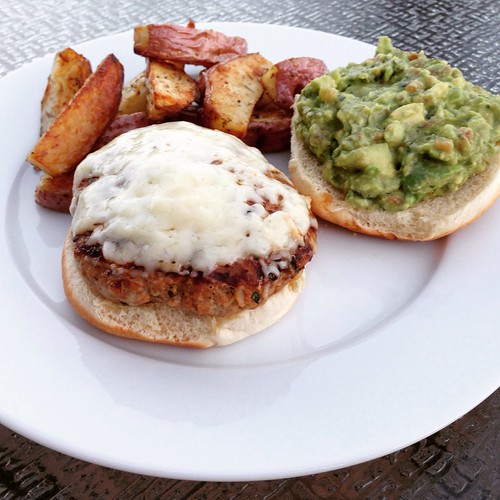
Turkey Burgers with Cheddar and Guacamole

These turkey burgers were a happy accident. See, the plan had been to make my friend Jaida's Turkey Tikka Burgers. I've been thinking about them since she posted the recipe and I couldn't wait to try them. Unfortunately, both the curry paste and mango chutney available in our supermarket weren't safe for Baby Girl since they might contain nuts. Phooey.

Turkey burger with guacamole

Not to be deterred, I looked for a replacement recipe and remembered that I'd been wanting to try this recipe for Jalapeño Cheddar Chicken Burgers with Guacamole that a lot of my favorite bloggers made a couple of years ago. I happened to have everything but the jalapeno, which was fine because Baby Girl doesn't like spicy food.

These were absolutely outstanding. SP said, "this couldn't possibly be a turkey burger. Turkey burgers are dry and flavorless. This is incredible." And Baby Girl gave them two thumbs way up as she inhaled her dinner. I only had one pound of turkey and I graciously allowed SP to take the leftover patty to work today (grumble, grumble) but that just means I need to make them again soon.

Turkey Burgers with Cheddar and Guacamole
Slightly modified from What's Gabby Cooking, seen on Annie's Eats

For the burgers:
1 1/2 lbs. ground turkey (or chicken)
1/2 cup onion, minced
1/3 cup fresh cilantro, minced
2 cloves garlic, minced
1 teaspoon ground cumin
1 teaspoon paprika
Juice of 1/2 small lemon
1/3 cup shredded cheddar cheese, plus more for topping
1/2 teaspoon kosher salt
1/2 teaspoon pepper

To serve:
Burger buns
Guacamole*
Salsa

To make the burgers, combine all the ingredients in a large bowl and mix lightly until evenly combined. Form the mixture into 4-5 patties.

Preheat an outdoor grill and oil the grates. Or, you can cook these on a grill pan or non-stick skillet indoors. Coat whichever pan you're using with cooking spray and heat over medium-high heat.

Cook the patties 3-4 minutes per side, flipping once. A few minutes before the burgers are finished cooking, top with shredded cheddar cheese. Remove the burgers to a plate and let rest a few minutes before serving.

Place one burger on each bottom bun. Put guacamole and/or salsa on the top bun, or on the burger directly, and serve.

*Here's how I made the guacamole for this recipe:

2 ripe avocados
Juice from the other half of the lemon used in the burgers
Minced cilantro
Salt and pepper
A few spoonfuls of prepared salsa

Cut each avocado in half and scoop the flesh into a bowl. Squeeze the lemon juice over the avocado and toss to coat. Add as much cilantro as you like then season with salt and pepper. Add some salsa and stir to combine. Taste and season as needed.
Pin It!

Wednesday, September 16, 2015

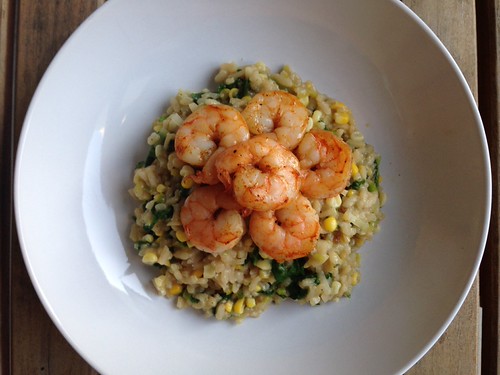
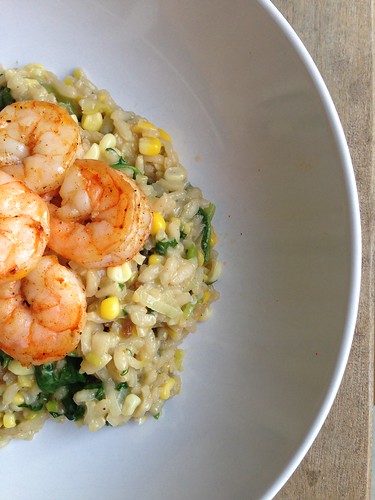
Sweet Corn Risotto with Roasted Shrimp

We all love risotto. I see it as a blank slate, the perfect starting point for whatever combination of flavors you happen to want that day. I recently saw a recipe for Sweet Corn Risotto on Iowa Girl Eats and figured I better make it ASAP before corn season is over.

Shrimp and corn risotto

I've been on a shrimp kick lately, made possible by a sale on frozen shrimp at Acme. I love Ina Garten's method for roasting shrimp - it's so easy and flavorful. I threw in half a bag of baby spinach once the risotto was done for a little color and extra veggies and dinner was served.

Shrimp and corn risotto

This was wonderful with fresh corn, but I imagine I'll make this again multiple times this winter with frozen corn and it will be just fine. Don't let the fact that corn season is over deter you from trying this recipe.

Sweet Corn Risotto with Roasted Shrimp
Risotto from Iowa Girl Eats, roasted shrimp from Ina Garten

2 large leeks, white and light green parts only, sliced in half then into thin half moons
6 cups chicken broth
3 tablespoons butter
2 cups corn kernels (from 3 ears, you can also use frozen corn)
2 cloves garlic, minced
salt and pepper
2 tablespoons extra virgin olive oil, divided
1 large shallot or 1/2 small onion, chopped
1-1/2 cups arborio rice
1/2 cup dry white wine
1-lb shrimp (at least 21-25 or 26-30 count, you can go larger if you want)
1/2 cup freshly grated Parmesan cheese
1/2 bag of baby spinach (3-4oz), roughly chopped

Important note: You need to soak the leeks before you start cooking. After the leeks have been cut as directed above, place them in a bowl of water for at least 30 minutes. Swish them around a few times, making sure to separate all the pieces. Leeks are VERY sandy and you don't want grit in your risotto. After they've been soaking for 30 minutes, drain in a colander and rinse with fresh water.

Bring chicken broth to a boil in a saucepan then turn heat down to low to keep warm.

Melt 2 tablespoons butter in a large skillet over medium heat then add corn, leeks, and garlic, season with salt and pepper. Saute until leeks are tender, about 10 minutes. Remove mixture to a bowl then set aside.

Melt remaining tablespoon butter in 1 tablespoon olive oil in the skillet then add the shallots and saute until starting to turn tender, 2 minutes. Add rice then stir for one minute. Add wine then stir until nearly absorbed by the rice. Add two ladlefuls of chicken broth then stir until nearly absorbed before adding another two ladlefuls. Repeat until the rice is creamy and al dente, 25-30 minutes. Be sure to taste the risotto when you're nearing the end of the chicken broth, in case you need more.

While the risotto is cooking, preheat the oven to 400 degrees F. Peel and devein the shrimp. Place them on a sheet pan with 1 tablespoon olive oil, salt, and pepper. Toss to coat, then spread them in an even layer. Roast for 8 to 10 minutes, just until pink and firm and cooked through.

Remove the risotto from the heat then stir in the Parmesan cheese, corn and leek mixture, and the spinach. Season with salt and pepper to taste then serve topped with the roasted shrimp.

Pin It!

Friday, September 11, 2015

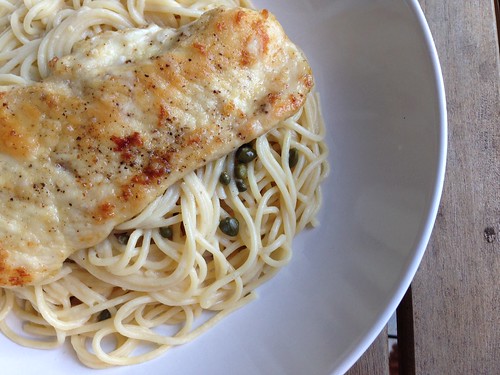
Chicken Piccata with Lemony Noodles

My family loves a good chicken and pasta dish so this recipe for Chicken Piccata with Lemony Noodles was right up our alley. Simple yet bold flavors from the lemon juice and the capers really make the dish.

Chicken piccata

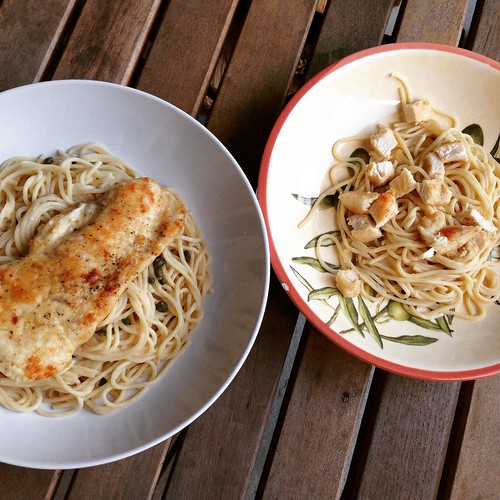
I rarely make a full pound of pasta anymore and it didn't sound like there would be enough sauce, but I went ahead and made the whole box (actually, since I buy Dreamfields pasta, it was 13.25-oz) and there was too much pasta and not enough sauce. I increased the liquid below and decreased the pasta to 8 ounces. I think that will be a better ratio since hot pasta is like a sponge and soaks up all the liquid.

Chicken piccata

And one more photo because Baby Girl loves it when I photograph our plates together.

Chicken Piccata with Lemony Noodles
As seen on So Tasty, So Yummy

3 boneless, skinless chicken breasts
1/2 cup flour
1/2 teaspoon salt
1/2 teaspoon pepper
2 tablespoons butter
2 tablespoons olive oil
2 cloves garlic, minced
1 cup chicken broth
1/2 cup dry white wine
Juice of 1 lemon
1 cup half and half, plus more if needed
1 tablespoon drained capers
8 ounces spaghetti, angel hair or linguine

Slice each chicken breast in half lengthwise. In a food storage bag, combine the flour, salt and pepper. Add the chicken, seal the bag, and toss to coat.

Heat the butter and oil in large skillet over medium heat. Add the chicken and cook until golden brown, about 3 minutes per side. Remove the chicken to a plate.

Add the garlic and sauté for 30 seconds. Add the broth, wine and lemon juice, whisk and scrape the bottom of the skillet. Cook until the sauce is reduced by half. Add salt and pepper to taste. Reduce the heat to low, stir in the cream and capers.

While the chicken and sauce are cooking, cook and drain the pasta. Toss the drained noodles with the sauce. Serve with slices of the chicken on top.
Pin It!

Tuesday, September 08, 2015

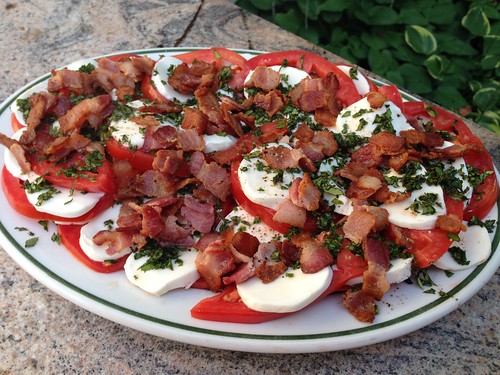
Caprese Salad with Warm Bacon Dressing

Raise your hand if you're mourning the end of summer. I know I am. I love everything about summer - the warmth, the sun setting later, the pool, the beach, kids playing in the backyard before bed. I'm not one of those people who looks forward to fall with its cooler temps, sweaters and boots. Give me t-shirts and flip flops any day.

But, alas, summer is winding down. The good news is, this is the time when Jersey tomatoes are still at their best and there's no better way to showcase them than in caprese salad. I'm not usually one to mess with perfection. Caprese, with its creamy fresh mozzarella and red ripe tomatoes sprinkled with basil is my idea of a perfect summer meal. I love to eat it plain or tossed with pasta.

Caprese with warm bacon dressing

Then I saw this recipe for Caprese Salad with Warm Bacon Dressing. I was skeptical at first. Bacon on caprese? With red wine vinegar? Admittedly, I'm not a fan of balsamic on caprese, so I was hesitant to try this. But I'm so glad I did. We had this with my parents for Labor Day dinner and we were fighting over it. The crispy bacon is the perfect contrast to the mozzarella and tomatoes and the warm dressing, with just the right amount of tang from the red wine vinegar, is addictive.

Caprese Salad with Warm Bacon Dressing
As seen on Fake Ginger, adapted from Southern Living

2 1/2 pound beefsteak tomatoes, cut into 1/2-inch slices
8 ounces fresh mozzarella, cut into 1/2-inch slices
1/2 cup fresh basil leaves, finely minced
6 thick bacon slices, chopped into bite-size pieces
2 tablespoons red wine vinegar
1/2 teaspoon salt
1/2 teaspoon pepper

Arrange the tomatoes and mozzarella on a serving platter. Sprinkle with the minced basil.

Saute the bacon pieces in a large skillet over medium heat until crisp. Remove the bacon pieces to a paper towel-lined plate. Transfer 2 tablespoons of the bacon fat to a small bowl. Let stand for 1 minute, then whisk in the vinegar, salt, and pepper. Add the bacon pieces to the dressing and stir to combine. Drizzle the dressing over the salad right before serving.
Pin It!

Friday, September 04, 2015

Recipe Redo: Texas BBQ Chicken Quesadillas

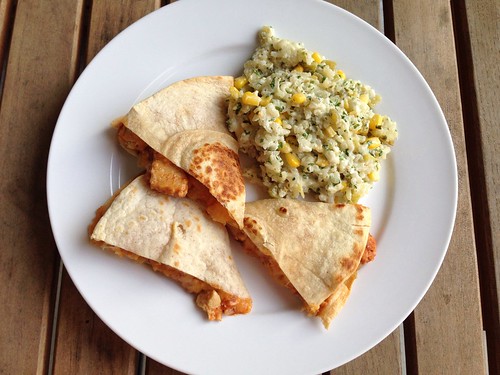
I've been making these Texas BBQ Chicken Quesadillas for years but I've never blogged them properly, with an actual recipe and a decent photo. I made them for dinner tonight and figured now was as good a time as any, seeing as some Facebook friends were asking for the recipe.

BBQ chicken quesadillas

Use your favorite BBQ sauce for the chicken. We like Dinosaur sauce.

Texas BBQ Chicken Quesadillas
As seen on Allrecipes

2 tablespoons oil
2 onions, sliced into thin rings
1 tablespoon honey
2-3 chicken breasts, diced
1/2 cup BBQ sauce
cooking spray
4 10-inch (burrito size) flour tortilla
shredded Mexican cheese

Preheat the oven to 350. Line a baking sheet with foil.

Heat 1 tablespoon of the oil in a pan over medium high heat. Add the onions and cook until they begin to caramelize, stirring often, about 20 minutes. Turn the heat down if the onions are browning too quickly. You want them to be soft and deeply brown. Mix in the honey and stir to combine. Remove the onions to a bowl and set aside.

Put the remaining 1 tablespoon oil in the pan and add the chicken. Cook over medium high heat until cooked through, about 5 minutes. Off heat, stir in the BBQ sauce to evenly coat the chicken.

Coat a griddle pan or large, flat skillet with cooking spray and add one of the tortillas. Heat over medium heat until hot, then add one of the tortillas. Cook until the tortilla is lightly browned on both sides. Remove the tortilla to a cutting board and repeat with the other 4 tortillas.

While the other tortillas are cooking, start assembling the quesadillas. Lay one tortilla flat and add some shredded cheese to one half. Top with a quarter of the onions and a quarter of the chicken. Add some more cheese, then fold the tortilla in half. Place on the prepared baking sheet. As the other tortillas brown, assemble in the same way.

Once all the quesadillas have been assembled, put the baking sheet in the oven for about 10-15 minutes to melt the cheese.
Pin It!

Thursday, August 20, 2015

Lemon Parsley Turkey Meatballs in Curry Sauce over Coconut Rice

I've become obsessed with meatballs.

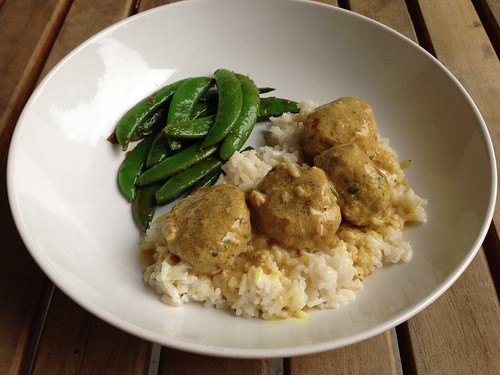
Turkey meatballs coconut rice

My friend, Jaida, posted this recipe for Lemon Parsley Turkey Meatballs with Lemon Coconut Curry Sauce and Lemon-Coconut Rice (sorry, Jaida, I had to shorten the name) last month and I couldn't wait to make them. She came up with this one all on her own, which is pretty amazing if you ask me.

We're also obsessed with coconut rice in this house and these delicious, light meatballs in a drinkably good curry sauce were the perfect thing to serve on top. I decided to make a few changes to Jaida's original recipe to suit our tastes and it did not disappoint. I'm already plotting when I can make it again.

Lemon Parsley Turkey Meatballs in Curry Sauce over Coconut Rice
Slightly modified from Sweet Beginnings

Lemon-Parsley Turkey Meatballs
1 lb ground turkey
Zest and juice of 2 medium-large lemons
1/4 cup parsley leaves, chopped
Salt and pepper, to taste
1/3 cup Panko bread crumbs
1 egg
1 tablespoon olive oil

Coconut Rice
1 tablespoon butter
1 cup long-grain rice
1 cup coconut milk
1 cup water

Curry Sauce
1 can, plus what's left in the can used for the rice, coconut milk
Juice of 1 large lemon
2 teaspoons yellow curry powder
Salt and pepper, to taste

In a large bowl, combine all of the meatball ingredients, except the olive oil. Gently mix with your hands until well combined. Take about 2 tablespoons of the meat at a time and form into balls. Place each meatball on a plate and repeat with all the meat. Heat 1 tablespoon of olive oil in a large skillet over medium-high heat and swirl around to coat the bottom of the pan. Once hot, add the meatballs so that they are not touching. Cook for 2-3 minutes per side, until all sides are browned. Reduce the heat to medium.

While the meatballs are cooking, heat 1 tablespoon of butter over medium heat in a large saucepan. Once the butter is melted, add the rice and stir to coat each grain evenly. Toast the rice for a few minutes, until you start to see brown spots. Add the coconut milk and water and bring to a boil. Reduce the heat, cover, and let simmer for 20 minutes. Remove from heat and let sit while you finish the meatballs and sauce.

Put all the sauce ingredients in a small saucepan over medium heat. Heat, stirring occasionally, while the meatballs cook. Once the meatballs have been browned, carefully pour the sauce over the meatballs. Simmer for 5-10 minutes, until the sauce thickens slightly and the meatballs are cooked all the way through.

Serve the meatballs and sauce over the rice.

Pin It!

Thursday, July 23, 2015

Grilled Ciabatta Bread Salad

My friend Mary Ellen made this Grilled Ciabatta Bread Salad for us twice before I finally got off my butt and made it myself. It's one of SP's favorite salads so he's been bugging me to make it.

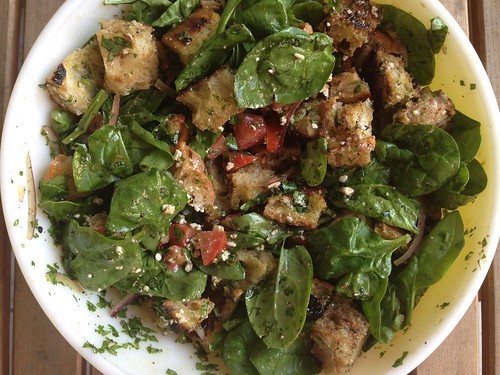
Grilled bread salad

We have a charcoal grill, which makes it harder to control the heat of the fire. My bread got pretty blackened so I had to cut some sections off (I really dislike overly charred food), but that was no big deal. This made a TON of salad, way more than the three of us could eat, so next time I'll cut the recipe in half or just make it when we have company.

Grilled Ciabatta Bread Salad
As seen on Mary Ellen's Cooking Creations

1/2 small red onion, thinly sliced
1 small bunch cilantro, chopped
1 cup good olive oil, divided
1 loaf ciabatta bread
1 6-oz bag baby spinach
2 tomatoes, chopped
blue cheese or feta crumbles, to taste

1/2 cup balsamic vinegar
Salt, pepper and oregano, to taste

Place onions, cilantro and 1/2 cup olive oil in a large bowl and toss together. Let marinate in the fridge while you grill the bread.

Slice the bread into two long halves. Spray or brush with cooking spray/olive oil, season with salt and pepper and grill until charred on both sides.

Let the bread rest until it's cool enough to handle, then chop into 1 inch pieces. Add bread cubes to the onion and cilantro mixture, along with the remaining 1/2 cup olive oil. Chill at least 30 minutes.

Before serving, add the tomatoes, spinach and cheese. Toss with the balsamic (start slowly and add to taste), salt, pepper and oregano to taste. Serve immediately
Pin It!