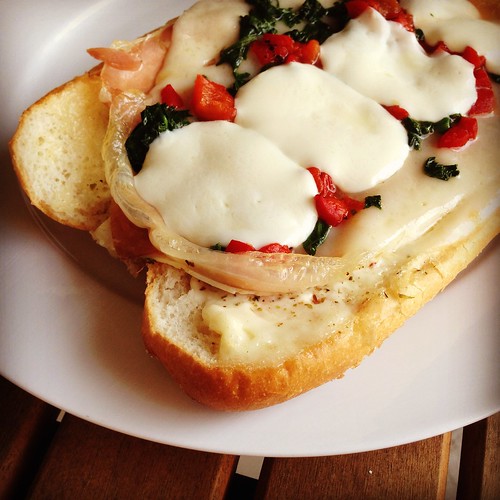
This sandwich. Oh, this sandwich. Nichole posted this recipe for Sarcone Deli's Junk Yard Special awhile back and I've had it on my short list to make. I've been trying to use up things I've squirreled away in my freezer, so when I found some prosciutto I'd been saving I knew I wanted to finally make this sandwich.
This was so, so worth the wait. Everything combines together beautifully to make one awesome sandwich. My only (minor) complaint is that the spinach gets lost in the flavor profile because of the roasted red peppers. I'd consider swapping out some of the peppers for sliced tomato next time, just so the spinach has a chance to shine through.
Junk Yard Special
As seen on The Cookaholic Wife, from Sarcone's Deli
4 hoagie rolls
1/2 cup mayo
2 tablespoons red wine vinegar
1/2 teaspoon dried Italian seasoning
1 tablespoon olive oil
1 8-oz bag baby spinach
salt and pepper
dash of nutmeg
16 slices prosciutto
16 slices deli turkey
8 slices provolone cheese
8oz fresh mozzarella, thinly sliced
1 cup minced roasted red peppers
fresh basil, shredded
Preheat the oven to 350. Line a baking sheet with foil.
Cut a slit into each roll lengthwise, leaving the bread hinged at one end. Mix the mayo, red wine vinegar and Italian seasoning together in a small bowl.
Heat the oil in a non-stick skillet over medium heat. Add a few handfuls of the spinach to the pan, turning to wilt the leaves. Season with salt and pepper and a dash of nutmeg. Add more leaves once the first batch of leaves are wilted enough that there's space in the pan. Cook until all the spinach is wilted. Set aside.
Spread some of the mayo onto each roll. Place 4 slices each of prosciutto and turkey on each sandwich. Add two slices of Provolone cheese, 1/4 of the mozzarella, 1/4 of the roasted red peppers, and 1/4 of the sauteed spinach to each sandwich. Sprinkle each sandwich with 1/4 of the fresh basil.
Place the sandwiches on the baking sheet and bake for 10 minutes or until the bread is crusty and the cheese is melted. Serve warm.
Pages
▼
Monday, July 21, 2014
Friday, July 18, 2014
Krispie Chocolate Chip Cookies
I needed a dessert for Fourth of July. I've had Stephanie's Krispie Chocolate Chip Cookies printed out for awhile, I even bought the Rice Krispies to make them awhile back, so I figured it was time to make them happen.
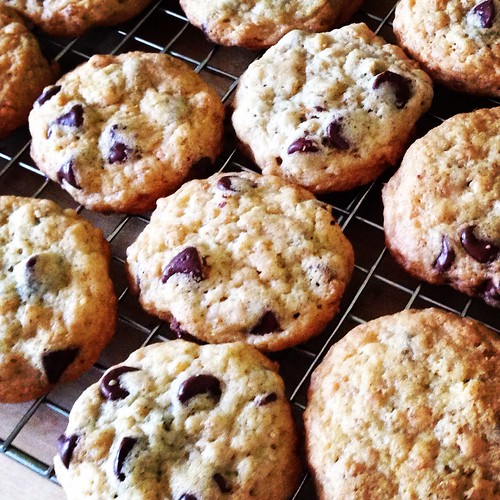
These cookies take some planning because you need to chill the dough twice before baking. I can't stand when cookies spread because the butter in the dough is too warm, so I appreciate taking the extra time to make sure these don't do that.
The Rice Krispies add an interesting texture to these cookies. Even after we finished the batch I still couldn't decide if I was a fan or not. Don't get me wrong, the cookies were delicious, but the cooked cereal gets chewy and I prefer a moist, cakey chocolate chip cookie rather than a chewy one. It didn't stop me from eating them, though. Wink, wink.
Krispie Chocolate Chip Cookies
As seen on Stephanie Cooks
1 1/4 cups all-purpose flour
1 teaspoons baking powder
1/2 teaspoon salt
1/2 teaspoon baking soda
1 stick unsalted butter, at room temperature
3/4 cup granulated sugar
1 large egg, at room temperature
2 teaspoons hot water
2 teaspoons vanilla
1 1/2 cups Rice Krispies
1 cup chocolate chips
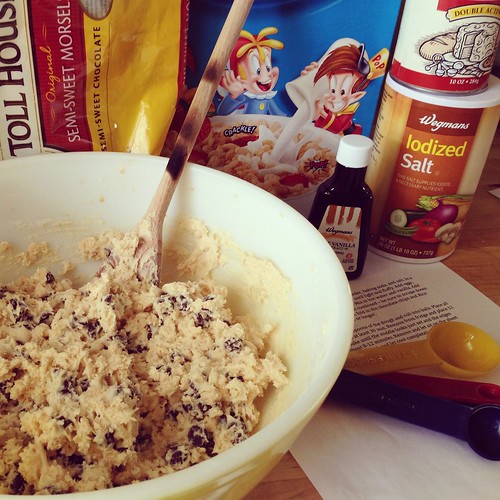
Whisk or sift the flour, baking powder, baking soda, and salt together. In a large mixing bowl, beat together the butter and sugar until light and fluffy. Add the egg, beating until just combined. Add the hot water and vanilla and beat until combined.
Add the flour mixture, in two batches, beating just until combined – be sure to scrape down the sides of the bowl. Using a wooden spoon, fold in the chocolate chips and Rice Krispies. Cover and refrigerate for 30 minutes or longer.
Scoop out 1 tablespoon of dough at a time and roll into a ball. Place all the dough balls on one baking sheet and chill at least 30 minutes.
Preheat the oven to 375 degrees.
Remove the dough from fridge and place 12 balls on a cookie sheet, evenly spaced apart. Bake until the middle looks just set and the edges begin to brown, about 8 minutes. Don't overcook. Remove and let sit on the baking sheet for 1 minute. Move the cookies to a wire rack and let cool completely. Repeat with the remaining dough.
Wednesday, July 16, 2014
Caprese Macaroni and Cheese
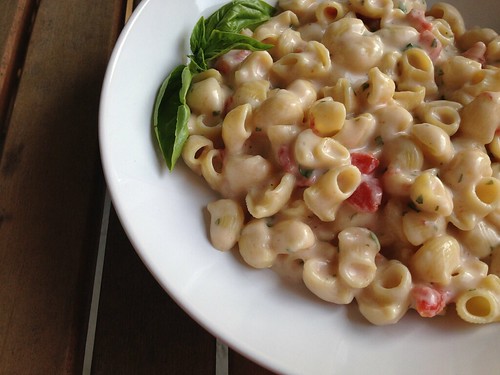
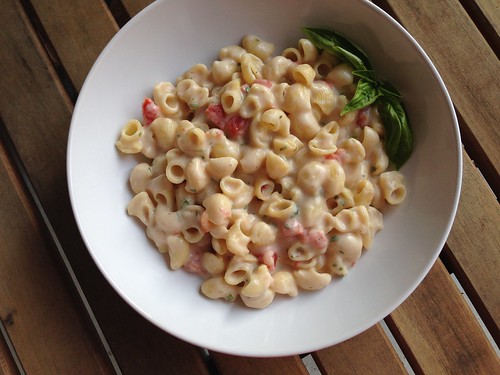
It's no secret that I love all things caprese. So when Stephanie posted this recipe for Caprese Macaroni and Cheese I was intrigued. Why had it never occurred to me to combine two of my favorite things into one dish?
This will come as no surprise, but this dish was outstanding. The gooey, cheesy mozzarella, the bright tomatoes and the fresh basil all worked so well with the creamy sauce. In an effort to make this a wee bit healthier I omitted the cream and upped the amount of milk. I also upped the amount of flour so the sauce would thicken. I used canned diced tomatoes, but if you've got tomatoes and basil in your garden I highly recommend using those instead. When I made this my basil plant hadn't started growing yet but thankfully my neighbors were overrun with basil and gladly shared some with me.
Caprese Macaroni and Cheese
As seen on Stephanie Cooks
1/2 pound elbows (or other short-cut pasta)
2 tablespoons butter
2 cloves garlic (I omitted)
2 tablespoons flour
1 1/2 cups whole milk
1/2 cup chicken broth
1 teaspoon garlic salt
Black pepper
1 1/2 cups shredded mozzarella cheese
1 cup diced tomatoes (fresh or canned)
minced fresh basil, to taste
Cook pasta according to package directions. Drain and place back in the pot.
In a large saucepan, melt the butter and garlic (if using), stirring well. Add the flour, mixing, until a paste forms. Slowly whisk in the milk, broth, garlic salt, and black pepper. Bring to a boil.
Remove the saucepan from the heat and stir in the mozzarella cheese, tomatoes and basil. Taste and season with salt and pepper, if needed. Add the cooked pasta, stirring, until covered in cheese sauce. Serve immediately.
Monday, July 14, 2014
Recipe Redo: Mexican Sour Cream Rice
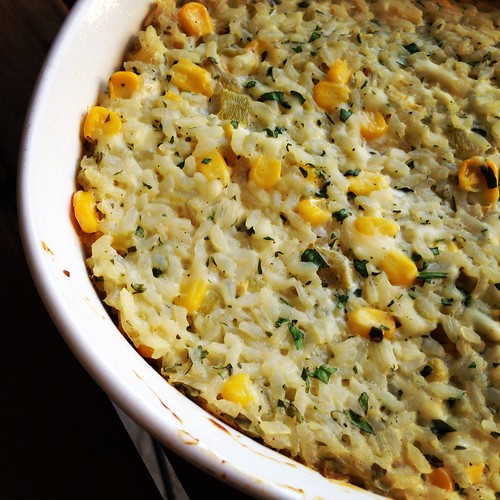
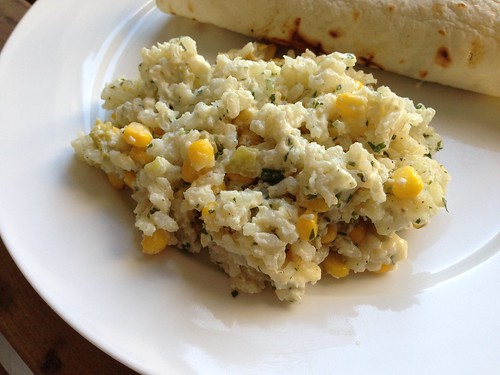
I've been making this Mexican Sour Cream Rice for years. I used to make it any time we had anything even slightly Mexican-inspired for dinner. It was definitely my go-to side dish.
I've been recommending the dish to friends a lot recently and I figured it was time to update my blog with some better pictures. Please forgive those early blogging pics - I may not be a professional photographer but I think my photos have come a long way since then.
The last time I made this I used regular Monterrey Jack cheese instead of pepper Jack because Baby Girl doesn't like spicy things. We both felt it lost a little something with the milder cheese so next time I'm going to throw caution to the wind and go back to pepper Jack. We don't remember it being super spicy that way so hopefully Baby Girl won't refuse to eat it.
Mexican Sour Cream Rice
Modified from All Recipes
1 3/4 cups chicken broth
1 cup uncooked long grain white rice
1 cup sour cream
1 (4 ounce) can diced green chile peppers
2 cups shredded Monterey or pepper Jack cheese
1 1/2 cups frozen corn
1/4 cup finely chopped fresh cilantro
salt and pepper to taste
Bring the chicken broth to a boil in a large sauce pot. Add the rice, stir and then reduce the heat to low. Cover and simmer for 20 minutes.
Meanwhile, preheat the oven to 350. Lightly grease a 1-1/2 quart casserole dish.
Add the sour cream, green chile peppers, cheese, corn, and cilantro to the pot with the rice. Stir to combine, then season with salt and pepper. Transfer to the greased casserole dish.
Bake uncovered for 30 minutes until the top is lightly browned.
Friday, July 11, 2014
Pepperoni Pizza Burgers
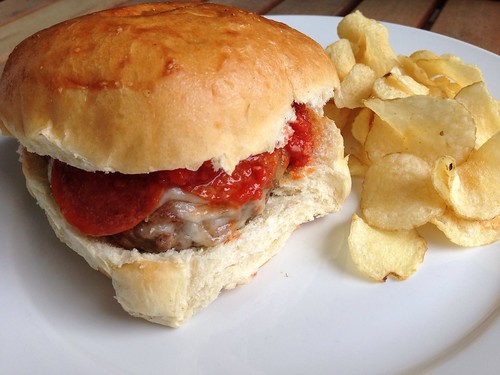
As much as I love summer, I always miss Pizza Fridays once the hot weather arrives. I just can't justify cranking my oven to 500 degrees when it's in the 90s. I needed a plan for Friday night and found myself craving both pizza and burgers. A quick spin around the interwebs brought me to Pioneer Woman's Pepperoni Pizza Burgers.
Because of the sausage in these burgers you have to cook them all the way through. Thankfully the fat from the sausage helps keep these burgers from drying out. SP was a bit skeptical of topping a burger with pizza sauce, pepperoni and cheese but he admitted these were good. I was a big fan. I loved the combo of the meats in the patty, the sauce, gooey cheese and tangy pepperoni. I even dipped my burger in some of the leftover sauce as I ate. Yes!
Pepperoni Pizza Burgers
As seen on Pioneer Woman Cooks
1-1/2 pound ground beef
1/2 pound Italian sausage
1/2 teaspoon Italian seasoning
8 slices (or 1/2 cup shredded) mozzarella cheese
Pepperoni slices
Pizza sauce
Grated Parmesan cheese
4 whole rolls/buns, toasted
Combine ground beef, Italian sausage, and Italian seasoning in a bowl. Knead it together and then form into four patties.
Heat a large skillet or grill pan over medium heat. Add the burgers and cook on one side for several minutes, then turn the burgers. Lay 2 slices of cheese (or a mound of shredded cheese) on each patty, followed by several slices of pepperoni. Allow the burgers to cook all the way through while the cheese melts and the pepperoni warms.
Spread both halves of each roll with some pizza sauce and sprinkle the sauce with Parmesan cheese. Lay the patties on the bottom buns, then top with the top buns.
Wednesday, July 09, 2014
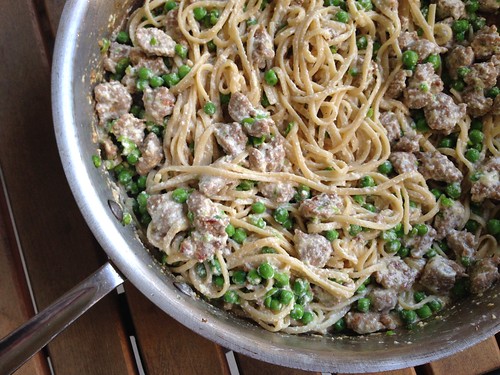
Pasta with Smashed Peas, Sausage, and Ricotta Cheese
We had an almost-full container of ricotta cheese in the fridge, so I asked SP to search for a recipe to use it up. He found this one for Tagliatelle with Smashed Peas, Sausage, and Ricotta Cheese that sounded both easy and delicious.
Like I do with most pasta recipes these days, I only used a half pound instead of the full pound. Cutting down on the pasta while keeping the filler ingredients the same is an easy way for us to get our pasta fix without going overboard. I also cut the peas down from a full pound to a half pound because, wow a pound is a lot of peas. SP wanted the sauce to be smoother. We couldn't taste the ricotta at all, which was disappointing, but we still enjoyed it.
Pasta with Smashed Peas, Sausage, and Ricotta Cheese
Giada De Laurentiis
1/2 pound fresh or dried tagliatelle pasta (or other wide, long pasta)
2 tablespoons olive oil
2 cloves garlic, chopped
1 pound hot Italian sausage, casings removed
1/2 pound frozen peas, thawed
1 cup whole milk ricotta cheese
1 bunch fresh basil leaves chopped (about 3/4 cup)
1/4 cup fresh grated Pecorino Romano cheese
salt and pepper, to taste
Bring a large pot of salted water to a boil over high heat. Cook the pasta according to package directions. Drain, reserving 1 cup of the pasta cooking water.
Meanwhile, in a large, heavy skillet heat the olive oil and garlic over medium-high heat and add the sausage. Use a wooden spoon to break up the sausage into bite-sized bits.
Once the sausage has browned, about 5 minutes, remove and set aside. Add the peas to the pan and, using the back of the wooden spoon, smash the peas.
Turn off the heat. Add the ricotta cheese along with the cooked pasta and toss to coat, adding the pasta cooking water in 1/4 cup additions, if needed, to make the pasta moist. Return the sausage to the pan. Add the basil, Pecorino Romano cheese, and salt. Toss gently to coat and serve immediately
Wednesday, July 02, 2014
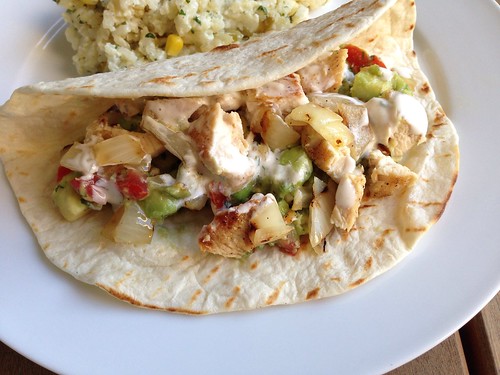
Grilled Chicken Tacos with Spiced Mayo and Avocado Salsa
These Grilled Chicken Tacos with Spiced Mayo and Avocado Salsa are, hands down, my new favorite taco. As soon as I saw them I knew I had to make them. I could almost taste them just by reading the recipe.
I had to make a slight modification because I refuse to pay $1 for one lime when I can't even be guaranteed the lime will have any juice in it. Have you ever bought a lime and found it completely dry? How does that even happen? Lemons are still cheap so I just swapped it out. I also left out the hot sauce because Baby Girl isn't a fan of spicy food.
I prepared these on my indoor grill pan because, as I've mentioned before, we have a charcoal grill and getting that set up on a weeknight just doesn't happen. Since skewers won't fit on the grill pan I cut the chicken breasts in half lengthwise and grilled them before cutting into cubes. Same for the onion - I grilled it in rings and then chopped them. These tacos were so delicious we barely had enough leftover for one lunch the next day.
Grilled Chicken Soft Tacos with Spiced Mayo and Avocado Salsa
As seen on Seeded at the Table, originally from Weber's New Real Grilling
For the chicken:
zest of 1 lemon
1/2 teaspoon ground cumin
Salt & pepper
Olive oil
4 boneless, skinless chicken breasts, cut in half lengthwise
1 large yellow onion, peeled and cut into 3/4-inch rings
1/2 cup mayonnaise
Juice from 1 lemon
1 teaspoon hot sauce (optional)
1/4 teaspoon cumin
For the Avocado Salsa:
2 large avocados, peeled, pitted and diced
2 medium Roma tomatoes, seeded and finely diced
3 scallions, minced
2 tablespoons fresh lemon juice
1 tablespoon chopped cilantro
1/4 teaspoon hot sauce (optional)
8 taco or fajita-size flour tortillas
Preheat grill pan over medium-high heat.
In a large bowl or plastic food storage bag, combine the lemon zest, 1/2 teaspoon cumin, 1/2 teaspoon salt, 1/4 teaspoon black pepper and a few tablespoons of oil. Place the chicken pieces into the bowl or bag and toss to combine until evenly coated with the seasonings. In a separate bag or bowl, toss the onion rings with some oil, salt and pepper.
In a small bowl, whisk together the mayonnaise, lemon juice, hot sauce (if using), and 1/4 teaspoon cumin. Stir in water, 1 teaspoon at a time, until the mixture can be drizzled.
In another bowl, toss together the salsa ingredients and season with salt and pepper, to taste.
Add the onion rings to the grill pan and cook, turning often, until the onions are soft and blackened in spots. Remove from the grill to a bowl and cover with foil or plastic wrap. Add the chicken to the grill pan and cook 5 minutes on one side, then flip and cook another 4 minutes. Remove from the grill and let rest. Add the tortillas to the grill pan to warm and brown in spots, turning once. Cut the chicken and onions into bite-size pieces. Let everyone assemble their own tacos with the mayo and salsa.

